
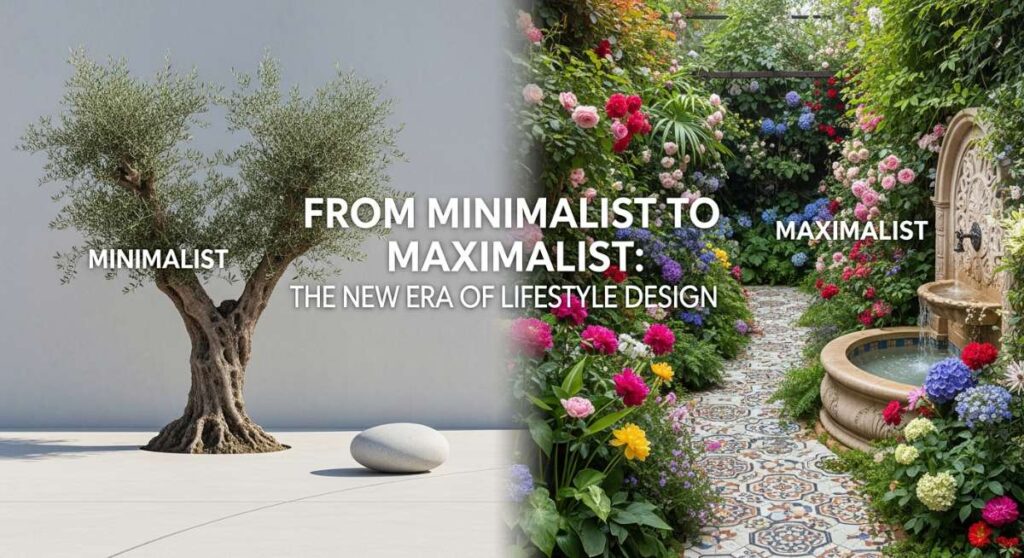
For years, we’ve been told that less is more—that clean lines and empty spaces are the ultimate markers of a sophisticated life. But if you’re like me, you’ve started to feel a little restless in those quiet, white-walled rooms. There is a new energy sweeping through our homes and our hearts, moving us from the sterile silence of minimalism into the rich, soulful embrace of lifestyle design that actually tells a story.
This shift isn’t about clutter; it’s about curation. It’s about surrounding ourselves with the things that spark a memory, provide deep comfort, or simply make a Tuesday afternoon feel like a special occasion. Whether it’s the splash of a pool in the backyard or the tactile joy of a perfectly styled market stall, we are reclaiming our spaces to reflect the vibrant, multifaceted people we truly are.
How to Design a Backyard Oasis with a Stock Tank Pool
Why we love this
There is something undeniably nostalgic and grounding about the sight of a shimmering galvanized steel tank nestled in a lush garden. As the sun beats down, the cool, clear water offers a sensory escape that feels both rugged and incredibly refined, smelling faintly of summer rain and cedar decking. We love how the metallic texture contrasts with soft ferns and the gentle hum of a nearby filter, creating a private swimming hole that feels like a hidden gem found in a secret meadow, rather than just another backyard fixture.
Essential Elements:
- 8-foot galvanized stock tank
- Sand filter pump system
- Through-wall plunger valves and strainer
- Marine-grade silicone sealant
- Levelling sand or a concrete pad
- Chlorine floater and pool cover
How to make it
- Identify a perfectly level spot in your yard; the weight of the water is immense, so any slope will cause the tank to buckle over time. Dig out grass and create a 4-inch base of leveled sand or pour a concrete pad.
- Thoroughly clean the interior of the tank with a mild detergent to remove any factory oils that might interfere with your sealant.
- Using a hole saw attachment on a high-power drill, cut two precise circles into the side of the tank—one near the top for the return and one near the bottom for the suction.
- Install the bulkhead fittings and plunger valves, applying a generous bead of marine-grade silicone around the gaskets to ensure a watertight seal; let this cure for at least 24 hours.
- Connect the hoses to your sand filter pump, ensuring all clamps are tightened to a professional standard to prevent air leaks in the system.
- Fill the tank slowly, checking for leaks at every 6-inch interval, and once full, treat the water with a starter shock and set your pump timer for 4-6 hours of daily filtration.
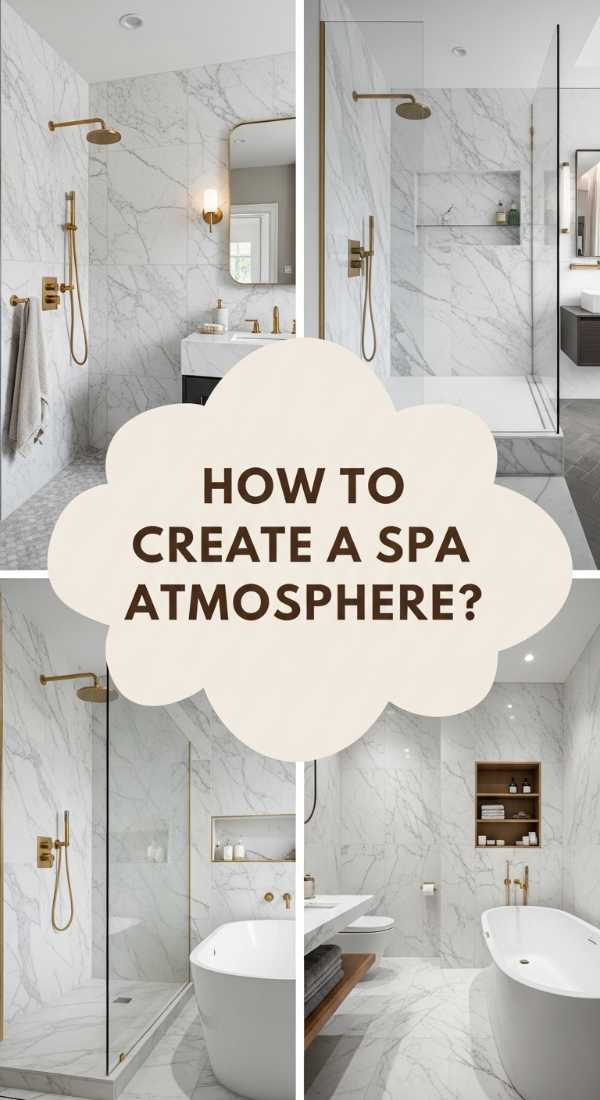
How to Create a Spa Atmosphere with Large Tiles
Why we love this
Stepping into a bathroom clad in massive, floor-to-ceiling tiles feels like entering a high-end sanctuary where the world’s noise simply melts away. The lack of grout lines creates a seamless visual flow that mimics natural stone cliffs, making the air feel cooler and the space significantly more expansive. We adore the way the soft morning light glides over the polished surfaces, reflecting off the water droplets in the shower to create a rhythmic, calming dance of shadows and highlights that rivals any five-star resort.
Essential Elements:
- Large format porcelain or stone tiles (at least 24×48 inches)
- High-polymer thin-set mortar
- Leveling clip system (T-lock)
- Diamond blade wet saw
- Epoxy grout in a matching shade
- Waterproof backer board (Schluter system or similar)
How to make it
- Ensure your walls and floors are perfectly plumb and flat; large tiles are unforgiving, and any slight bow in the wall will lead to ‘lippage’ where edges don’t meet flush.
- Apply a high-quality waterproofing membrane over your backer board, paying special attention to corners and seams to create a literal tank for your moisture.
- Measure your space and plan your layout from the center out, ensuring you don’t end up with tiny slivers of tile at the corners which would break the illusion of a solid stone wall.
- Mix your thin-set to a ‘peanut butter’ consistency and ‘back-butter’ every tile—this means applying a thin layer of mortar to the back of the tile itself as well as the wall to ensure 100% coverage.
- Use a leveling clip system religiously between every tile; these plastic spacers pull the tiles into a perfectly flat plane as they dry, preventing any tripping hazards or uneven shadows.
- Allow the mortar to set for 48 hours before removing the clips and applying epoxy grout, which is stain-resistant and much more durable for a high-moisture spa environment.
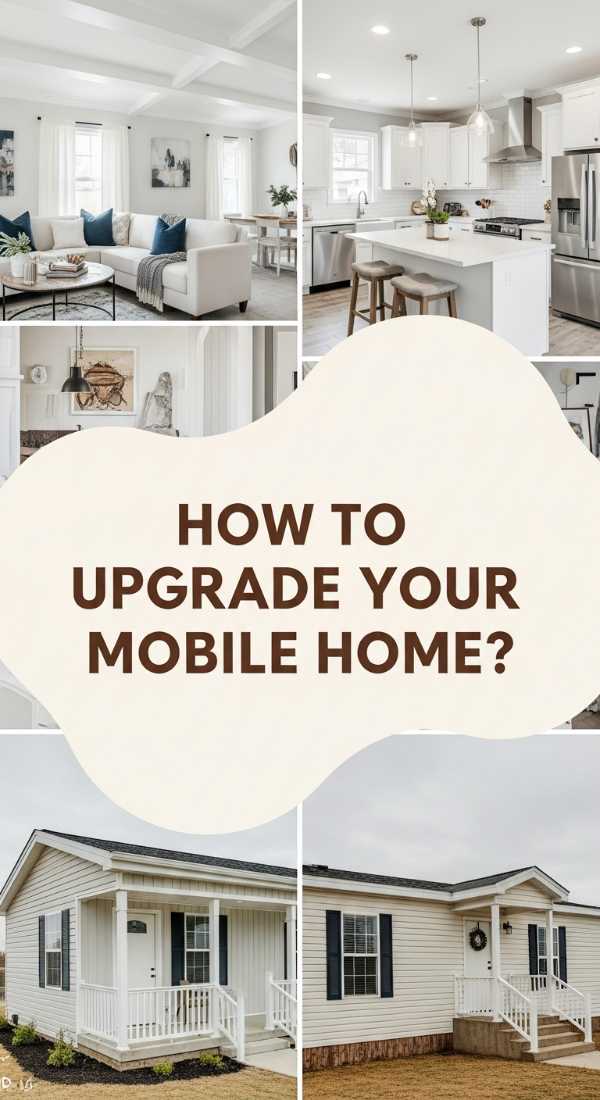
How to Upgrade Your Mobile Home for Modern Living

Why we love this
Transforming a mobile home is a masterclass in seeing potential where others see limits, turning a compact structure into a bespoke jewel box of design. We love the tactile warmth of luxury vinyl planks that mimic aged oak underfoot, and the way crisp, white crown molding can suddenly make a standard ceiling feel soaring and intentional. There is a unique satisfaction in hearing the solid ‘thud’ of a newly installed modern door, replacing the hollow sounds of the past with the weight and gravity of a permanent, stylish residence.
Essential Elements:
- Luxury Vinyl Plank (LVP) flooring
- Modern interior trim and crown molding
- High-adhesion primer (specifically for laminate surfaces)
- Updated cabinet hardware and faucets
- Recessed LED lighting kits
- Lightweight peel-and-stick backsplash
How to make it
- Strip away all dated elements including plastic trim, old carpet, and thin baseboards to reveal the raw bones of the space.
- Sand all walls lightly; mobile home walls are often coated in a slick vinyl wallpaper that requires a high-adhesion primer (like Zinsser B-I-N) to ensure your new paint doesn’t peel.
- Install your LVP flooring throughout the entire home without transition strips where possible; this creates a long, unbroken visual line that makes the home feel significantly larger.
- Replace standard mobile home windows with energy-efficient residential-grade versions; this improves the R-value and instantly elevates the exterior look of the home.
- Swap out the factory-grade plastic faucets and light fixtures for matte black or brushed gold hardware, ensuring you use ‘mobile home to residential’ adapters if the plumbing spacing is non-standard.
- Install crown molding and thicker 5-inch baseboards using a brad nailer, which adds the architectural weight necessary to make the interior feel like a traditional stick-built house.
How to Style a Market Booth for Better Sales
Why we love this
A well-styled market booth is a sensory journey that pulls customers in with the scent of dried lavender and the inviting glow of warm Edison bulbs. We love the choreography of height and texture—the way a velvet riser makes a piece of jewelry feel like a treasure, or how a rustic wooden crate adds a sense of ‘just-picked’ freshness to handmade goods. It’s about creating a miniature world that feels curated and safe, where every item tells a story that the customer can’t wait to take home and make part of their own life.
Essential Elements:
- Neutral, high-quality table linens
- Varied height risers and crates
- Branded signage with clear pricing
- Warm, battery-operated accent lighting
- Tactile props (plants, textiles, baskets)
- Business card holder and digital payment display
How to make it
- Start with a clean slate by covering your tables in floor-length linens; this hides your packing bins and creates a professional, polished foundation.
- Apply the ‘Rule of Three’ and vary your heights; place your most expensive or ‘hero’ items at eye level using sturdy risers, ensuring the eye travels in a zigzag pattern across your display.
- Group products by color or use-case rather than just stacking them; create ‘vignettes’ that show the customer how the item will look in their own home.
- Ensure your branding is visible from 20 feet away; use a high-contrast sign with a clear font and place it at the highest point of your booth.
- Check your lighting; even in outdoor markets, shadows can make products look dull. Use small LED spotlights to highlight your best-sellers and create a warm, inviting glow.
- Leave ‘white space’ in your display; a booth that is too crowded feels overwhelming and cheap, while a booth with breathing room feels premium and curated.
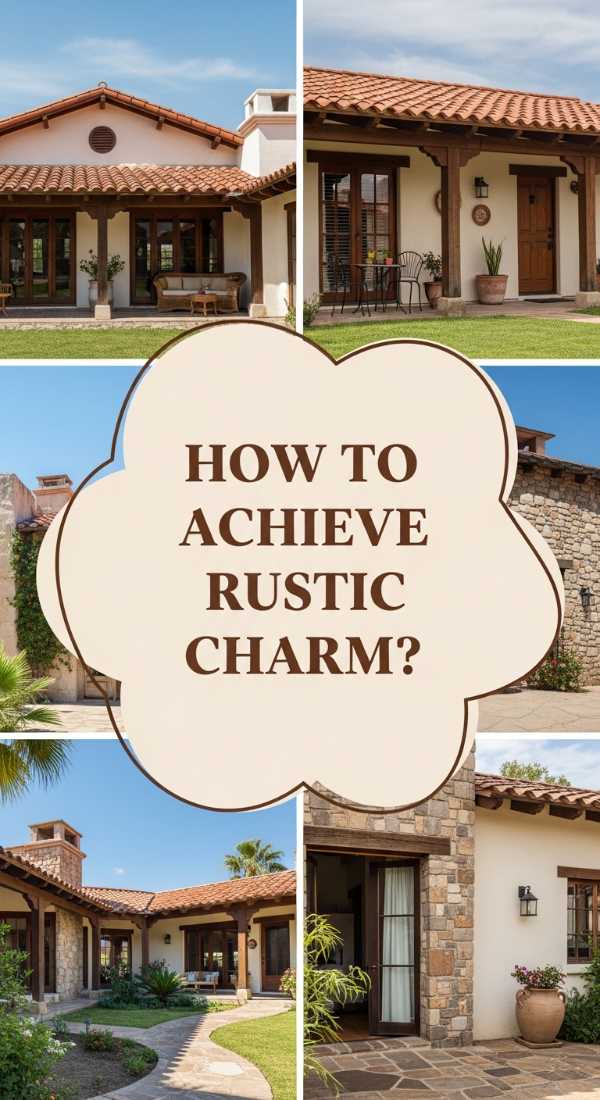
How to Achieve Rustic Charm in Ranch Style Homes
Why we love this
The low-slung, sprawling nature of a ranch home is the perfect canvas for rustic charm, blending the rugged textures of the outdoors with the cozy intimacy of single-story living. We love the sound of a heavy barn door sliding shut, the smell of beeswax on reclaimed wood beams, and the visual warmth of a stone hearth that anchors the living room. It’s a design style that celebrates the imperfect—the knots in the wood, the patina on the copper, and the lived-in comfort of a space that feels like it has been there for generations.
Essential Elements:
- Reclaimed wood mantels or ceiling beams
- Natural stone veneer
- Wrought iron light fixtures
- Chunky knit throws and linen upholstery
- Distressed leather furniture
- Antique brass hardware
How to make it
- Introduce architectural interest to flat ranch ceilings by installing faux or reclaimed wood box beams; this draws the eye upward and breaks up the ‘long’ feeling of the rooms.
- Update a standard brick fireplace by applying a lime-wash or a stacked stone veneer to create a rugged, textural focal point that feels authentic to the landscape.
- Replace hollow-core doors with solid wood ‘X’ brace barn doors or shaker-style doors with wrought iron handles to add immediate tactile quality.
- In the kitchen, swap out modern cabinetry for a mix of open shelving made from live-edge wood and base cabinets painted in earthy tones like sage or terracotta.
- Incorporate ‘living finishes’ like unlacquered brass or copper for faucets and hardware; these will develop a beautiful patina over time, adding to the rustic, aged aesthetic.
- Layer your lighting with a mix of industrial-style sconces and soft, amber-hued lamps to avoid the sterile ‘overhead’ light common in older ranch builds.
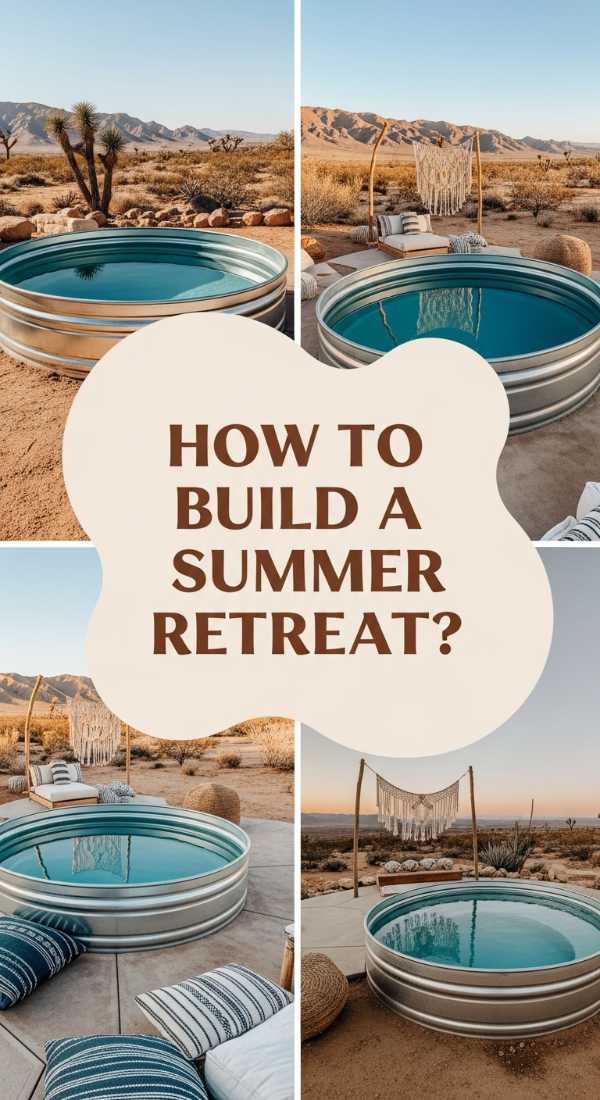
How to Build a Summer Retreat with Poly Pools

Why we love this
Poly pools are the ultimate disruption to the expensive world of traditional pool building, offering a sleek, sapphire-blue escape that is as durable as it is beautiful. We love the smooth, non-porous feel of the high-density polyethylene against the skin, and the way the water stays remarkably warm thanks to the material’s natural insulative properties. It’s the feeling of a summer resort condensed into a weekend DIY project, where the only thing on the agenda is the rhythmic sound of a splashing fountain and the clink of ice in a glass.
Essential Elements:
- High-density polyethylene (HDPE) pool shell
- Compact sand or gravel base
- External cartridge filter and pump
- UV-resistant pool liner (optional for color)
- Surrounding timber or composite decking
- Solar heater attachment
How to make it
- Excavate your site to the specific dimensions of your poly shell, plus an extra 12 inches on all sides for backfilling and plumbing access.
- Compact a 6-inch layer of crushed stone or leveling sand at the bottom of the pit; use a plate compactor to ensure there is zero chance of settling.
- Lower the poly shell into the pit using a crane or several sets of hands, checking for level across the entire top rim multiple times during the process.
- Fill the pool with 12 inches of water, then backfill the exterior with 12 inches of pea gravel; continue this ‘step’ process (12 inches water, 12 inches gravel) until the pool is full to prevent the walls from bowing inward or outward.
- Plumb your pump and filter system using PVC piping rather than flexible hoses for a more permanent, high-pressure setup that will last for years.
- Construct a ‘surround’ deck that sits flush with the rim of the pool, hiding the poly edges and creating a seamless transition from the water to your lounging area.
How to Remodel Your Bathroom for Effortless Cleaning
Why we love this
There is a profound sense of peace that comes from a bathroom that stays sparkling with just a quick wipe, rather than a weekend of scrubbing. We love the clinical-yet-chic look of wall-hung vanities that leave the floor clear, and the scent of fresh eucalyptus lingering on surfaces that refuse to harbor mold. It’s the luxury of time reclaimed—a space that looks perpetually ‘just-detailed’ because the design itself resists the clutter and grime of daily life, leaving you with more time for your morning ritual.
Essential Elements:
- Wall-hung vanity and toilet
- Large-format tiles with minimal grout lines
- Linear shower drain
- Quartz or solid-surface countertops (no seams)
- Frameless glass shower doors with hydrophobic coating
- Epoxy or urethane grout
How to make it
- Incorporate a ‘wet room’ layout where the shower floor is continuous with the rest of the bathroom; this eliminates the curb where hair and soap scum traditionally collect.
- Choose a wall-hung toilet with a concealed tank; this removes the difficult-to-clean porcelain base and allows you to mop the entire floor in one single, unobstructed motion.
- Install a slab-style quartz countertop with an under-mount sink; ensure the fabricator creates a seamless transition so there is nowhere for water to sit and grow bacteria.
- Use epoxy grout exclusively; unlike traditional cement grout, it is non-porous, meaning it will never need sealing and will never stain or grow mildew.
- Select fixtures with a ‘spot-resist’ finish, particularly in matte black or brushed nickel, to minimize the appearance of water spots and fingerprints between cleanings.
- Install a powerful, humidity-sensing exhaust fan that triggers automatically; keeping the air dry is the single best way to prevent cleaning issues before they start.
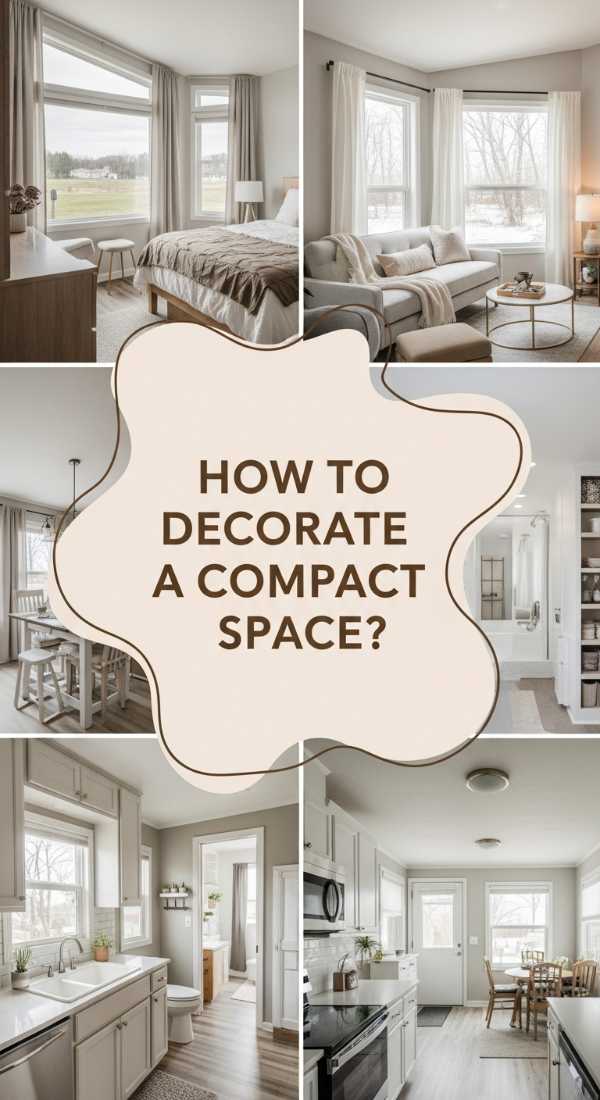
How to Decorate a Compact Living Space with Style

Why we love this
Small spaces have a unique magic; they force a level of intentionality that large homes often lack, resulting in a cozy, highly-edited sanctuary. We love the cleverness of a mirror that doubles as a window to a larger world, and the tactile richness of a jewel-toned velvet sofa that anchors a tiny room with undeniable confidence. It’s about the feeling of being ‘hugged’ by your home, where every object is within reach and every corner has been thoughtfully curated to serve both function and beauty.
Essential Elements:
- Multi-functional furniture (storage ottomans, sofa beds)
- Large-scale mirrors
- Vertical shelving units
- Light, airy window treatments
- Transparent acrylic ‘ghost’ furniture
- Unified color palette
How to make it
- Use the ‘one big thing’ rule: instead of filling a small room with several tiny pieces of furniture (which creates visual clutter), choose one full-sized, high-quality sofa to ground the space.
- Mount everything you can to the walls—from bedside lamps to bookshelves; keeping the floor clear creates the optical illusion of significantly more square footage.
- Place a large mirror directly opposite your main window; this bounces natural light deep into the room and effectively ‘doubles’ your view.
- Stick to a monochromatic color palette with varying textures; using different shades of the same color prevents the eye from stopping at harsh boundaries, making the walls feel like they are receding.
- Choose ‘leggy’ furniture; pieces that sit high off the ground on thin legs allow you to see the floor underneath, which tricks the brain into perceiving more open space.
- Utilize the ‘fifth wall’ (the ceiling) by painting it a very pale blue or a high-gloss white to create a sense of height and airiness in a low-ceilinged room.
How to Arrange Your Display for Maximum Impact
Why we love this
A perfectly arranged display is like a visual poem—it leads the eye on a journey of discovery through color, shape, and shadow. We love the tension between a smooth ceramic vase and the rough texture of a dried branch, and the way a strategically placed spotlight can turn a simple shelf into a dramatic stage. There is a deep, quiet satisfaction in finding the ‘balance’ of a room, where objects no longer feel like things, but like a cohesive expression of a personal aesthetic that resonates with everyone who enters.
Essential Elements:
- A clear focal point (the ‘hero’ object)
- Varying heights and depths
- Cohesive color story
- Negative space (breathing room)
- Directional lighting
- Odd-number groupings (3, 5, or 7)
How to make it
- Start by clearing the entire surface; you cannot build a successful display on top of an existing mess. Determine your ‘anchor’—the largest or most visually heavy item.
- Apply the ‘Pyramid Principle’; arrange your objects so that they form a triangle, with the tallest item at the peak and smaller items flaring out to the sides.
- Incorporate ‘leading lines’ by overlapping items slightly; this creates depth and forces the viewer’s eye to move through the entire collection rather than looking at individual pieces.
- Balance your textures: if you have several glass or shiny objects, pair them with something organic like wood, bone, or stone to ground the display and prevent it from looking cold.
- Step back frequently; view your display from the doorway and from various seating positions to ensure it looks balanced from every angle in the room.
- Use ‘micro-lighting’—small puck lights or thin LED strips hidden under shelves—to create highlights and shadows that add drama and professional-grade polish to your arrangement.
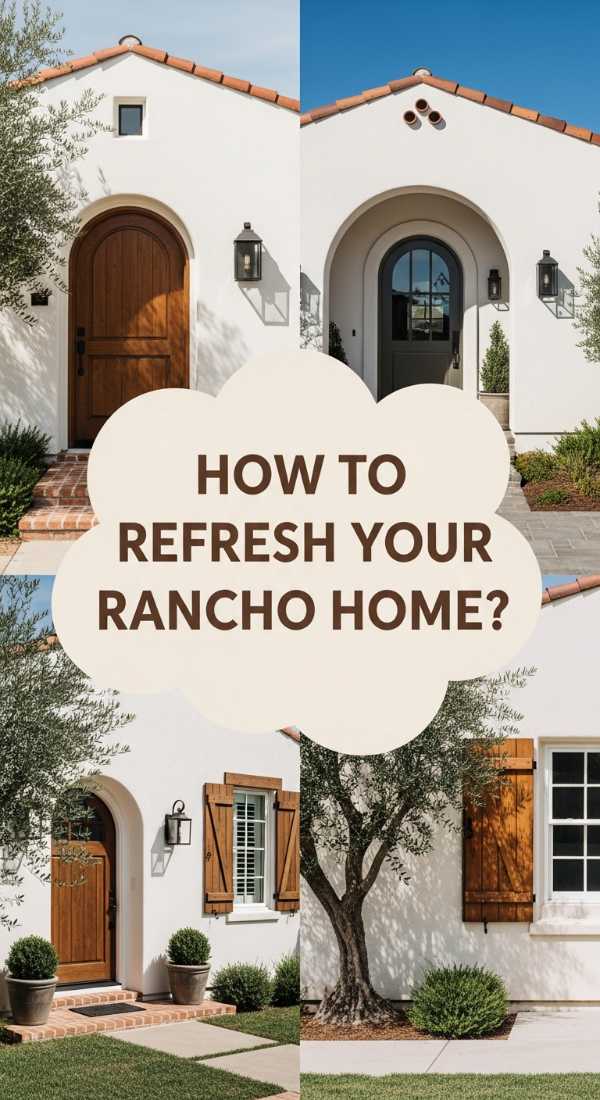
How to Refresh Your Rancho Home for Curb Appeal
[IMAGE_10]
Why we love this
Refreshing a Rancho-style home is about honoring its earthy, Southwestern roots while injecting a dose of modern sophistication that feels fresh and inviting. We love the smell of damp terracotta after a light watering, the vibrant pop of a turquoise door against a warm desert-tan wall, and the way architectural lighting can turn a flat facade into a sculptural masterpiece at night. It’s the feeling of a warm welcome before you even reach the doorstep—a promise of the comfort and style that lies within.
Essential Elements:
- Modern desert landscaping (agaves, boulders, decomposed granite)
- Large-scale house numbers in a modern font
- Updated exterior lighting (dark-sky compliant)
- A bold, high-contrast front door color
- Natural wood or black metal garage doors
- Consistent hardware finishes
How to make it
- Ditch the thirsty lawn and replace it with a sophisticated xeriscape; use varying sizes of river rock and decomposed granite to create ‘zones’ that mimic a natural desert wash.
- Paint your trim and eaves in a dark, grounding color like charcoal or deep bronze; this defines the low-slung roofline that is the hallmark of Rancho architecture.
- Install oversized, backlit house numbers vertically near the entrance; this provides a modern, high-end feel and makes the home easily identifiable for guests.
- Replace old, ‘carriage style’ porch lights with sleek, cylindrical up-and-down lights that highlight the texture of your stucco or siding.
- Upgrade your entryway with a natural wood door—specifically stained in a warm walnut or oak—to provide a soft, organic touch to the exterior.
- Ensure all visible hardware, from the mailbox to the door handle to the gate latches, is in a matching finish (like matte black) to create a cohesive, designer-led look.
The End of the Cookie-Cutter Era
As we move through this transition from minimalism to a more curated, maximalist lifestyle, remember that the only rules that matter are the ones that make you feel at home. Whether you are building a pool in a tank or rethinking the way your bathroom cleans itself, you are designing a life that is uniquely yours. Embrace the textures, the colors, and the functional upgrades that make your daily routine feel like a luxury. The era of ‘safe’ design is over; it’s time to make it personal.