
Viral Home Hacks: These DIY Projects Are Taking Over the Internet
There is something truly magical about the way a home evolves. It isn’t just a structure of wood and nails; it’s the backdrop of our lives, the container for our memories, and the canvas where we express our wildest creative dreams. I remember the first time I picked up a drill—my hands were shaking, and I was convinced I’d ruin the drywall, but the moment that first shelf clicked into place, I felt a surge of empowerment that changed everything. That’s the beauty of DIY; it transforms us just as much as it transforms our living spaces.
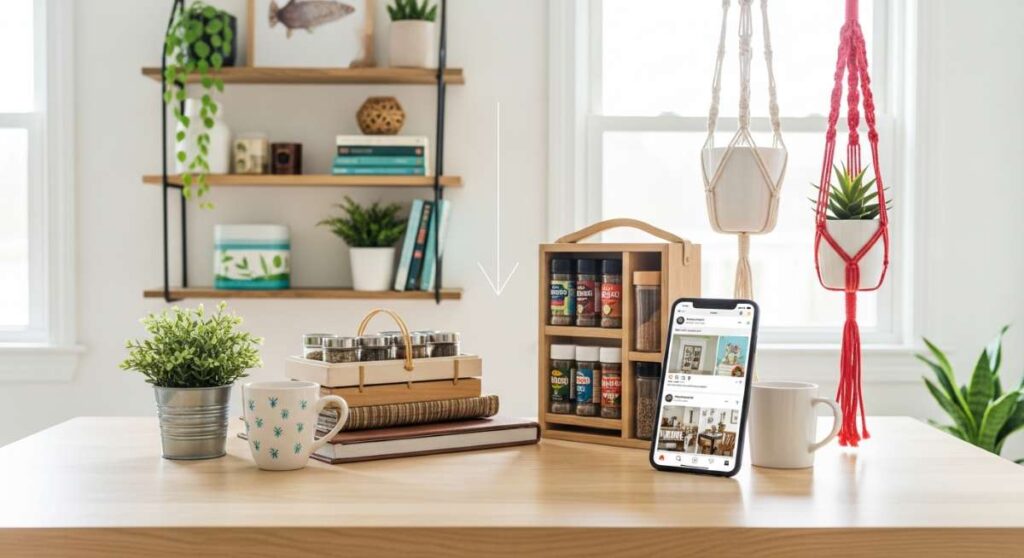
Lately, my social media feeds have been exploding with these incredible, high-impact projects that look like they belong in a luxury magazine but are actually being tackled by everyday homeowners on a budget. From the soothing sounds of a backyard water feature to the organized bliss of a perfectly labeled pantry, these viral hacks are taking over for a reason. They bridge the gap between ‘Pinterest-perfect’ and ‘actually livable.’ I’ve curated the top ten projects that are currently breaking the internet, and I’m so excited to share my personal tips on how you can bring these vibes into your own sanctuary.
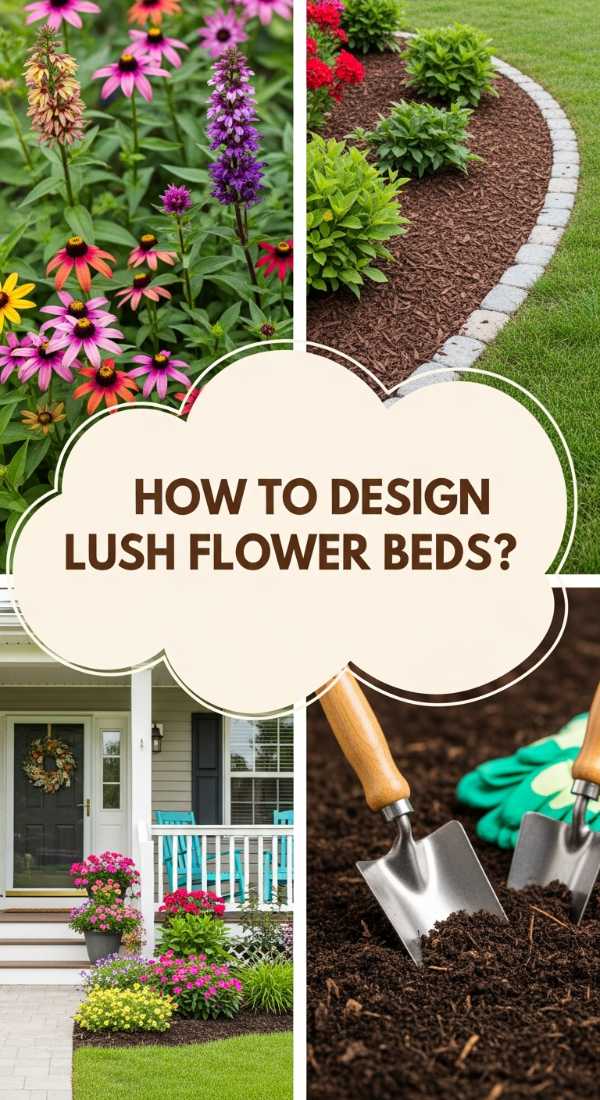
How to Design Lush Flower Beds for Instant Curb Appeal
Why we love this
There is nothing quite like pulling into your driveway and being greeted by a riot of color and the sweet, intoxicating scent of blooming jasmine and lavender. Lush flower beds add a layer of soft, organic texture to the sharp lines of a home’s architecture, creating a welcoming embrace before you even step through the front door. We love the way the petals catch the golden hour light, casting long shadows over rich, dark mulch, and how the gentle hum of bees creates a living, breathing ecosystem right in your front yard. It’s a sensory experience that grounds you, making the transition from the busy world to your private haven feel instantaneous and serene.
Essential Elements:
- Hardwood mulch or pine nuggets
- A mix of perennials (Hostas, Peonies, Coneflowers)
- Annuals for seasonal color (Petunias, Marigolds)
- Natural stone or metal landscape edging
- High-quality garden soil and compost
- Slow-release fertilizer
How to make it
- Begin by marking the perimeter of your bed using a garden hose or spray paint; aim for soft, flowing curves rather than rigid straight lines to create a more natural, viral aesthetic.
- Remove all grass and weeds from the designated area using a sharp spade, ensuring you dig deep enough to pull out the roots to prevent regrowth later in the season.
- Amend the soil by tilling in 3-4 inches of organic compost and aged manure, creating a nutrient-dense foundation that is loose and well-draining for delicate root systems.
- Arrange your plants while they are still in their nursery pots; place taller shrubs in the back, mid-height perennials in the center, and low-growing groundcover at the very front to create a tiered, professional look.
- Dig holes twice as wide as the root ball and just as deep, gently teasing the roots before placing the plant and backfilling with soil, pressing down firmly to remove air pockets.
- Apply a 3-inch layer of mulch across the entire bed, keeping it away from the direct stems of the plants to prevent rot while locking in moisture and suppressing future weeds.
- Water deeply immediately after planting, using a soft spray nozzle to ensure the soil is saturated to a depth of 6 inches, encouraging deep root growth.
How to Build a Custom Grill Station for Backyard Entertaining

Why we love this
Imagine the sizzle of marinated steak hitting a hot grate while you stand comfortably at a granite-topped station, a cold drink in hand and everything you need within arm’s reach. This project is the ultimate upgrade for the home chef, turning a solitary chore into a social centerpiece. We love the rugged, earthy smell of cedar wood mingling with the smoky aroma of charcoal, and the way a dedicated station provides a sense of permanence and luxury to a simple patio. It’s about the tactile joy of smooth stone under your fingers and the visual satisfaction of a perfectly organized outdoor kitchen where every spatula and spice has its place.
Essential Elements:
- Pressure-treated 4×4 posts for the frame
- Cedar or composite decking for the exterior
- Countertop material (Granite, concrete, or stainless steel)
- Built-in grill insert or a cutout for a kettle grill
- Outdoor-rated cabinet hardware
- Hidden trash bin pull-out
How to make it
- Design your layout based on the height of your primary cook; standard kitchen counter height is 36 inches, but you may want to adjust for a taller ‘bar’ feel or a lower prep area.
- Construct the base frame using pressure-treated 4x4s and 2x4s, securing everything with 3-inch outdoor structural screws and ensuring the entire structure is perfectly level on your patio surface.
- Install horizontal cedar slats around the sides of the frame, leaving a 1/8-inch gap between boards for airflow and expansion, which gives the station that modern, viral ‘slat-wall’ appearance.
- If using a drop-in grill, build a specialized interior support shelf using heavy-duty lumber that can withstand the weight and heat of the unit, following the manufacturer’s clearance specs.
- Apply a high-quality outdoor wood sealer or stain to the cedar to protect it from UV rays and moisture, ensuring the color stays vibrant through the seasons.
- Install your countertop; if using concrete, you can pour it in place using a melamine mold for a sleek, industrial finish that is incredibly durable.
- Attach magnetic tool strips and a bottle opener to the side of the station to maximize functionality and keep your prep space clear of clutter.
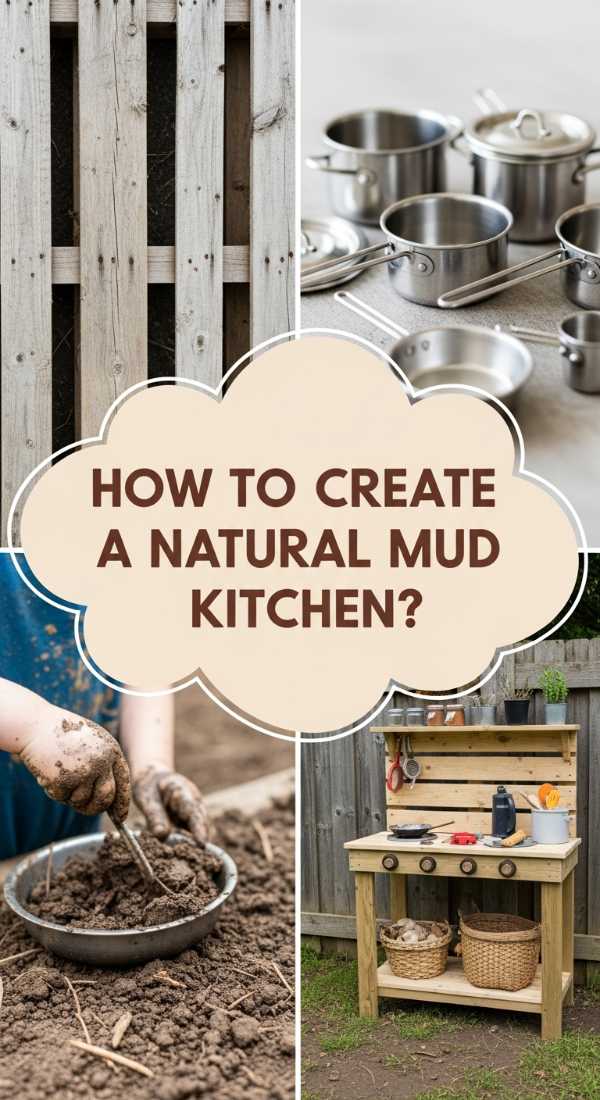
How to Create a Natural Mud Kitchen for Endless Outdoor Play
Why we love this
There is a raw, nostalgic beauty in watching children play with the elements—the squelch of wet earth between fingers, the clink of old metal spoons, and the earnest ‘cooking’ of dandelion soup. A mud kitchen is a viral sensation because it encourages a return to tactile, screen-free childhood. We love the aesthetic of weathered wood and vintage pots against the backdrop of a garden, and the way it transforms a corner of the yard into a laboratory of imagination. It’s the smell of rain-soaked dirt and the sound of pure, unbridled laughter that makes this project a heartwarming addition to any family home.
Essential Elements:
- Untreated cedar or heat-treated pallets
- Stainless steel mixing bowls (to serve as sinks)
- Old kitchen faucets (non-functional)
- Chalkboard paint for a ‘menu’
- Hanging hooks for wooden spoons and ladles
- A bag of potting soil and a water source
How to make it
- Select a shady spot in your yard where a little mess won’t matter, and level the ground using a small amount of pea gravel or wood chips to create a clean ‘floor’ for the kitchen.
- Build a simple rectangular table frame using 2×4 lumber, ensuring the height is appropriate for your child—usually between 20 to 24 inches for toddlers and preschoolers.
- Cut circular holes in the tabletop using a jigsaw, sized slightly smaller than the lip of your stainless steel bowls, so the bowls can drop in and be removed for cleaning.
- Construct a vertical backboard from pallet wood and attach it to the rear of the table; this is where you will mount your ‘faucet’ and hanging hooks for accessories.
- Sand every square inch of the wood with 80-grit then 120-grit sandpaper to ensure there are zero splinters, as safety is the top priority for this high-touch project.
- Paint a section of the backboard with three coats of outdoor chalkboard paint, allowing 24 hours of curing time before ‘seasoning’ the board with chalk.
- Stock the kitchen with thrifted treasures like whisks, muffin tins, and pitchers, and provide a dedicated bucket of ‘clean’ mud or sand for the chefs to begin their work.
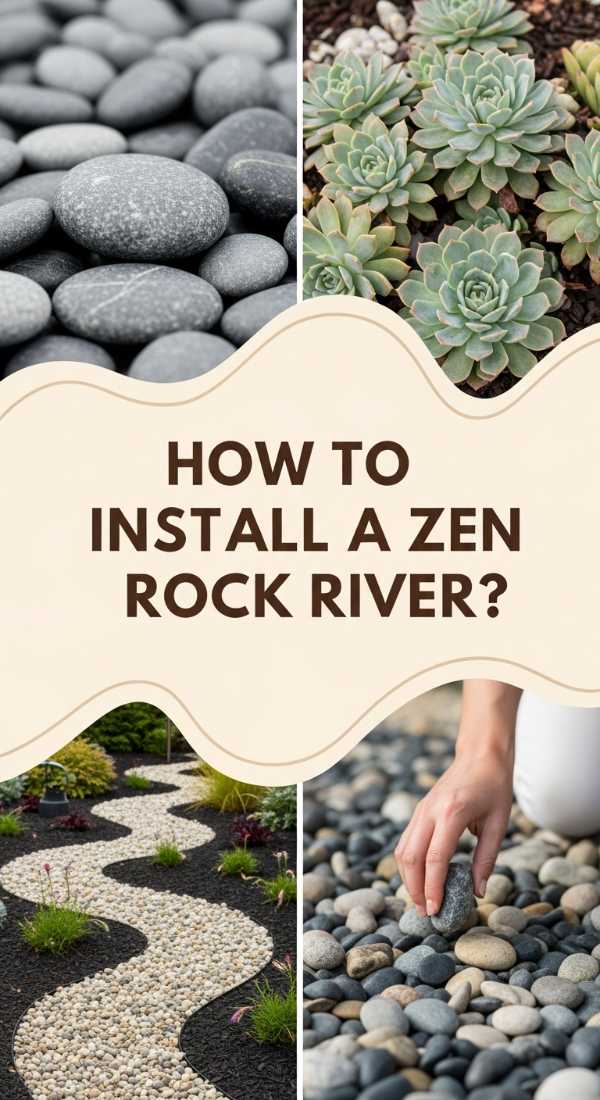
How to Install a Zen Rock River Bed for a Serene Garden
Why we love this
A Zen rock river bed brings an element of fluid motion to a static landscape without the maintenance of a real water feature. We love the way the different sizes of smooth, grey river stones mimic the path of a rushing stream, catching the light and changing color when wet from the rain. It provides a striking visual contrast to green lawns and soft foliage, offering a hardscape element that feels ancient and grounded. The meditative process of placing each stone and the rhythmic sound of wind passing over the pebbles create a sense of peace that can turn any backyard into a private retreat.
Essential Elements:
- Varying sizes of river rocks (pea gravel to large boulders)
- Professional-grade landscape fabric
- U-shaped garden staples
- Steel or heavy-duty plastic edging
- Large feature stones or ‘hero’ rocks
- Low-light succulents or ornamental grasses
How to make it
- Trace a meandering, ‘S’ shaped path through your garden, making the ‘river’ wider at the bends and narrower in the straightaways to mimic natural hydraulic flow.
- Excavate the path to a depth of 4-6 inches, ensuring a slight slope away from your home’s foundation to assist with drainage during heavy storms.
- Lay down heavy-duty landscape fabric to prevent weeds from poking through your rocks, securing it every 12 inches with garden staples to prevent shifting.
- Install edging along the sides of the trench to keep the rocks contained and the surrounding mulch or grass from spilling into your river.
- Place your largest ‘anchor’ boulders first at the bends of the river, burying them slightly so they look like they’ve been there for centuries rather than just sitting on top.
- Fill the remaining space with medium-sized river rocks, then finish with a top layer of smaller pebbles to fill in the gaps and create a dense, layered look.
- Plant drought-tolerant grasses like Blue Fescue or Japanese Forest Grass along the ‘banks’ to soften the edges and complete the serene, viral aesthetic.
How to Construct a Floating Deck for a Cozy Outdoor Retreat
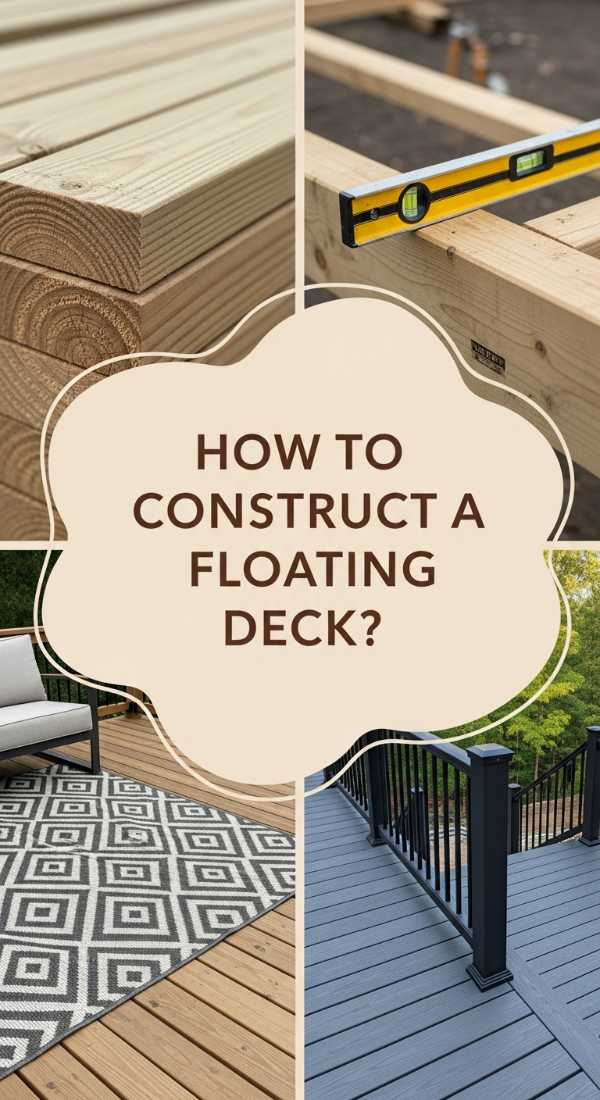
Why we love this
The floating deck is the darling of the DIY world because it offers the high-end look of a traditional deck without the need for deep footings or complex permits. We love the feeling of being slightly elevated above the grass, creating a distinct ‘room’ in the middle of nature where you can lounge with a book or host a candlelit dinner. The scent of sun-warmed wood and the cozy, intimate scale of these platforms make them feel like a secret getaway just steps from the back door. It’s a project that instantly upgrades the functionality of your yard, providing a level surface for chic outdoor furniture and string lights.
Essential Elements:
- Concrete deck blocks
- Pressure-treated 2×6 joists
- Premium wood or composite decking boards
- Hidden deck fasteners or stainless steel screws
- Landscape fabric and gravel (for the base)
- Joist tape for moisture protection
How to make it
- Clear the area of all vegetation and level the ground as much as possible; lay down landscape fabric and a layer of gravel to prevent moisture from rotting the joists from below.
- Position your concrete deck blocks in a grid pattern, typically spaced 4 to 5 feet apart, ensuring they are perfectly level with one another using a long straight edge and a spirit level.
- Build the outer frame of the deck using 2×6 pressure-treated lumber, checking for square by measuring the diagonals; they must be identical for the deck to be true.
- Install the interior joists 16 inches apart (on center), securing them to the outer frame with joist hangers to provide maximum structural integrity.
- Apply joist tape to the top of all wooden members to create a waterproof barrier that will double the life of your deck by preventing rot at the screw holes.
- Lay your decking boards starting from the outside edge, using spacers to maintain a consistent 1/8-inch gap for drainage and expansion.
- Finish the wood with a high-quality UV-protectant stain or sealer, and add a few oversized planters or a fire pit to the center to create an inviting viral destination.
How to Style a Nostalgic Teen Room for Retro Aesthetic Vibes

Why we love this
The ‘Newstalgia’ trend is taking over interiors, and nowhere is it more fun than in a teen’s bedroom. This look is all about mixing the vibrant, kitschy energy of the 90s with modern comfort. We love the glow of sunset lamps and neon signs reflecting off velvet textures and glossy posters. It’s a space that feels curated yet lived-in, featuring a palette of checkers, pastels, and bold accents that spark creativity. There’s a certain warmth in the soft hum of a record player and the plushness of a faux-fur rug that makes this room the ultimate sanctuary for dreaming and self-expression.
Essential Elements:
- Sunset lamps or RGB LED strip lighting
- Vinyl record wall displays
- Checkered pattern rugs or bedding
- Wavy or ‘squiggles’ floor mirrors
- Floating shelves for collectibles
- A mix of vintage-inspired posters and art prints
How to make it
- Start with a neutral base wall color like a soft cream or muted sage to allow the colorful ‘retro’ accessories to pop without overwhelming the visual field.
- Install LED light strips along the ceiling perimeter or behind the bed frame to create a customizable ambient glow that can change based on the mood.
- Create a ‘gallery wall’ featuring a mix of thrifted frames, vinyl records, and graphic posters; use a cohesive color story to keep the busy look feeling intentional.
- Introduce various textures by layering a chunky knit throw over a velvet duvet cover and adding a high-pile rug near the bed for immediate underfoot comfort.
- Incorporate a ‘tech-free’ zone with a small desk or nook dedicated to journaling, featuring a vintage-style task lamp and a corkboard for tactile inspiration.
- Use clear acrylic or ‘ghost’ furniture for desks or chairs to maintain a sense of openness while adding a modern, 70s-futurism touch to the room.
- Finish the styling with a few low-maintenance indoor plants like a Pothos or a Snake Plant to add a breath of life and organic shape to the retro lines.
How to Craft Rustic Birdhouses for a Charming Wildlife Sanctuary
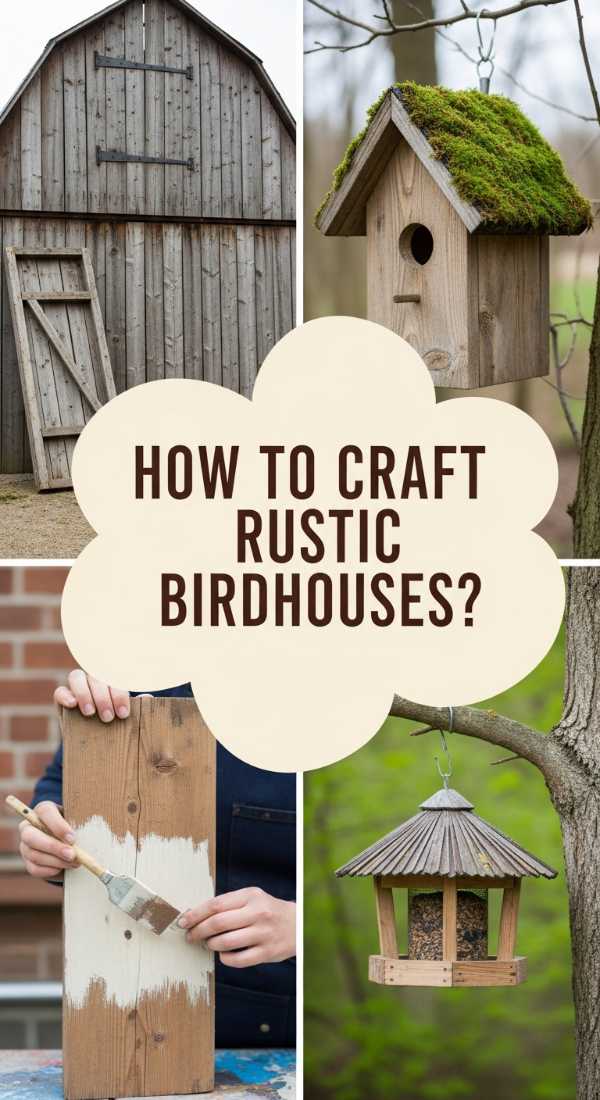
Why we love this
There is a quiet, soulful joy in inviting nature to live alongside you. Rustic birdhouses, with their weathered wood and whimsical designs, turn your garden into a bustling wildlife sanctuary. We love the morning chorus of songbirds and the sight of a mama bird bringing nesting materials to a house you built with your own hands. The scent of cedar and the rough-hewn texture of the wood provide a beautiful, earthy aesthetic that complements any outdoor space. It’s a project that feels both timeless and rewarding, connecting your home to the rhythms of the natural world in a viral, cottagecore way.
Essential Elements:
- Cedar, redwood, or pine boards (naturally rot-resistant)
- Galvanized nails or outdoor wood glue
- A 1.5-inch spade bit (for the entry hole)
- Tree bark or moss for decoration
- Mounting brackets or heavy-duty twine
- Non-toxic outdoor sealant
How to make it
- Cut your wood into six pieces: a base, a front, a back, two sides, and a roof, ensuring the roof has a significant overhang to protect the entry hole from rain.
- Drill a hole in the front panel using a 1.5-inch spade bit; this size is ideal for attracting bluebirds and chickadees while keeping larger predators out.
- Assemble the walls and base using outdoor wood glue and galvanized nails, being careful not to leave any sharp points protruding into the interior nesting area.
- Attach the roof at a steep pitch to allow for quick water runoff, and consider leaving one side of the roof on a hinge for easy cleaning after nesting season.
- Decorate the exterior with found natural elements like strips of birch bark, flat river stones, or dried moss to help the house blend into the environment.
- Avoid painting the interior or the entrance hole, as the fumes can be harmful to birds; keep the finish strictly on the outside to preserve the rustic look.
- Mount the birdhouse 5 to 10 feet off the ground on a sturdy post or tree trunk, facing it away from prevailing winds to ensure a cozy, safe home for your new neighbors.
How to Achieve Realistic Pantry Organization for a Stress-Free Kitchen

Why we love this
Opening a perfectly organized pantry is like taking a deep breath for your brain. We love the visual rhythm of matching glass jars filled with colorful grains, the satisfying ‘click’ of an airtight lid, and the way everything from pasta to spices is visible at a glance. It’s about more than just aesthetics; it’s about the sensory peace of a clutter-free environment and the practical ease of knowing exactly what you have. The smell of fresh coffee beans and cinnamon sticks is heightened when they aren’t hidden in crumpled boxes, making the daily ritual of cooking feel like a high-end experience.
Essential Elements:
- Uniform glass or BPA-free plastic canisters
- Custom labels (vinyl or chalkboard)
- Tiered ‘stadium’ risers for canned goods
- Lazy Susans for oils and vinegars
- Woven baskets for bulky items
- Airtight cereal dispensers
How to make it
- Completely empty your pantry and wipe down every shelf with a mild cleaner; this ‘blank slate’ approach allows you to see the true potential of the space.
- Group your items into categories: baking, breakfast, snacks, dinner staples, and ‘backstock’ for items you bought in bulk that don’t fit in primary jars.
- Decant dry goods like flour, sugar, pasta, and nuts into uniform airtight containers; this not only looks viral-worthy but keeps your food fresh significantly longer.
- Apply clear, minimalist labels to every jar at the same height to create a clean, linear look that is instantly calming to the eye.
- Utilize vertical space by adding ‘under-shelf’ baskets for flat items like wraps or small snack bags that often get lost in the back of the pantry.
- Place a Lazy Susan in the corners of your shelves to ensure that bottles of oil, honey, and sauce are easily accessible with a quick spin rather than a frustrated search.
- Establish a ‘snack station’ at eye level for children (or yourself!) using open baskets, making it easy to grab a healthy bite without tearing through the organization.
How to Set Up a Tropical Pool Bar for Summer Fun

Why we love this
Transforming your pool deck into a tropical oasis brings that ‘vacation state of mind’ directly to your backyard. We love the vibrant contrast of teal water against warm bamboo and the festive rustle of a thatch roof in the summer breeze. It’s the ultimate setting for serving up frosty pineapples and coconut drinks, where the air smells like sunscreen and sea salt. A pool bar creates a social hub that feels exotic and playful, making every weekend feel like a luxury resort stay. It’s about the tactile coolness of a stone countertop and the bright, happy colors that make summer memories pop.
Essential Elements:
- Pressure-treated wood frame
- Bamboo fencing or slat-wall siding
- Synthetic or natural palm thatch roofing
- Outdoor-rated bar stools
- Submersible LED puck lights for the counter
- Weatherproof blender and ice chest
How to make it
- Build a sturdy bar-height frame (42 inches) using 2x4s and 4x4s, ensuring the structure is weighted or anchored so it doesn’t tip during a summer storm.
- Wrap the exterior of the frame in bamboo rolls, securing them with zip ties or heavy-duty staples for that instant island-vibe texture.
- Construct a simple shed-style roof frame over the bar and staple layers of palm thatch to the top, overlapping them by 4 inches to ensure a lush, full appearance.
- Install a durable countertop made of sealed wood or composite decking that can withstand splashes from the pool and the occasional spilled drink.
- Add a ‘rail’ on the bartender’s side of the counter to hold spirits and mixers, keeping the top surface clear for guests to lean on and enjoy their beverages.
- Hang string lights or ‘tiki’ lanterns from the thatch roof to create a warm, inviting glow for evening pool parties and late-night swims.
- Stock the back of the bar with colorful acrylic glassware and a large galvanized tub filled with ice to keep the ‘tropical resort’ energy high all season long.
How to Master Sidewalk Chalk Designs for Creative Summer Days

Why we love this
There is a fleeting, ephemeral beauty in sidewalk chalk art that captures the essence of summer. We love the dusty feel of the chalk in our hands, the vibrant pastels against the grey pavement, and the way a simple driveway can become a portal to another world. It’s an activity that brings neighbors together and stops passersby in their tracks. The scent of hot asphalt mixed with the dusty chalk creates a nostalgic sensory trigger that takes us back to childhood, while the massive scale of these viral ‘3D’ or ‘stained glass’ designs offers a sophisticated creative outlet for all ages.
Essential Elements:
- High-pigment ‘sidewalk paint’ or jumbo chalk sticks
- Painter’s tape (for crisp edges)
- Buckets of water and old sponges
- Blending brushes or microfiber cloths
- A knee pad for comfort during long sessions
- Hairspray (optional, for temporary setting)
How to make it
- Start by cleaning the pavement with a broom to remove all loose debris and dust, ensuring the chalk can adhere properly to the porous surface.
- For a ‘stained glass’ look, lay down painter’s tape in a geometric grid pattern across a large section of the driveway, pressing the edges down firmly.
- Color in each section with a different shade of chalk, applying heavy pressure to get deep, saturated color that looks like professional paint.
- Use a damp sponge or your fingers to blend the chalk within each section, creating smooth gradients and transitions that give the art a polished, viral look.
- Carefully peel back the tape while the chalk is still fresh to reveal crisp, clean grey lines that make the colors pop with incredible intensity.
- For 3D effects, use a ‘forced perspective’ technique by drawing your subject elongated and narrow at the top to make it look like it’s standing up when viewed from a specific spot.
- Mist the final design very lightly with water or cheap hairspray to help the pigment sit in the ‘pores’ of the concrete, making it last through a light breeze.
Conclusion
Our homes are the heart of our story, and taking the time to invest in these DIY projects is a way of honoring that narrative. Whether you’re building a sanctuary for the local birds or crafting a tropical escape by the pool, each of these viral hacks offers a chance to infuse your space with personality, warmth, and a little bit of internet-famous flair. I hope these projects inspire you to pick up a tool, get your hands a little dirty, and create something that makes you smile every time you walk through the door. Remember, the best homes aren’t just designed; they are built with love, one project at a time.