
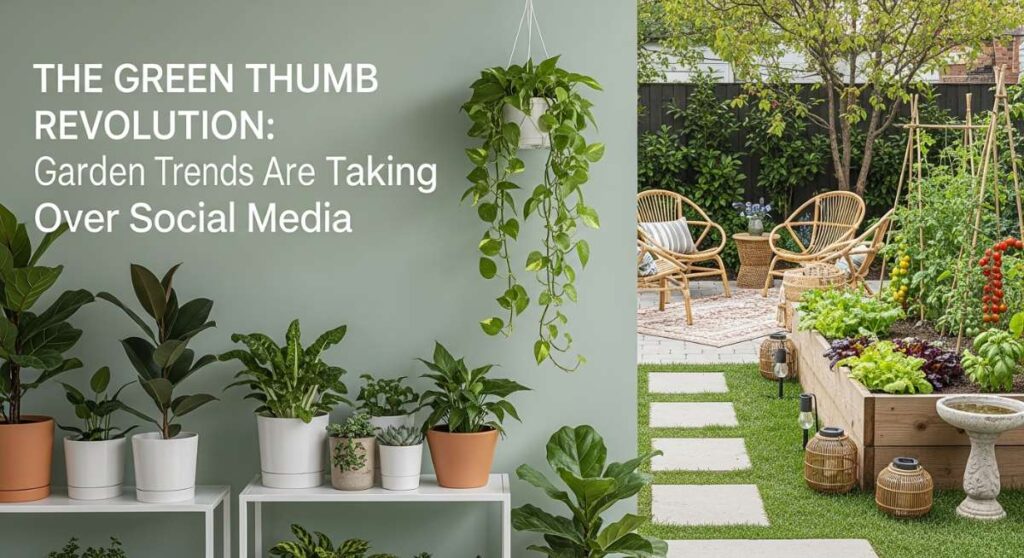
There is something undeniably magical about the early morning light filtering through a garden you’ve built with your own two hands. It starts with a single seed, a splash of paint, or a perfectly curated digital corner that reflects your inner world. We are living in an era where our physical backyards and our digital landscapes are blending into one beautiful, cohesive lifestyle, and I am absolutely here for this ‘Green Thumb Revolution’ that is taking over our feeds and our hearts.
Lately, my Pinterest and TikTok have been a whirlwind of cozy chicken coops, aesthetic blog layouts, and DIY projects that feel both grounding and incredibly stylish. It’s no longer just about ‘making do’; it’s about crafting a life that feels as good as it looks. Whether you’re scraping a coop at dawn or designing a dreamy desktop aesthetic at midnight, there’s a shared joy in the process of creation and care that connects us all in this modern homesteading movement.
How to Build a Poop Shelf Chicken Coop for a Cleaner Farm Life

Why we love this
There is nothing quite like the rustic, earthy scent of a clean coop combined with the satisfied soft clucking of hens settling in for the night. A poop shelf transforms the chore of cleaning into a satisfying, five-minute ritual, keeping your coop smelling like fresh pine and sweet hay rather than ammonia. Imagine the smooth glide of a scraper across a slick surface, knowing your girls are sleeping on pristine bedding while the waste is neatly contained and ready for the compost pile. It’s the ultimate hack for the busy homesteader who craves a pristine environment for their feathered friends.
Essential Elements:
- Smooth, moisture-resistant plywood or OSB
- Self-adhesive linoleum or vinyl flooring scraps
- 1×2 or 2×2 lumber for support cleats
- Heavy-duty wood screws
- Metal scraper or putty knife
- Sweet PDZ or sand for a non-stick surface
How to make it
- Measure the area directly beneath your roosting bars; the shelf should extend at least 8 inches beyond the bars on all sides to catch every drop.
- Cut your plywood to size using a circular saw, ensuring the edges are straight for a flush fit against the coop walls.
- Apply the self-adhesive linoleum to the top surface of the plywood, smoothing out any air bubbles with a roller to create a perfectly waterproof, slick barrier.
- Install your support cleats onto the coop wall studs approximately 8-10 inches below the roosting bars using 2-inch wood screws; use a level to ensure the shelf won’t slant.
- Place the shelf onto the cleats and secure it with a few screws (keep them accessible in case you ever need to remove the shelf for a deep scrub).
- Dust the entire surface with a thin layer of Sweet PDZ or fine sand; this acts as a ‘clumping’ agent that makes daily waste removal effortless.
How to Design a Blue Rentry Divider PNG for an Aesthetic Blog Layout

Why we love this
A crisp, cerulean or soft dusty blue divider brings a sense of serenity and professional polish to any digital space, reminiscent of a clear summer sky or a calm coastal breeze. When you scroll through a blog and see a beautifully rendered graphic separating your thoughts, it provides a visual breath of fresh air that keeps the reader engaged without feeling overwhelmed. The texture of a well-designed PNG can range from a watercolor wash to a sharp, modern geometric line, adding a layer of depth and personality that text alone simply cannot provide.
Essential Elements:
- Graphic design software (Canva, Photoshop, or GIMP)
- A curated blue color palette (Hex codes like #A2C2E1 or #5DADE2)
- Transparency settings (PNG-24 format)
- Standard web width (usually 1200px or 800px)
- Brush tools or shape vectors
How to make it
- Open your design software and create a new canvas with a width of 1200px and a height of 100px to ensure a wide, slim profile.
- Set the background to ‘transparent’ immediately; this is crucial for the PNG to blend seamlessly into your blog’s background color.
- Select your primary blue shade and use a soft-edged brush tool or a vector rectangle to draw your divider across the center of the canvas.
- Add a subtle gradient or a ‘noise’ filter to give the blue some texture, making it look more like organic paper or silk rather than flat digital color.
- Export the file specifically as a PNG-24 with ‘transparency’ checked to ensure no white boxes appear around your design when uploaded.
- Upload to your blog hosting site and use CSS to center the image between paragraphs for a clean, professional aesthetic.
How to Choose Concrete Colors Outdoor for a Modern Backyard Oasis

Why we love this
Selecting the right concrete hue is like picking the perfect foundation for your home; it sets the emotional temperature for your entire outdoor living area. A warm, sandy beige can make a patio feel like a sun-drenched Mediterranean villa, while a deep charcoal gray offers a sleek, sophisticated edge that highlights the vibrant greens of your garden. The way the light hits a colored concrete surface—changing from a matte earthiness in the shade to a glowing, radiant texture in the afternoon sun—transforms a simple walkway into a deliberate design statement.
Essential Elements:
- Integral color pigments (mixed into the wet concrete)
- Color hardeners (applied to the surface)
- Curing sealers (to protect the hue)
- Concrete color charts/samples
- Clear UV-resistant topcoat
How to make it
- Observe your backyard’s lighting throughout the day; colors will look significantly lighter in direct sunlight and much darker in the evening shadows.
- Compare color samples against your home’s siding and existing stone elements; look for complementary tones rather than exact matches to avoid a ‘flat’ look.
- If you are pouring new concrete, opt for ‘integral color’ where the pigment is mixed into the truck; this ensures the color goes all the way through the slab so chips aren’t visible.
- For existing concrete, choose a reactive acid stain for a variegated, marble-like look or a water-based stain for a more uniform, solid color.
- Test a small, inconspicuous patch of concrete first to see how the material reacts to the pigment, as different concrete mixes absorb color differently.
- Apply a high-quality, UV-resistant sealer once the color has cured to prevent fading and to give the concrete a lush, ‘wet’ look that makes the color pop.
How to Style a Pink Rentry Divider Lace for the Ultimate Girly Desktop

Why we love this
There is a delicate, nostalgic charm to digital lace that feels like a love letter to the ‘coquette’ and ‘soft girl’ aesthetics currently dominating social media. The intricate loops and airy patterns of a pink lace divider bring a touch of Victorian elegance to the digital age, creating a desktop environment that feels soft, safe, and incredibly creative. Every time you open your laptop, you’re greeted by a whisper of blush and rose, making even the most mundane digital tasks feel like you’re writing in a silk-bound journal in a garden gazebo.
Essential Elements:
- Lace pattern brushes or PNG assets
- Soft pink color palette (#FFD1DC, #F4C2C2)
- Markdown or HTML code for layout
- Drop shadow effects
- Matching desktop wallpaper
How to make it
- Source or create a high-resolution lace border PNG with a transparent background to ensure it looks delicate on any surface.
- Using a photo editor, tint the lace to your desired shade of pink, adjusting the ‘lightness’ to ensure it doesn’t clash with your text color.
- Apply a very subtle ‘Outer Glow’ or ‘Drop Shadow’ (around 2px spread) to give the lace a 3D effect, making it look like it’s sitting on top of your screen.
- In your Rentry or blog settings, use the ‘Image’ tag to insert the divider, setting the width to 100% so it spans the entire width of your content block.
- Adjust the ‘margin-top’ and ‘margin-bottom’ in your CSS to give the lace breathing room, ensuring it doesn’t crowd your text or images.
- Layer smaller lace ‘corner’ graphics in the top and bottom edges of your desktop folders to complete the cohesive, hyper-feminine look.
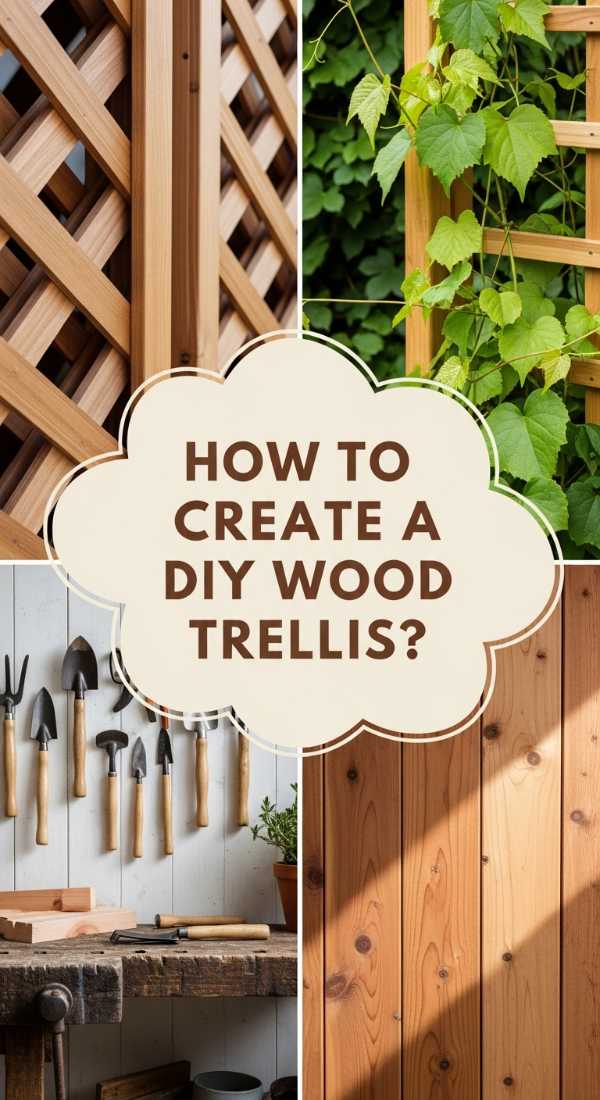
How to Create a DIY Wood Trellis for a Lush Secret Garden
Why we love this
The smell of freshly cut cedar and the tactile roughness of raw wood under your fingertips are the hallmarks of a truly rewarding DIY project. A handmade trellis isn’t just a support structure; it’s a promise of future blooms, a skeleton that will soon be covered in the intoxicating fragrance of jasmine or the vibrant reach of climbing roses. There’s a deep satisfaction in watching a bare wooden frame slowly disappear behind a curtain of green, knowing you’ve created the perfect ladder for nature to climb toward the sun.
Essential Elements:
- 8-foot cedar or pressure-treated 2x2s
- Horizontal lath strips (1x2s or lattice)
- Exterior grade wood glue
- Galvanized finish nails or screws
- Outdoor wood stain or sealant
- Measuring tape and level
How to make it
- Lay two 8-foot 2x2s parallel on a flat surface, spacing them exactly 24 inches apart to form the main vertical supports of your trellis.
- Cut your 1×2 lath strips into 24-inch lengths; you will need roughly 10-12 pieces depending on how tight you want the grid to be.
- Starting from the top, apply wood glue to the ends of a lath strip and nail it across the two vertical supports, ensuring the corners are square.
- Measure down 8 inches and repeat the process for each subsequent horizontal strip until you reach the bottom, leaving the last 18 inches of the 2x2s bare for anchoring into the ground.
- Sand the entire structure to remove any splinters, then apply a rich outdoor stain to protect the wood from the elements and enhance its natural grain.
- Let the trellis dry completely for 24 hours in a well-ventilated area before moving it to the garden for installation.
How to Maintain a Poop Shelf Chicken Coop for Healthier Happy Hens

Why we love this
Maintenance is the ultimate act of love for your flock, and there’s a rhythmic, meditative quality to the morning coop check. Seeing your hens’ bright eyes and fluffy feathers as they hop down onto a clean floor is the best reward for a few minutes of work. A well-maintained shelf prevents the buildup of pests and keeps the air inside the coop as fresh as the morning breeze, ensuring your girls are spending their energy on laying delicious, golden-yolked eggs rather than fighting off respiratory issues.
Essential Elements:
- Wide metal bench scraper
- Small handheld broom and dustpan
- Aromatic coop refresher (lavender/mint)
- Fresh Sweet PDZ or lime-free sand
- Waste bucket or wheelbarrow
How to make it
- Perform a ‘daily scrape’ every morning while the hens are out in the run; simply pull the metal scraper across the linoleum shelf to drop waste into your bucket.
- Once a week, use your handheld broom to sweep away any lingering dust or small feathers that have accumulated in the corners of the shelf.
- Apply a fresh, light dusting of Sweet PDZ or sand to the shelf surface to keep it dry; the moisture-absorbing properties are key to odor control.
- Inspect the linoleum for any lifting edges or cracks where mites could hide; if you find a gap, seal it immediately with exterior-grade caulk.
- Monthly, give the shelf a quick wipe-down with a 50/50 water and white vinegar solution to disinfect the surface naturally without using harsh chemicals.
- Transfer the collected waste to your compost bin, layering it with brown materials (like leaves) to break down into ‘black gold’ for next season’s garden.
How to Customize Concrete Colors Outdoor for Elevated Curb Appeal

Why we love this
Customizing your outdoor concrete is the adult version of coloring outside the lines—it’s where utility meets high art. When you step onto a driveway or porch that has been thoughtfully colored to echo the slate blues of the mountains or the warm terracottas of a sunset, the entire house feels more intentional and grounded. The subtle shifts in tone and the depth provided by custom staining create a rich, multi-dimensional surface that invites you to kick off your shoes and feel the cool, colored stone beneath your feet.
Essential Elements:
- Concrete etching solution
- Semi-transparent or solid color concrete stain
- Painter’s tape and plastic sheeting
- Pump sprayer or high-density foam roller
- Non-slip additive for the final sealer
How to make it
- Thoroughly power-wash the concrete surface to remove all dirt, oil, and old sealers; the concrete must be ‘thirsty’ to absorb the new color.
- Apply a concrete etching solution to open the pores of the material; you’ll see it fizz slightly—this is the visual cue that it’s working.
- Rinse the etcher off and let the concrete dry for a full 48 hours; any trapped moisture will prevent the color from adhering properly.
- Tape off your edges and use a pump sprayer to apply the stain in a circular motion, keeping the nozzle about 12 inches from the surface to avoid pooling.
- If you want a variegated look, mist a second, slightly darker color over the first while it’s still damp to create natural-looking shadows and highlights.
- Once the stain is dry to the touch (usually 4-6 hours), apply two thin coats of sealer mixed with a non-slip additive to ensure the surface isn’t slippery when wet.
How to Install a DIY Wood Trellis for Growing Vertical Greenery

Why we love this
The moment of installation is when a project finally ‘meets’ the earth, and there’s a beautiful sense of permanence in anchoring your trellis. As you step back and see the vertical lines cutting through the garden, you realize you’ve just added a new dimension to your landscape. The trellis stands like a silent guardian, ready to be embraced by tendrils of sweet pea or the heavy weight of ripening cherry tomatoes, providing a structural elegance that lasts through every season, even when the vines go dormant in winter.
Essential Elements:
- Post hole digger or sturdy shovel
- Level and rubber mallet
- Zinc-plated wall brackets (if mounting to a fence)
- Galvanized wire or twine for training
- Mulch and organic fertilizer
How to make it
- Choose a location with at least 6 hours of sunlight and well-draining soil to ensure your climbing plants thrive once they meet the trellis.
- Dig two holes 18 inches deep and 24 inches apart; if your soil is very sandy, you may want to add a small amount of quick-set concrete for extra stability.
- Insert the bare legs of your trellis into the holes, using a level to check both the front-to-back and side-to-side verticality.
- Backfill the holes with soil or gravel, tamping it down firmly with the end of a shovel every few inches to eliminate air pockets.
- If mounting against a wall, use spacers to keep the trellis at least 2 inches away from the surface; this allows for vital air circulation behind the leaves.
- Plant your climbers at the base, gently weaving the first few stems into the lower rungs of the trellis and securing them loosely with garden twine.
How to Layer Blue Rentry Divider PNG Graphics for Professional Web Design

Why we love this
Layering is the secret sauce of professional digital design; it’s what takes a blog from ‘basic’ to ‘bespoke.’ When you stack different shades of blue and varying textures of PNG dividers, you create a sense of parallax and movement that draws the eye downward through your content. It feels like looking into the depths of a clear pool—there’s a richness and a sophisticated complexity that makes your digital home feel lived-in and carefully curated, providing a high-end experience for every visitor who lands on your page.
Essential Elements:
- Multiple PNG divider files (thin lines, thick washes, and accents)
- CSS z-index properties
- Varying opacity levels (100%, 70%, 40%)
- Layout container (Div tags)
- Consistency in hex codes
How to make it
- Select three different blue PNGs: one solid ‘base’ line, one ‘texture’ wash, and one ‘accent’ (like a sparkle or leaf flourish).
- In your CSS editor, place these within the same container block but assign them different ‘z-index’ values (z-index: 1 for the base, 2 for the texture, 3 for the accent).
- Apply ‘position: absolute’ to the texture and accent layers so you can nudge them slightly off-center from the base line for a more organic feel.
- Adjust the ‘opacity’ of the middle layer to around 0.6; this allows the base color to peek through, creating a new, custom ‘intermediate’ blue shade.
- Use ‘margin-left’ and ‘margin-right’ tweaks to stagger the start and end points of the dividers, preventing them from looking like a single, flat block.
- Refresh your live preview often to ensure the layering doesn’t interfere with the legibility of the surrounding text or break the mobile responsiveness.
How to Craft Pink Rentry Divider Lace Borders for Dreamy Digital Stationery

Why we love this
Crafting your own digital stationery is the ultimate form of self-expression in the digital age, turning a simple ‘to-do’ list into a work of art. These pink lace borders act as a frame for your thoughts, encasing your goals and dreams in a layer of digital silk and rose-tinted pixels. The softness of the lace against a crisp white background is visually soothing, reducing digital eye strain and making the time you spend on your computer feel more like a creative retreat than a chore.
Essential Elements:
- Seamless lace pattern tile
- Adobe Illustrator or Procreate
- High-resolution export settings (300 DPI)
- Soft pink and cream color palette
- Digital ‘paper’ textures
How to make it
- Start with a seamless lace pattern; if creating in Procreate, use the ‘Symmetry’ tool to ensure the left and right sides of your lace loops match perfectly.
- Set your color to a soft ‘Ballet Slipper’ pink and draw your intricate lace detailing on a canvas that is exactly 1000x1000px for easy tiling.
- Test the ‘seamlessness’ by duplicating the tile and placing them side-by-side; there should be no visible seam where the patterns meet.
- Once satisfied, export the lace border as a long, thin horizontal strip (e.g., 3000x200px) by repeating your seamless tile multiple times.
- Layer this strip onto a slightly off-white ‘digital paper’ background to give it that authentic stationery feel, adding a faint texture overlay for realism.
- Save the final file as a transparent PNG so you can use it to border your digital planners, Rentry pages, or even your email signature for a dreamy touch.
The Garden and the Screen: A Harmonious Lifestyle
Whether you’re getting your hands dirty in the garden or clicking away at a new blog design, the ‘Green Thumb Revolution’ is all about intentionality. By taking the time to build a better coop, choose the right outdoor colors, or craft a beautiful digital space, you are investing in your own happiness and the beauty of the world around you. This lifestyle is a celebration of the handmade and the heart-designed, proving that with a little bit of effort, every corner of our lives—both physical and digital—can be a lush, secret garden of our own making.