
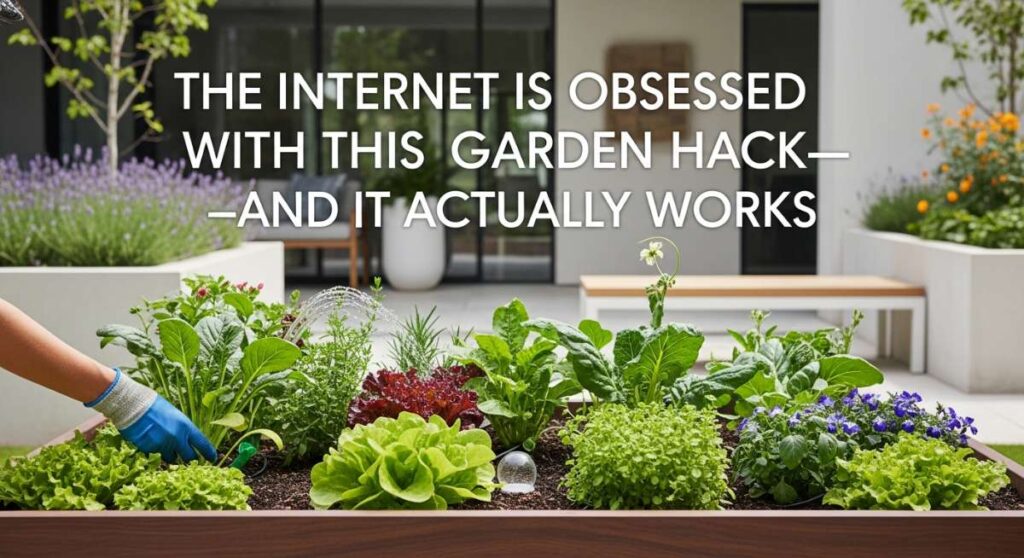
There is a specific kind of magic that happens when you scroll past a DIY project and something just clicks. You know the feeling—your heart beats a little faster, your mind starts mapping out the corner of the yard that’s been neglected for years, and suddenly, you can almost smell the fresh cedar and damp earth. We’ve all been burned by ‘life hacks’ that turn out to be more headache than help, but every once in a while, the internet delivers a gem that truly transforms a home. Lately, the gardening world has been buzzing with a specific approach to outdoor living that blends aesthetic bliss with total functionality.
I remember sitting on my back porch last summer, looking at a patch of brown grass and feeling completely overwhelmed. I wanted that ‘Instagram-worthy’ sanctuary, but I didn’t have a professional landscaper’s budget or forty hours a week to pull weeds. That’s when I stumbled upon these viral techniques. They aren’t just about making things look pretty for a photo; they are about creating spaces that breathe life back into your daily routine. From the way the sun hits a new floating deck to the nostalgic glow of a retro-styled room, these projects are about reclaimed joy.
Today, I’m breaking down the absolute best of the best. These are the projects that have taken the internet by storm for one simple reason: they actually work. Whether you are looking to boost your curb appeal or create a secret hideaway in your backyard, these ten guides will give you the professional results you’ve been dreaming of without the professional price tag. Let’s get into the dirt and details!
How to Design Dreamy Front Yard Landscapes for Instant Curb Appeal
Why we love this
There is nothing quite like the pride of pulling into your driveway and being greeted by a lush, intentional landscape that feels like a warm hug. This design philosophy focuses on the sensory experience—the soft rustle of ornamental grasses against the sharp, clean lines of a stone walkway, and the intoxicating scent of star jasmine climbing a trellis. It creates a layered look that provides visual depth, making even a small yard feel like a grand estate. The contrast between the dark, rich mulch and the vibrant greens of boxwoods creates a crisp, clean aesthetic that stays beautiful through every season.
Essential Elements:
- Flagstone or paver stones for structured walkways
- A mix of evergreen shrubs for year-round structure
- Dark hardwood mulch for moisture retention and contrast
- Low-voltage LED path lights for evening ambiance
- A statement tree, like a Japanese Maple or Dogwood
How to make it
- Begin by sketching a ‘flow map’ of your yard, identifying natural walking paths and focal points near the entryway.
- Remove existing grass using a sod cutter or the ‘smother’ method with cardboard to ensure a clean slate for your new beds.
- Define your edges using a sharp spade or decorative edging to create deep, sweeping curves that lead the eye toward the front door.
- Install your hardscaping first, such as flagstone paths, ensuring you level the ground with a sand base to prevent shifting over time.
- Plant your larger ‘anchor’ shrubs in the back, then layer in mid-sized perennials, and finish with groundcovers in the front for a tiered effect.
- Apply a three-inch layer of high-quality mulch, keeping it a few inches away from the base of the plants to prevent rot.
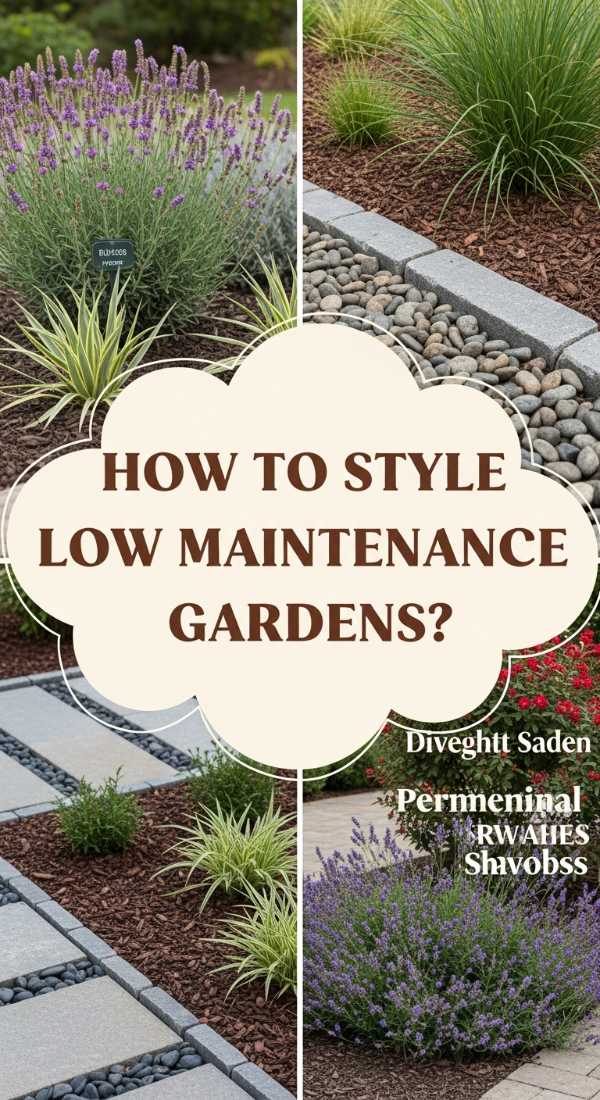
How to Create Low Maintenance Flower Beds for Effortless Beauty

Why we love this
The true luxury of a garden isn’t just how it looks, but how it lets you relax. These low-maintenance beds are designed to thrive with minimal intervention, allowing you to spend your weekends sipping iced tea rather than pulling stubborn weeds. Imagine a sea of purple lavender and silvery sage that releases a calming aroma every time the breeze catches it, attracting golden honeybees and delicate butterflies. The texture is soft and wild yet contained, offering a sophisticated ‘cottage-core’ vibe that feels both timeless and perfectly curated for the modern, busy homeowner.
Essential Elements:
- Drought-tolerant perennials (Lavender, Coneflower, Sedum)
- Professional-grade landscape fabric or heavy cardboard
- Slow-release organic fertilizer beads
- Drip irrigation kit for automated watering
- Pre-emergent weed preventer
How to make it
- Select a site with at least 6 hours of sunlight and test the soil drainage by digging a small hole and filling it with water; it should drain within an hour.
- Lay down a double layer of corrugated cardboard over the area to kill existing weeds and grass while adding organic matter back into the soil.
- Cut ‘X’ shapes into the cardboard exactly where you want to place your plants, ensuring you space them according to their full-grown width.
- Incorporate a handful of compost into each planting hole to give your perennials a nutrient-dense start.
- Install a simple drip irrigation line across the bed, connecting it to a battery-operated timer on your outdoor faucet for hands-free hydration.
- Cover the entire area with wood chips or gravel to suppress future weed seeds and regulate soil temperature throughout the year.
How to Build a Custom Grill Station for the Ultimate BBQ Experience
Why we love this
A custom grill station transforms a simple backyard cookout into a high-end culinary event. There is something deeply satisfying about the cool touch of a granite countertop paired with the rugged warmth of stacked stone. As the smoke rises from the grill, carrying the savory aroma of charred wood and seared steak, this station becomes the heartbeat of the home. It’s not just a place to cook; it’s a social hub where friends lean against the counter with a cold drink, watching the magic happen in a space that feels like a professional outdoor kitchen.
Essential Elements:
- Pressure-treated lumber for the internal frame
- Cement board siding for fire resistance
- Stone veneer or outdoor-rated tile
- Drop-in grill head and stainless steel cabinet doors
- Food-grade countertop surface (Granite or Polished Concrete)
How to make it
- Level a concrete pad or reinforced deck section to act as the foundation, ensuring it can support the significant weight of the finished station.
- Build the internal skeleton using 2×4 pressure-treated lumber, creating specific ‘boxes’ or cutouts for the grill, fridge, and storage drawers.
- Sheath the entire frame in 1/2-inch cement board, using alkali-resistant screws to provide a moisture-proof and fire-resistant base for the finish.
- Apply a thin-set mortar and attach your stone veneer, starting from the bottom and working up, using spacers to keep your lines clean and professional.
- Measure and cut your countertop material (or pour a concrete top), ensuring a slight overhang to protect the stone veneer from drips and spills.
- Slide in your drop-in components and seal the edges with high-heat silicone to prevent water from entering the interior frame.
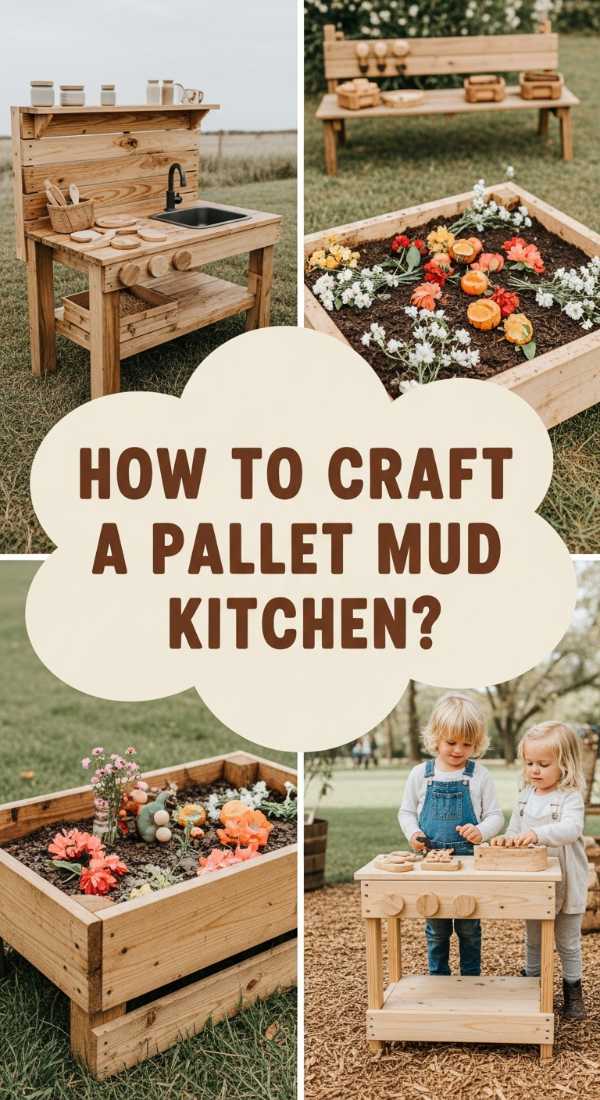
How to Craft a Whimsical Pallet Mud Kitchen for Creative Outdoor Play
Why we love this
This project is a love letter to childhood imagination and the tactile joy of getting messy. A mud kitchen brings the ‘indoor’ comfort of play outside, surrounded by the scent of pine needles and the sound of birdsong. The rough-hewn texture of reclaimed pallet wood gives it a rustic, storybook charm that looks beautiful in any garden corner. Watching little hands ‘bake’ mud pies topped with dandelion petals and pebbles is a reminder of the simple, screen-free joys of the natural world. It is a durable, enchanting space where the only limit is a child’s creativity.
Essential Elements:
- Heat-treated (HT) shipping pallets
- Stainless steel mixing bowls (to serve as sinks)
- Old kitchen faucets or hand pumps
- Hooks for hanging wooden spoons and whisks
- Outdoor-rated chalkboard paint
How to make it
- Source pallets marked with ‘HT’ (Heat Treated) to ensure they are free from harmful chemical pesticides used in ‘MB’ (Methyl Bromide) pallets.
- Disassemble the pallets and sand every surface thoroughly with 60-grit followed by 120-grit sandpaper to remove all splinters and rough edges.
- Construct a sturdy table frame at a height appropriate for your children, using the thickest pallet stringers for the legs.
- Cut a circular hole in the ‘countertop’ slightly smaller than the lip of your stainless steel bowls so they can drop in and sit securely.
- Attach a vertical backboard to the kitchen, adding a shelf for ‘ingredients’ like jars of acorns and a small chalkboard for the daily menu.
- Finish the wood with a non-toxic, water-based exterior sealant to protect it from the elements while keeping it safe for little hands.
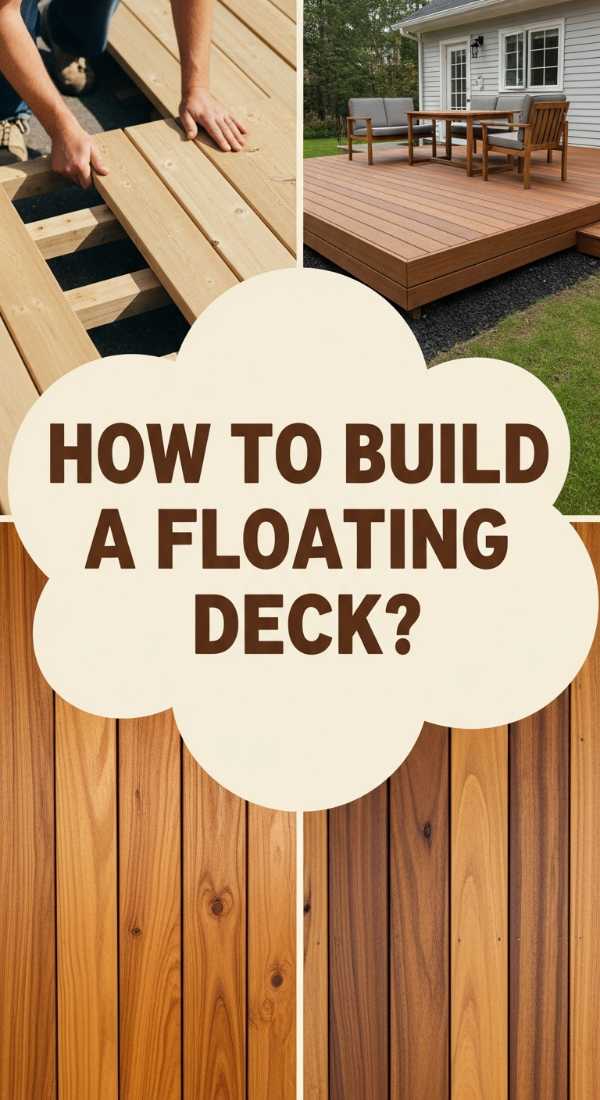
How to Construct a Floating Deck for a Luxurious Backyard Retreat

Why we love this
There is a sophisticated lightness to a floating deck that traditional attached decks simply cannot match. It feels like an island of tranquility nestled directly into your landscape. The smooth, warm boards of cedar or redwood underfoot provide a grounding sensation, while the low profile creates a seamless transition from the grass to your seating area. Surrounded by potted ferns and glowing lanterns, this space becomes a private sanctuary where the stresses of the day melt away into the evening air. It’s a high-impact architectural feature that brings a touch of resort-style luxury to your own backyard.
Essential Elements:
- Concrete deck blocks or ‘TuffBlocks’
- Pressure-treated 2×6 joists
- Cedar or composite decking boards
- Hidden deck fasteners for a clean look
- Landscape fabric and gravel for the base
How to make it
- Clear the area of all vegetation and level the ground, then lay down heavy-duty landscape fabric topped with a layer of gravel to ensure proper drainage.
- Position your deck blocks in a grid pattern, checking with a long level and a string line to ensure every block is perfectly even with the others.
- Install your outer frame and inner joists into the blocks, using joist hangers and galvanized nails for a secure, wiggle-free structure.
- Check the squareness of the frame by measuring diagonally from corner to corner; the two measurements must be identical.
- Lay your decking boards across the joists, using a spacer to maintain a consistent 1/8-inch gap for wood expansion and water runoff.
- Secure the boards with hidden fasteners or color-matched screws, then trim the edges with a circular saw for a perfectly flush, professional finish.
How to Decorate a Nostalgic Teen Room for the Perfect Retro Vibe
Why we love this
Stepping into a retro-inspired room feels like a warm embrace from a simpler time. This aesthetic is all about ‘comfort-core’—think the soft, hazy glow of a lava lamp, the tactile click of a vinyl record player, and the cozy texture of corduroy throw pillows. The color palette of burnt oranges, mustard yellows, and avocado greens creates a moody, sunset-drenched atmosphere that is perfect for studying or lounging. It’s a space that celebrates personality and history, blending vintage finds with modern comforts to create a retreat that feels entirely unique and deeply personal.
Essential Elements:
- Woven macramé wall hangings or beaded curtains
- Retro-style record player and vinyl storage
- Neon LED signs or color-changing strip lights
- Thrifted vintage furniture with mid-century lines
- Shag rugs or plush floor cushions
How to make it
- Start with a neutral base wall color like ‘warm cream’ to allow the bold retro accents and colorful posters to pop without overwhelming the space.
- Incorporate a ‘statement wall’ using removable vintage-patterned wallpaper or a collection of old album covers arranged in a grid.
- Layer your lighting by avoiding the harsh overhead light; instead, use a mix of floor lamps with warm bulbs and accent neon lights for a soft glow.
- Mix textures by pairing a sleek wooden desk with a chunky knit blanket and velvet pillows to create a sense of ‘lived-in’ luxury.
- Source authentic vintage pieces from local thrift stores, like a refurbished nightstand or a classic bean bag chair, to ground the room in history.
- Create a ‘chill zone’ by placing a low-profile rug and floor cushions in a corner, perfect for a reading nook or a gaming station.
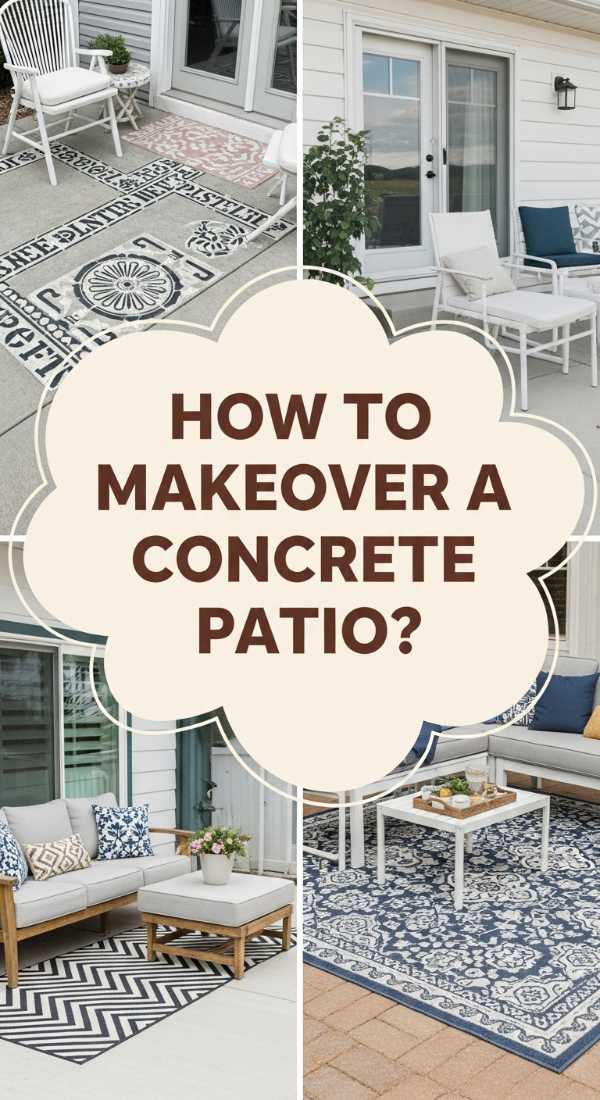
How to Refresh a Concrete Patio for a Modern Outdoor Oasis
Why we love this
An old, stained concrete patio is often the biggest eyesore in a yard, but with a modern refresh, it becomes the foundation of an outdoor oasis. The transformation is visual and tactile—moving from cold, cracked gray to a sleek, slate-finished or patterned surface that feels intentional and high-end. When paired with oversized black planters and minimalist furniture, the refreshed patio reflects the light beautifully, making the entire backyard feel larger and more cohesive. It is the ultimate ‘before and after’ that proves you don’t need a total demo to get a brand-new look.
Essential Elements:
- Concrete etcher or muriatic acid solution
- Outdoor concrete paint or semi-transparent stain
- Large-scale geometric stencils (optional)
- High-gloss or matte concrete sealer
- Pressure washer and stiff scrub brush
How to make it
- Deep clean the concrete using a pressure washer to remove all dirt, oil, and moss, then apply a concrete etcher to open the ‘pores’ of the stone.
- Patch any significant cracks with a concrete filler, smoothing it out with a putty knife and letting it cure completely before proceeding.
- Apply a base coat of high-quality outdoor concrete paint using a long-handled roller, working in small sections to ensure even coverage.
- If using a stencil, secure it with painter’s tape and use a nearly-dry sponge or small roller to apply a contrasting color, preventing bleed-under.
- Allow the paint to dry for at least 24-48 hours, then apply two coats of clear sealer to protect the design from UV rays and foot traffic.
- Style the area with outdoor rugs and weather-resistant furniture to turn the hard surface into a soft, inviting living space.
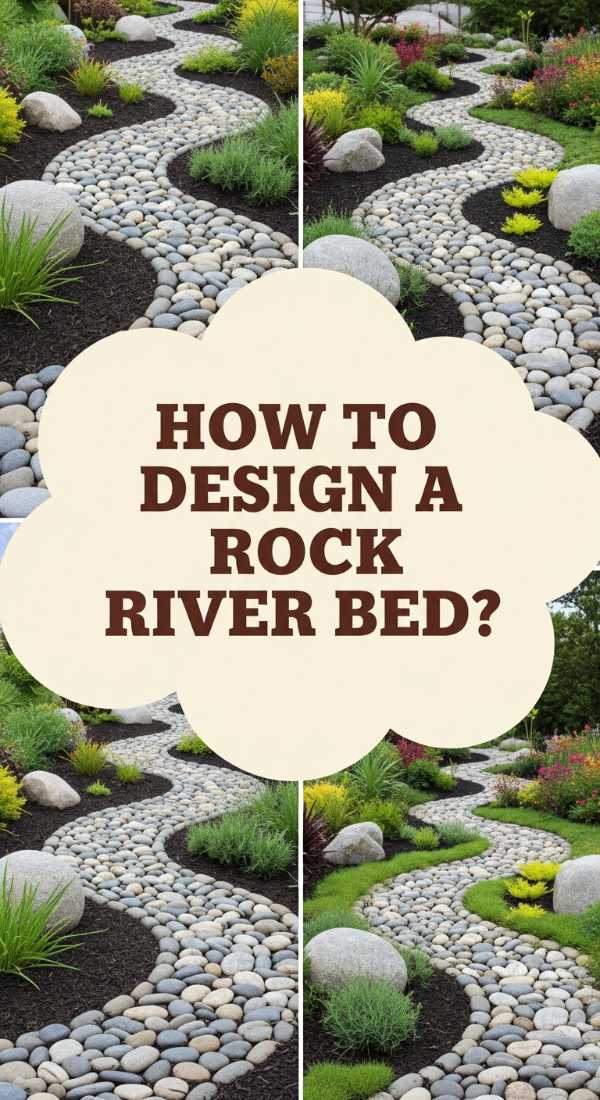
How to Install a Rock River Bed for Beautiful Natural Drainage
Why we love this
A rock river bed is the perfect marriage of form and function. It solves the practical problem of backyard drainage while mimicking the serene, earthy beauty of a dried mountain creek. The variety of textures—from the smooth, cool surfaces of river jacks to the jagged edges of larger boulders—creates a visual rhythm that draws the eye through the garden. When it rains, the stones darken and glisten, and the sound of water trickling through the rocks creates a peaceful, meditative atmosphere. It’s a rugged, natural element that adds instant maturity and ‘soul’ to a landscape.
Essential Elements:
- Non-woven geotextile landscape fabric
- Various sizes of river rocks (pea gravel to 6-inch stones)
- Large ‘anchor’ boulders for realism
- Steel or heavy-duty plastic edging
- Shovel and trenching tool
How to make it
- Observe your yard during a heavy rain to identify the natural path of runoff, and mark this path with landscape spray paint in a meandering ‘S’ curve.
- Dig a trench along the marked path, approximately 12-18 inches wide and 6 inches deep, creating a slight ‘V’ shape at the bottom.
- Line the trench with heavy-duty geotextile fabric, pinning it down with landscape staples to prevent the rocks from sinking into the soil over time.
- Place your largest ‘anchor’ boulders first at the bends of the river to make it look like the water has naturally flowed around them for years.
- Fill the bottom with a layer of medium-sized river rocks, then scatter smaller pea gravel along the edges to soften the transition to the lawn.
- Ensure the end of the river bed leads to a safe drainage area, such as a rain garden or a French drain, to prevent pooling at the finish.
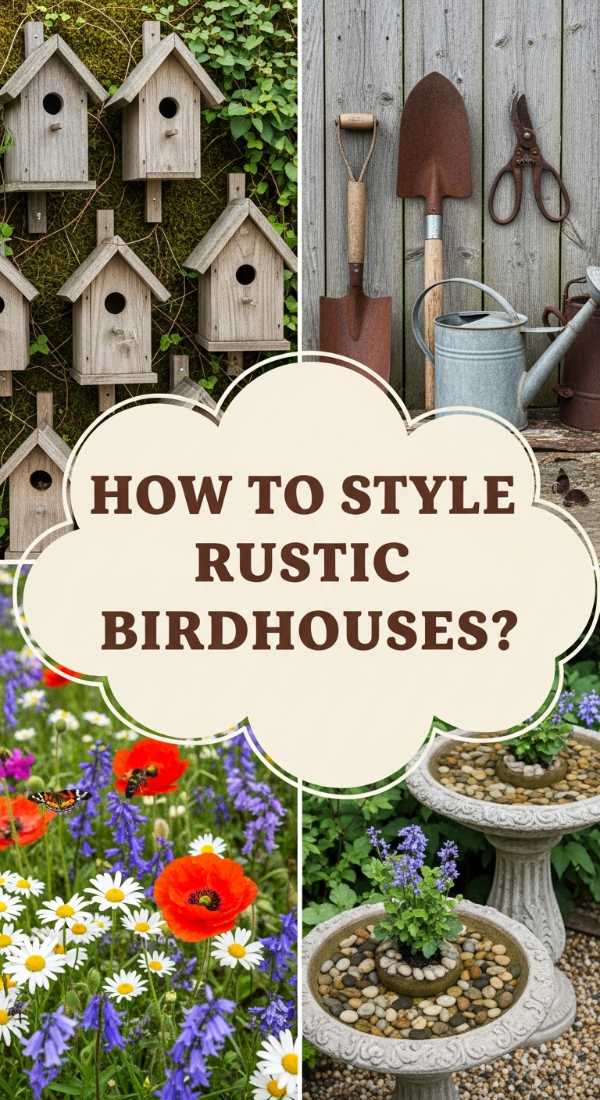
How to Style Rustic Birdhouses for a Charming Cottage Garden
Why we love this
There is a whimsical, timeless charm to rustic birdhouses that makes a garden feel like a scene from a fairytale. The weathered wood, perhaps with a bit of peeling paint in a dusty robin’s egg blue or sage green, tells a story of seasons passed. As you sit in your garden, the sight of a bluebird darting into a tiny cedar home and the sound of distant chirping adds a layer of life and movement that plants alone cannot provide. These birdhouses serve as both sculptural art and a vital sanctuary for local wildlife, bridging the gap between human design and the natural world.
Essential Elements:
- Cedar or reclaimed barn wood (natural rot resistance)
- Corrugated tin or copper scraps for roofing
- Decorative ‘found’ objects (old keys, buttons, or wire)
- Non-toxic outdoor milk paint
- Mounting poles or heavy-duty hanging wire
How to make it
- Build or buy a simple birdhouse with a 1.5-inch entry hole, which is the ‘sweet spot’ for most common songbirds while keeping out larger predators.
- Distress the wood by lightly hitting it with a chain or sanding the edges to give it an aged, ‘shabby-chic’ appearance.
- Apply a thin coat of milk paint, then immediately wipe parts of it away with a damp cloth to create a faded, sun-drenched look.
- Attach a small piece of corrugated tin or a copper sheet to the roof using upholstery tacks to add a rustic, industrial texture.
- Ensure there are small drainage holes in the bottom and a side panel that opens, allowing you to clean the house out every winter.
- Mount the birdhouses at varying heights—between 5 and 10 feet—in a quiet area of the garden away from high-traffic footpaths.
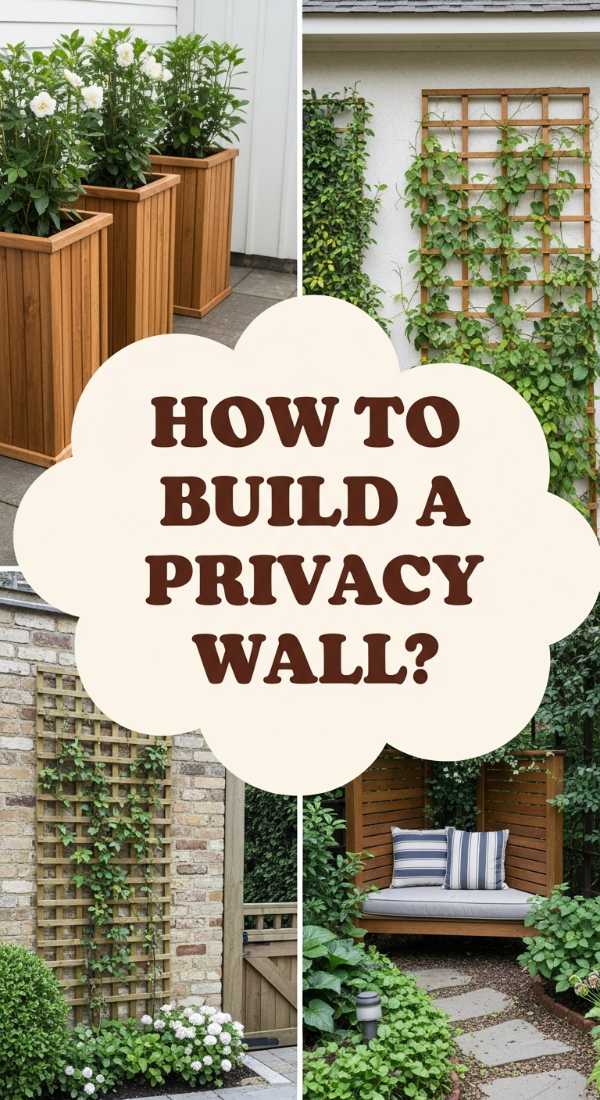
How to Build a Planter Privacy Wall for a Secluded Garden Sanctuary
[IMAGE_10]
Why we love this
The planter privacy wall is the ultimate solution for urban or suburban dwellers craving a secret hideaway. Instead of a cold, sterile fence, you get a living, breathing barrier that smells of cedar and fresh herbs. The vertical lines of the slats provide a modern, architectural feel, while the cascading greenery of trailing ivy or sweet potato vine softens the edges. It’s a ‘green cocoon’ that muffles neighborhood noise and blocks prying eyes, creating a private pocket of peace where you can truly be yourself. The scent of damp wood and growing leaves makes every morning coffee feel like a getaway.
Essential Elements:
- 4×4 pressure-treated posts for the main structure
- 1×4 cedar slats for the screen
- Built-in planter boxes at the base or mid-height
- Landscape liner for the planter boxes
- Exterior wood stain in a modern tone (like Ebony or Teak)
How to make it
- Set your 4×4 posts in concrete, ensuring they are perfectly plumb and spaced exactly 4 to 6 feet apart for maximum stability.
- Construct rectangular planter boxes at the base of the posts, using cedar for its natural resistance to water and insects.
- Line the inside of the planters with plastic landscape liner, poking a few holes for drainage, to prevent the wood from rotting prematurely.
- Attach the 1×4 horizontal slats to the posts, using a 1-inch spacer between each board to allow for airflow while still providing privacy.
- Stain or seal the entire structure with a high-quality UV-protectant to maintain the rich color of the wood against the sun.
- Fill the planters with a mix of upright grasses for height and trailing vines for a ‘curtain’ effect that will fill in the gaps over time.
Conclusion
Creating a home and garden that you truly love doesn’t require a miracle—it just requires a little bit of inspiration and the right steps to follow. Each of these projects offers a way to reclaim your space, adding value not just to your property, but to your daily life. Whether you start with a small birdhouse or go big with a floating deck, the process of building something with your own hands is where the real magic happens. So, grab your gloves, pick a project, and let’s start making your dream home a reality!