
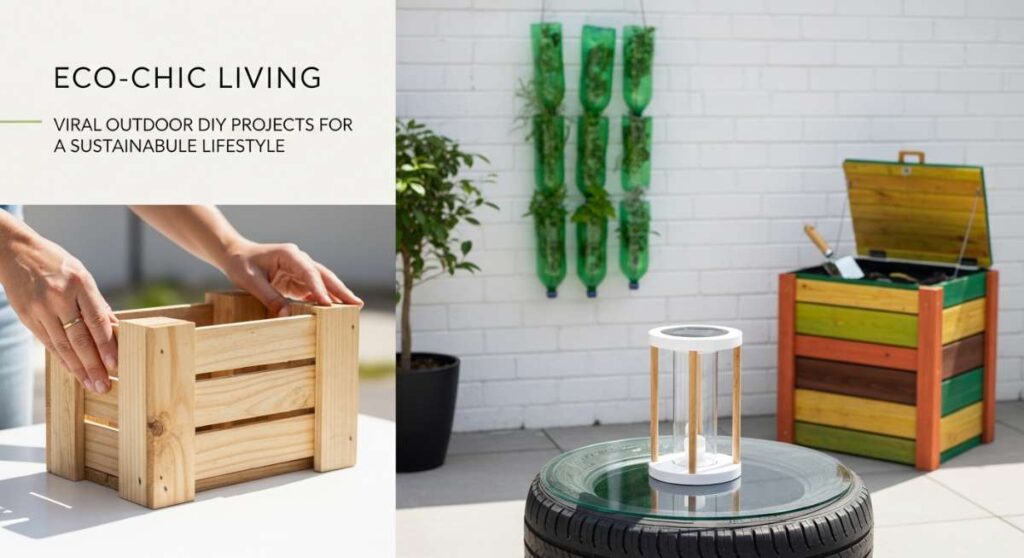
Imagine waking up to the soft rustle of leaves and the sweet, earthy scent of blooming jasmine drifting through your window. There’s something deeply soul-soothing about creating a home that breathes with nature, turning every corner of your outdoor space into a sanctuary of style and sustainability. It’s more than just decor; it’s about crafting a lifestyle that celebrates slow living, recycled materials, and the sheer joy of getting your hands a little dirty under the golden afternoon sun.
Lately, I’ve been obsessed with how we can transform our everyday environments using DIY projects that aren’t just beautiful, but also eco-conscious. Whether it’s repurposing a stack of old pallets into a playground for the little ones or reimagining a ranch exterior to reflect modern country elegance, these projects are viral for a reason: they reconnect us to our homes and the earth. Let’s dive into these eco-chic transformations that will make your space the envy of the neighborhood.
How to Design Front Yard Landscaping for Instant Curb Appeal
Why we love this
There is nothing quite like the feeling of pulling into your driveway and being greeted by a lush, intentional landscape that reflects your personal style. We adore this approach because it balances the structural beauty of evergreens with the whimsical movement of ornamental grasses, creating a multi-sensory experience. The fragrance of lavender and sage wafts toward the porch, while the varied textures of mulch and stone provide a grounded, high-end finish that makes even a simple home look like a luxury estate.
Essential Elements:
- Layered perennials (Lavender, Salvia, Coneflowers)
- Dwarf evergreen shrubs for year-round structure
- Natural hardwood mulch or dark pea gravel
- Solar-powered LED path lighting
- A statement specimen tree (like a Japanese Maple)
How to make it
- Start by clearing all weeds and old debris from your designated garden beds to create a clean slate. Use a garden hose to outline organic, curved edges which feel more natural than harsh straight lines.
- Improve your soil quality by tilling in three inches of organic compost. This ensures your plants have the nutrients they need to thrive and reduces the need for chemical fertilizers later.
- Place your tallest plants (like shrubs or small trees) toward the back or center of the bed. Middle layers should feature mid-sized perennials, while the edges should be reserved for low-growing groundcovers.
- Dig holes twice as wide as the root ball of each plant. Place the plant in the hole, ensuring the top of the root ball is level with the soil surface, then backfill and firm the soil gently with your hands.
- Apply a 3-inch layer of mulch around all plants, being careful not to touch the stems directly, as this prevents moisture retention against the bark. Water deeply immediately after planting to settle the roots.
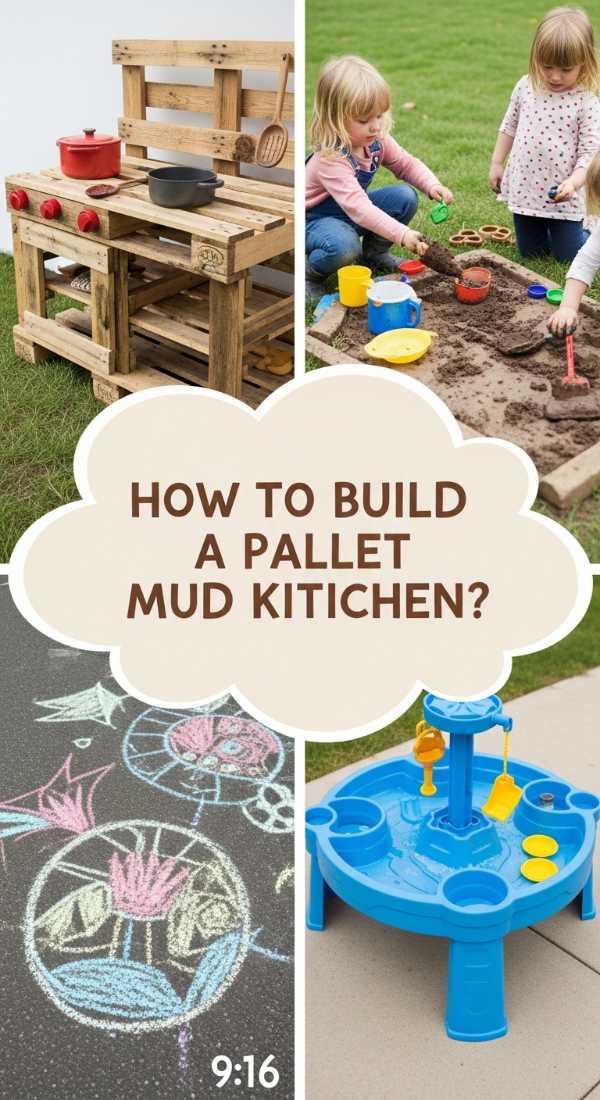
How to Build a Pallet Mud Kitchen for Endless Childhood Joy
Why we love this
This project is the ultimate tribute to sustainable play, turning discarded shipping pallets into a magical culinary laboratory for kids. The smell of damp earth mixed with the woody aroma of heat-treated pine creates an irresistible invitation for little ones to explore. Watching children squish mud through their fingers, “season” dirt pies with fallen flower petals, and mimic the rhythms of home life in the fresh air is a heartwarming sight that reminds us of the simple joys of a screen-free childhood.
Essential Elements:
- Two or three heat-treated (marked ‘HT’) wooden pallets
- Old stainless steel mixing bowls (for sinks)
- Discarded kitchen utensils and old pots/pans
- Outdoor-rated wood screws and water-based sealant
- Hand-painted wooden knobs for the ‘stove’
How to make it
- Thoroughly sand your pallets using 80-grit sandpaper followed by 120-grit. It is vital to remove all splinters and sharp edges to make the wood safe for little hands.
- Use one pallet as the vertical backboard and another as the horizontal base. Secure them using heavy-duty L-brackets and outdoor wood screws, ensuring the structure is completely stable and wobble-free.
- Cut a circular hole in the top pallet board using a jigsaw, sized slightly smaller than the lip of your stainless steel bowl. Drop the bowl in to create a removable ‘sink’ for easy cleaning.
- Create a ‘stove top’ by painting four black circles on the wood surface or attaching slices of round logs. Screw in old kitchen knobs or wooden discs that kids can turn for a tactile sensory experience.
- Apply two coats of a non-toxic, clear outdoor sealant. This protects the wood from the elements and the inevitable mud splatters, ensuring the kitchen lasts for many seasons of play.
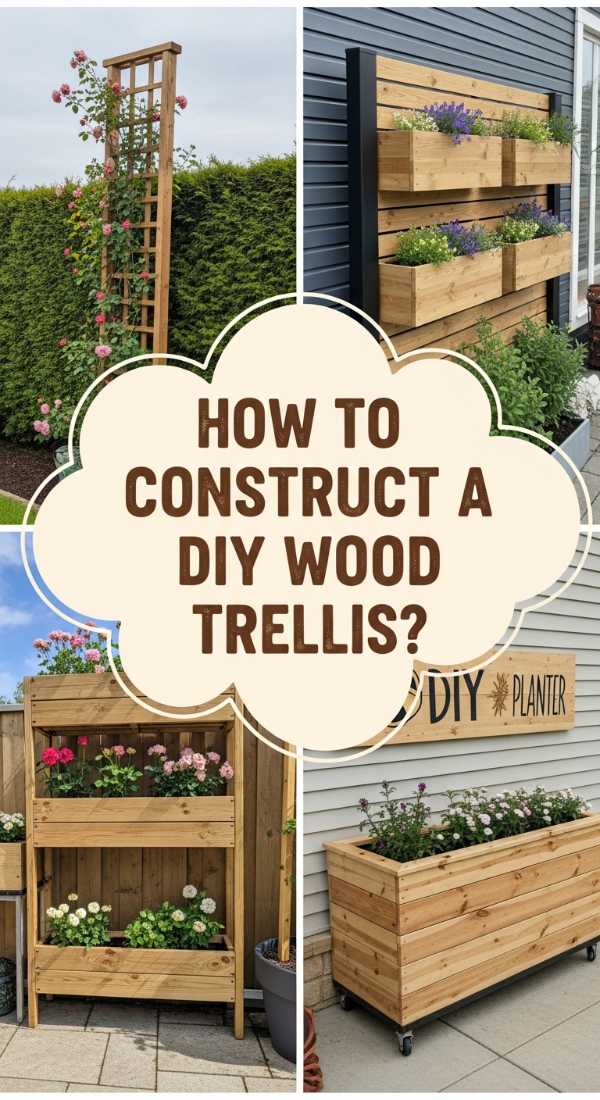
How to Construct a DIY Wood Trellis for a Lush Garden Sanctuary
Why we love this
A vertical garden is the secret to adding depth and romance to any outdoor space, and a custom wood trellis is the perfect backbone for climbing beauties. We love the way the sunlight filters through the geometric slats, casting dancing shadows across the patio while providing a sturdy home for climbing roses or sweet peas. The scent of vertical blooms is more concentrated at nose-level, turning a flat wall into a living, breathing tapestry of color and fragrance that feels like a hidden English garden.
Essential Elements:
- Cedar or redwood 1×2 and 2×2 lumber
- Weather-resistant wood glue
- Galvanized finish nails or a brad nailer
- Exterior wood stain or clear coat
- Sturdy wall spacers or heavy-duty stakes
How to make it
- Measure your space and cut your outer frame pieces from the 2×2 lumber using a miter saw for clean 45-degree corner joints. Secure the frame with wood glue and galvanized nails.
- Lay out your horizontal and vertical 1×2 slats in a grid or chevron pattern. Use a spacer block (like a scrap piece of wood) to ensure every gap is perfectly uniform for a professional, viral-worthy look.
- Nail each intersection point where the slats overlap. This creates a rigid, structural lattice that can support the weight of heavy vines like Wisteria or Honeysuckle without sagging.
- Sand the entire structure and apply a UV-resistant stain. This step is crucial for preventing the wood from graying and rotting over time when exposed to rain and sun.
- Mount the trellis to your wall using spacers. These 1-inch gaps allow air to circulate behind the plants and give the vine tendrils enough room to wrap around the wood slats effectively.
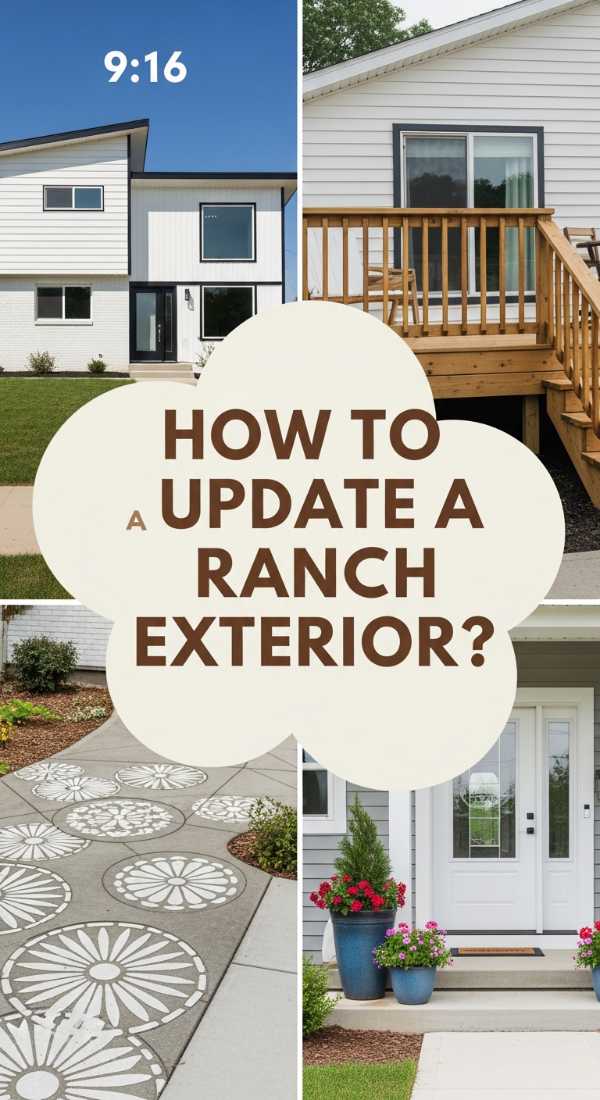
How to Update a Ranch Exterior Remodel for a Modern Country Vibe
Why we love this
Ranch-style homes have a wonderful horizontal footprint that is just begging for a modern glow-up, and this transformation is all about warmth and light. We love the contrast between crisp, creamy whites and the rich, organic tones of natural wood accents. It feels like a breath of fresh air; the home suddenly looks taller, more expensive, and deeply inviting. The addition of black iron hardware and oversized lanterns provides a sophisticated touch that bridges the gap between rustic charm and contemporary luxury.
Essential Elements:
- Off-white or light gray exterior paint (Matte or Eggshell finish)
- Natural wood shutters or porch pillars
- Modern black gooseneck or barn-style lighting
- Updated house numbers in a clean, sans-serif font
- Dark bronze or black window trim accents
How to make it
- Power wash the entire exterior to remove oxidation and dirt. Scrape away any peeling paint and prime any bare wood or masonry surfaces to ensure the new paint adheres perfectly.
- Paint the main body of the house using a high-quality exterior acrylic. Use an airless sprayer for the smoothest finish, which provides that sleek, modern look seen in high-end remodels.
- Install natural cedar shutters or wrap existing porch columns in cedar planks. The warmth of the wood against the light paint creates that sought-after “modern country” contrast.
- Swap out dated gold or white light fixtures for oversized black iron lanterns. Ensure the height of the light is roughly 1/4th the height of the door for the best visual proportions.
- Finish the look by painting the window trim and front door in a contrasting dark hue like charcoal or navy. This small detail adds incredible definition and “pops” in photographs.
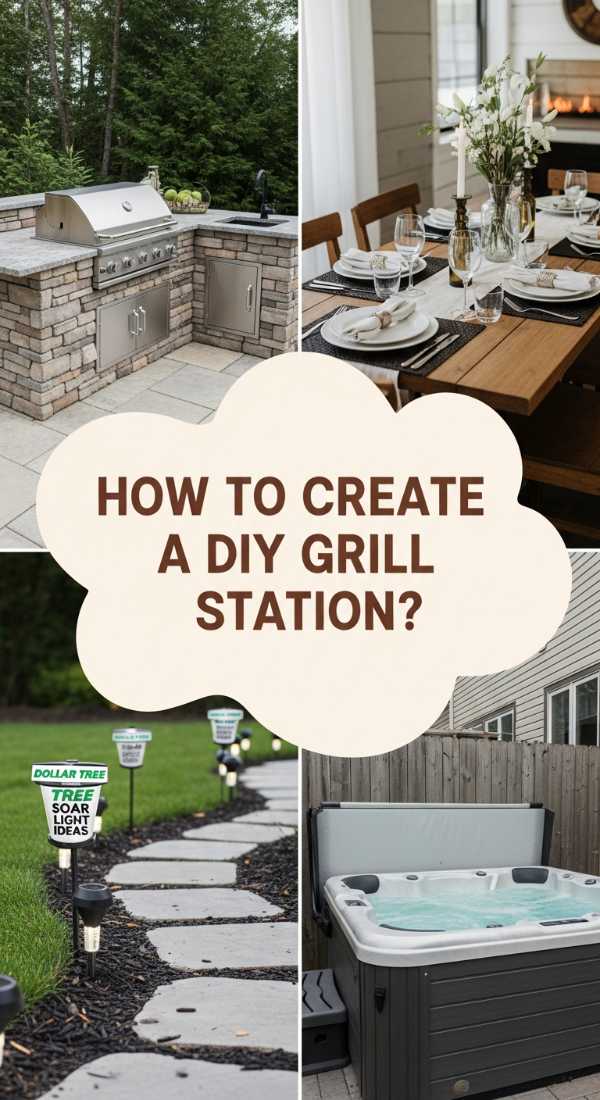
How to Create a DIY Grill Station for the Ultimate Summer Cookout

Why we love this
Every backyard chef knows that a grill alone isn’t enough; you need a stage for your culinary magic, and this DIY station provides exactly that. The smell of charred cedar and sizzling steak becomes even more enjoyable when you have a dedicated prep space that keeps everything organized. We love the functional elegance of having a built-in counter for drinks and condiments, turning a solitary chore into a social centerpiece where friends can lean in, chat, and enjoy the aroma of the feast to come.
Essential Elements:
- Counter-height wooden frame (Pressure-treated or Cedar)
- Concrete or granite tile countertop
- Built-in hooks for grilling tools
- Lower shelf for charcoal or propane storage
- Heavy-duty locking casters for mobility
How to make it
- Construct the base frame using 4×4 posts for legs and 2x4s for the shelving supports. Use pocket-hole joinery to keep the screws hidden for a professional, clean finish.
- Add a bottom shelf made of deck boards with 1/4-inch gaps between them. This allows for drainage and air circulation if the station is left out in the rain.
- For the countertop, you can pour a custom concrete slab or use exterior-grade plywood topped with large-format porcelain tiles. Ensure the surface is heat-resistant and easy to wipe down.
- Attach a magnetic tool bar or heavy-duty S-hooks to the side of the frame. This keeps your spatulas, tongs, and brushes within arm’s reach and off the dirty ground.
- Apply a high-performance deck stain to the wood components. This protects the station from grease splatters and UV damage, ensuring it remains the star of your patio for years.
How to Style Above Ground Pool Bar Ideas for a Tropical Staycation
Why we love this
Who says you need an in-ground pool to have a luxury resort experience? An above-ground pool bar brings that vacation-at-home energy right to your doorstep. We love the sound of ice clinking in a glass and the cool breeze as you sit on a barstool right at the water’s edge. It transforms a standard pool into a social hub, where the vibrant colors of tropical fruit and the texture of thatched roofing create a sensory escape that makes every Saturday feel like a trip to the Caribbean.
Essential Elements:
- A wooden counter structure built to the height of the pool rail
- Weather-proof bar stools
- Tiki-style thatch or a sleek cantilever umbrella
- Outdoor Bluetooth speakers and waterproof LED strip lights
- Built-in ice bucket or cooler trough
How to make it
- Build a free-standing bar frame using pressure-treated lumber that sits just outside the pool wall. Do not attach it directly to the pool structure to avoid putting stress on the liner.
- Install a wide countertop—at least 15 inches—using composite decking material. This material is perfect for pool areas because it is splinter-free and highly resistant to moisture and chlorine.
- Mount an outdoor-rated power strip underneath the bar top. This allows you to plug in a blender for frozen drinks and keep your phone charged while you lounge.
- Add a “kick plate” or footrest at the bottom of the stools using a sturdy metal pipe or a piece of 2×4. This small ergonomic detail makes sitting at the bar significantly more comfortable.
- Decorate with solar-powered tiki torches and potted hibiscus. The lighting creates an incredible nighttime ambiance, while the plants provide a lush, tropical screen for privacy.
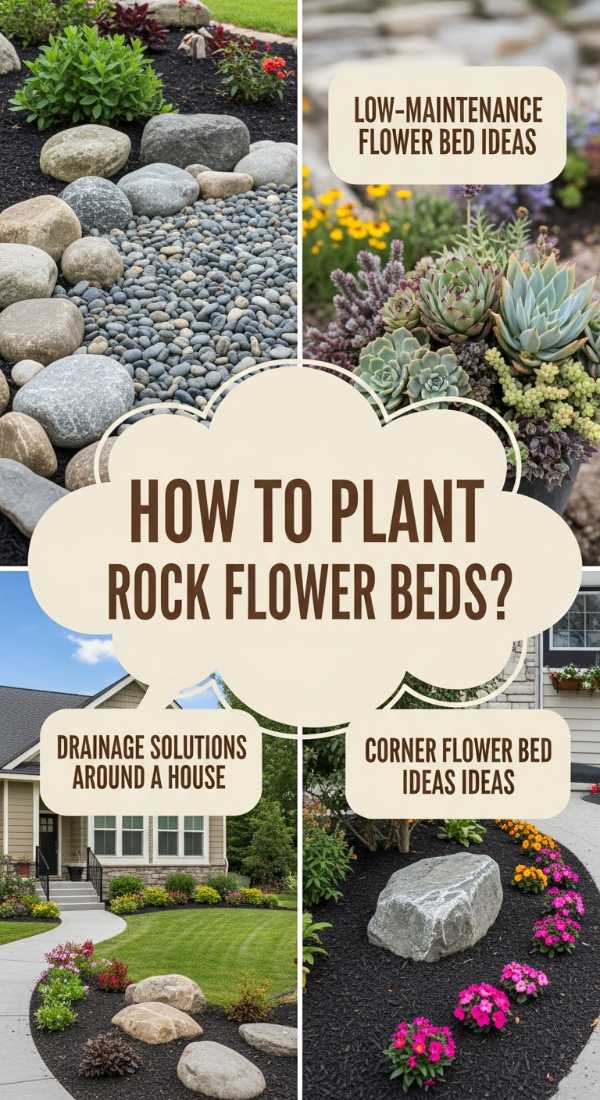
How to Plant Rock Flower Beds for a Stunning Low Maintenance Garden

Why we love this
Rock flower beds are the ultimate eco-chic solution for the busy gardener who still wants a stunning exterior. There is a beautiful, Zen-like quality to the contrast between the hard, smooth surfaces of river rocks and the soft, vibrant foliage of succulents and perennials. We love how the stones retain the sun’s warmth and suppress weeds naturally, creating a clean, architectural look that stays pristine year-round without the need for constant mulching or watering.
Essential Elements:
- Heavy-duty landscape fabric (weed barrier)
- A mix of River Rock, Mexican Beach Pebbles, or Lava Rock
- Drought-tolerant plants (Agave, Sedum, Lavender)
- Metal or plastic landscape edging
- Drip irrigation tubing (optional but recommended)
How to make it
- Excavate the area to a depth of about 3 inches and install a high-quality, woven landscape fabric. Secure it with garden staples to prevent weeds from poking through your beautiful stone layer.
- Install your edging first. This keeps the rocks from migrating into your lawn and provides a crisp, professional border that defines the garden’s shape.
- Cut ‘X’ shapes in the fabric where you want your plants to go. Dig the holes, plant your greenery, and then fold the fabric flaps back around the base of the plant.
- Pour your chosen rocks into the bed, spreading them evenly to a depth of 2-3 inches. Using a variety of sizes—from small gravel to larger accent boulders—creates a more natural, viral-worthy aesthetic.
- Rinse the rocks with a garden hose once they are laid. This removes the dust from the quarry and reveals the true, vibrant colors and textures of the stone.
How to Organize Beach Hacks for a Stress Free Family Vacation

Why we love this
The beach should be about the rhythm of the waves and the feeling of salt on your skin, not the stress of sandy sandwiches and lost sunscreen. We love these hacks because they turn chaos into a streamlined system of relaxation. There’s something so satisfying about the ‘sand-free’ feeling of using talcum powder or the genius of a fitted sheet ‘playpen.’ It allows the family to focus on the sensory delights—the cold bite of a frozen grape and the warmth of the sun—without the usual seaside frustrations.
Essential Elements:
- Mesh tote bags (for sand to fall through)
- A fitted bed sheet and four heavy corner items
- Talcum powder or cornstarch (for sand removal)
- Frozen water bottles (serve as ice packs, then drinks)
- Ziploc bags for electronics
How to make it
- Create a ‘Sand-Free Zone’ by laying a fitted sheet on the sand and placing your bags or coolers in the four corners to pull the sides up. This creates a walled-off barrier that keeps blowing sand out of your lounging area.
- Pack all beach toys in a mesh laundry bag. At the end of the day, give the bag a vigorous shake; the sand falls back onto the beach instead of into your car trunk.
- Pre-freeze grapes and water bottles the night before. They keep your lunch cold throughout the morning and provide a refreshing, icy treat as they slowly melt in the afternoon heat.
- Keep a small bottle of baby powder in your bag. Rubbing it on sandy skin absorbs moisture and allows the sand to fall off instantly, preventing that itchy, uncomfortable feeling on the ride home.
- Stash your valuables in a cleaned-out, empty sunscreen bottle. It’s a clever ‘hidden in plain sight’ trick that keeps your keys and cash safe while you’re splashing in the waves.
How to Decorate a Teen Room for a Nostalgic Aesthetic Refresh
Why we love this
Teen bedrooms are a canvas for self-expression, and the current trend of ‘nostalgic aesthetic’ is a beautiful blend of 90s charm and modern comfort. We love the soft glow of sunset lamps and the tactile comfort of chunky knit throws and velvet pillows. It’s a space that feels like a warm hug, filled with the visual rhythm of Polaroid walls and vine-draped ceilings. This design style prioritizes mood and feeling, creating a cozy sanctuary where a teen can truly unwind and feel seen.
Essential Elements:
- Fairy lights or color-changing LED strips
- Macrame wall hangings or woven tapestries
- Faux ivy vines for ceiling or wall borders
- A gallery wall of vintage posters or personal photos
- Floor cushions and soft, layered textures
How to make it
- Start with a neutral base color on the walls to allow the decor to pop. Use command hooks to drape faux ivy vines along the perimeter of the ceiling for a lush, forest-like feel.
- Create a ‘photo dump’ wall using a grid of printed photos. Use tiny wooden clothespins and twine to hang them, which allows for easy updates as memories are made.
- Layer lighting to create ambiance. Avoid the harsh ‘big light’ and instead use a combination of sunset lamps, neon signs, and warm-toned fairy lights at different heights.
- Incorporate a ‘chill corner’ with a papasan chair or a stack of floor pillows. Using different fabrics like faux fur, corduroy, and linen adds a high-end, curated sensory experience.
- Add a pegboard or a corkboard for ‘organized chaos.’ This gives a dedicated space for ticket stubs, notes, and jewelry, keeping the rest of the room looking intentionally styled rather than cluttered.
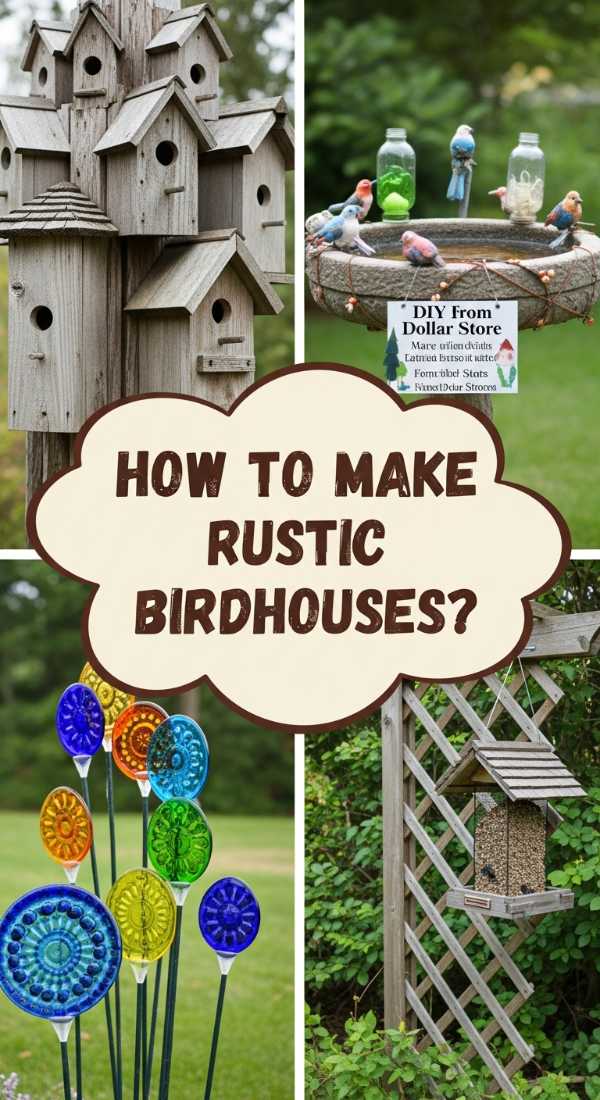
How to Make Rustic Birdhouses for a Charming Backyard Wildlife Haven
[IMAGE_10]
Why we love this
There is a profound sense of peace that comes from inviting nature into your backyard with handcrafted birdhouses. We love the rustic look of weathered wood and the earthy smell of cedar, which naturally resists decay without the need for harsh chemicals. Hearing the first chirps of spring from a house you built yourself is incredibly rewarding. These little sanctuaries add a touch of whimsy and movement to your garden, reminding us of the interconnectedness of our eco-chic lifestyle and the local ecosystem.
Essential Elements:
- Untreated Cedar, Pine, or Reclaimed barn wood
- Exterior wood glue and galvanized nails
- A 1.5-inch spade bit (for the entry hole)
- Natural twine or heavy-duty mounting brackets
- A small twig or dowel for a perch
How to make it
- Cut your wood into six pieces: a base, a roof (two pieces for a peak), two sides, and a front. Ensure the roof has a generous overhang to protect the entry hole from rain.
- Use a spade bit to drill an entry hole in the front panel. Research local bird species to determine the ideal hole size—1.5 inches is generally perfect for Bluebirds and Tree Swallows.
- Assemble the walls and base using wood glue and galvanized nails. Do not use pressure-treated wood, as the chemicals can be harmful to the birds; stick to naturally rot-resistant cedar.
- Attach the roof pieces, ensuring the peak is tightly sealed. You can add a strip of shingle or a piece of tin to the top for extra weather protection and a more ‘viral’ rustic look.
- Mount the birdhouse 5-10 feet off the ground in a quiet area of the yard. Facing the entrance toward the east or south helps keep the interior warm in the morning and sheltered from prevailing winds.
Conclusion: Embracing the Eco-Chic Journey
Transforming your home into an eco-chic sanctuary doesn’t happen overnight, but each of these DIY projects is a step toward a more intentional, beautiful lifestyle. By choosing sustainable materials, prioritizing outdoor living, and adding personal, handmade touches, you’re not just increasing your home’s value—you’re enriching your daily experience. So, grab your tools, embrace the textures of the earth, and start building a space that reflects the very best of you. Happy crafting!