
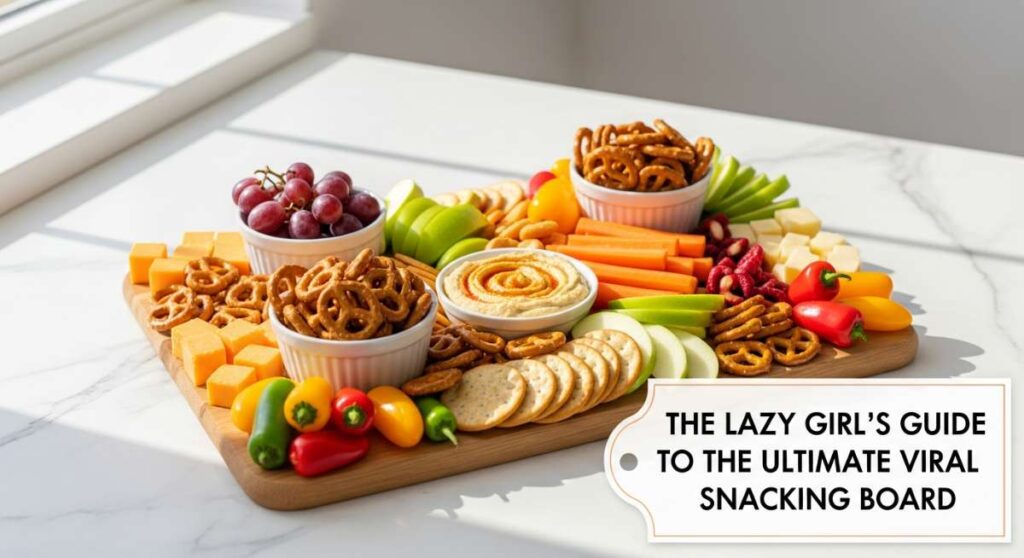
We’ve all been there—it’s 6 PM, your stomach is growling, and the thought of standing over a hot stove for an hour feels like a Herculean task. But then you scroll through your feed and see those stunning, colorful, and impossibly chic food boards that look like they belong in a high-end bistro. You want that vibe, that nutrition, and that aesthetic, but you also really want to stay in your sweatpants. Enter: The Lazy Girl’s Guide to the Ultimate Viral Snacking Board. This isn’t just about crackers and cheese; it’s about elevated, simple components that make you feel like a gourmet chef with minimal effort.
The secret to a viral food board is variety and texture. It’s about taking those everyday staples—potatoes, chicken, greens—and prepping them in a way that feels intentional and indulgent. By mastering a few quick techniques, you can assemble a grazing platter that hits every single craving: salty, savory, crunchy, and creamy. Let’s dive into the ultimate components that will turn your coffee table into a five-star dining experience while you catch up on your favorite series.
How to prep healthy bowls?

Why we love this
There is something deeply satisfying about a perfectly composed bowl filled with vibrant colors and contrasting textures. When you take that first bite, you get the crisp snap of fresh greens paired with the earthy heartiness of grains, all tied together by a zesty dressing that awakens the palate. It feels like a celebration of health that doesn’t sacrifice flavor, offering a cooling, refreshing base that balances out the warmer, heavier elements on your snacking board. The aroma of fresh herbs and toasted seeds creates an instant spa-like atmosphere in your kitchen.
Ingredients
- Base: Quinoa, farro, or brown rice
- Greens: Baby spinach or massaged kale
- Crunch: Shredded carrots, sliced radishes, and cucumber
- Healthy Fats: Avocado slices or hemp hearts
- Dressing: Lemon juice, olive oil, tahini, and sea salt
How to make it
- Start by prepping your grains; rinse 1 cup of quinoa thoroughly to remove any bitterness, then simmer in 2 cups of salted water or vegetable broth. Bring to a boil, then reduce to a low simmer, covering tightly for 15 minutes until the water is absorbed and the grains are fluffy.
- While the grains cool, prepare your greens. If using kale, remove the tough ribs and massage the leaves with a drizzle of olive oil and a pinch of salt for 2 minutes until they soften and turn dark green.
- In a small mason jar, whisk together 2 tablespoons of creamy tahini, the juice of half a lemon, 1 tablespoon of olive oil, and a splash of warm water to reach a drizzling consistency.
- Assemble the bowl by layering the grains at the bottom, followed by the massaged greens, and then artfully arranging your shredded carrots and sliced radishes in distinct sections.
- Finish with the avocado and a heavy sprinkle of hemp hearts for a nutty finish, drizzling the dressing only right before serving to keep the vegetables crisp.
How to make crispy potatoes?

Why we love this
The sound of a perfectly crispy potato skin shattering under your fork is pure kitchen magic. These golden gems offer a cloud-like, fluffy interior that melts away, contrasted against a deeply browned, salty crust that hums with the fragrance of rosemary and garlic. Each bite is a savory explosion, providing that essential comfort-food element to your board. They carry a nostalgic, rustic aroma that fills the whole house, making even a casual weeknight feel special and cozy.
Ingredients
- Potatoes: Baby Yukon Gold or red potatoes
- Fat: Extra virgin olive oil or melted ghee
- Seasoning: Sea salt, cracked black pepper, garlic powder, and fresh rosemary
- Acid: A squeeze of lemon or a splash of malt vinegar (optional)
How to make it
- Preheat your oven to 425°F (220°C). High heat is the absolute key to achieving that shatteringly crisp exterior without overcooking the inside.
- Wash and halve your baby potatoes, then place them in a large pot of cold, heavily salted water. Bring to a boil and parboil for about 8-10 minutes until they are fork-tender but not falling apart.
- Drain the potatoes and let them steam-dry in the colander for 2 minutes. Shake them vigorously to roughen up the edges; these starchy bits turn into the crunchiest parts once roasted.
- Toss the potatoes on a pre-heated baking sheet with 3 tablespoons of oil, garlic powder, and salt. Ensure every surface is coated and spread them out so they aren’t touching; crowding leads to steaming, not roasting.
- Roast for 25-30 minutes, flipping halfway through, until they are deep golden brown. Toss with fresh rosemary during the last 5 minutes of cooking for a fragrant finish.
How to cook tender steak?

Why we love this
There is a luxurious, buttery richness to a steak that has been seared to perfection, offering a savory Maillard crust that gives way to a tender, juicy pink center. The aroma of browning butter mixed with garlic and thyme creates a sensory experience that is undeniably indulgent. On a snacking board, thinly sliced steak adds a high-protein, sophisticated element that pairs beautifully with tangy dips or crispy starches. It feels substantial and grounding, providing a deep umami flavor that anchors the lighter components.
Ingredients
- Meat: Ribeye, New York Strip, or Top Sirloin
- Aromatics: Whole garlic cloves (smashed) and fresh thyme sprigs
- Fat: High-smoke point oil (avocado oil) and unsalted butter
- Seasoning: Coarse kosher salt and freshly cracked black pepper
How to make it
- Remove the steak from the refrigerator at least 30 minutes before cooking to bring it to room temperature; this ensures even cooking throughout the cut.
- Pat the steak extremely dry with paper towels. Moisture is the enemy of a good sear. Season aggressively with salt and pepper on all sides, including the edges.
- Heat a cast-iron skillet over medium-high heat until it is smoking slightly. Add 1 tablespoon of avocado oil. Lay the steak into the pan, pressing down slightly to ensure full contact.
- Sear for 3-4 minutes without moving it to develop a dark crust. Flip the steak. Add 2 tablespoons of butter, smashed garlic, and thyme to the pan.
- As the butter foams, tilt the pan and spoon the hot flavored butter over the steak repeatedly (basting) for another 3 minutes for medium-rare. Remove from heat when the internal temperature hits 130°F (54°C) and let it rest for 10 minutes before slicing against the grain.
How to season juicy chicken?
Why we love this
Perfectly seasoned chicken should be a masterclass in moisture, bursting with savory juices and a balanced blend of herbs that sing on the tongue. We love how versatile it is, taking on the smoky notes of paprika or the bright zing of lemon and oregano. The texture is supple and soft, making it the perfect vehicle for various sauces on your viral board. The scent of roasted poultry and toasted spices is incredibly inviting, promising a meal that is as nourishing as it is delicious.
Ingredients
- Protein: Boneless, skinless chicken thighs (for maximum juiciness)
- Spices: Smoked paprika, onion powder, dried oregano, and cumin
- Liquid: Olive oil and a splash of soy sauce or Worcestershire
- Freshness: Lemon zest and minced garlic
How to make it
- Place your chicken thighs in a large mixing bowl. Avoid using breasts if you are prone to overcooking meat, as thighs have more fat and remain juicy at higher temperatures.
- Create a wet rub by mixing 2 tablespoons of olive oil with 1 teaspoon each of paprika, onion powder, and oregano, plus the zest of one lemon and 2 cloves of minced garlic. The oil helps the spices penetrate the meat and prevents sticking.
- Massage the marinade into the chicken, ensuring every crevice is covered. Let it marinate for at least 20 minutes (or up to 4 hours in the fridge).
- Heat a large pan over medium heat. You don’t want it screaming hot like steak, or the spices will burn before the chicken cooks through.
- Cook the thighs for 6-7 minutes per side. Use a meat thermometer to ensure they reach an internal temperature of 165°F (74°C). Let them rest for 5 minutes so the juices redistribute before slicing them into bite-sized strips.
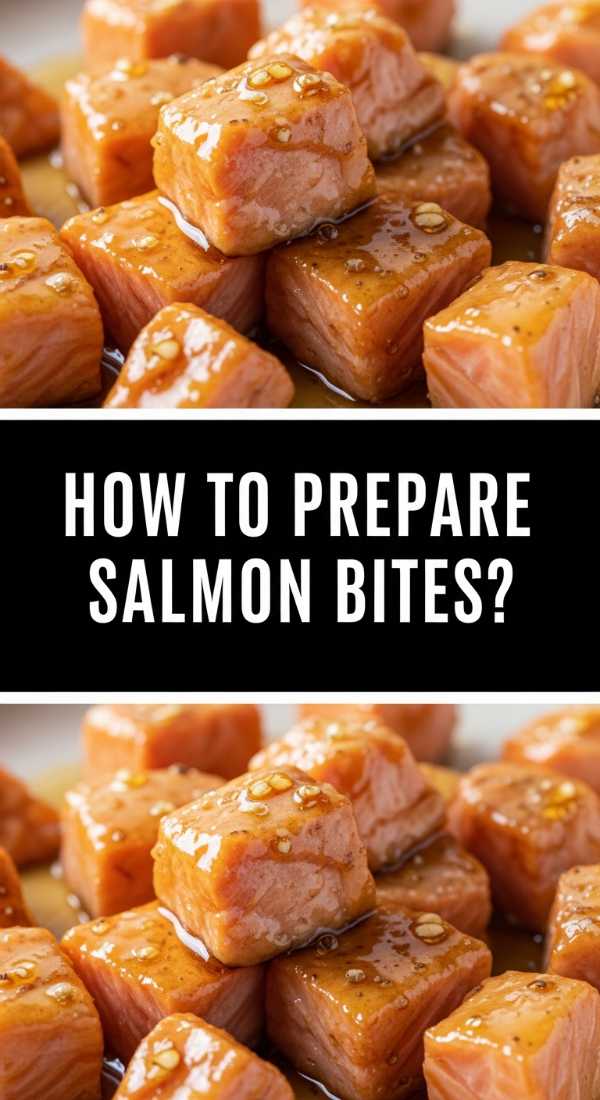
How to prepare salmon bites?

Why we love this
Salmon bites are the ultimate “fancy but easy” snack, offering a delicate, buttery texture that flakes effortlessly with every bite. When seasoned with a touch of sweetness like honey or maple, the edges caramelize into a sticky, savory candy that is absolutely addictive. They bring a pop of vibrant pink to your board and provide a light, healthy fat source that feels sophisticated. The aroma is clean and oceanic, enhanced by the brightness of citrus and the savory depth of soy.
Ingredients
- Fish: Fresh Atlantic or Sockeye salmon fillets, skin removed
- Glaze: Honey, soy sauce, and sriracha
- Oil: Neutral oil like grapeseed or avocado
- Garnish: Toasted sesame seeds and chopped green onions
How to make it
- Cube your salmon into uniform 1-inch pieces. Keeping them the same size is crucial for ensuring they all cook at the exact same rate.
- In a small bowl, whisk 1 tablespoon of honey, 1 tablespoon of soy sauce, and a teaspoon of sriracha. Set half of this mixture aside for dipping.
- Toss the salmon bites gently in the remaining half of the glaze. Heat a non-stick skillet over medium heat with a light coating of oil.
- Place the salmon bites in the pan, leaving space between them. Sear for 2-3 minutes on one side until a golden crust forms, then flip and cook for another 1-2 minutes.
- The sugar in the honey will caramelize quickly, so watch the heat to prevent burning. The bites are done when they are opaque but still slightly translucent in the very center. Sprinkle with sesame seeds and serve warm.
How to bake sweet potatoes?
Why we love this
Baking sweet potatoes transforms them into a decadent treat, with their natural sugars concentrating into a rich, caramel-like syrup that oozes from the skin. The interior becomes incredibly velvety and sweet, offering a warm, earthy flavor that pairs perfectly with both salty meats and sharp cheeses. We love the vibrant orange hue they add to a snacking board, making everything look more appetizing. The smell of roasting sweet potatoes is reminiscent of autumn afternoons and cozy firesides.
Ingredients
- Base: Medium-sized Jewel or Garnet sweet potatoes
- Coating: Olive oil and flaky sea salt
- Optional toppings: A dollop of Greek yogurt or a sprinkle of cinnamon
How to make it
- Preheat your oven to 400°F (200°C). Scrub the sweet potatoes thoroughly to remove any dirt, as the skins become deliciously edible when roasted properly.
- Use a fork to prick the potatoes 5-6 times all over. This allows steam to escape and prevents the potato from bursting in the oven.
- Rub each potato with a light coating of olive oil and a generous sprinkle of sea salt. This encourages the skin to crisp up and provides a savory contrast to the sweet interior.
- Place the potatoes directly on the oven rack for the best airflow, with a baking sheet on the rack below to catch any sugary drips.
- Bake for 45-60 minutes depending on size. You’ll know they are ready when they feel soft when squeezed (use a mitt!) and the skin has puffed up slightly away from the flesh.
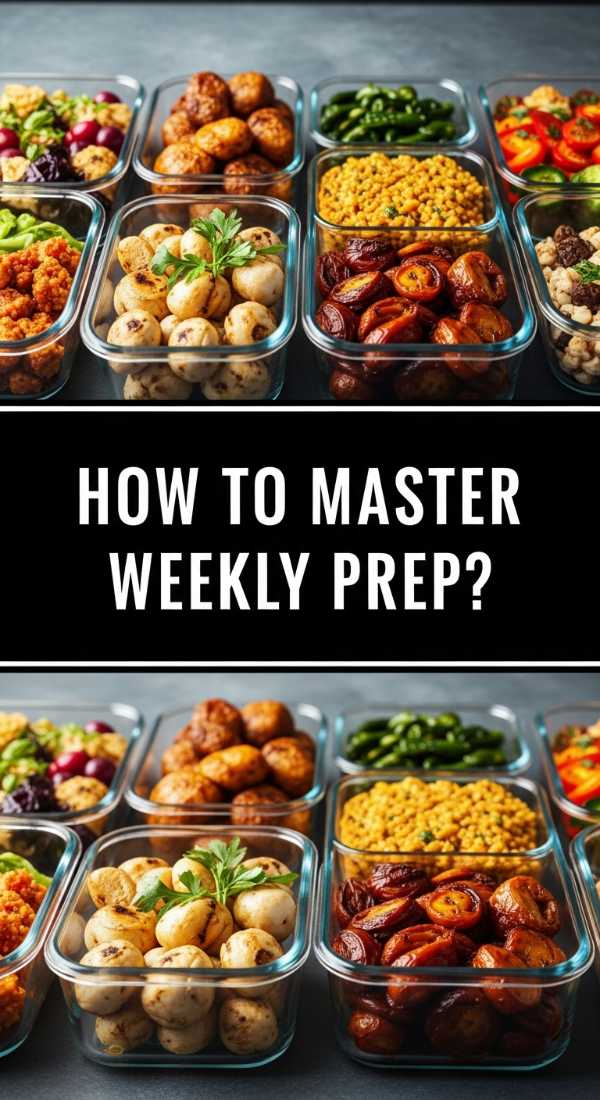
How to master weekly prep?

Why we love this
The feeling of opening a fridge stocked with prepped containers is pure mental clarity. It’s the ultimate “lazy girl” hack—doing the work once so you can enjoy the rest of your week in total relaxation. There is a visual harmony in seeing neatly chopped vegetables and cooked proteins ready to be assembled onto a board at a moment’s notice. It turns the daily chore of cooking into an effortless act of self-care, ensuring you always have high-quality, delicious food within reach.
Ingredients
- Tools: Glass airtight containers, labels, and sharp knives
- Bulk Items: Grains, roasted veggies, and washed greens
- Proteins: Pre-cooked chicken or hard-boiled eggs
How to make it
- Dedicate a 90-minute block on Sunday to “The Big Chop.” Wash all your produce at once, drying it thoroughly before storing. Moisture is what makes veggies go slimy in the fridge.
- Cook a large batch of grains (like the quinoa mentioned earlier) and store it in a flat container so it cools quickly and stays fluffy.
- Roast your hardier vegetables (potatoes, broccoli) all at once on multiple sheet pans. Once they are cool, portion them into containers.
- Prepare one or two “multi-use” sauces, like a lemon-tahini or a garlic-herb oil, which can be used on bowls, meats, or as a dip for your snacking board.
- Store everything in clear glass containers at eye-level in your fridge. This visual cue makes it much more likely that you’ll choose these healthy options when you’re tired and hungry.
How to make creamy pasta?

Why we love this
A bowl of creamy pasta is the ultimate culinary hug, featuring silky strands of noodles coated in a rich, velvety sauce that clings to every curve. The aroma of simmering cream, melting parmesan, and a hint of nutmeg or garlic is enough to soothe any stressful day. It provides a luxurious, soft texture to your snacking board that contrasts beautifully with crunchy veggies or seared steak. It’s indulgent, comforting, and feels like a true reward for a long day’s work.
Ingredients
- Pasta: Fettuccine, penne, or rigatoni
- Sauce: Heavy cream, high-quality Parmesan cheese, and butter
- Flavor: Fresh garlic, black pepper, and a pinch of red pepper flakes
- Liquid: Starchy pasta water (the secret ingredient!)
How to make it
- Boil your pasta in a large pot of heavily salted water. Aim for ‘al dente’—about 1-2 minutes less than the package directions suggest, as it will finish cooking in the sauce.
- Before draining, reserve at least 1 cup of the cloudy pasta water. This liquid gold contains starch that helps the sauce emulsify and stick to the pasta.
- In a wide skillet, melt 2 tablespoons of butter over medium heat. Sauté 2 cloves of minced garlic for 30 seconds until fragrant but not browned.
- Add 1/2 cup of heavy cream and bring to a gentle simmer. Whisk in 1/2 cup of finely grated Parmesan cheese until the sauce is smooth and thick.
- Toss the pasta into the skillet. Add the reserved pasta water a splash at a time, tossing vigorously, until the sauce transforms from a liquid into a glossy, creamy coating that envelopes every noodle.
How to roast fresh broccoli?
Why we love this
Roasted broccoli is a revelation; the high heat of the oven transforms the florets into crispy, lace-like crowns with a nutty, charred flavor that is worlds away from steamed greens. The stalks remain tender-crisp, providing a satisfying bite that feels both healthy and decadent. When finished with a dusting of parmesan or a squeeze of lemon, the aroma is savory and bright. It’s the perfect finger food for a snacking board, offering a complex flavor profile that keeps you coming back for more.
Ingredients
- Veggie: 2 large heads of fresh broccoli
- Fat: Olive oil (don’t be shy!)
- Flavor: Lemon wedges, garlic powder, and red pepper flakes
- Finishing: Grated pecorino or parmesan cheese
How to make it
- Preheat your oven to 425°F (220°C). Cut the broccoli into medium-sized florets, ensuring they are roughly the same size so they cook evenly.
- Dry the broccoli completely after washing. Any water left on the florets will create steam in the oven, leading to mushy broccoli instead of crispy edges.
- On a large baking sheet, toss the florets with 2-3 tablespoons of olive oil, salt, pepper, and garlic powder. Use your hands to massage the oil into the “trees” of the florets.
- Spread them out in a single layer. Roast for 20-25 minutes. Do not open the oven frequently, as you want the heat to remain consistent to achieve that deep char.
- The broccoli is done when the tips are dark brown and crispy. Immediately after removing from the oven, squeeze fresh lemon juice over the top and sprinkle with cheese while still hot.
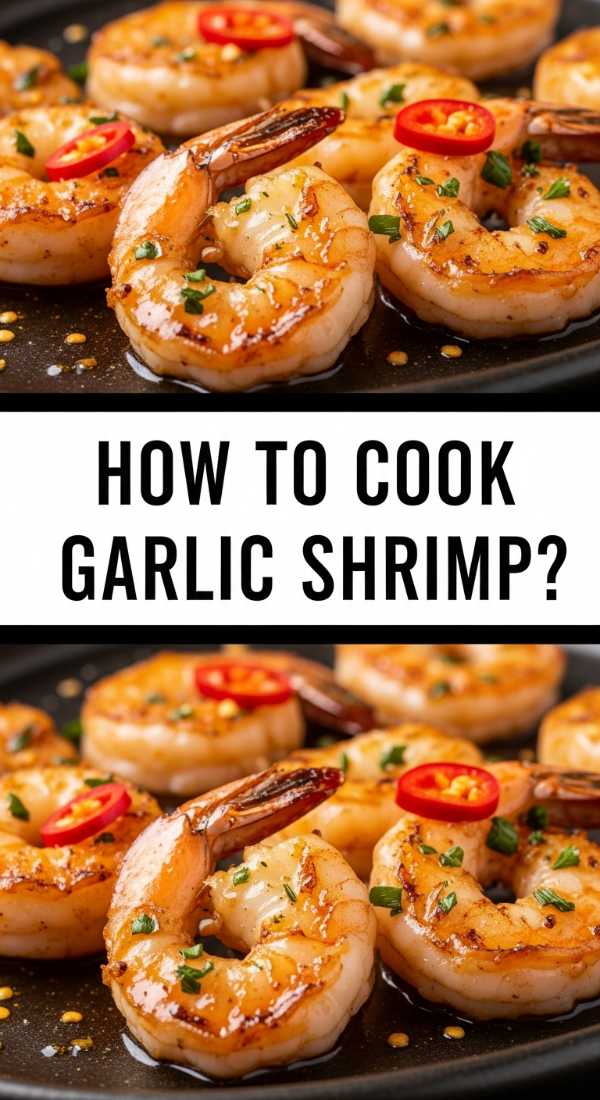
How to cook garlic shrimp?
[IMAGE_10]
Why we love this
Garlic shrimp are the ultimate quick-cook luxury, offering a snappy, succulent texture and a flavor that is boldly aromatic. The pool of garlic-infused butter that surrounds them is perfect for dipping bread or drizzling over other items on your board. We love the way the pink, curled shrimp look against green herbs, adding a touch of coastal elegance to your spread. The smell of sizzling garlic and butter is legendary, instantly drawing everyone to the table with high expectations that are always met.
Ingredients
- Seafood: Large shrimp (peeled and deveined, tail-on for aesthetic)
- Fat: Unsalted butter and olive oil
- Aromatics: 4-5 cloves of fresh garlic, minced
- Herbs: Fresh parsley and a pinch of dried chili flakes
How to make it
- Pat the shrimp dry with paper towels to ensure a good sear. Season lightly with salt and pepper.
- In a large skillet, heat 1 tablespoon of olive oil and 2 tablespoons of butter over medium-high heat. The oil prevents the butter from burning too quickly.
- Add the shrimp in a single layer. Cook for 2 minutes without moving them. You are looking for them to turn opaque and pink about halfway up the sides.
- Flip the shrimp and immediately add the minced garlic and chili flakes. Cooking the garlic only for the last 1-2 minutes prevents it from becoming bitter and burnt.
- Once the shrimp have curled into a ‘C’ shape and are fully opaque, remove from heat. Toss in a handful of chopped parsley and a final squeeze of lemon to brighten the buttery sauce.
The Ultimate Lazy Girl Hosting Hack
Creating a viral snacking board isn’t about perfection; it’s about the joy of variety and the ease of preparation. By combining these simple yet elevated components, you create a dining experience that feels curated and thoughtful without spending your entire evening in the kitchen. Whether you’re hosting friends or just treating yourself to a solo movie night, this board is the ultimate way to eat well, look good, and keep things perfectly low-stress. Enjoy the crunch, the cream, and the flavors!