
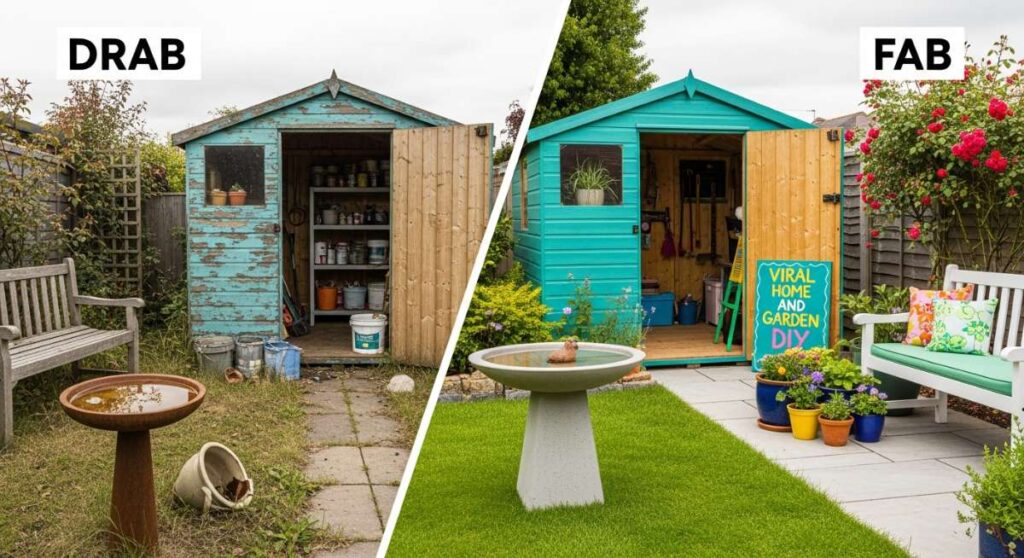
We’ve all been there—staring at that one corner of the house that just feels… ‘blah.’ Maybe it’s the patchy grass in the front yard or that kitchen pantry that looks like a snack explosion occurred. I spent years feeling like my home was just a place where I kept my stuff, rather than a sanctuary that reflected my soul. But then, I discovered the magic of the DIY glow-up. It’s not just about the final result; it’s about the tactile joy of getting your hands dirty, the smell of fresh cedar, and the deep sigh of relief when a space finally feels like home.
Creating a home you love doesn’t require a celebrity budget or a professional contractor. It requires a bit of imagination, a Saturday afternoon, and the willingness to try something new. Whether you’re dreaming of a backyard that feels like a hidden oasis or a pantry that makes you feel like a Michelin-starred chef, these viral projects are designed to transform your environment from drab to absolutely fabulous. Let’s dive into these transformations and find the spark for your next weekend project!
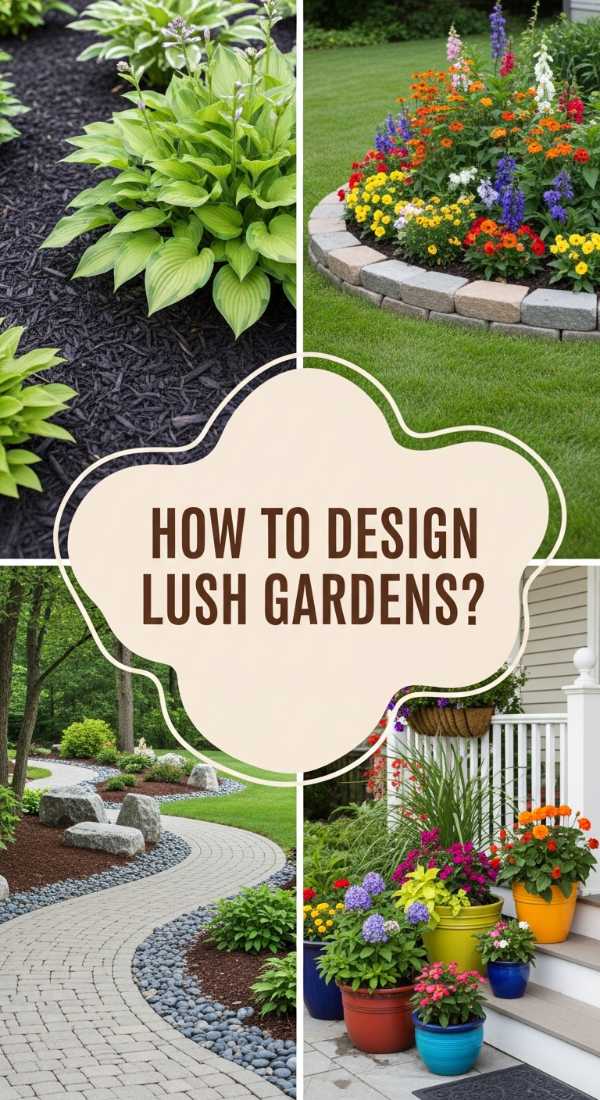
How to Design Flower Beds for Stunning Curb Appeal
Why we love this
There is something inherently soul-soothing about pulling up to a home framed by vibrant, healthy blooms. This project transforms a flat, uninspiring lawn into a layered masterpiece of color and texture. We love the way the scent of lavender and jasmine wafts toward the front door on a breeze, greeting you before you even turn the key. The visual rhythm of varying heights—from low-creeping groundcovers to tall, majestic perennials—creates a professional, estate-like feel that makes every homecoming feel like a special occasion.
Essential Elements:
- Hardwood mulch or decorative stone
- Borders (stone, brick, or metal edging)
- Soil conditioner and organic compost
- A mix of perennials (Hostas, Coneflowers, Lavender)
- Specimen shrubs (Boxwoods or Hydrangeas)
- Spade, garden fork, and landscape fabric
How to make it
- Define your bed shape by using a garden hose to map out organic, flowing curves. Avoid harsh straight lines for a more natural, professional look.
- Remove all grass and weeds within the marked area. Use a spade to cut deep edges, ensuring you remove the root systems to prevent regrowth.
- Amend the soil by tilling in three to four inches of high-quality compost and organic matter. This ensures your plants have the nutrient-dense foundation they need to thrive.
- Arrange your plants while they are still in their nursery pots. Place the tallest plants at the back (near the house) and taper down to shorter varieties at the front. Space them according to their ‘mature size’ to avoid overcrowding later.
- Dig holes twice as wide as the root ball. Tease the roots gently before placing the plant in the ground, ensuring the top of the root ball is level with the soil surface.
- Apply a 2-3 inch layer of mulch across the entire bed. This suppresses weeds and locks in moisture, giving the bed a clean, finished look.
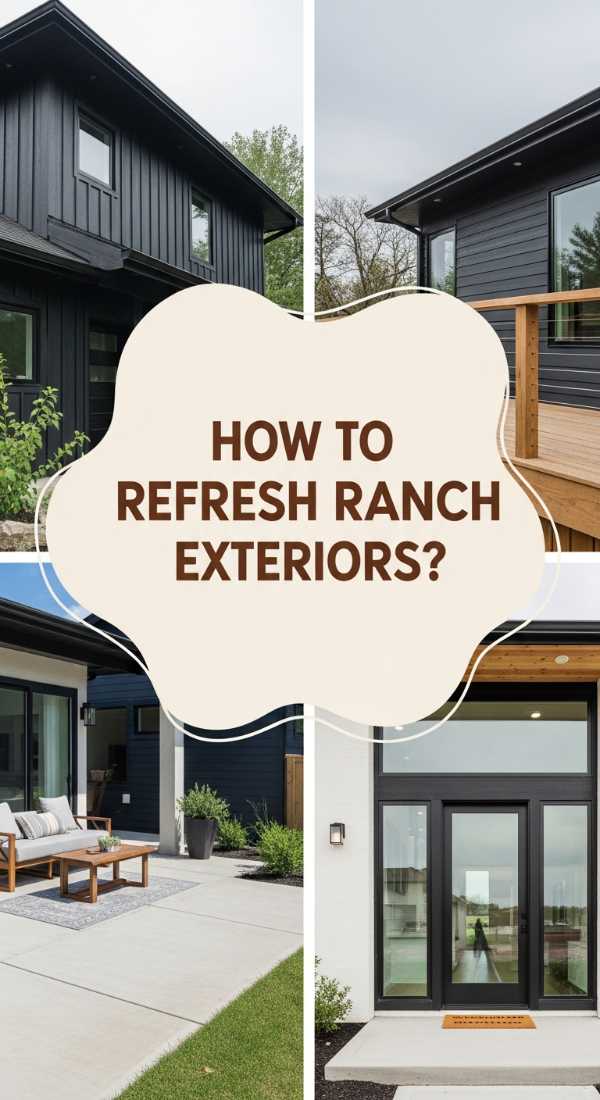
How to Remodel a Ranch Home for Modern Style
Why we love this
Ranch homes are the unsung heroes of the suburbs, offering a sprawling canvas that is just begging for a modern touch. We love this transformation because it takes the ‘boxy’ feel of the mid-century and breathes fresh air into it with open concepts and clean lines. Imagine walking into a space where the light flows unobstructed from the kitchen to the living room, highlighting warm white walls and sleek, natural wood accents. It’s about honoring the vintage soul of the home while upgrading it for the way we live today—uncluttered, bright, and effortlessly cool.
Essential Elements:
- Matte black hardware and lighting fixtures
- Wide-plank engineered hardwood or LVP flooring
- Neutral paint palette (warm whites and soft greys)
- Minimalist trim and baseboards
- Large-scale windows or glass sliding doors
- Open shelving for the kitchen
How to make it
- Assess non-load-bearing walls for removal. Opening the partition between the kitchen and living area is the hallmark of a modern ranch remodel. Always consult a structural engineer before swinging a sledgehammer.
- Update the flooring throughout the entire main level to create a seamless flow. Choose a light-toned oak or a modern grey-wash to maximize the feeling of space.
- Replace dated, heavy casings and baseboards with simple, square-profile trim. Paint them the same color as the walls in a semi-gloss finish for a sophisticated, monochromatic look.
- Swap out old, yellowed lighting for recessed LEDs and statement pendant lights in matte black or brushed brass. Focus on ‘layering’ your light with dimmers to control the mood.
- Upgrade the exterior with a fresh coat of dark charcoal or crisp white paint on the siding, and add a natural wood front door to provide a warm, inviting focal point.
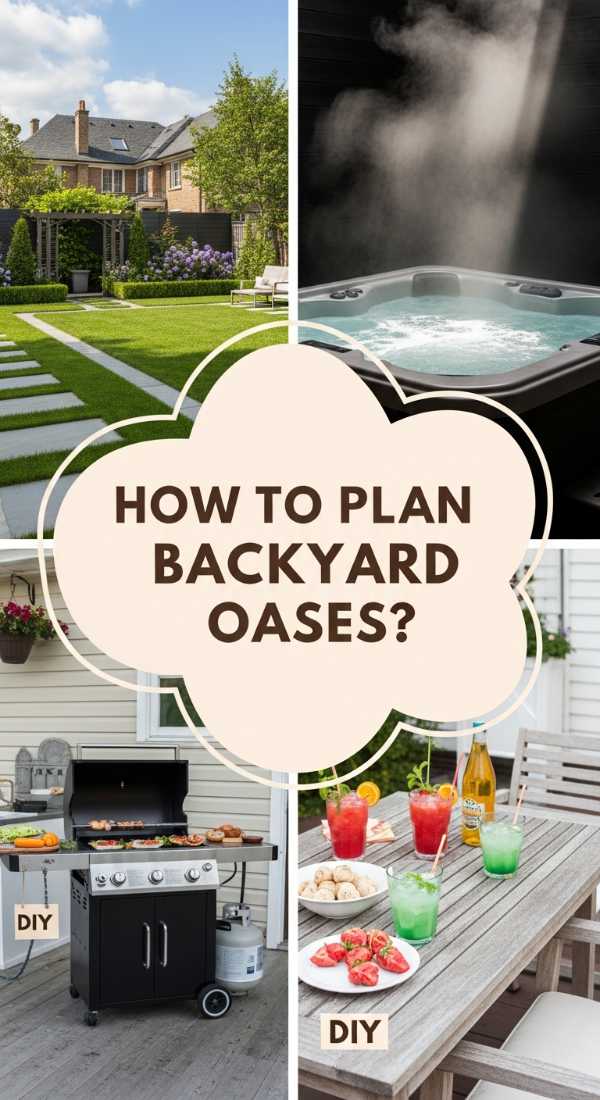
How to Plan a Backyard Layout for Ultimate Relaxation
Why we love this
A well-planned backyard is more than just a yard; it’s an outdoor living room where the stress of the day simply melts away. We love the intentionality of ‘zoning’—creating a specific spot for morning coffee, a cozy nook for reading, and an open area for evening gatherings. The sound of rustling ornamental grasses combined with the soft glow of solar-powered lanterns creates an atmosphere of pure tranquility. It’s about reclaiming your outdoor space as a sanctuary where you can reconnect with nature without leaving your property.
Essential Elements:
- Zoning map (sketch of the yard)
- Outdoor rugs and weather-resistant furniture
- Privacy screens or tall hedges
- Ambient lighting (string lights or lanterns)
- A focal point (fire pit, water feature, or statue)
- Pathways (stepping stones or pea gravel)
- Map your traffic patterns. Observe where you naturally walk and mark those as your ‘paths.’ Keep these clear to ensure the yard feels organized and navigable.
- Create ‘rooms’ by using outdoor rugs to define the dining area and the lounging area. This visual separation makes a large yard feel cozy and a small yard feel functional.
- Install privacy elements like vertical slatted fences or tall planters filled with clumping bamboo. This creates a ‘cocoon’ effect, shielding you from neighbors’ views.
- Incorporate a water feature, like a small plug-and-play fountain, near the seating area. The white noise effectively masks neighborhood sounds, enhancing the sense of peace.
- Layer your lighting. Use path lights for safety, string lights for atmosphere, and uplights on trees to create depth and drama after the sun goes down.
- Predator-proof animal housing (coops or hutches)
- Rainwater harvesting barrels
- Compost bins for animal waste
- Organic feed storage containers
- Fenced grazing areas or ‘chicken tractors’
- Native plantings for natural forage
- Select a site for your animal housing that offers both shade and sun. Ensure it has excellent drainage to prevent mud and bacteria buildup during rainy seasons.
- Construct housing using non-toxic, sustainable materials like cedar. Use heavy-duty hardware cloth (not chicken wire) buried 12 inches into the ground to protect against burrowing predators.
- Set up a greywater or rainwater collection system near the housing to provide a sustainable source of hydration for your animals and nearby gardens.
- Implement a ‘deep litter’ method in the coop. Layer pine shavings and straw, allowing them to compost in place over the winter, which provides natural warmth for the birds.
- Rotate grazing areas to prevent overgrazing and soil depletion. Use portable fencing to move animals to fresh patches of grass, which keeps them healthy and naturally fertilizes the soil.
- Low-level tables or ‘mud kitchens’
- Tactile bins (filled with beans, sand, or water)
- Aromatic plants (mint, rosemary, lemon balm)
- Sound elements (bamboo chimes or outdoor xylophones)
- Different textures (smooth river rocks, soft moss, crunchy bark)
- Easy-clean flooring or outdoor mats
- Designate a corner of the yard or playroom that is easily washable. If outdoors, use a base of artificial turf or smooth patio stones.
- Build or buy a ‘mud kitchen’ at waist-height for your child. Include old pots, pans, and wooden spoons to encourage imaginative ‘cooking’ with natural elements.
- Create ‘Texture Stations.’ Fill large, shallow bins with different materials: one with dry corn kernels, one with water and floating toys, and one with soft sand.
- Incorporate a vertical herb garden. Choose kid-safe plants like chocolate mint or fuzzy lamb’s ear to engage their sense of smell and touch.
- Add a sound wall using repurposed kitchen items like metal colanders and bells. Secure them to a wooden pallet so children can experiment with different percussive sounds.
- Uniform glass or BPA-free plastic canisters
- Airtight seals for freshness
- Woven or wire baskets for bulk items
- Tiered shelving for canned goods
- Label maker or custom vinyl decals
- Over-the-door organizers for small items
- Empty the entire pantry. Check expiration dates and discard anything past its prime. Group remaining items into categories (baking, grains, snacks, canned goods).
- Decant dry goods like flour, sugar, pasta, and nuts into uniform clear containers. This not only looks beautiful but keeps food fresh significantly longer by creating an airtight seal.
- Use ‘Zone’ organization. Place the items you use daily at eye level, heavy bulk items on the floor or bottom shelf, and occasional-use items (like holiday platters) on the highest shelves.
- Apply clear, legible labels to every container and basket. This ensures that every family member knows exactly where things go, maintaining the system long-term.
- Install a motion-sensor LED light strip inside the pantry. This small tech upgrade makes the space feel high-end and ensures you never lose a rogue jar of honey in the dark corners.
- White or silver-foliage plants (Dusty Miller, White Roses)
- Edison-style string lights
- Solar-powered garden stakes
- Comfortable floor cushions or a hammock
- Citronella candles in decorative hurricanes
- A small fire pit or chiminea
- Select a central ‘glow’ area. This is usually your seating area. Drape high-quality outdoor string lights in a ‘zigzag’ pattern overhead to create a soft, warm canopy of light.
- Plant ‘white-themed’ flowers like White Moonflowers or Alyssum. These reflect the moonlight and appear to ‘glow’ in the dark, adding a ghostly beauty to the perimeter.
- Place solar spotlights at the base of your most dramatic trees or statues. Pointing the light upward (uplighting) creates shadows and depth that look stunning after dark.
- Incorporate silver-leafed plants like Lamb’s Ear or Eucalyptus. Their silvery sheen catches the light and adds a metallic texture to the garden at night.
- Add a heat source. A small, modern fire pit provides a flickering orange light that contrasts beautifully with the cool moonlight, making the space usable even on chilly evenings.
- Outdoor rugs with bold patterns
- Privacy lattice or cedar slat walls
- Large potted trees (Fiddle Leaf Figs or Palms)
- Comfortable sectional seating
- Weatherproof throw pillows and blankets
- Outdoor curtains or sunshades
- Start with the ‘floor.’ If your concrete is stained or ugly, use an outdoor rug or interlocking deck tiles to instantly warm up the surface and define the space.
- Build or install privacy screens. Horizontal cedar slats provide a modern, airy feel while blocking the view. Attach these to the sides of your patio or use freestanding planters with built-in trellises.
- Incorporate ‘oversized’ greenery. Use large pots to house tall plants, which act as living walls. This adds a lush, tropical vibe and helps with sound dampening.
- Hang outdoor curtains. Using a simple galvanized pipe as a rod, hang white linen-look outdoor curtains. When closed, they provide total privacy; when open, they add a soft, breezy movement.
- Add a ‘comfort layer.’ Don’t skimp on the pillows. Use outdoor-rated fabrics in calming tones like sage or navy to make the seating look and feel like an indoor living room.
- Adjustable drafting table or sturdy easel
- North-facing light (or daylight-spectrum LED lamps)
- Vertical storage (pegboards or floating shelves)
- Rolling utility carts for supplies
- Inspirational mood board
- Comfortable, ergonomic stool
- Position your primary workspace near a window. North-facing light is the gold standard for artists as it provides consistent, indirect light that doesn’t change color throughout the day.
- Install a large pegboard on the main wall. This allows you to keep brushes, scissors, and palettes within arm’s reach while keeping your horizontal surfaces clear of clutter.
- Organize your media by type. Use clear acrylic bins for pens and markers, and use a rolling cart for heavy paints and mediums so you can pull them right up to your easel when working.
- Create a ‘Wet Station’ and a ‘Dry Station.’ Keep your messy painting or clay work separate from your sketching or digital work to prevent accidents and keep the space functional.
- Dedicate one wall as a ‘Gallery Wall.’ Use washi tape or clips to hang finished pieces and works-in-progress. Seeing your progress is the best way to stay motivated and inspired.
- Mid-century modern bed frame (tapered legs)
- Retro-patterned bedding or throw blankets
- Macramé wall hangings
- Vintage-style record player and vinyl display
- Lava lamps or globe pendant lights
- Velvet textures in earthy tones
- Start with a statement piece of furniture. A low-profile wooden bed frame with tapered legs immediately sets the retro tone for the entire room.
- Layer your textiles. Choose a duvet cover in a bold geometric print or a solid velvet in an earthy ochre. Add a chunky knit throw to provide that ‘grandma’s house’ level of coziness.
- Incorporate vintage tech. A record player on a dedicated stand serves as both a functional music source and a major decor element. Display your favorite album covers like art.
- Use ‘warm’ lighting. Avoid cool blue LEDs. Use amber-tinted bulbs in globe-shaped lamps to create a sunset-like glow that highlights the warm wood and rich colors of the room.
- Add greenery with a ‘retro’ feel. Snake plants, Spider plants, and Monstera were staples of 70s decor and are incredibly easy to care for, adding life and oxygen to your sanctuary.
How to make it
How to Build a Sustainable Homestead for Happy Animals
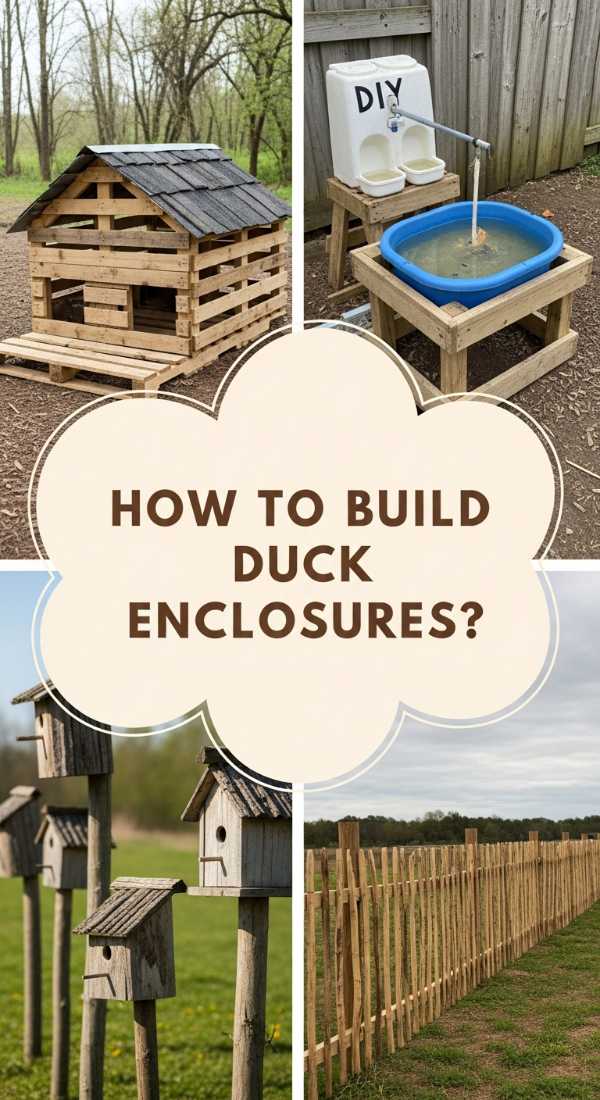
Why we love this
There is a profound sense of fulfillment that comes from living in harmony with animals and the land. Building a sustainable homestead is about creating a closed-loop system where your animals are happy, healthy, and part of the ecosystem. We love the rustic aesthetic of weathered cedar coops, the earthy scent of fresh straw, and the morning ritual of gathering warm eggs. It’s a lifestyle shift that brings you closer to the rhythm of the seasons and teaches the beauty of responsibility and slow living.
Essential Elements:
How to make it
How to Create a Sensory Play Space for Curious Kids
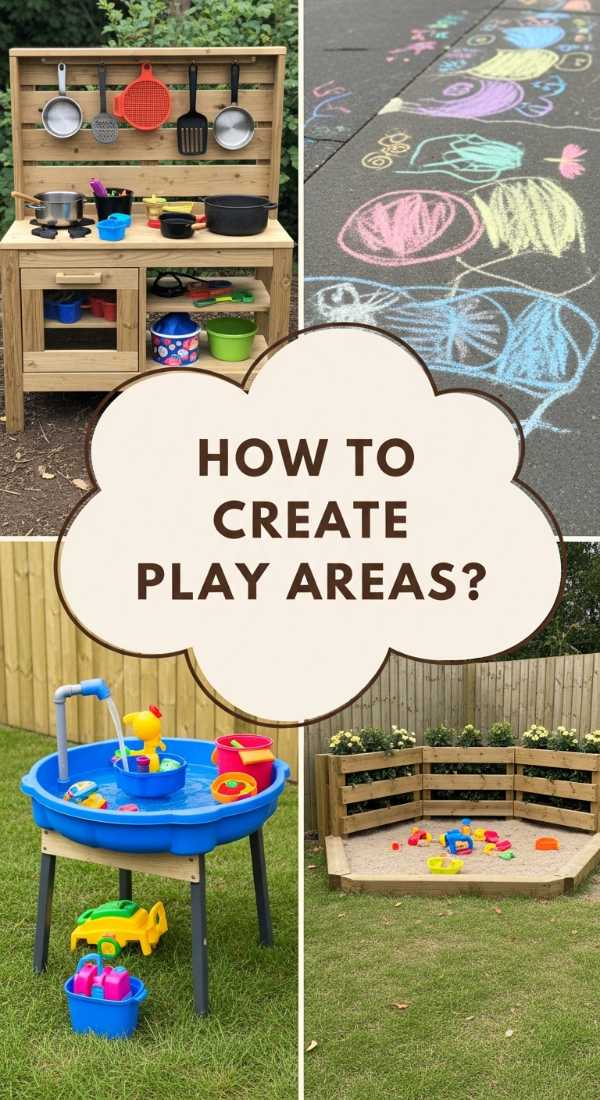
Why we love this
Watching a child engage with a sensory play space is like watching a scientist at work. This project is all about stimulating the senses through touch, sound, and sight, moving away from plastic screens and toward tactile exploration. We love the ‘organized mess’—the clicking of stones, the squish of kinetic sand, and the bright pops of color from non-toxic herbs. It’s a dedicated zone where curiosity is king, and children can develop fine motor skills while getting lost in their own little worlds of wonder.
Essential Elements:
How to make it
How to Organize a Dream Pantry for Stress-Free Cooking
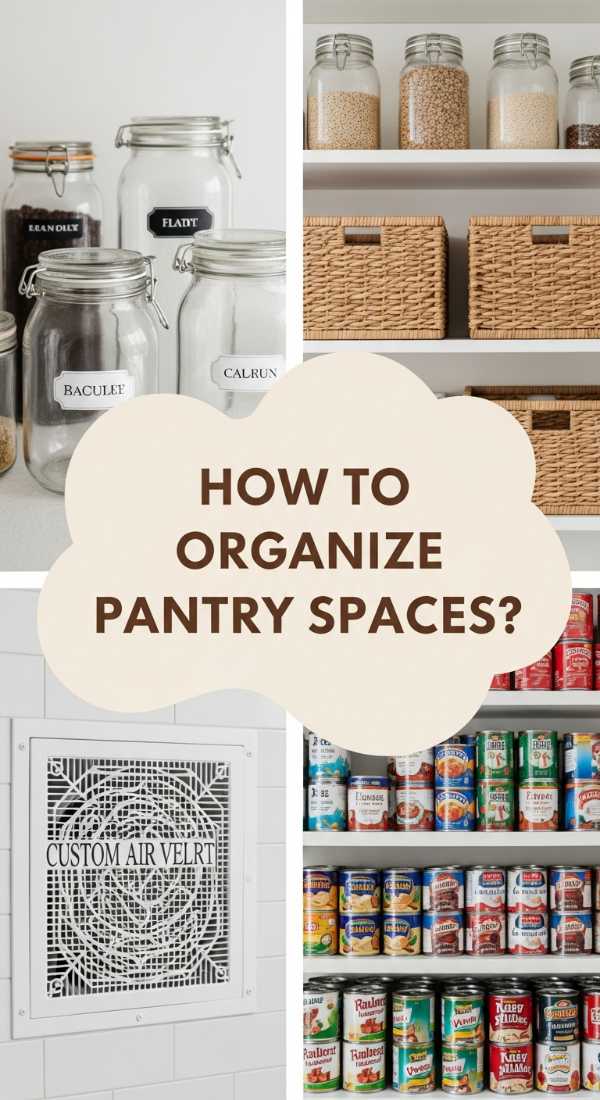
Why we love this
A perfectly organized pantry is the ultimate kitchen flex. We love this project because it transforms the daily chore of cooking into a streamlined, aesthetic experience. Imagine opening your pantry doors to see uniform glass jars filled with grains, neatly labeled baskets for snacks, and a dedicated coffee station that rivals your favorite cafe. The visual order reduces decision fatigue and makes it easy to see exactly what you have, preventing food waste and turning the ‘what’s for dinner?’ panic into a moment of creative inspiration.
Essential Elements:
How to make it
How to Decorate a Magical Garden for Summer Nights
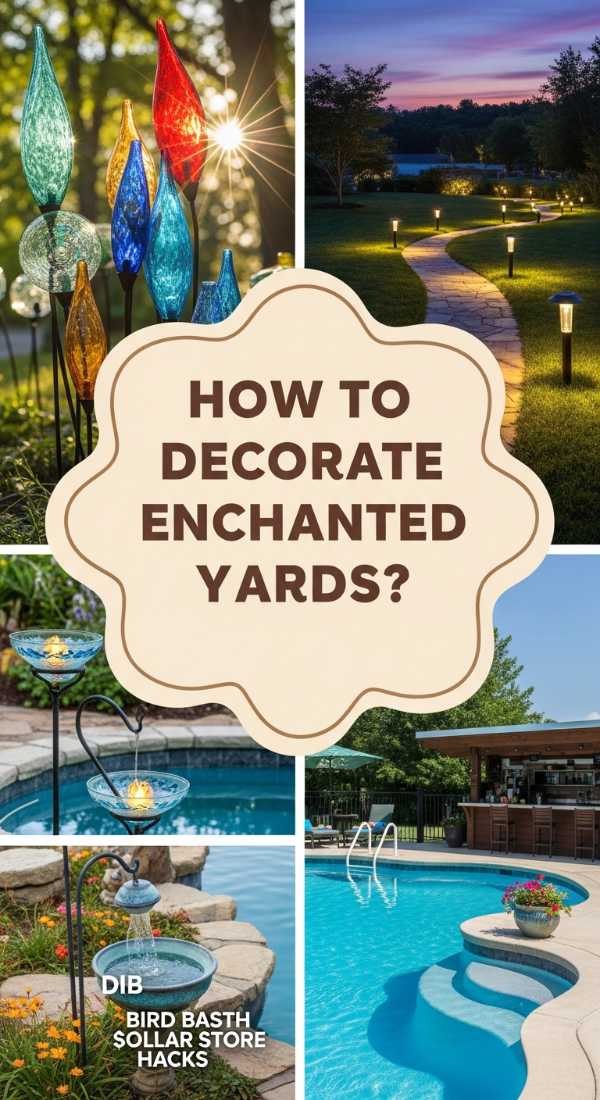
Why we love this
When the sun sets, the garden shouldn’t disappear—it should transform. We love the ethereal, dreamlike quality of a ‘moonlight garden.’ By using light-reflecting plants and warm, glowing accents, you create a space that feels like it belongs in a fairytale. The combination of twinkling fairy lights draped through tree branches and the heady scent of night-blooming flowers creates an intoxicating atmosphere that is perfect for late-night cocktails or quiet reflection under the stars.
Essential Elements:
How to make it
How to Upgrade a Plain Patio for a Private Retreat

Why we love this
A plain concrete slab can feel cold and exposed, but with the right DIY touches, it becomes a secluded sanctuary. We love this project because it’s about ‘enveloping’ yourself in comfort. By adding vertical elements and soft textures, you turn a high-traffic area into a private escape. It’s the feeling of being in a high-end resort right in your own backyard—a place where you can lounge in your pajamas with a book, shielded from the wind and the prying eyes of the street.
Essential Elements:
How to make it
How to Set Up an Art Studio for Creative Expression

Why we love this
Every creative soul needs a ‘room of one’s own.’ Setting up an art studio is about more than just a desk; it’s about creating an environment that invites the muse. We love the functional beauty of this space—the rainbow of paint tubes organized on a rolling cart, the natural light flooding the canvas, and the sense of possibility that hangs in the air. It’s a dedicated zone where it’s okay to be messy, where experiments are encouraged, and where your creative identity can truly take root.
Essential Elements:
How to make it
How to Style a Nostalgic Bedroom for Retro Vibes
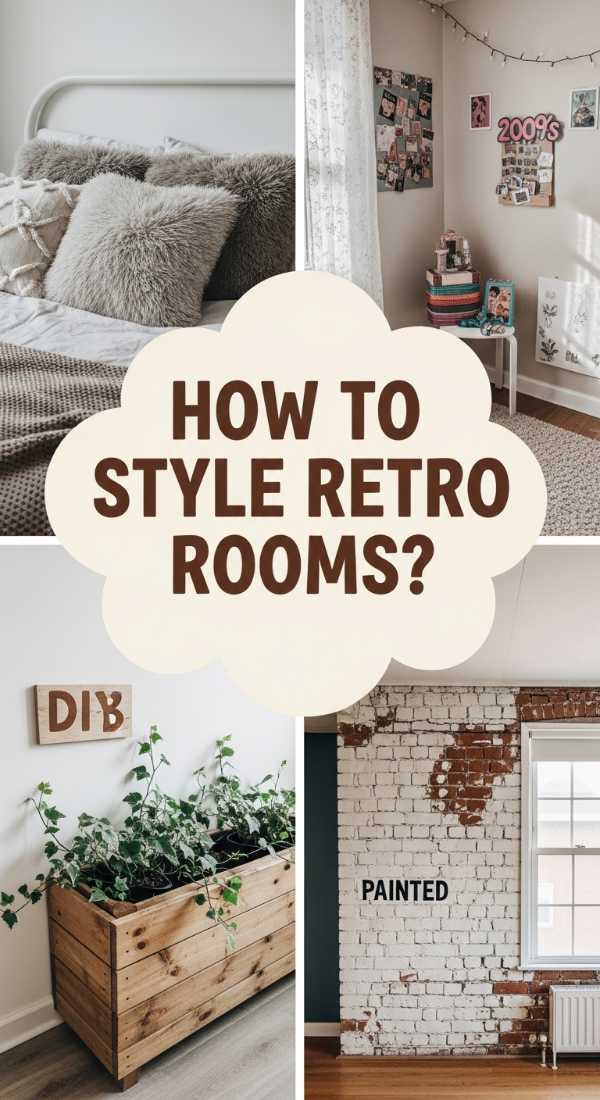
Why we love this
There is something incredibly comforting about the design trends of the past. A nostalgic bedroom takes the best of the 60s and 70s—the warm wood tones, the funky patterns, and the tactile fabrics—and mixes them with modern comfort. We love the ‘vibe’ of this space; it feels lived-in and storied. It’s the perfect blend of mustard yellows, burnt oranges, and avocado greens, grounded by mid-century furniture that feels both timeless and trendy. It’s a room that doesn’t take itself too seriously and encourages deep relaxation.
Essential Elements:
How to make it
Wrapping Up Your Home Transformation
Transforming your home from drab to fab is a journey of a thousand small, creative steps. Each project we’ve explored today is designed to do more than just change the look of a room; they are designed to change how you *feel* when you inhabit those spaces. Whether you start with a single flower bed or dive into a full room remodel, remember that the most important element is your own personal touch. Your home is a living, breathing reflection of your journey—so make it a beautiful one! Happy DIY-ing!