
There is something truly magical about the moment you turn onto your street and catch sight of your home, feeling that immediate surge of pride and peace. Our homes are more than just structures; they are reflections of our journeys, our families, and our personal style. However, between the hustle of daily life and the constraints of a budget, it’s easy to let the exterior fall by the wayside, leaving us with a ‘to-do’ list that feels more like a burden than an opportunity.
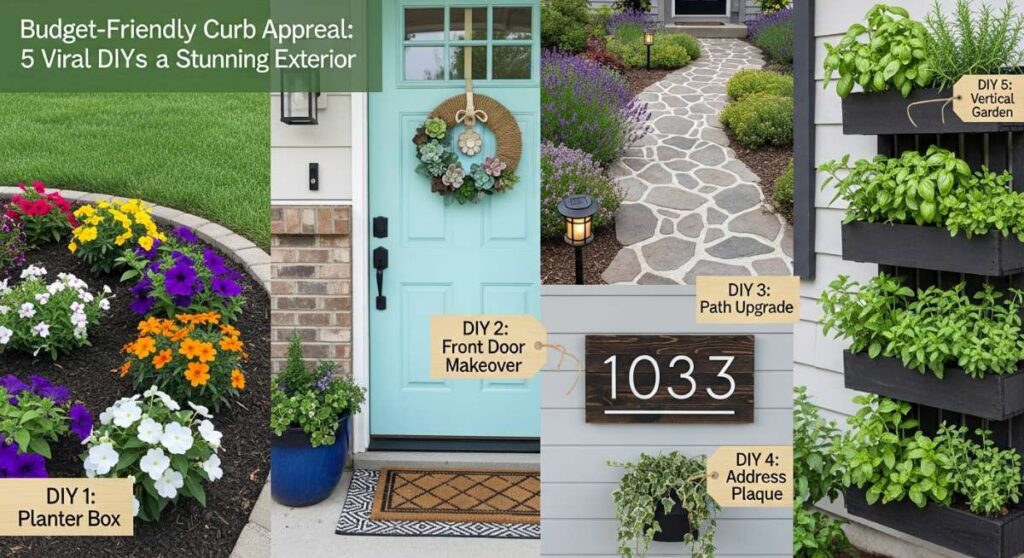
Today, I want to change that narrative. You don’t need a massive renovation budget or a team of contractors to create a look that stops traffic and warms the heart. By focusing on high-impact, viral DIY projects, we can transform even the most tired exteriors into stunning masterpieces. Whether you’re looking to host the perfect summer garden party or simply want to smile every time you pull into the driveway, these budget-friendly updates are designed to bring joy, texture, and a high-end feel to your living space without the high-end price tag.
How to Arrange Front Porch Flower Pots for Instant Curb Appeal
Why we love this
Walking onto a porch filled with lush, vibrant greenery is like receiving a warm hug from your home. The sensory experience is unparalleled; the sweet, delicate aroma of jasmine or petunias dancing on a breeze, combined with the varied textures of waxy leaves and soft petals, creates an atmosphere of sophisticated charm. We love this because it utilizes the ‘Thriller, Filler, Spiller’ method, which creates a professional, tiered look that draws the eye upward and makes even a small entryway feel like a grand estate entrance.
Essential Elements:
- Varying sizes of weather-resistant planters (ceramic or high-quality resin).
- A ‘Thriller’ plant (Cordyline, Grass, or Canna Lily).
- ‘Filler’ plants (Geraniums, Lantana, or Petunias).
- ‘Spiller’ plants (Sweet Potato Vine or Creeping Jenny).
- Premium potting soil with slow-release fertilizer.
How to make it
- Select three pots of varying heights to create a visual triangle. Clean them thoroughly with a mild soap solution to ensure no pests are transferred.
- Fill the bottom third of the pots with empty plastic water bottles or lightweight filler if the pots are deep; then fill the rest with high-quality potting soil, stopping 2 inches from the rim.
- Place your ‘Thriller’ (the tallest plant) in the center or slightly toward the back. Ensure the root ball is level with the soil surface.
- Surround the Thriller with your ‘Fillers.’ These should be mounding plants that add bulk and color. Space them about 4 inches apart to allow for growth.
- Plant your ‘Spillers’ along the edges. Angle them slightly outward so they naturally cascade over the rim of the pot.
- Water deeply until water runs out of the drainage holes. For a professional finish, top the soil with decorative moss or smooth river stones to retain moisture.
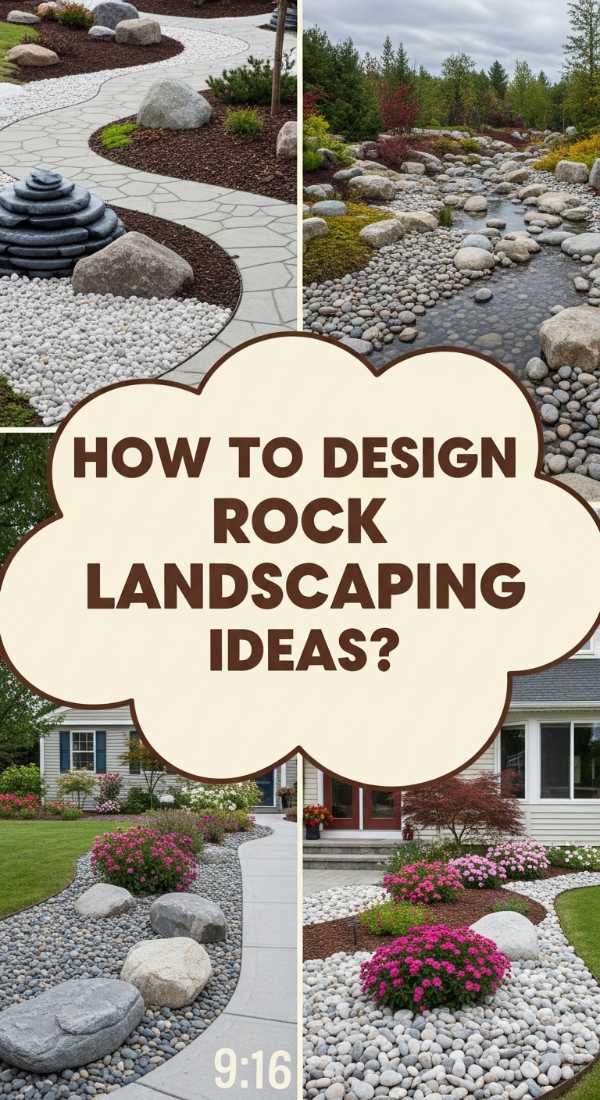
How to Design Rock Landscaping Ideas for a Low Maintenance Masterpiece
Why we love this
There is a serene, grounding quality to rock landscaping that speaks of permanence and timelessness. The visual contrast between the rugged, matte texture of grey river rocks and the sharp, bright green of ornamental grasses creates a modern aesthetic that is incredibly pleasing to the eye. We love this project because it eliminates the constant cycle of weeding and mulching, offering a crisp, clean look that stays perfect through rain and shine, giving you more time to actually enjoy your outdoor sanctuary.
Essential Elements:
- Heavy-duty landscape fabric.
- Galvanized steel or heavy plastic edging.
- A mix of River Rock, Pea Gravel, or Mexican Beach Pebbles.
- Drought-tolerant plants like Agave or Lavender.
- Landscaping staples.
How to make it
- Clear the area of all grass and weeds. Dig down approximately 2-3 inches to create a recessed bed that will hold the rocks in place.
- Install your edging along the perimeter. Use a rubber mallet to secure it, ensuring it sits about an inch above the soil line to prevent rock migration.
- Lay down the heavy-duty landscape fabric, overlapping seams by at least 6 inches. Secure it tightly with landscaping staples every 12 inches to prevent shifting.
- Cut ‘X’ shapes into the fabric where you wish to plant your greenery. Dig the holes, plant your specimens, and fold the fabric back around the base of the plants.
- Pour your chosen rocks into the area. Use a metal rake to spread them evenly, aiming for a depth of at least 2 inches so the fabric is completely invisible.
- Rinse the rocks with a garden hose to remove dust and reveal their natural, vibrant colors and textures.
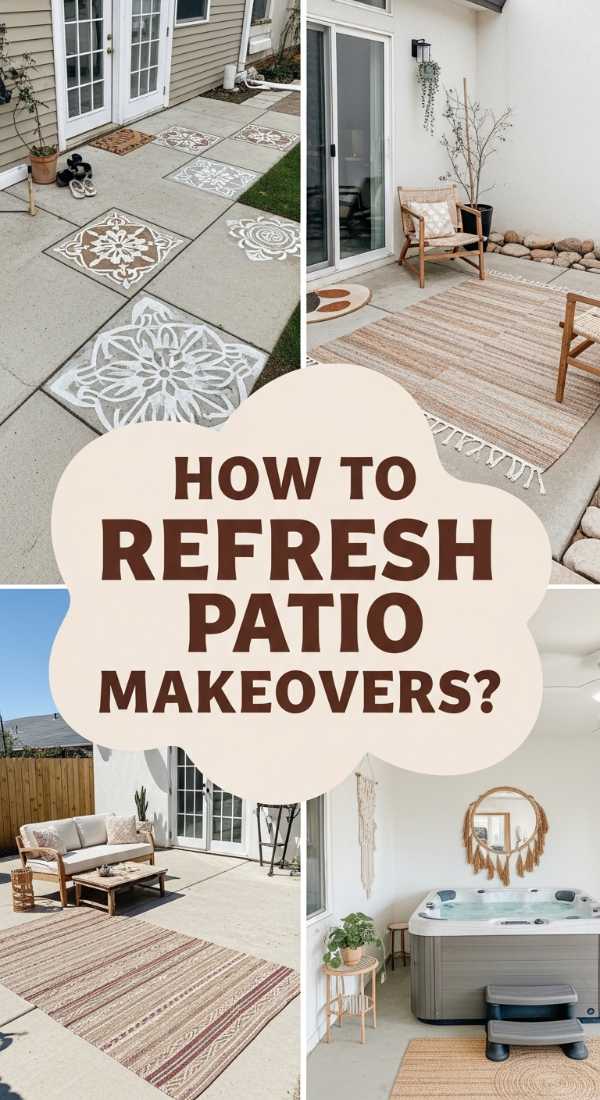
How to Refresh a Concrete Slab Patio Makeover for a High End Feel
Why we love this
Turning a cold, grey concrete slab into a designer patio is one of the most rewarding DIYs you can tackle. The transformation is visceral; the smooth, cool touch of a freshly painted surface underfoot and the visual rhythm of a crisp tile-effect pattern can make your backyard feel like a Mediterranean villa. This makeover breathes life into ‘dead’ space, providing a sophisticated backdrop for morning coffees and late-night stargazing, all while significantly increasing the perceived value of your home.
Essential Elements:
- Concrete cleaner/degreaser.
- Exterior concrete paint (base color and accent color).
- Large-scale floor stencil.
- High-density foam rollers and stencil brushes.
- Concrete sealant (matte or gloss).
How to make it
- Scrub the concrete slab with a heavy-duty degreaser and a stiff brush. Pressure wash the surface and allow it to dry completely for at least 24-48 hours.
- Apply two thin, even coats of your base color exterior paint using a long-handled roller. Wait the manufacturer-recommended time between coats (usually 4-6 hours).
- Starting in the most visible corner, secure your stencil with painter’s tape. Use a ‘dry brush’ technique with your accent color—meaning you load the roller and then roll most of the paint off onto a paper towel before hitting the stencil.
- Carefully lift the stencil and realign it using the registration marks. Repeat across the entire patio, being patient with the drying time of each section.
- Once the pattern is dry, apply two coats of clear concrete sealant. This protects your hard work from UV rays and foot traffic, giving it that professional ‘high-end’ sheen.
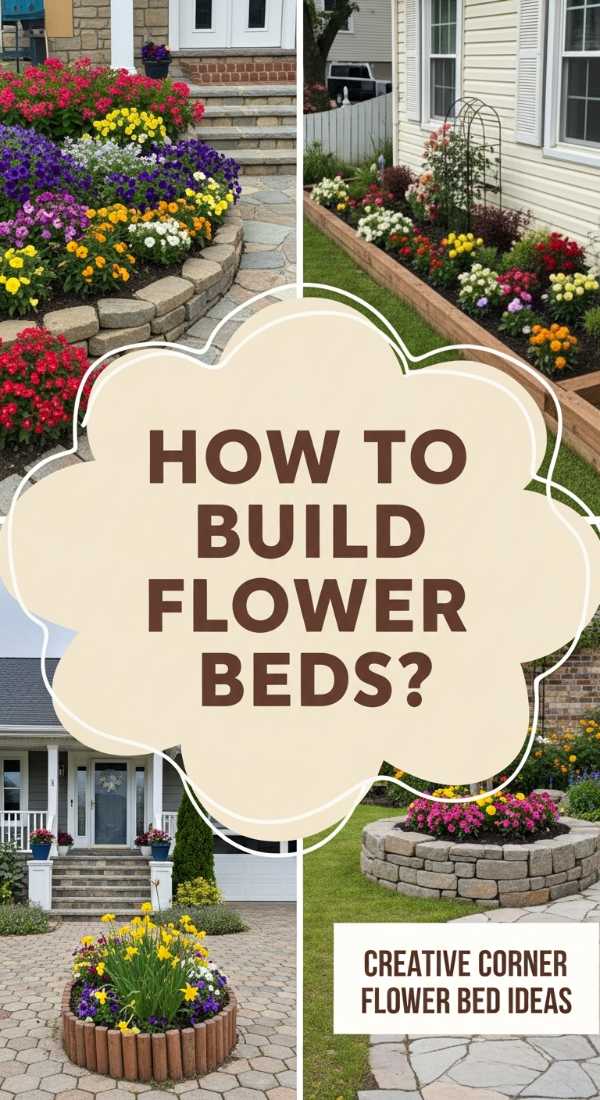
How to Build Flower Beds in Front of House for Year Round Color
Why we love this
A well-planned flower bed is like a living painting that changes with the seasons. We love the layered approach because it provides a rich tapestry of colors and heights—think the soft, pillowy texture of spring hydrangeas transitioning into the fiery oranges of autumn sedum. This DIY adds a layer of softness to the hard lines of your home’s architecture, creating a welcoming, aromatic barrier that makes your house feel established and cared for throughout every month of the year.
Essential Elements:
- Marking paint or a garden hose for outlining.
- Garden spade and metal rake.
- Soil conditioner and organic compost.
- A mix of perennials, evergreens, and seasonal annuals.
- Cedar or hardwood mulch.
How to make it
- Use a garden hose to mock up the shape of your beds—curved lines look more organic and high-end than straight ones. Use marking paint to finalize the outline.
- Remove the sod within the outline. Dig down about 6 inches and turn the soil to aerate it, mixing in a generous amount of compost and soil conditioner.
- Arrange your plants while they are still in their nursery pots. Place evergreens in the back for structure, medium perennials in the middle, and low annuals in the front.
- Dig holes twice as wide as the root balls. Add a pinch of transplant fertilizer to each hole, plant your greenery, and firm the soil gently around the bases.
- Apply a 3-inch layer of mulch across the entire bed, keeping it a few inches away from the direct stems of the plants to prevent rot.
- Water the entire bed thoroughly and install a simple drip irrigation line or soaker hose hidden under the mulch for easy maintenance.
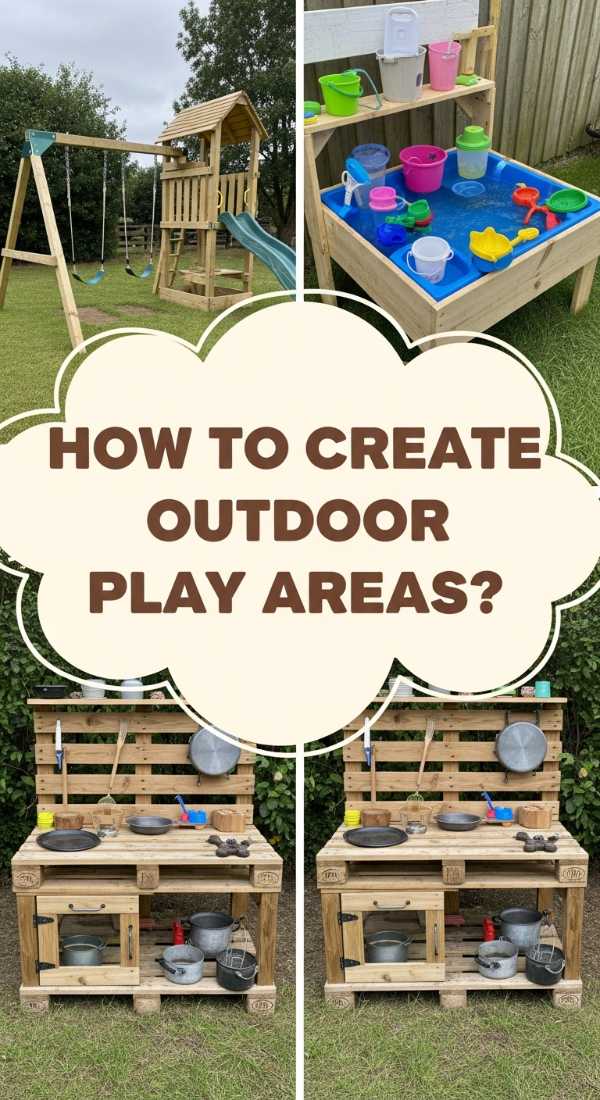
How to Create an Outdoor Play Area for Kids to Spark Pure Joy
Why we love this
There is no sound more beautiful than the laughter of children playing in the fresh air. By creating a dedicated, aesthetic play zone, you merge functionality with style. We love using natural materials like wood and smooth bark, which feel wonderful to the touch and blend seamlessly into your landscaping. It’s about creating a ‘destination’ in the yard—a place where imagination takes flight amidst the scent of cedar and the shade of a backyard tree, keeping the main lawn clear for adult relaxation.
Essential Elements:
- Rubber mulch or engineered wood fiber.
- Timber landscape ties for borders.
- Weatherproof chalkboard paint and plywood.
- Outdoor-rated play equipment (swings, mud kitchen).
- Sun sail or canopy for shade.
How to make it
- Level the ground in your chosen corner. Install timber ties around the perimeter, securing them with rebar driven into the ground to create a safe, contained ‘pit.’
- Lay down a thick layer of landscape fabric to prevent weeds and provide a barrier between the dirt and the play surfacing.
- Fill the area with 4-6 inches of certified playground mulch. This provides the necessary ‘critical fall height’ protection for active kids.
- Mount a large sheet of plywood painted with three coats of outdoor chalkboard paint to a fence or stand. This adds a creative station that doesn’t take up floor space.
- Install your play elements, ensuring they are anchored according to safety standards. Add a sun sail overhead using heavy-duty posts or existing structures for UV protection.
- Finish with a small wooden bench for ‘spectators’ (parents!) and a weather-proof bin to house toys and chalk.
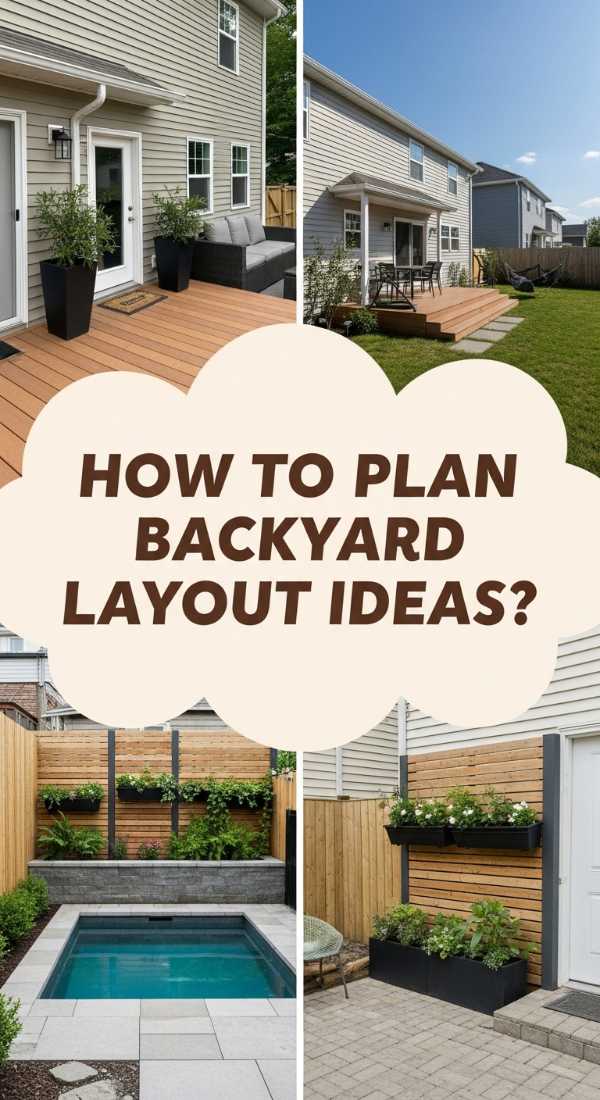
How to Plan Backyard Layout Ideas Rectangle for a Serene Sanctuary

Why we love this
A rectangular backyard can often feel like a boring ‘corridor,’ but with the right layout, it becomes a sophisticated series of outdoor rooms. We love the ‘Zoning’ technique because it creates a sense of discovery; as you move from a cozy dining nook to a lush grassy area and finally to a hidden fire pit, the space feels exponentially larger and more intentional. The geometric precision combined with soft plantings creates a modern, serene sanctuary that balances order with nature.
Essential Elements:
- Graph paper or digital planning tool.
- Hardscape materials (pavers or decking).
- Vertical interest (trellises or tall shrubs).
- Outdoor lighting (string lights and path lights).
- Comfortable, weather-proof furniture.
How to make it
- Measure your yard and draw it to scale. Divide the rectangle into three distinct squares or zones: Dining, Recreation, and Relaxation.
- Place your Dining zone closest to the house for easy kitchen access. Use pavers or a deck to define this ‘hard’ floor.
- Create a transition in the middle zone using a lush lawn or a rock garden. This ‘soft’ zone provides visual relief and a place for movement.
- Set the Relaxation zone at the far end of the rectangle. Use a fire pit or a focal-point bench surrounded by tall, airy plants like Mexican Feather Grass to create privacy.
- Connect the zones with a clear path made of stepping stones or gravel. This guides the eye and the foot through the space.
- Install vertical elements like a pergola or tall ‘Sky Pencil’ hollies along the long fences to break up the ‘box’ feel and add a sense of height.
How to Master Realistic Pantry Organization for a Stress Free Kitchen
Why we love this
While this is an interior project, it reflects the same desire for order and beauty that we crave for our exteriors. There is a deep, tactile satisfaction in seeing rows of glass jars filled with colorful grains and spices, all perfectly labeled. We love this because it removes the sensory ‘noise’ of mismatched packaging, replacing it with a clean, streamlined aesthetic that makes the daily chore of cooking feel like a calm, curated experience in a high-end boutique.
Essential Elements:
- Airtight glass or BPA-free plastic canisters.
- Uniform labels (minimalist or script).
- Tiered risers for canned goods.
- Woven baskets for ‘bulky’ items like snacks or potatoes.
- Lazy Susans for oils and vinegars.
How to make it
- Empty your entire pantry and wipe down the shelves with a microfiber cloth and a mild lavender cleaner. Discard any expired items.
- Group your items into categories: Baking, Grains, Breakfast, Snacks, and Dinner Essentials.
- Decant dry goods (flour, pasta, cereal) into your uniform canisters. This not only looks beautiful but keeps food fresh for much longer.
- Apply your labels at the same height on every jar for a professional, ‘viral’ look. Use a ruler to ensure perfect alignment.
- Place your most-used items at eye level. Use the tiered risers for cans so you can see every label at a glance without digging.
- Utilize the baskets on lower shelves for unsightly bags of chips or root vegetables, keeping the visual clutter to a minimum.
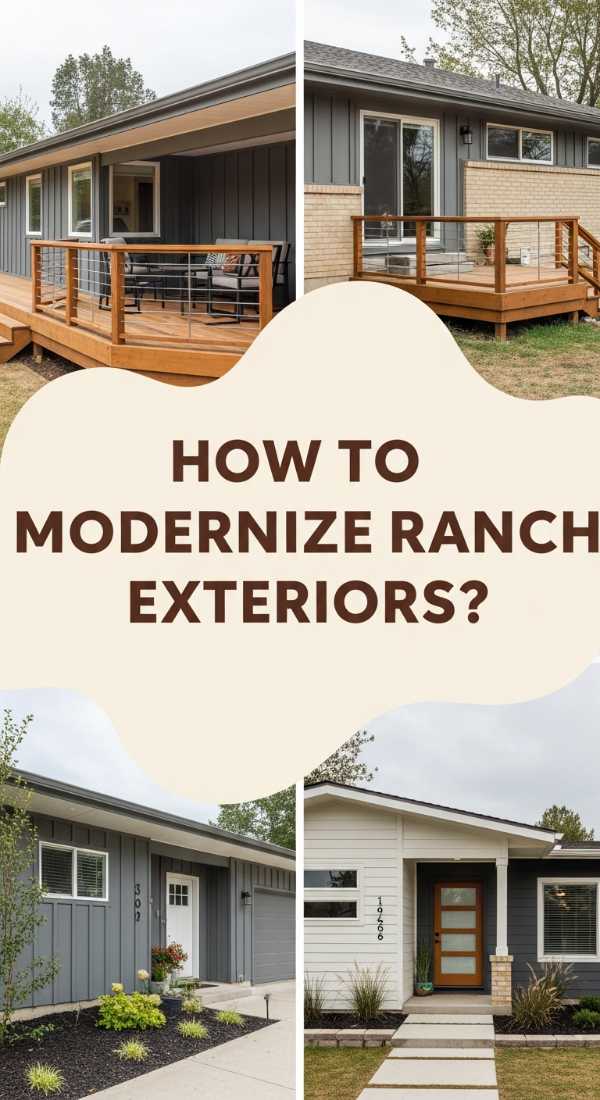
How to Modernize a Ranch Exterior Remodel for a Timeless Look
Why we love this
The classic ranch home has such ‘good bones,’ and modernizing it is like revealing a hidden gem. By updating the color palette to sophisticated charcoals or warm whites and adding natural wood accents, you transform a dated facade into a contemporary masterpiece. We love the contrast of the long, low rooflines with modern, vertical elements; it’s a study in balance that feels both grounded and incredibly fresh, proving that you don’t need a new house to have a ‘new’ home.
Essential Elements:
- Modern exterior paint (e.g., Benjamin Moore ‘Swiss Coffee’ or ‘Iron Mountain’).
- Natural wood shutters or a cedar-wrapped porch post.
- Modern black hardware (house numbers, mailbox, door handle).
- Updated light fixtures (gooseneck or sleek sconces).
- Low-profile, architectural landscaping.
How to make it
- Clean the siding and brick thoroughly. If painting brick, use a high-quality masonry paint that allows the material to ‘breathe.’
- Paint your front door a bold, contrasting color—think deep navy or a modern mustard—to create a focal point that draws the eye.
- Replace dated, spindly porch posts with thicker 6×6 cedar posts. The warmth of the wood instantly elevates the cool tones of the paint.
- Swap out old, small house numbers for large, 6-inch modern floating numbers in a matte black finish.
- Install new light fixtures that are proportional to the house; most people choose lights that are too small. Aim for fixtures that are 1/4 the height of the door.
- Update the landscaping with structural plants like Boxwood globes and ornamental grasses to mirror the clean lines of the ranch’s silhouette.
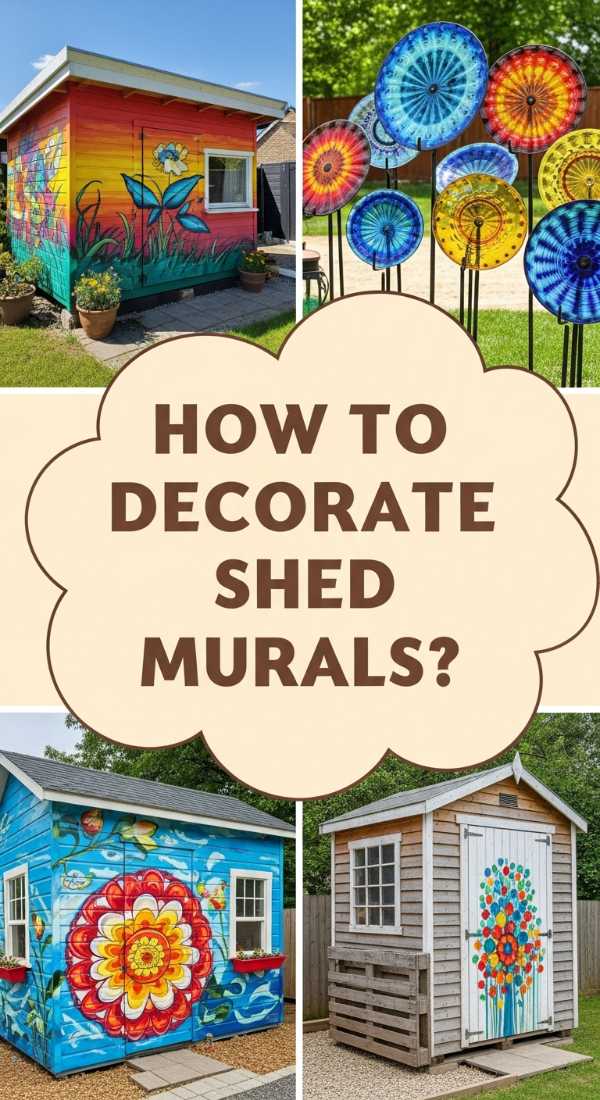
How to Decorate Shed Murals Outdoor for a Creative Backyard Escape
Why we love this
A garden shed is often an eyesore, but with a mural, it becomes a canvas for pure creativity. The feeling of standing back and seeing a burst of hand-painted wildflowers or a geometric sunset where there used to be peeling paint is exhilarating. We love this because it injects personality and whimsy into the garden, turning a functional storage unit into a conversation piece that feels like a secret, artistic escape tucked away in the trees.
Essential Elements:
- Exterior-grade acrylic paints or sample pots.
- Stencils (if you’re not comfortable free-handing).
- High-quality synthetic brushes and small rollers.
- UV-resistant clear topcoat.
- Painter’s tape and chalk for sketching.
How to make it
- Sand any peeling paint off the shed and apply a coat of exterior primer. This is crucial for ensuring your ‘art’ doesn’t flake off in the rain.
- Sketch your design onto the shed using a piece of chalk. This allows you to stand back and adjust the proportions before any permanent paint is applied.
- Start with the background colors first, using a small roller for large areas. Work from the top down to prevent drips from ruining finished sections.
- Layer in your details using smaller brushes. If using stencils, ensure they are taped flat against the surface and use a dabbing motion to prevent bleeding.
- Once the mural is completely dry (wait 24 hours), apply two coats of a UV-resistant clear sealer to protect the colors from fading in the sun.
- Add a few potted plants or a small bench in front of the mural to integrate the ‘art’ into the surrounding landscape.
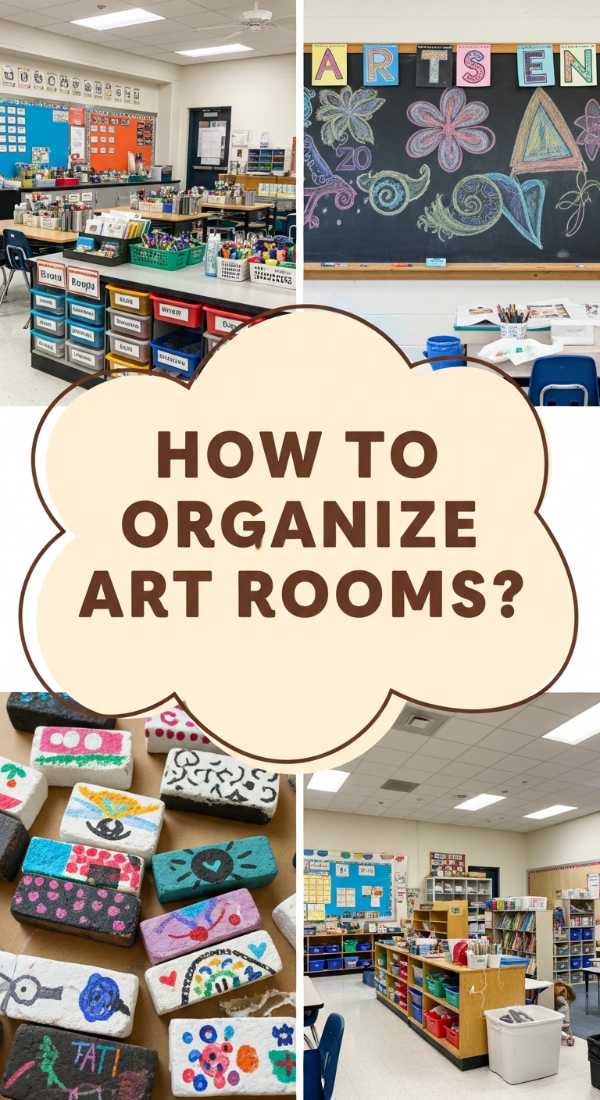
How to Organize Elementary Art Rooms for Endless Creative Inspiration
[IMAGE_10]
Why we love this
An organized art room is a catalyst for genius. When supplies are displayed in a rainbow of colors and tools are within easy reach, the barrier to creativity vanishes. We love the ‘Visual Accessibility’ of this setup; the sight of neatly sorted markers, jars of glitter, and stacks of crisp paper is enough to inspire anyone, regardless of age. It’s a tactile playground where the organization itself becomes a form of art, encouraging exploration and messy, beautiful fun without the stress of the cleanup.
Essential Elements:
- Clear, stackable bins and drawer units.
- Color-coded sorting containers (the ‘rainbow’ method).
- Pegboards for hanging scissors, tape, and aprons.
- Durable, wipeable labels.
- A dedicated ‘drying rack’ station.
How to make it
- Sort all supplies into broad categories: Wet Media (paints), Dry Media (crayons, markers), and Sculptural (clay, pipe cleaners).
- Use the ‘Rainbow Method’ for markers and pencils. Not only is it visually stunning for social media, but it also makes it intuitive for children to put things back where they belong.
- Install a large pegboard at kid-height. Use hooks and baskets to keep the most-used tools like safety scissors and glue sticks off the table surfaces.
- Label every bin with both words and a small icon or picture. This empowers young artists who are still learning to read to navigate the space independently.
- Create a ‘Work in Progress’ (WIP) station using a horizontal mail sorter so that projects can dry safely without taking up valuable table space.
- Set up a ‘Cleaning Station’ with a small dustpan and a tub of wipes, teaching that the creative process includes caring for the tools and the environment.
Conclusion: Your Dream Exterior Awaits
Transforming your home’s curb appeal doesn’t require a miracle—it just requires a little bit of vision and the willingness to get your hands dirty. From the rhythmic pattern of a stenciled patio to the vibrant life of a well-arranged flower pot, these DIYs prove that beauty is accessible on any budget. As you tackle these projects, remember that the goal isn’t just a ‘perfect’ house, but a home that reflects your spirit and provides a sanctuary for you and your loved ones. So, grab your gloves, pick a project, and start creating the stunning exterior you’ve always dreamed of!