
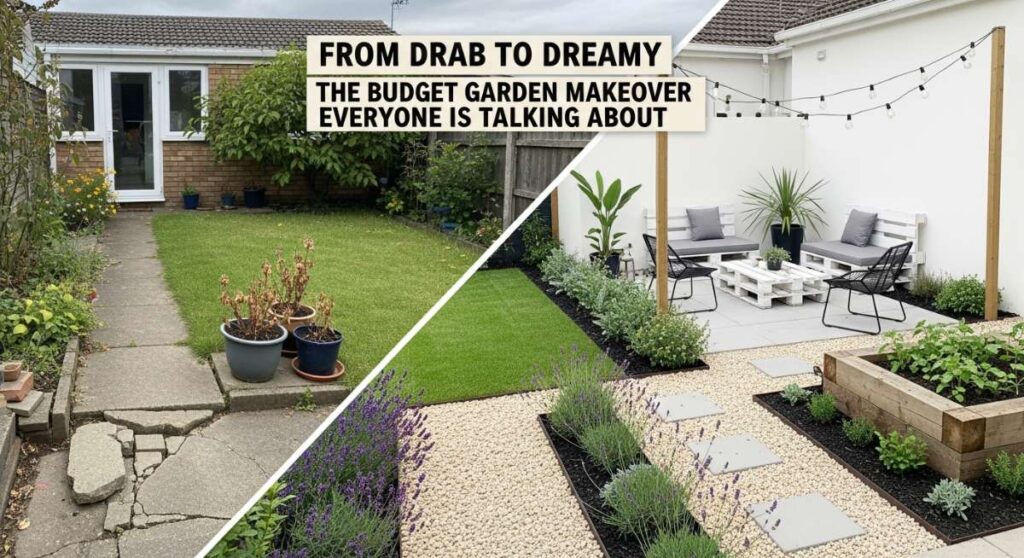
I still remember the first morning I looked out of my kitchen window and felt a pang of sadness at the sight of my patchy, overgrown lawn and the weathered, grey fence that looked more like a barrier than a sanctuary. We often overlook our outdoor spaces, seeing them as chores rather than extensions of our homes, but I realized that my soul needed a place to breathe. I wanted a garden that felt like a hug—a place for morning coffee, golden hour laughter, and a bit of dirt under my fingernails.
The journey from a drab, uninspired yard to a dreamy, viral-worthy oasis didn’t happen overnight, and surprisingly, it didn’t require a massive bank loan. It required a bit of creativity, a lot of passion, and the willingness to see the potential in the everyday. By focusing on textures, colors, and sustainable living, I transformed my backyard into a retreat that has become the talk of my neighborhood and my online community.
Today, I’m sharing the exact secrets, DIY projects, and lifestyle shifts that turned my outdoor space into a haven. Whether you’re looking to house some feathered friends or just want to create a minimalist corner for meditation, these tips are designed to help you curate a life and a garden that feels intentional, romantic, and utterly dreamy.
How to Maintain a Chicken Coop for Happy Healthy Hens

Why we love this
There is a profound sense of rhythm and peace that comes with keeping chickens; it’s a lifestyle choice that connects you directly to the source of your food and the cycles of nature. Imagine the soft, melodic clucking as you approach the coop in the morning, the scent of fresh pine shavings, and the warmth of a newly laid egg in your palm. Happy hens are curious, vibrant creatures with glossy feathers and bright eyes, and providing them with a pristine environment ensures they remain the joyful heart of your garden. A well-maintained coop isn’t just a chore; it’s a meditative practice that rewards you with organic fertilizer and the sweetest companions imaginable.
Essential Elements:
- High-quality pine shavings or hemp bedding
- A sturdy metal scraper for cleaning perches
- Organic diatomaceous earth for pest control
- Fresh, filtered water in a galvanized poultry fount
- Calcium-rich oyster shell supplements
- Automatic door system for safety
How to make it
- Perform a daily ‘spot check’ by removing any damp bedding or large deposits of manure near the roosting bars; this prevents ammonia buildup which can irritate the hens’ sensitive respiratory systems.
- Every Sunday, conduct a deep clean by completely shoveling out all old bedding and scrubbing the nesting boxes with a mixture of white vinegar and water to disinfect without using harsh chemicals.
- Check the ventilation slats to ensure they are clear of cobwebs and dust; visual cues for proper airflow include a lack of condensation on the interior walls and a fresh, earthy scent rather than a pungent one.
- Replenish the dust bath area with a mix of fine sand, wood ash, and a sprinkle of diatomaceous earth; this is the hens’ natural way of keeping mites away and is essential for their skin health.
- Inspect the perimeter of the coop for any signs of digging or loose wire; the security of your hens depends on a tightly sealed coop that is impenetrable to nocturnal predators.
How to Use Blue Digital Dividers for a Tidy Profile

Why we love this
In our modern age, your digital garden is just as important as your physical one, and there is something incredibly soothing about a curated online space that reflects your personal aesthetic. Using soft, cerulean or deep navy digital dividers on your profile or blog creates a sense of visual harmony that guides the eye and calms the mind. It’s like adding a clear blue sky to your digital horizon, providing a crisp, clean break between your thoughts and projects. This organization allows your creative work to shine, giving your audience a professional and polished experience that feels intentional and beautifully branded.
Essential Elements:
- Graphic design software (like Canva or Photoshop)
- A specific hex code palette (e.g., #A2C2E1 or #1B4F72)
- High-resolution PNG templates
- Consistent typography for overlay text
- Texture overlays (linen or watercolor effects)
How to make it
- Open your design workspace and set the canvas dimensions to a wide, thin rectangle, typically 1500px by 100px for a standard web divider.
- Select your chosen blue hue and apply it as a solid fill or a soft gradient; if you want a more organic feel, use a watercolor brush tool to layer different shades of blue for a sky-like effect.
- Add a subtle texture overlay by reducing the opacity of a ‘linen’ or ‘paper’ image to about 10%; this adds a tactile quality to the digital image that feels more premium and less flat.
- Export the file as a PNG with a transparent background to ensure it sits perfectly on any page color without an awkward white box around the edges.
- Upload the divider to your blog or social profile and use it to separate sections like ‘About Me,’ ‘Latest Projects,’ and ‘Contact Information,’ ensuring the spacing above and below the divider is uniform for a symmetrical look.
How to Select Concrete Colors for a Chic Outdoor Space

Why we love this
Concrete is no longer just a cold, industrial material; when treated with the right colors, it becomes a sophisticated canvas that anchors your entire outdoor design. We love the way a warm terracotta stain can make a patio feel like a Tuscan villa, or how a sleek, charcoal grey can provide a modern, high-end foundation for minimalist furniture. The texture of stained concrete is smooth yet grounded, and as the sun moves across the yard, the depth of the color shifts, creating a dynamic visual experience. It’s an affordable way to add permanent character and a touch of luxury to your garden’s footprint.
Essential Elements:
- Acid-based or water-based concrete stains
- Concrete sealer (gloss or matte finish)
- Pressure washer for preparation
- Painter’s tape and plastic sheeting
- High-quality rollers and sprayers
How to make it
- Begin by thoroughly cleaning the concrete surface with a pressure washer to remove all oils, dirt, and previous sealants; the concrete must be porous enough to absorb the new pigment.
- Perform a ‘water test’ by pouring a small amount of water on the surface; if it beads up, you need to grind or acid-etch the surface more, but if it soaks in, you are ready to color.
- Apply your chosen stain using a pump sprayer in circular, overlapping motions to avoid ‘lap lines’; for a variegated, natural stone look, use two slightly different shades of the same color family.
- Allow the stain to cure according to the manufacturer’s instructions—usually 4 to 24 hours—until the color looks consistent and dry to the touch across the entire slab.
- Apply two thin coats of a UV-resistant sealer; use a matte finish for a contemporary, organic look or a high-gloss finish to make the colors ‘pop’ and look perpetually wet and vibrant.
How to Add Lace Details for a Dreamy Romantic Aesthetic

Why we love this
Adding lace to a garden setting creates an ethereal, vintage charm that feels like stepping into a classic Victorian novel. The way light filters through the intricate patterns of a lace tablecloth or a hanging lace curtain creates ‘dappled light’ effects that are incredibly soft and flattering. It introduces a delicate, tactile contrast to the ruggedness of wood and stone, evoking a sense of nostalgia and whimsical romance. Whether it’s draped over a garden gate or used to soften a patio seating area, lace brings an air of elegance and femininity that makes every moment spent outdoors feel like a special occasion.
Essential Elements:
- Vintage lace tablecloths or runners
- Weatherproofing fabric spray
- Clothespins or decorative clips
- Fine-gauge lace ribbons
- Sheer lace outdoor curtains
How to make it
- Select high-quality lace with a heavy enough weight to hang beautifully; cotton-based lace is often more durable for outdoor use than purely synthetic versions.
- Spray all lace items with a clear, matte fabric protector that offers UV and water resistance; this prevents the delicate fibers from yellowing in the sun or molding in the humidity.
- Drape a lace runner over a weathered wooden garden table, securing it with heavy decorative stones or ‘tablecloth weights’ to ensure it doesn’t blow away in a breeze.
- For a dreamy photo backdrop, string a wire between two trees and hang floor-length lace curtains; use a low-heat iron to remove any harsh fold lines before hanging to ensure they flow gracefully.
- Incorporate lace ribbons by tying them around the necks of glass jars filled with wildflowers; this small detail ties the entire romantic aesthetic together across different areas of the garden.
How to Construct a Wood Trellis for Vertical Garden Success

Why we love this
A wood trellis is the architectural backbone of a vertical garden, providing a sturdy and beautiful framework for climbing roses, jasmine, or even vegetable vines like snap peas. We love the way natural wood ages over time, taking on a silvery patina that blends seamlessly into the greenery, and the structural height it adds to an otherwise flat yard. There is a specific joy in watching a tiny vine find its way up the lattice, eventually covering it in a lush blanket of leaves and blossoms. It’s a functional piece of art that maximizes space while adding a sense of privacy and old-world garden charm.
Essential Elements:
- Cedar or redwood slats (naturally rot-resistant)
- Galvanized wood screws
- Wood glue (exterior grade)
- Electric drill and miter saw
- Level and measuring tape
How to make it
- Cut your vertical support beams to the desired height—usually 6 to 7 feet—and lay them out on a flat surface, ensuring they are perfectly parallel using a framing square.
- Cut your horizontal slats to width; for a classic look, space them 4 to 6 inches apart, securing each one with a drop of exterior wood glue and two galvanized screws at every junction point.
- Check for ‘squareness’ after every three slats by measuring diagonally from corner to corner; if the measurements are identical, your trellis is perfectly straight.
- Sand any rough edges with 120-grit sandpaper to prevent the delicate climbing tendrils of your plants from getting snagged or damaged as they grow.
- Mount the trellis to a wall or fence using spacers (like small blocks of wood) to leave a 2-inch gap behind it; this allows for essential airflow and gives the plants room to wrap around the slats.
How to Renovate a Retro Ranch Exterior for Modern Charm

Why we love this
Retro ranch homes have a unique, low-profile silhouette that is just begging for a modern glow-up. We love the transformation of mid-century bones into a contemporary masterpiece through the use of bold contrasts, natural materials, and clean lines. By emphasizing the horizontal nature of the architecture and bringing in updated textures like horizontal wood slatting or matte black hardware, you can turn a dated exterior into a high-end, stylish residence. It’s about honoring the history of the home while infusing it with a fresh, airy energy that feels perfectly suited for today’s indoor-outdoor lifestyle.
Essential Elements:
- Modern paint palette (charcoal, navy, or off-white)
- Cedar siding accents
- Matte black house numbers and lighting
- Low-profile, structural landscaping
- Large-format glass entry door
How to make it
- Clean the brick or siding thoroughly and apply a high-quality masonry or exterior primer; for a modern look, choose a ‘flat’ or ‘eggshell’ finish rather than ‘glossy’ to emphasize the home’s texture.
- Identify a focal point, such as the entryway, and install vertical or horizontal cedar planks; the warmth of the wood against a dark paint color creates an instantly sophisticated, custom-built appearance.
- Replace dated, small light fixtures with oversized, geometric matte black lanterns; place them at eye level to draw the gaze and emphasize the home’s horizontal lines.
- Update the landscaping by removing overgrown bushes and replacing them with ‘architectural’ plants like horsetail reed, agaves, or ornamental grasses arranged in clean, linear rows.
- Swap out old door hardware for a modern ‘handleset’ in a matching matte black finish; the weight and feel of high-quality hardware are subtle cues that the home has been meticulously renovated.
How to Style Glass Yard Art for a Whimsical Garden Vibe
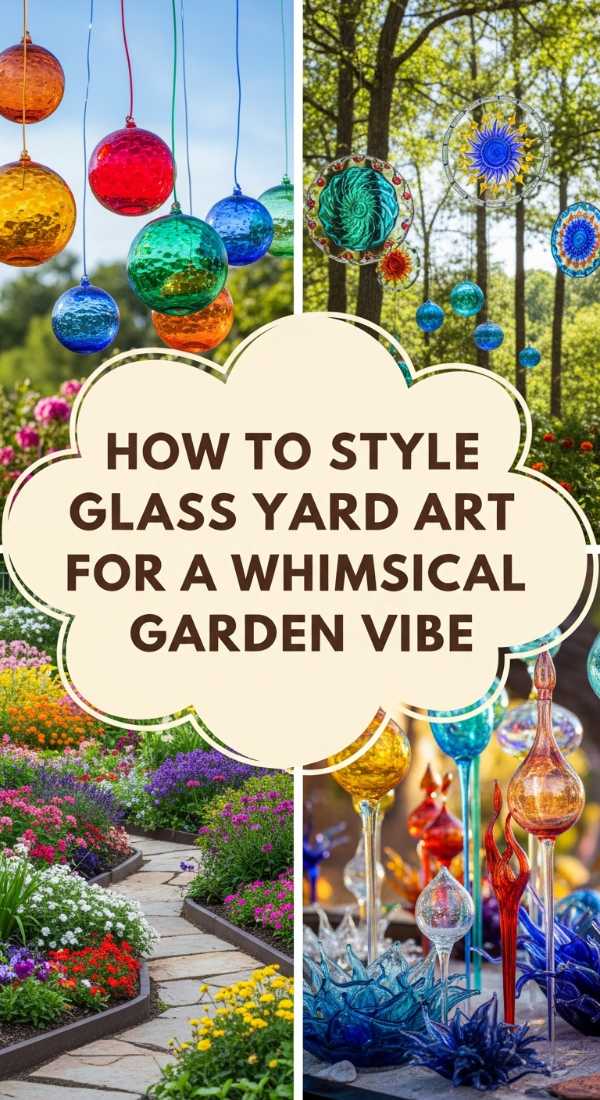
Why we love this
Glass yard art is like jewelry for your garden, catching the sunlight and scattering rainbows across your lawn. We love the unexpected pop of color and the delicate, luminous quality it brings to the greenery, creating a sense of wonder and whimsy. Whether it’s a hand-blown glass globe tucked among the ferns or a series of colorful glass stakes rising from a flower bed, these pieces add a layer of sophistication and artistry. They provide visual interest during the winter months when the flowers have faded, ensuring your garden remains a vibrant, soulful space all year round.
Essential Elements:
- Hand-blown glass garden globes
- Recycled glass bottle trees
- Stained glass suncatchers
- Copper or steel mounting rods
- Solar-powered glass pebbles
How to make it
- Position your glass art in areas that receive direct morning or late afternoon sun; ‘golden hour’ light will make the glass glow with an inner fire that is truly magical.
- Cluster glass globes in groups of three with varying heights; using odd numbers creates a more natural, aesthetically pleasing arrangement that mimics organic growth.
- For ‘bottle trees,’ ensure the central structure is buried at least 18 inches deep in a concrete footer or packed gravel to prevent it from tipping during high winds.
- Clean your glass pieces once a month with a soft cloth and a gentle glass cleaner to remove water spots and pollen, ensuring the clarity and brilliance of the color remain intact.
- Integrate solar-powered glass stones along a pathway; they charge during the day and provide a soft, bioluminescent glow at night that guides guests through your whimsical landscape.
How to Organize an Eco Friendly Backyard for Simple Living
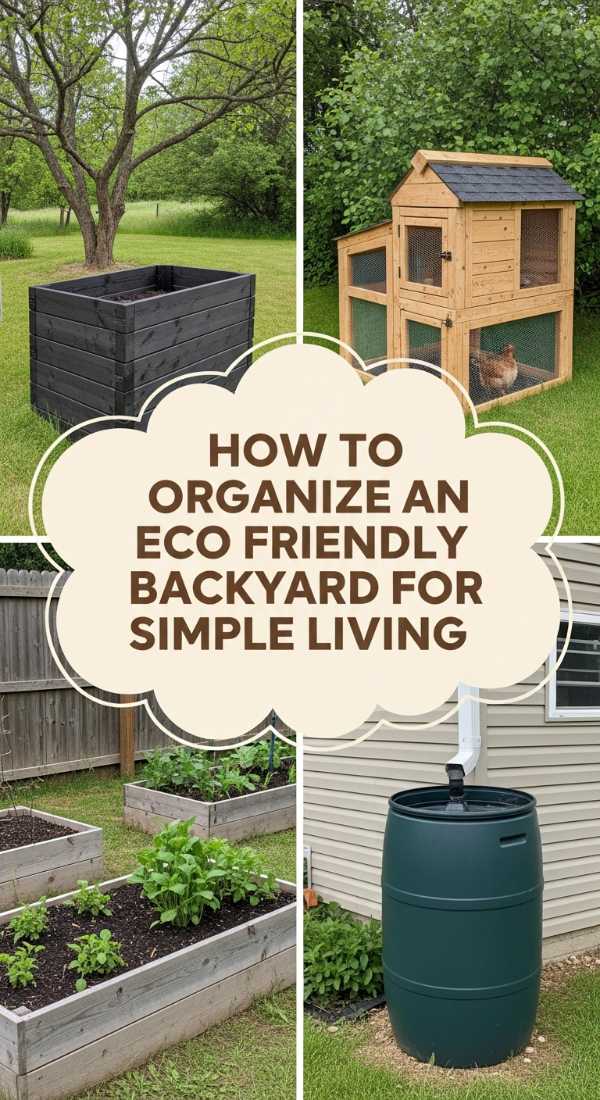
Why we love this
Organizing an eco-friendly backyard is about more than just sustainability; it’s about creating a lifestyle of ease, intention, and harmony with the planet. We love the way a well-planned garden can reduce waste through composting, conserve water with rain barrels, and provide a sanctuary for local pollinators like bees and butterflies. It feels good to know that your beautiful space is also a working ecosystem that gives back to the earth. This approach simplifies your outdoor chores, focusing on natural processes rather than chemical interventions, leading to a more relaxing and rewarding garden experience.
Essential Elements:
- Dual-chamber compost tumbler
- Rain harvesting barrels with brass spigots
- Native plant species (drought-tolerant)
- Mulch made from recycled organic matter
- Solar-powered garden task lighting
How to make it
- Designate a ‘utility zone’ in a discreet corner of the yard for your compost tumbler and rain barrels; keep this area organized with a small gravel pad to prevent mud and ensure easy access.
- Replace thirsty turf grass with native groundcovers or ‘clover lawns’ that require significantly less water and no chemical fertilizers to stay lush and green.
- Install a drip irrigation system connected to your rain barrels; this delivers water directly to the roots of your plants, minimizing evaporation and ensuring every drop is used efficiently.
- Create a ‘pollinator highway’ by planting clusters of nectar-rich flowers in sunny spots; visual cues for a healthy eco-backyard include the frequent presence of birds and beneficial insects.
- Use natural cedar mulch around the base of all plants to retain moisture and suppress weeds; this reduces the need for constant weeding and watering, leaning into the ‘simple living’ philosophy.
How to Create a Minimalist Patio for Total Relaxation
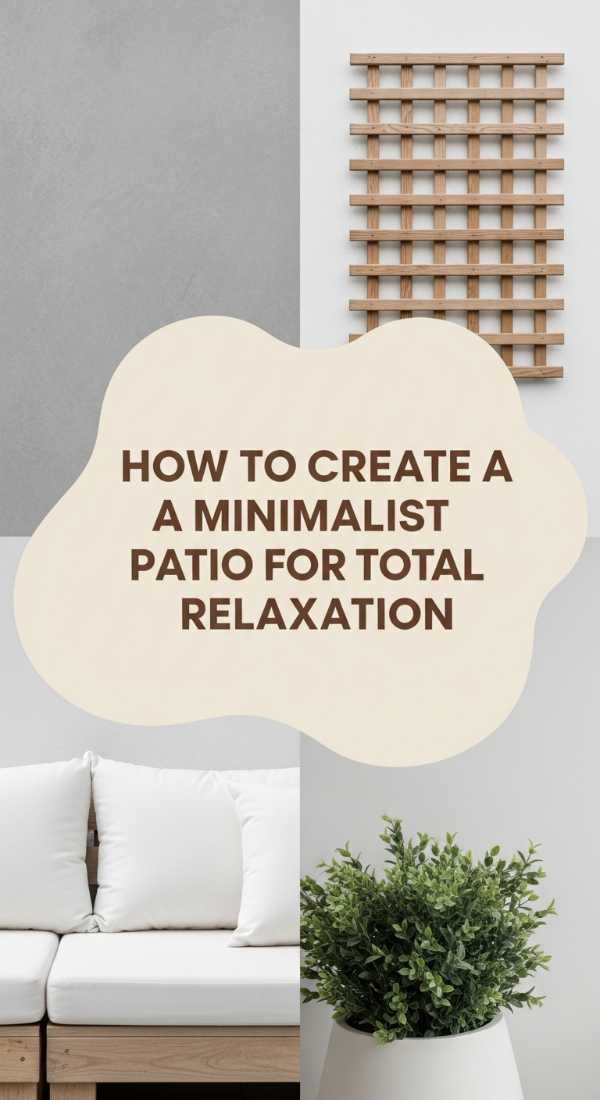
Why we love this
A minimalist patio is the ultimate antidote to the chaos of modern life, offering a clean, serene space where the mind can finally rest. We love the ‘less is more’ approach, where every piece of furniture is chosen for both its comfort and its sleek silhouette. By stripping away the clutter and focusing on a neutral color palette and high-quality materials, you create a sanctuary that feels incredibly spacious and calm. The air seems lighter, the view clearer, and the relaxation deeper when you are surrounded by simplicity and open space, making it the perfect spot for deep breaths and quiet contemplation.
Essential Elements:
- Low-profile modular outdoor sofa
- Concrete or natural stone coffee table
- Outdoor rug in a solid neutral tone
- Large, architectural potted plants
- Hidden storage for cushions and throws
How to make it
- Clear the entire patio of all current items and power wash the floor to create a ‘blank canvas’; visual clarity starts with a spotless foundation.
- Choose a monochromatic color scheme—such as shades of beige, grey, or white—and ensure that your furniture, rug, and planters all adhere strictly to this palette.
- Position your largest piece of furniture, like a modular sectional, to face the best view in your garden, leaving plenty of ‘negative space’ around it so the area doesn’t feel cramped.
- Select one or two large, statement planters rather than a dozen small ones; a single tall ‘Snake Plant’ or ‘Fiddle Leaf Fig’ provides a clean, green vertical element without the visual noise of multiple pots.
- Keep the surfaces clear; only bring out items like books or trays when they are being used, and store everything else in integrated hidden benches to maintain the minimalist aesthetic.
How to Customize Your Online Space for Professional Branding

Why we love this
Just as you curate your garden to reflect your soul, customizing your online space allows you to present your most authentic and professional self to the world. We love the empowerment that comes with having a digital home—be it a blog or a social media portfolio—that feels like a true extension of your personal brand. When your colors, fonts, and imagery are all in sync, it builds trust and recognition with your audience. It’s the difference between a cluttered yard and a designed landscape; one is a collection of things, while the other is a cohesive, inspiring story that people want to follow.
Essential Elements:
- Custom logo and brand mark
- Curated ‘Brand Board’ with 5-color palette
- Professional headshots and ‘hero’ images
- Uniform font pairings (Serif and Sans-Serif)
- Social media templates for consistency
How to make it
- Start by defining your ‘Brand Voice’—is it whimsical, modern, or rustic? This decision will dictate every visual choice you make from this point forward.
- Create a style guide that lists your specific hex codes and font names; use a classic Serif font for headings to show authority and a clean Sans-Serif for body text to ensure readability.
- Update your website’s ‘Header’ and ‘Footer’ with your custom logo and brand colors; ensure there is consistent ‘white space’ (padding) around your elements so the site feels breathable and professional.
- Use a consistent filter or editing style on all your photos; whether you prefer warm, sun-drenched tones or cool, crisp edits, keeping them uniform creates a cohesive visual ‘vibe’ across your entire online space.
- Regularly audit your profile links and ‘About’ sections to ensure the information is current and the language matches your evolving brand story, keeping your digital garden as well-tended as your physical one.
Conclusion
Transforming your life and your garden from drab to dreamy isn’t about how much money you spend, but how much heart you put into the details. From the way you care for your hens to the way you present your journey online, every choice is a brushstroke on the canvas of your lifestyle. I hope these projects inspire you to step outside, breathe in the fresh air, and start creating a sanctuary that truly reflects the person you are becoming. Your dreamy garden is waiting!