
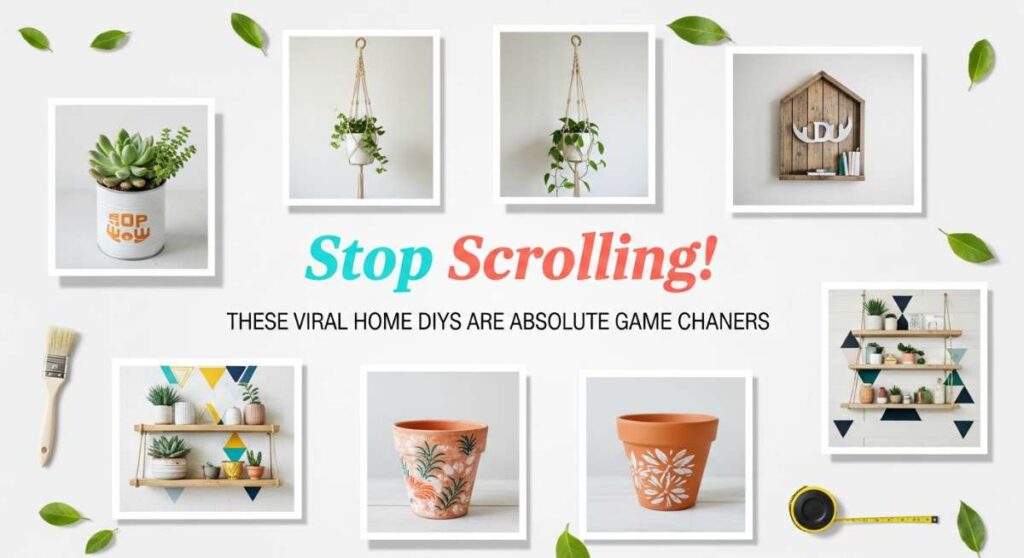
Have you ever spent hours scrolling through your feed, admiring those perfectly curated homes and thinking, ‘I wish my space looked like that,’ only to realize your own to-do list feels more like a chore than a dream? I’ve been there, staring at a dated ranch exterior or a soggy patch of yard, feeling completely overwhelmed. But here is the secret: those viral transformations aren’t just for influencers with massive budgets. They are for us—the weekend warriors who aren’t afraid to get a little dirt under our fingernails to create a sanctuary we truly love.
There is something so incredibly soul-soothing about taking a neglected corner of your home and breathing new life into it with your own two hands. Whether it’s the satisfying click of a custom vent cover fitting perfectly into place or the way the afternoon sun catches on a piece of handmade glass garden art, these projects change the energy of your home. They turn ‘just a house’ into a reflection of your creativity and a place where you can finally exhale and feel at peace.
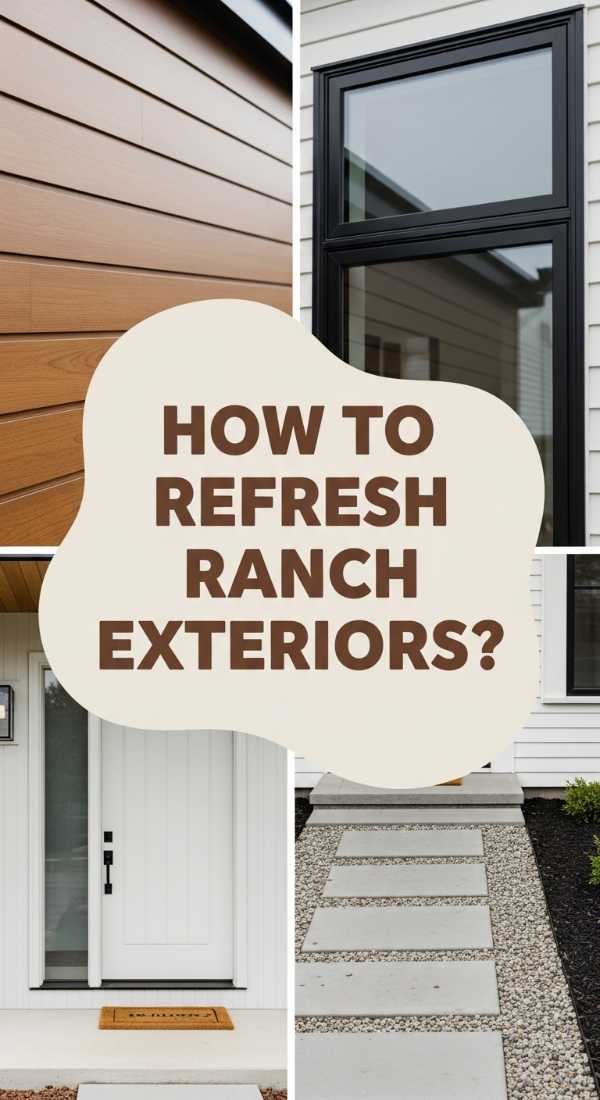
How to Modernize a Ranch Exterior for Instant Curb Appeal
Why we love this
There is a nostalgic charm to ranch-style homes, but they can often feel a bit heavy or stuck in the past with their low profiles and dated brick. Modernizing the exterior is like giving your home a deep, refreshing breath; it opens up the facade and highlights those clean, mid-century lines we all adore. We love the tactile contrast of smooth, matte charcoal paint against warm, organic cedar accents and the way a modern front door becomes a bold statement piece. Walking up to a refreshed ranch feels sophisticated and welcoming, offering a high-end aesthetic without the high-end price tag.
Essential Elements:
- Modern paint palette (charcoal, navy, or off-white)
- Natural wood accents (cedar planks or shutters)
- Contemporary house numbers and hardware
- Updated light fixtures with clean lines
- Minimalist landscaping
How to make it
- Begin by power washing the entire exterior to remove decades of dirt and loose paint; ensure the surface is bone-dry before proceeding to ensure maximum adhesion.
- Apply a high-quality masonry primer if you are painting brick, using a thick-nap roller to get into all the porous crevices for a seamless finish.
- Select a modern satin or flat finish paint for the siding; apply two coats using a professional-grade sprayer for an even, stroke-free appearance, paying close attention to the wind to avoid overspray.
- Measure and install cedar cladding around structural pillars or on a section of the facade to introduce warmth; use stainless steel screws to prevent rust streaks over time.
- Swap out old, ornate hardware for sleek, black, or brushed brass house numbers and lighting, ensuring all fixtures are level and properly sealed against the elements.
How to Create Whimsical Glass Yard Art for a Sparkly Garden

Why we love this
Imagine wandering through your garden as the golden hour hits, and suddenly, the sunlight catches a cluster of glass blooms, sending dancing rainbows across your lawn. This DIY glass yard art adds a touch of pure magic and whimsy, mimicking the delicate beauty of flowers that never wilt. We love the smooth, cool texture of the vintage glass plates and the way jewel-toned cobalt, amber, and emerald hues pop against the natural greenery. It’s a sensory delight that brings a sense of wonder and artistic flair to even the simplest flower bed, making your outdoor space feel like a hidden gallery.
Essential Elements:
- Vintage glass plates, bowls, and vases in various sizes
- Waterproof silicone adhesive (E6000 or similar)
- Copper pipes or sturdy rebar stakes
- Drill with a diamond-tipped bit (optional)
- Glass beads or marbles for centers
How to make it
- Source unique glassware from thrift stores, looking for pieces with interesting textures and scalloped edges that will catch the light effectively.
- Thoroughly clean and dry all glass pieces with rubbing alcohol to remove any oils or residues that might compromise the adhesive bond.
- Layer your glass pieces from largest to smallest to create a ‘flower’ shape, applying a generous bead of waterproof silicone adhesive between each layer and pressing firmly to remove air bubbles.
- Allow the ‘blooms’ to cure undisturbed for at least 24 to 48 hours in a dry, room-temperature environment to ensure the bond is rock-solid.
- Attach the glass flower to a copper pipe using more adhesive or by drilling a small hole in the center with a diamond bit; then, stake it into your garden at varying heights for a natural, layered look.
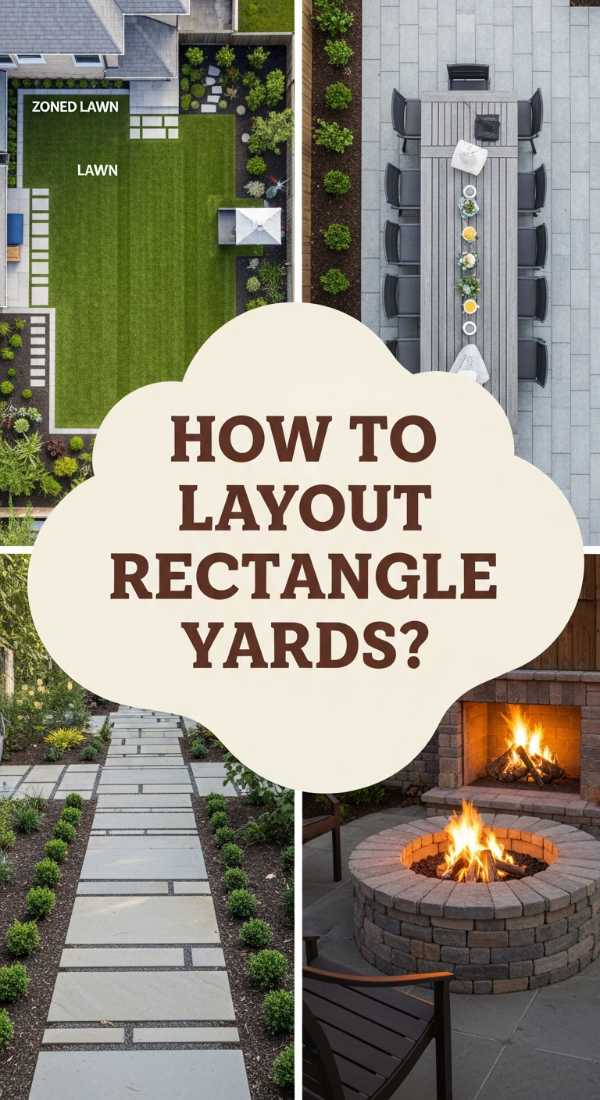
How to Design a Rectangular Backyard Layout for Maximum Functionality
Why we love this
Rectangular backyards can sometimes feel like a bowling alley—long, narrow, and difficult to zone—but with the right layout, they become masterclasses in functional design. We love the way ‘outdoor rooms’ create a sense of discovery, leading you from a cozy fire pit area to a lush dining space with purpose. The balance of hardscaping and soft greenery creates a rhythmic flow that feels intentional and grounded. There is a deep satisfaction in seeing every square inch of your lot utilized, turning a simple patch of grass into a multi-functional retreat for entertaining, relaxing, and playing.
Essential Elements:
- Zoning materials (pavers, decking, or gravel)
- Vertical elements like pergolas or trellises
- Pathways to connect different areas
- Strategic lighting for evening ambiance
- Low-maintenance border plants
How to make it
- Map out your zones on graph paper first, designating specific areas for dining, lounging, and gardening to ensure there is enough clearance for foot traffic.
- Use physical markers like spray paint or string lines in the actual yard to ‘test drive’ the layout and ensure the scale of each zone feels comfortable and not cramped.
- Install a central ‘anchor’ like a patio or deck using leveled crushed stone as a base to provide a stable, long-lasting surface for heavy furniture.
- Create visual separation between zones using vertical interest, such as a modern pergola or a row of tall ornamental grasses, which breaks up the long sightlines of the rectangular space.
- Lay down a defined pathway using stepping stones or pea gravel to guide the eye and feet naturally from the back door to the farthest point of the yard.
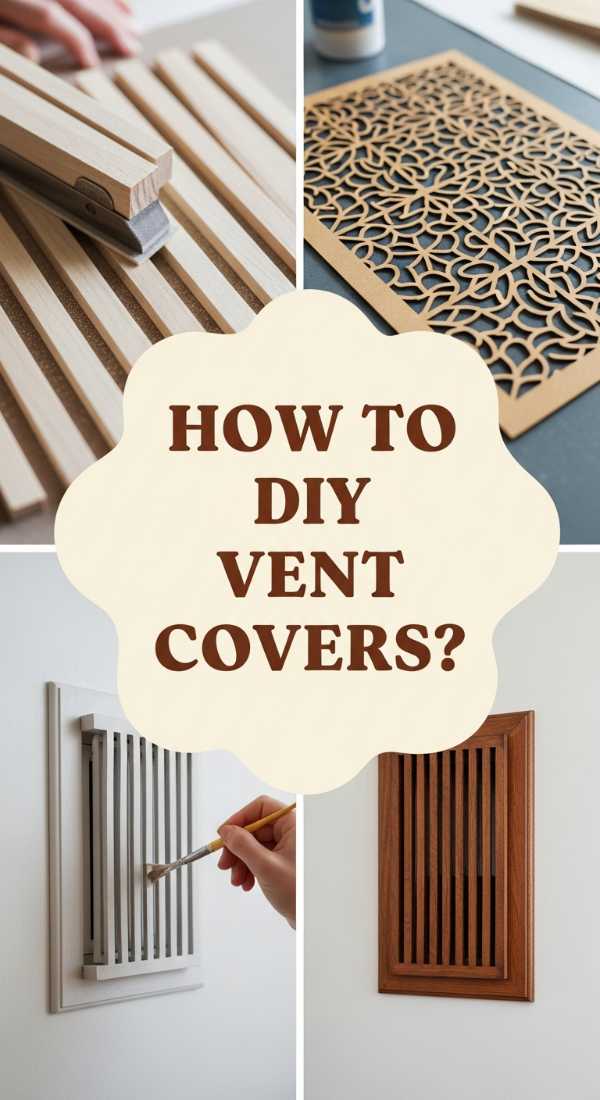
How to Craft a Custom Air Return Vent Cover for a Seamless Look
Why we love this
Nothing kills a room’s vibe faster than a clunky, beige metal vent cover staring back at you from a beautiful accent wall. Crafting a custom cover is the ultimate ‘hidden’ DIY that makes your home feel expensive and high-end without the designer price tag. We love the sleek, architectural feel of wooden slats and the way they blend seamlessly into the wall, providing necessary airflow while disappearing into the decor. It is a detail that feels polished and intentional, giving you that ‘Pinterest-perfect’ finish that makes guests ask, ‘Wait, where did you get that?’
Essential Elements:
- 1×2 or 1×3 wood slats (pine or oak)
- Miter saw or hand saw
- Wood glue and finishing nails
- Fine-grit sandpaper
- Stain or paint to match your trim
How to make it
- Measure the interior dimensions of your air return opening precisely, subtracting 1/8 inch on all sides to ensure the new cover fits snugly without scraping the paint.
- Construct a simple rectangular frame using your wood slats, using mitered corners for a professional look and securing them with wood glue and brad nails.
- Cut horizontal or vertical slats to fit within the frame, using spacers (like a scrap piece of wood) to ensure every gap is perfectly even for consistent airflow.
- Sand the entire assembly until it is buttery smooth, focusing on the edges to remove any splinters or rough patches that could catch dust.
- Finish the cover with a high-quality stain or a paint that matches your wall color, then secure it to the wall using magnetic catches for easy removal during filter changes.
How to Build a Budget Friendly Fence for Total Privacy
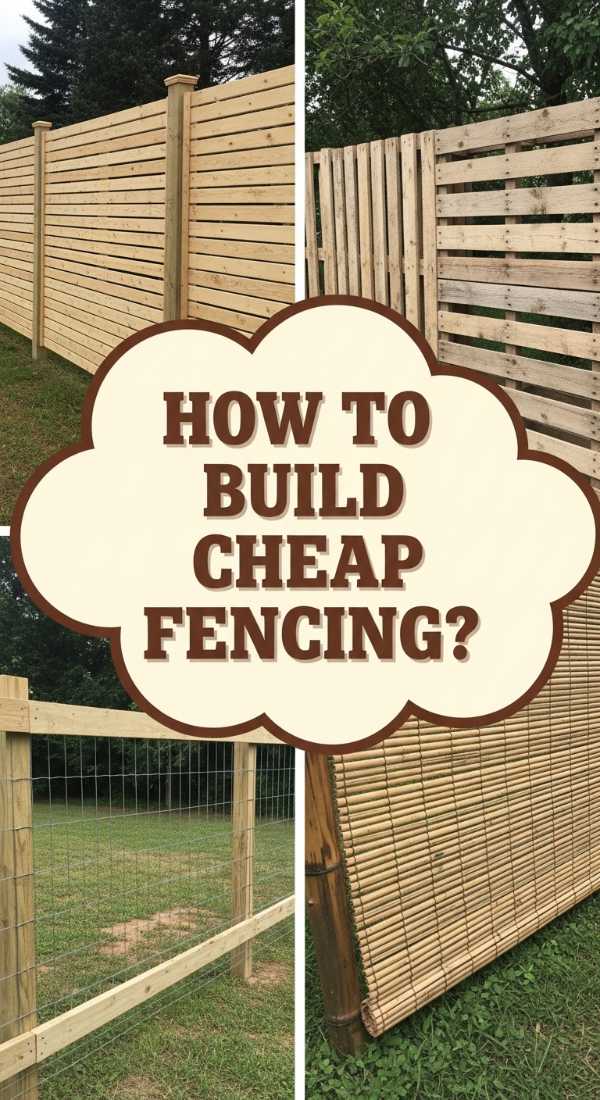
Why we love this
There is nothing quite like the feeling of stepping into your backyard and knowing you are in your own private sanctuary, shielded from the prying eyes of neighbors or the noise of the street. Building a budget-friendly fence is about more than just boundaries; it’s about creating a sense of security and intimacy. We love the raw, rustic texture of pressure-treated pine and the rhythmic pattern of the pickets against the horizon. It provides a clean, neutral backdrop for your garden to shine, and the peace of mind it offers is truly priceless, making every outdoor moment feel more personal.
Essential Elements:
- Pressure-treated 4×4 posts
- Horizontal 2×4 rails
- 6-foot dog-ear or flat-top pickets
- Fast-setting concrete mix
- Galvanized fence nails or screws
How to make it
- Mark your fence line using stakes and string, ensuring you are following local property line regulations and have called utility companies to flag underground lines.
- Dig post holes at least 24 inches deep (or below the frost line) and every 6 to 8 feet apart to ensure a sturdy foundation that won’t lean over time.
- Set your 4×4 posts in the holes, using a level to ensure they are perfectly vertical, and pour fast-setting concrete, adding water and letting it cure for 24 hours.
- Attach your horizontal 2×4 rails—one near the top, one in the middle, and one near the bottom—using galvanized screws to prevent rot and rust.
- Nail the pickets to the rails, using a spacer to ensure even gaps (or no gaps for total privacy), and finish with a high-quality exterior sealant to protect the wood from UV damage.
How to Style Outdoor Fake Flower Pots for Year Round Color

Why we love this
Let’s be honest: keeping real flowers alive in the scorching heat or freezing cold can be a full-time job. Styling high-quality UV-resistant ‘faux’ florals is the ultimate life hack for busy homeowners who want that lush, vibrant look without the daily watering. We love the burst of eternal color—deep fuchsias, bright yellows, and rich greens—that never fades or wilts. There is a tactile joy in ‘planting’ these stems and seeing your porch look perpetually in bloom. It’s a stress-free way to maintain curb appeal and bring a smile to your face every time you pull into the driveway, regardless of the season.
Essential Elements:
- High-quality UV-protected faux flowers and greenery
- Large, decorative outdoor planters
- Floral foam or heavy sand for weight
- Spanish moss or dried mulch for the top layer
- Wire cutters
How to make it
- Select faux florals that feature realistic leaf textures and varying shades of color to mimic the natural imperfections of real plants.
- Fill the bottom of your planter with heavy stones or sand to prevent it from blowing over in high winds, then wedge a block of dense floral foam on top.
- Begin by ‘planting’ your tallest stems in the center to create height, using wire cutters to trim the stems to the appropriate length.
- Work your way outward with ‘filler’ flowers and ‘spiller’ greenery (like faux ivy) that drapes over the edge of the pot for a realistic, overflowing look.
- Cover the visible foam with a layer of real Spanish moss or wood mulch to hide the mechanics and give the arrangement an authentic, grounded appearance.
How to Fix Drainage Around the House for a Dry Foundation

Why we love this
While drainage might not be the most ‘glamorous’ DIY, there is an immense sense of relief and pride in knowing your home’s foundation is protected from the elements. We love the functional beauty of a well-designed drainage system—seeing water diverted away from the house during a heavy storm is incredibly satisfying. It’s a project that saves your basement from dampness and your foundation from costly cracks. There is a rugged, hands-on appeal to digging into the earth and creating a solution that works with nature rather than against it, ensuring your home stays dry and sturdy for decades.
Essential Elements:
- Perforated drainage pipe and non-perforated pipe
- Landscape fabric to prevent silt clogging
- Gravel or river rock
- Catch basins or downspout adapters
- A sturdy shovel and a level
How to make it
- Identify the low spots where water pools and dig a trench that slopes away from the foundation at a rate of at least 1 inch of drop for every 8 feet of length.
- Line the trench with heavy-duty landscape fabric, leaving enough extra on the sides to wrap over the top of the pipe later.
- Lay a 2-inch bed of gravel in the trench, then place your drainage pipe on top, ensuring the holes are facing downward to allow water to enter from the bottom.
- Cover the pipe with more gravel, then wrap the excess landscape fabric over the top like a burrito to prevent dirt from infiltrating and clogging the system.
- Backfill the remaining trench with soil and sod, or finish with decorative river rock to create a functional and attractive dry creek bed.
How to Plant Flower Beds in Front of the House for Lush Beauty
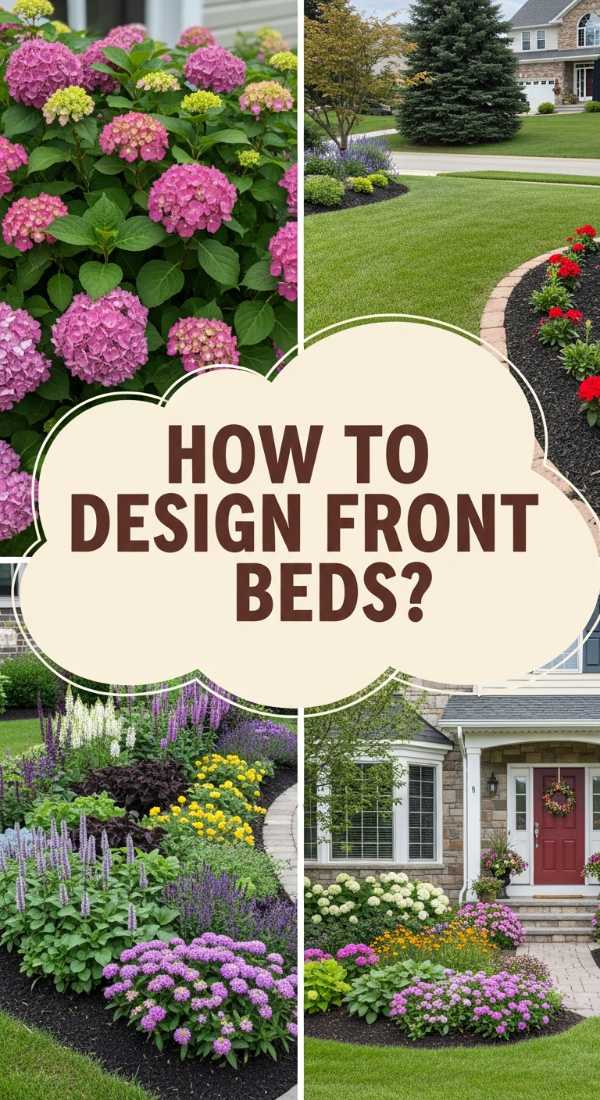
Why we love this
A well-planted flower bed is like the jewelry of a home; it adds sparkle, color, and personality to the architecture. We love the fragrance of fresh lavender and roses wafting through the air and the visual feast of layered heights and textures. From the soft, silvery leaves of lamb’s ear to the bold, architectural spikes of salvia, a front-yard garden creates a soft transition between the street and your private world. It’s a living, breathing project that evolves with the seasons, offering a sense of peace and a deep connection to the natural world every time you step outside.
Essential Elements:
- Selection of perennials and annuals suited for your zone
- High-quality garden soil and organic compost
- Mulch (cedar or hardwood)
- Edging material (stone, brick, or metal)
- Garden trowel and gloves
How to make it
- Define the shape of your flower bed using a garden hose to create soft, organic curves that lead the eye toward the front entrance.
- Remove the grass and weeds, then till the soil to a depth of 12 inches, mixing in a generous amount of organic compost to provide a nutrient-rich base for your plants.
- Arrange your plants while they are still in their pots, placing ‘thrillers’ (tall plants) in the back, ‘fillers’ in the middle, and ‘spillers’ or low-growers at the front edge.
- Dig holes twice as wide as the root ball, gently tease the roots if they are bound, and plant them at the same depth they were in the nursery container.
- Apply a 3-inch layer of mulch across the entire bed to retain moisture and suppress weeds, taking care to keep the mulch a few inches away from the plant stems.
How to Build a Cozy Duck Enclosure for Happy Birds

Why we love this
There is something undeniably joyful about the cheerful ‘quack’ of happy ducks and the sight of them waddling around a safe, cozy home. Building a duck enclosure is a project of pure love, providing your feathered friends with a secure retreat from predators and the elements. We love the rustic, farmhouse aesthetic of a wooden coop and the way it becomes a focal point of a hobby farm. Watching your ducks settle into a bed of clean straw or splash in a protected water area is incredibly rewarding, bringing a sense of life and animation to your backyard that is simply infectious.
Essential Elements:
- Hardware cloth (not chicken wire) for predator protection
- Pressure-treated lumber for the frame
- Plywood for the walls and nesting boxes
- Roofing material (shingles or corrugated metal)
- A secure latching system
How to make it
- Design the enclosure with at least 4 square feet of floor space per duck inside the coop and 10 square feet per duck in the outdoor run.
- Build a sturdy frame using 2×4 lumber, ensuring the coop is elevated at least 6-12 inches off the ground to prevent dampness and discourage rodents from nesting underneath.
- Wrap the outdoor run in 1/2-inch hardware cloth, burying the mesh 12 inches into the ground or creating a ‘skirt’ to prevent predators like foxes or raccoons from digging under.
- Install a sloped roof with a slight overhang to ensure rain sheds away from the entrance, and add plenty of ventilation near the top to prevent moisture buildup inside.
- Construct a wide door for easy cleaning and a smaller ramp for the ducks to enter, ensuring all doors have heavy-duty, predator-proof carabiner latches.
How to Install a Rock River Bed for a Stunning Landscape

Why we love this
A rock river bed is the perfect marriage of form and function, offering a maintenance-free landscape feature that looks like it was plucked straight from a mountain stream. We love the cool, smooth texture of river stones and the way the different sizes—from tiny pebbles to large ‘anchor’ boulders—create a sense of natural movement and depth. It provides a striking visual contrast to green lawns and colorful flower beds, and it’s an ingenious way to handle heavy runoff without the need for traditional pipes. It brings a grounded, Zen-like energy to the garden that feels both ancient and modern.
Essential Elements:
- River rocks in varying sizes (1 inch to 10 inches)
- Large decorative boulders for accents
- Heavy-duty landscape fabric
- U-shaped landscape staples
- Shovel and steel rake
How to make it
- Trace a meandering, natural-looking path for your river bed, avoiding straight lines which look artificial; aim for varying widths to mimic a real stream.
- Excavate the path to a depth of about 4-6 inches, creating a slight ‘V’ shape in the center to help channel water effectively.
- Lay down heavy-duty landscape fabric to prevent weeds from growing through the stones, and secure it firmly with landscape staples every 2 feet.
- Place your largest ‘anchor’ boulders first at the bends of the ‘river’ to create a natural look, then fill in the base with medium-sized stones.
- Finish by scattering smaller pebbles around the edges to soften the transition to the surrounding landscape, ensuring all fabric is completely covered for a polished look.
Transforming Your Space, One DIY at a Time
Home improvement isn’t just about the finished product; it’s about the confidence you build with every swing of the hammer and every plant you tuck into the earth. These viral DIYs are more than just trends—they are opportunities to take ownership of your environment and create a place that truly nourishes your spirit. Whether you start with a small vent cover or tackle a full ranch modernization, remember that every step forward is a victory. So, put down the phone, pick up your tools, and start creating the home you’ve always dreamed of. You’ve got this!