
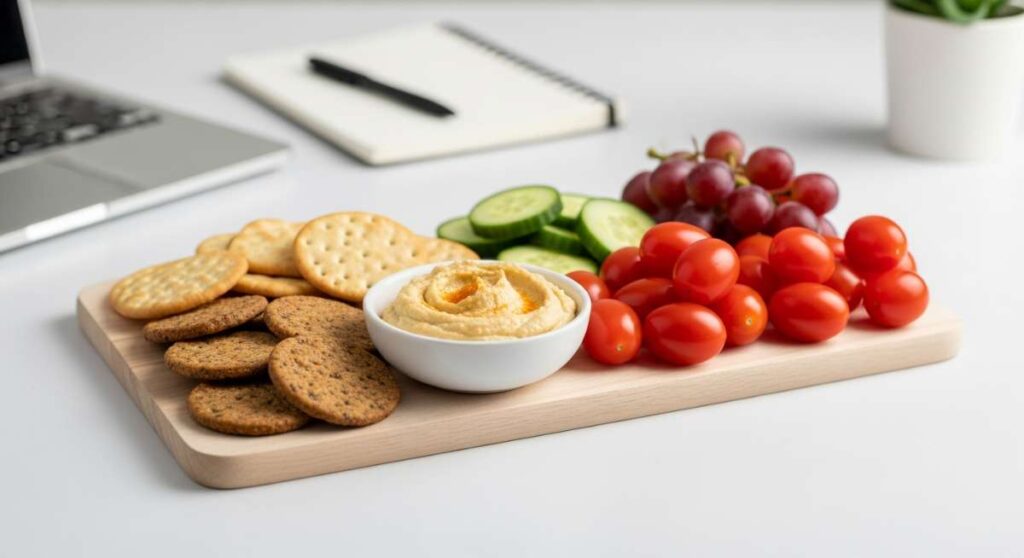
Why This Simple Snack Board is Every Blogger’s Secret Weapon
There is a specific kind of magic that happens when you set down a massive, overflowing board in the center of a table. It’s not just about the aesthetic—though, let’s be honest, the Instagram-worthiness is a huge plus—it’s about the way it invites everyone to lean in, linger, and share. As bloggers, our lives are often a whirlwind of deadlines and lighting setups, but the ‘Simple Food Board’ has become my ultimate secret weapon for entertaining without the meltdown.
I remember the first time I ditched the traditional three-course dinner for a curated spread of finger foods and mini-meals. The tension in the room immediately evaporated. There’s something so human and warm about picking exactly what you want, when you want it. It turns a meal into an experience, and today, I’m sharing the foundational recipes that make my boards the talk of the town every single time.
How to Get the Ultimate Crispy Roast Potatoes?

Why we love this
There is nothing quite as soul-satisfying as the audible crunch of a perfectly roasted potato yielding to a fluffy, cloud-like interior. These golden gems carry the scent of rosemary and toasted garlic, filling the kitchen with a cozy aroma that feels like a warm hug on a cold day. The contrast between the rugged, salty exterior and the buttery center is a sensory delight that makes them the undisputed star of any snack board spread.
Ingredients
- 2 lbs Yukon Gold potatoes
- 1/4 cup extra virgin olive oil
- 4 cloves garlic, smashed
- 2 sprigs fresh rosemary
- 1 tsp sea salt
- 1/2 tsp cracked black pepper
How to make it
- Start by peeling your potatoes and cutting them into uniform 2-inch chunks to ensure even cooking. Place them in a large pot of cold, heavily salted water.
- Bring the pot to a boil and cook the potatoes for exactly 8-10 minutes. You want them tender on the outside but still firm in the middle; use a fork to check—it should slide in with slight resistance.
- Drain the potatoes and let them steam-dry in the colander for 2 minutes. This is the pro secret: shake the colander vigorously to roughen up the edges. That ‘potato fluff’ on the surface is what turns into a crispy crust later.
- Preheat your oven to 425°F (220°C) and place a heavy baking sheet inside to get screaming hot.
- In a bowl, toss the roughed-up potatoes with olive oil, salt, and pepper. Carefully spread them onto the hot baking sheet in a single layer.
- Roast for 45-50 minutes, turning them every 15 minutes. In the last 10 minutes, toss in the smashed garlic and rosemary sprigs to infuse the oil without burning the herbs. Remove when they are deep mahogany gold and sound hollow when tapped.
How to Master the Perfect Slow Roasted Beef?

Why we love this
Slow-roasted beef is the epitome of rustic elegance, offering a deep, umami-rich fragrance that lingers in the air long before the meal begins. When sliced thin, the meat is incredibly tender, practically melting on the tongue with a succulent richness that pairs beautifully with sharp horseradish or tangy pickles. It adds a grounding, sophisticated element to your board that makes the entire spread feel curated and luxurious.
Ingredients
- 3 lb Top Sirloin or Eye of Round roast
- 3 tbsp olive oil
- 2 tbsp kosher salt
- 1 tbsp black pepper
- 1 tbsp dried thyme
- 4 cloves minced garlic
How to make it
- Remove the beef from the refrigerator at least 1 hour before cooking to bring it to room temperature. This ensures the center cooks at the same rate as the exterior.
- Pat the meat completely dry with paper towels. Moisture is the enemy of a good sear. Rub the entire roast with olive oil, then generously coat with the salt, pepper, thyme, and minced garlic mixture, pressing the spices into the meat.
- Preheat your oven to a low 250°F (120°C). This low-and-slow method prevents the protein fibers from tightening, resulting in edge-to-edge pink perfection.
- Heat a cast-iron skillet over high heat until it smokes slightly. Sear the roast for 2-3 minutes on every single side until a dark brown crust forms.
- Transfer the roast to a wire rack set over a baking sheet. Insert a meat thermometer into the thickest part.
- Roast until the internal temperature reaches 130°F (54°C) for medium-rare, which usually takes about 60-90 minutes. Remove from the oven and tent loosely with foil, letting it rest for at least 20 minutes before carving paper-thin slices.
How to Bake the Softest Chewy Chocolate Chip Cookies?

Why we love this
There is a nostalgic comfort in a warm chocolate chip cookie that appeals to the child in everyone. These cookies feature ripples of dark chocolate nestled in a dough that tastes of toasted brown butter and vanilla bean, offering a texture that is slightly crisp at the edges and decadently doughy in the center. The smell of caramelizing sugar wafting from the oven creates an atmosphere of pure bliss that completes any food board experience.
Ingredients
- 1 cup unsalted butter, browned and cooled
- 3/4 cup brown sugar
- 3/4 cup granulated sugar
- 1 large egg + 1 yolk
- 2 tsp vanilla extract
- 2 1/4 cups all-purpose flour
- 1 tsp baking soda
- 1 tsp sea salt
- 1.5 cups dark chocolate chunks
How to make it
- In a small saucepan, melt the butter over medium heat, swirling constantly until it foams and turns a nutty golden brown. Immediately transfer to a bowl and let it cool until it reaches a soft solid state.
- Cream the brown butter and both sugars together using a stand mixer for 3-4 minutes until the mixture looks pale and fluffy.
- Add the egg, extra yolk (for chewiness), and vanilla extract. Beat on medium speed for another minute until fully emulsified.
- Sift the flour, baking soda, and salt into the wet ingredients. Fold by hand with a spatula just until no white streaks remain—overmixing leads to tough cookies.
- Fold in the dark chocolate chunks. Now, the critical step: chill the dough in the fridge for at least 2 hours (or up to 24). This hydrates the flour and deepens the flavor.
- Preheat oven to 350°F (175°C). Scoop rounded tablespoons of dough onto a parchment-lined sheet, spacing them 3 inches apart. Bake for 10-12 minutes until the edges are just barely golden but the centers still look slightly underdone. Let them cool on the pan for 10 minutes to set.
How to Cook Authentic Al Dente Italian Pasta?

Why we love this
A bowl of perfectly cooked pasta is a masterclass in simplicity, offering a satisfying chew that acts as the perfect canvas for vibrant sauces. When done correctly, the pasta retains its structural integrity, releasing a gentle wheaty aroma that speaks of quality ingredients. It’s a versatile addition to a board, whether served in mini-bowls with pesto or tossed in a light lemon oil, providing a hearty, comforting texture that fills the belly and the soul.
Ingredients
- 1 lb high-quality bronze-cut pasta
- 6 quarts water
- 3 tbsp sea salt
- 1/2 cup reserved pasta water
- 2 tbsp high-quality olive oil
How to make it
- Fill a large stockpot with 6 quarts of water. Use a large pot so the pasta has room to move and won’t stick together.
- Bring the water to a rolling, aggressive boil. Add the sea salt—it should taste ‘like the sea.’ This is your only chance to season the pasta itself.
- Add the pasta all at once. Stir immediately and frequently for the first 2 minutes to prevent the starches from bonding the noodles together.
- Check the package instructions for the ‘al dente’ time, but start tasting the pasta 2 minutes before that time. ‘Al dente’ means ‘to the tooth’—it should have a firm bite in the center with no white floury ring visible inside.
- Before draining, dip a measuring cup into the pot and save at least 1 cup of the starchy pasta water. This is liquid gold for emulsifying sauces.
- Drain the pasta (do not rinse!) and immediately toss it into your warm sauce over low heat, adding splashes of the reserved water to create a glossy coating that clings to every strand.
How to Pan-Sear the Juiciest Ribeye Steak?

Why we love this
A pan-seared steak is a sensory explosion, from the rhythmic sizzling of the meat hitting the hot iron to the intoxicating scent of garlic-basted butter. The crust is dark and savory, while the interior remains a vibrant, juicy pink that overflows with rich, beefy flavor. It’s the ultimate high-protein anchor for a snack board, offering a steakhouse-quality experience that feels incredibly special yet effortlessly approachable.
Ingredients
- 1.5-inch thick Ribeye steak
- 2 tbsp neutral oil (like grapeseed)
- 3 tbsp unsalted butter
- 3 cloves garlic, smashed
- 2 sprigs fresh thyme
- Flaky sea salt
How to make it
- Take the steak out of the fridge 45 minutes before cooking and season it aggressively with kosher salt on all sides. This allows the salt to penetrate the fibers and draw out moisture for a better sear.
- Pat the steak dry with paper towels right before cooking. Heat a cast-iron skillet over high heat until the oil is shimmering and just beginning to smoke.
- Lay the steak in the pan away from you to avoid splashes. Press it down slightly to ensure contact. Sear undisturbed for 3-4 minutes until a thick, dark crust forms.
- Flip the steak. Immediately add the butter, smashed garlic, and thyme to the pan.
- Tilt the pan slightly so the melting butter pools at the bottom. Use a large spoon to continuously baste the hot, aromatically infused butter over the steak for the final 3 minutes of cooking.
- Remove the steak when it reaches 130°F (54°C) for medium-rare. Transfer to a cutting board and let it rest for a full 10 minutes. Slice against the grain and finish with a sprinkle of flaky sea salt.
How to Make Zesty Lemon Butter Chicken?

Why we love this
This dish is a bright, sunny addition to any table, featuring tender chicken bathed in a velvety sauce that balances sharp citrus with creamy richness. The aroma of simmering lemon zest and white wine is enough to make anyone’s mouth water, while the golden-brown skin of the chicken provides a satisfying crackle. It’s light yet indulgent, making it the perfect bridge between heavier meats and fresh vegetable components.
Ingredients
- 4 boneless, skin-on chicken thighs
- 1/2 cup dry white wine
- Juice and zest of 1 large lemon
- 4 tbsp cold butter, cubed
- 1 tbsp capers
- Fresh parsley for garnish
How to make it
- Season the chicken thighs with salt and pepper. In a stainless steel skillet over medium-high heat, add a splash of oil and place the chicken skin-side down.
- Weight the chicken down with a second heavy pan to ensure maximum skin contact. Sear for 6-8 minutes until the skin is deep gold and very crispy. Flip and cook for another 4 minutes until done. Remove chicken and set aside.
- Pour off excess fat but keep the browned bits (the fond). Pour in the white wine to deglaze, scraping the bottom of the pan with a wooden spoon.
- Let the wine reduce by half, then stir in the lemon juice and zest. Lower the heat to low.
- Whisk in the cold butter one cube at a time. This technique, called ‘monter au beurre,’ creates a thick, glossy emulsion that won’t break.
- Add the capers, return the chicken to the pan just to warm through (keep the skin above the sauce to stay crispy), and garnish with fresh chopped parsley.
How to Toss a Refreshing Strawberry Spinach Salad?

Why we love this
This salad is a celebration of texture and color, offering a refreshing pop of sweetness that cuts through the savory elements of a snack board. The crisp bite of fresh spinach leaves paired with the juicy, floral notes of ripe strawberries and the creamy tang of goat cheese creates a harmonious balance. It feels light and virtuous, yet the addition of toasted nuts and a zingy dressing makes it feel like a true gourmet treat.
Ingredients
- 5 oz baby spinach
- 1 pint fresh strawberries, sliced
- 1/4 cup red onion, thinly shaved
- 1/2 cup crumbled goat cheese
- 1/2 cup candied pecans
- 3 tbsp balsamic glaze
How to make it
- Wash the baby spinach thoroughly and use a salad spinner to ensure it is bone-dry. Wet leaves will make the dressing slide off and cause wilting.
- Place the spinach in a large, wide bowl. Add the thinly shaved red onions. Pro tip: soak the onions in ice water for 10 minutes before adding to remove the harsh ‘bite.’
- Scatter the sliced strawberries over the top. Use berries that are bright red all the way to the stem for the best natural sweetness.
- Just before serving, crumble the goat cheese over the salad. Use cold cheese so it crumbles into distinct nuggets rather than smearing.
- Add the candied pecans for a necessary crunch. If you don’t have candied, toasted walnuts or almonds work beautifully too.
- Drizzle the balsamic glaze in a zig-zag pattern across the top. Do not toss the salad until the very moment of service to keep the spinach leaves from becoming soggy under the acidity.
How to Build the Ultimate Roasted Veggie Bowl?

Why we love this
There is something deeply satisfying about a bowl filled with the rainbow, where each vegetable is roasted to its sweet, caramelized peak. The combination of earthy beets, charred broccoli, and tender sweet potatoes provides a variety of textures that make every bite a new discovery. Drizzled with a creamy tahini sauce, this bowl offers a grounded, wholesome energy that leaves you feeling nourished and vibrant.
Ingredients
- 1 sweet potato, cubed
- 1 head broccoli, cut into florets
- 1 cup chickpeas, drained and dried
- 2 cups cooked quinoa
- 2 tbsp tahini
- 1 tbsp maple syrup
How to make it
- Preheat your oven to 400°F (200°C). On a large sheet pan, toss the sweet potato cubes and chickpeas with olive oil, cumin, and smoked paprika.
- On a separate pan, toss the broccoli florets with oil and salt. Keeping them separate allows you to pull the broccoli out earlier if it chars faster than the potatoes.
- Roast the potatoes/chickpeas for 25-30 minutes and the broccoli for 15-20 minutes. You are looking for ‘blistered’ edges on the broccoli and a soft, fork-tender interior for the potatoes.
- While the veggies roast, whisk together the tahini, maple syrup, lemon juice, and a splash of warm water until it reaches a pourable, creamy consistency.
- Fluff your pre-cooked quinoa with a fork and divide it into shallow bowls.
- Arrange the roasted vegetables and crispy chickpeas over the quinoa. Drizzle generously with the tahini dressing and finish with a sprinkle of hemp seeds or fresh cilantro.
How to Bake the Gooiest Garlic Cheesy Bread?

Why we love this
Garlic cheesy bread is the ultimate crowd-pleaser, emitting a heavenly scent of toasted dough and melted fats that draws everyone to the table. The bread features a dramatic cheese pull that is as fun to eat as it is delicious, with a buttery garlic spread that seeps into every crevice. It’s the perfect vessel for dipping into soups or simply enjoying on its own as the ultimate comfort food component of your board.
Ingredients
- 1 loaf Italian bread or Sourdough
- 1/2 cup softened salted butter
- 4 cloves garlic, grated
- 1 cup shredded mozzarella
- 1/2 cup grated Parmesan
- 1 tsp dried oregano
How to make it
- Preheat your oven to 375°F (190°C). Slice the loaf of bread in half lengthwise, placing both halves cut-side up on a foil-lined baking sheet.
- In a small bowl, mix the softened butter with the grated garlic and dried oregano. Use a spatula to spread this mixture thick and even over the entire surface of the bread, making sure to hit the very edges.
- Bake the buttered bread for 5 minutes. This ‘pre-toast’ ensures the bread stays crispy and doesn’t get soggy once the cheese melts.
- Remove from the oven and pile on the shredded mozzarella and Parmesan. The mix of mozzarella (for the pull) and Parmesan (for the salt/flavor) is key.
- Return to the oven for another 10-12 minutes. For the final touch, turn on the broiler for 1-2 minutes until the cheese is bubbling and has small brown spots.
- Let it stand for 2 minutes before slicing into 2-inch strips. This allows the cheese to set slightly so it doesn’t all slide off when cut.
How to Simmer a Rich and Hearty Beef Chili?
[IMAGE_10]
Why we love this
A bowl of hearty chili is like a campfire in a bowl—smoky, spicy, and deeply warming. The complex layers of flavor from toasted spices and slow-simmered beef create a thickness that is incredibly satisfying to scoop up with a piece of crusty bread. It provides a rustic, bold counterpoint to the fresher elements on your board, making the meal feel complete and substantially filling.
Ingredients
- 1 lb ground beef (80/20 mix)
- 1 large onion, diced
- 2 tbsp chili powder
- 1 tsp unsweetened cocoa powder (secret ingredient!)
- 1 can (15 oz) kidney beans
- 1 can (28 oz) crushed tomatoes
How to make it
- In a large Dutch oven over medium-high heat, brown the ground beef. Break it into small crumbles with a wooden spoon. Drain about 80% of the fat, leaving just enough to cook the onions.
- Add the diced onions and sauté for 5 minutes until translucent and soft.
- Add the chili powder, cumin, and the cocoa powder. The cocoa doesn’t make it taste like chocolate; it adds a deep, dark ‘midnight’ richness to the beef. Toast the spices for 1 minute until fragrant.
- Pour in the crushed tomatoes and the kidney beans (rinsed and drained). If the mixture looks too thick, add half a cup of beef broth.
- Reduce the heat to low and simmer, uncovered, for at least 45 minutes. Stir every 15 minutes to prevent the bottom from scorching. The liquid should reduce until the chili is thick enough to hold a spoon upright.
- Taste and adjust seasoning with salt or a pinch of sugar if the tomatoes are too acidic. Serve in small crocks on your board, topped with a dollop of sour cream and chives.
Conclusion
Building a snack board isn’t just about the recipes; it’s about the permission to play with your food. Whether you’re hosting a formal brunch or just want to make a Tuesday night feel like a celebration, these ten staples provide the perfect foundation. Start with one, or try them all—your followers (and your taste buds) will thank you!