
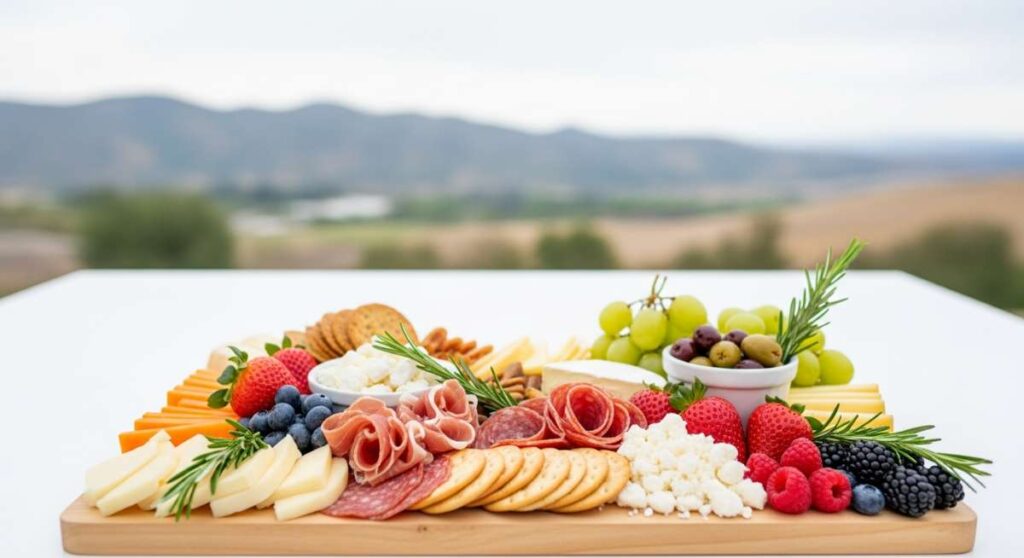
The Secret to the Viral Simple Food Board Everyone is Recreating
There is something inherently magical about a table filled with small bites, rich aromas, and the laughter of friends. We’ve all seen those stunning food boards across our feeds—the ones that look like a work of art but feel like a warm hug. It’s not just about the aesthetic; it’s about that feeling of abundance and the simple joy of sharing a meal that hits every craving at once.
Lately, I’ve been obsessed with the ‘Viral Simple Food Board’ because it bridges the gap between fancy hosting and cozy comfort. It’s a curation of everything from savory slow-cooked meats to decadent molten treats, arranged in a way that invites everyone to dig in. Today, I’m pulling back the curtain on the ten essential components that make this board a viral sensation, so you can recreate this masterpiece in your own kitchen tonight.
How to make creamy pasta?
Why we love this
This creamy pasta is the ultimate soul-soother, offering a velvet-like texture that clings to every strand of noodle. As you twirl your fork, the aroma of toasted garlic and freshly grated parmesan fills the air, creating an olfactory experience that is as comforting as a cozy blanket. The richness of the heavy cream is perfectly balanced by a hint of bright lemon zest, leaving a lingering warmth on the palate that makes it impossible to stop at just one serving.
Ingredients
- 1 lb Fettuccine or Pappardelle
- 2 cups heavy cream
- 1/2 cup unsalted butter
- 4 cloves garlic, minced
- 1 cup freshly grated Parmesan cheese
- Salt and cracked black pepper to taste
- Fresh parsley for garnish
How to make it
- Bring a large pot of heavily salted water to a rolling boil. Add your pasta and cook until just al dente, usually about 1-2 minutes less than the package instructions. Reserve one cup of starchy pasta water before draining.
- In a wide skillet over medium-low heat, melt the butter until it begins to foam. Add the minced garlic and sauté gently for 1-2 minutes until fragrant but not browned; you want to infuse the butter with a soft garlic flavor without any bitterness.
- Slowly pour in the heavy cream and bring the mixture to a gentle simmer. Do not let it reach a hard boil, as this can cause the fat to separate. Let it reduce for about 3-5 minutes until it slightly coats the back of a spoon.
- Whisk in the grated Parmesan cheese in small handfuls, stirring constantly until the sauce is completely smooth and glossy.
- Add the cooked pasta directly into the skillet. Toss vigorously, adding splashes of the reserved pasta water as needed to create a silky, emulsified sauce that grips the noodles. Finish with salt, pepper, and a sprinkle of parsley.
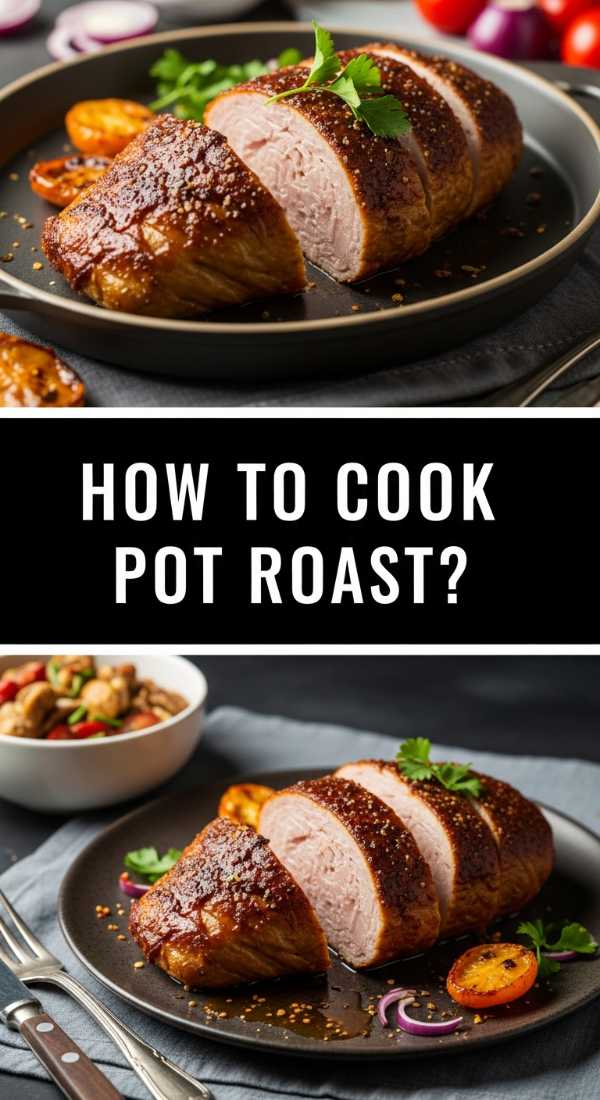
How to cook pot roast?

Why we love this
A classic pot roast is the centerpiece of any great food board, offering a deep, savory umami flavor that only comes from hours of slow braising. The meat becomes so tender that it practically melts under the slight pressure of a fork, releasing a rich jus infused with red wine, thyme, and rosemary. It’s a rustic, heart-warming dish that reminds us of Sunday dinners at grandma’s house, filling the entire home with an intoxicating scent of slow-cooked beef and earthy root vegetables.
Ingredients
- 3-4 lb Chuck roast
- 2 tbsp olive oil
- 1 large onion, chopped
- 3 carrots, cut into chunks
- 3 cloves garlic, smashed
- 2 cups beef broth
- 1 cup dry red wine
- 2 sprigs fresh rosemary and thyme
How to make it
- Preheat your oven to 300°F (150°C). Generously season all sides of the beef with salt and black pepper, pressing the seasoning into the meat.
- In a large Dutch oven, heat the olive oil over medium-high heat until shimmering. Sear the roast for 5-7 minutes per side until a deep, dark brown crust forms. This Maillard reaction is crucial for the final depth of flavor.
- Remove the meat and set aside. In the same pot, add the onions and carrots, sautéing for 5 minutes to pick up the browned bits (fond) from the bottom. Stir in the garlic for the final 60 seconds.
- Deglaze the pot by pouring in the red wine, scraping the bottom with a wooden spoon to release all the flavor. Add the beef broth and herbs.
- Return the roast to the pot; the liquid should come about halfway up the side of the meat. Cover with a tight-fitting lid and transfer to the oven. Braise for 3 to 4 hours until the meat is completely tender and pulls apart easily.
How to bake soft cookies?
Why we love this
There is nothing quite like the sensory delight of a warm, soft cookie with golden edges and a gooey, molten center. As they bake, the scent of caramelized sugar and high-quality vanilla extract wafts through the kitchen, creating an irresistible pull toward the oven. The texture is a delicate balance of chewiness and softness, with pockets of semi-sweet chocolate that smear perfectly when you take that first, decadent bite while they are still slightly warm.
Ingredients
- 1 cup unsalted butter, softened
- 3/4 cup brown sugar, packed
- 3/4 cup granulated sugar
- 2 large eggs
- 2 tsp vanilla extract
- 2 1/4 cups all-purpose flour
- 1 tsp baking soda
- 2 cups chocolate chips
How to make it
- In a large bowl or stand mixer, cream together the softened butter and both sugars on medium-high speed for at least 3-5 minutes until the mixture is pale, fluffy, and light. This incorporates air which is vital for the soft texture.
- Add the eggs one at a time, beating well after each addition, then stir in the vanilla extract.
- In a separate bowl, whisk together the flour, baking soda, and a pinch of salt. Gradually add the dry ingredients to the wet ingredients on low speed, mixing just until no streaks of flour remain. Do not overmix, or the cookies will become tough.
- Fold in the chocolate chips by hand. For the best results, chill the dough in the refrigerator for at least 30 minutes to prevent the cookies from spreading too thin.
- Preheat oven to 350°F (175°C). Scoop rounded tablespoons of dough onto a parchment-lined baking sheet. Bake for 9-11 minutes, or until the edges are just barely golden but the centers still look slightly underbaked. They will firm up as they cool on the pan.
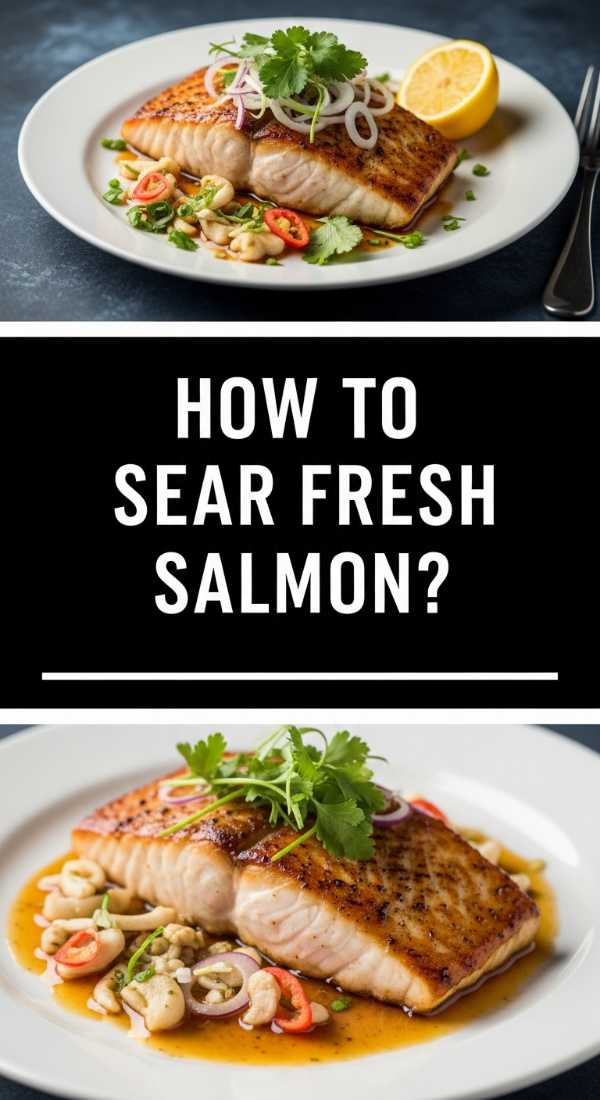
How to sear fresh salmon?
Why we love this
Searing salmon is an art form that results in a stunning contrast of textures: a glass-like, crispy skin and a tender, buttery interior that flakes away at the touch of a fork. The natural oils of the fish provide a rich, clean flavor that is heightened by the high-heat sear, creating a savory crust that locks in all the moisture. It feels incredibly light yet indulgent, making it a sophisticated addition to any food board that craves a healthy, vibrant protein.
Ingredients
- 2-4 Salmon fillets (skin-on)
- 2 tbsp avocado oil or grapeseed oil
- 1 tbsp unsalted butter
- Salt and lemon pepper
- Fresh lemon wedges
How to make it
- Remove the salmon from the fridge 15 minutes before cooking to bring it to room temperature. This ensures even cooking throughout the fillet.
- Use paper towels to pat the salmon skin and flesh completely dry. Moisture is the enemy of a good sear; if the fish is damp, it will steam rather than crisp.
- Season the fillets generously with salt and lemon pepper. Heat a heavy stainless steel or cast-iron skillet over medium-high heat. Add the oil and wait until it is shimmering and just starting to smoke.
- Place the salmon fillets skin-side down in the pan. Press down firmly with a spatula for 10 seconds to ensure the skin makes full contact with the heat. Cook undisturbed for 4-5 minutes until the skin is golden and crispy.
- Flip the fillets and add a knob of butter to the pan. Cook for another 2-3 minutes depending on thickness. The internal temperature should reach 125-130°F for a perfect medium-rare. Finish with a squeeze of fresh lemon juice.
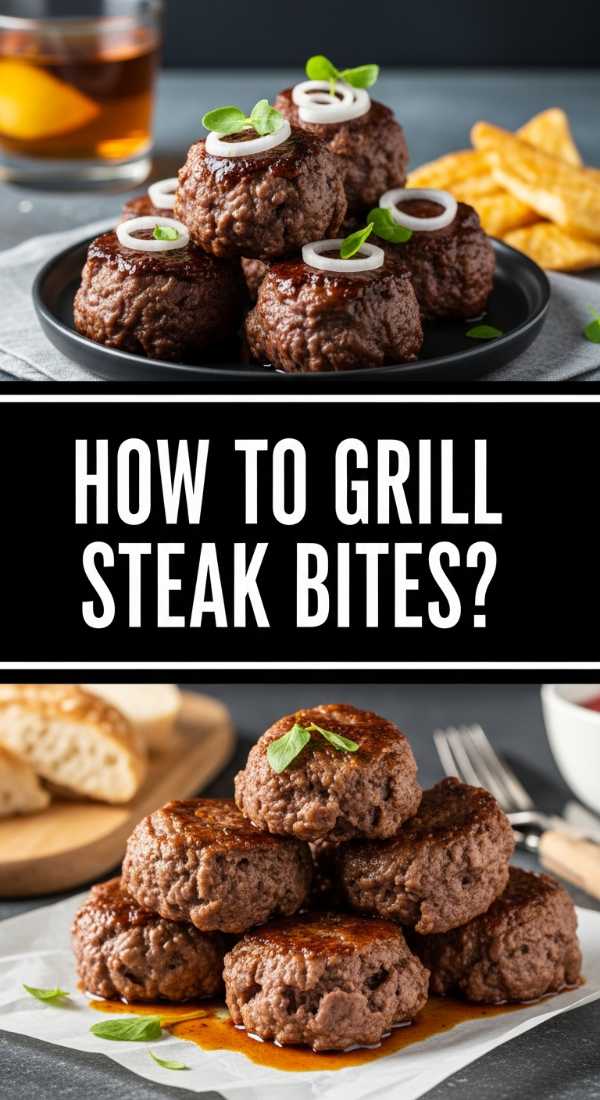
How to grill steak bites?
Why we love this
Steak bites are the ultimate finger food, offering concentrated bursts of juicy, beefy flavor in every single mouthful. When grilled at a high temperature, they develop a gorgeous charred exterior that contrasts beautifully with a succulent, pink center. Tossed in a pool of melted garlic butter and fresh herbs, these bites provide an explosion of savory richness that makes them the first thing to disappear from the board.
Ingredients
- 1.5 lb Sirloin or Ribeye steak, cut into 1-inch cubes
- 3 tbsp olive oil
- 4 tbsp butter
- 3 cloves garlic, minced
- 1 tsp smoked paprika
- Salt and cracked black pepper
How to make it
- Pat the steak cubes dry with paper towels. In a bowl, toss them with olive oil, salt, pepper, and smoked paprika until every piece is evenly coated.
- Preheat your grill or a heavy cast-iron grill pan to high heat. You want the surface to be screaming hot to achieve a fast sear without overcooking the inside.
- Place the steak bites on the grill in a single layer, ensuring they aren’t crowded. Grill for 2 minutes without moving them to develop a deep crust.
- Flip the bites and grill for another 1-2 minutes. The total cook time is very short—usually under 5 minutes for a perfect medium.
- While the steak is finishing, melt the butter with the minced garlic in a small saucepan. Toss the hot steak bites in the garlic butter immediately after removing them from the grill and let them rest for 2 minutes before serving.
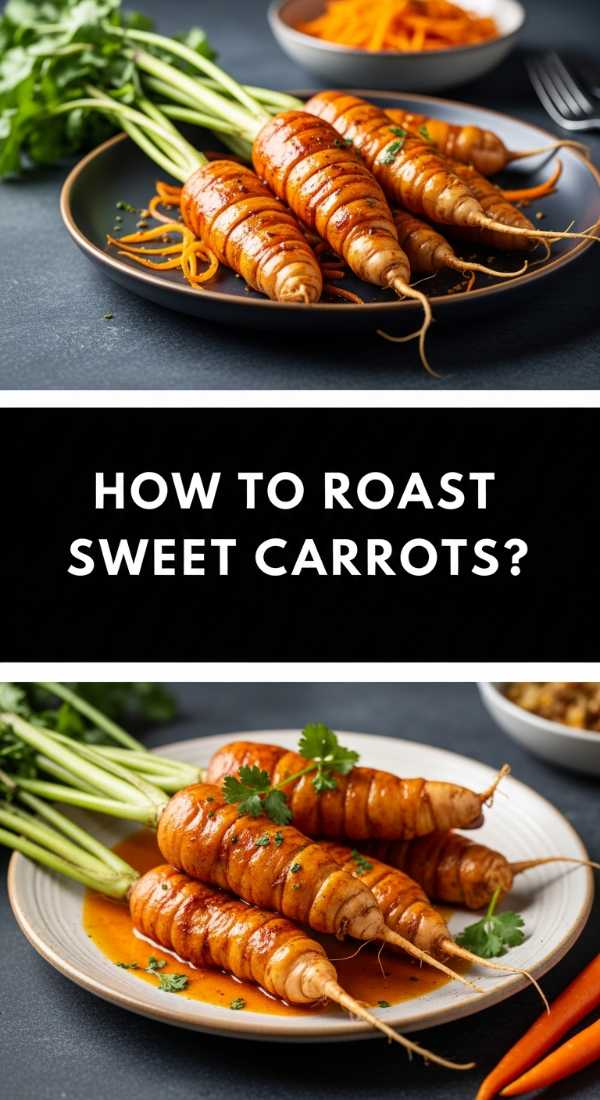
How to roast sweet carrots?

Why we love this
Roasting carrots transforms them from a humble root vegetable into a candy-like treat with concentrated sweetness and slightly charred, caramelized edges. The high heat of the oven draws out their natural sugars, while a drizzle of honey or maple syrup creates a sticky, glossy glaze that is visually stunning. They offer a soft, tender bite with a hint of earthy fragrance, making them the perfect vibrant side to balance out heavier meats on your board.
Ingredients
- 1 lb whole carrots (thinner ones work best)
- 2 tbsp olive oil
- 1 tbsp honey or maple syrup
- 1/2 tsp cumin
- Salt and pepper
- Fresh thyme leaves
How to make it
- Preheat your oven to 400°F (200°C). If using large carrots, slice them in half lengthwise so they cook evenly; otherwise, leave them whole for a rustic look.
- On a large rimmed baking sheet, toss the carrots with olive oil, honey, cumin, salt, and pepper. Spread them out in a single layer, ensuring they have plenty of space to roast rather than steam.
- Roast for 20-25 minutes. Halfway through the cooking time, use tongs to toss the carrots, ensuring all sides get that beautiful golden-brown caramelization.
- Check for doneness by piercing the thickest part of a carrot with a fork; it should slide in easily with no resistance.
- Remove from the oven and immediately sprinkle with fresh thyme leaves. The residual heat will wake up the oils in the herbs for a fresh, aromatic finish.
How to fry crispy chicken?

Why we love this
There is an auditory satisfaction in the loud ‘crunch’ of perfectly fried chicken that is truly unmatched. The golden-brown crags of the breading hold onto a blend of savory spices, while the meat inside remains incredibly juicy and tender thanks to a gentle brine. It’s the ultimate comfort food—salty, crispy, and deeply satisfying, providing a textural playground that pairs beautifully with cool dips or a drizzle of spicy honey.
Ingredients
- 1 lb Chicken thighs or tenders
- 1 cup buttermilk
- 1.5 cups all-purpose flour
- 1/2 cup cornstarch (for extra crunch)
- 2 tsp garlic powder, onion powder, and cayenne
- Peanut or vegetable oil for frying
How to make it
- Marinate the chicken in buttermilk for at least 30 minutes (or up to 4 hours). The acidity in the buttermilk tenderizes the meat and helps the breading stick.
- In a shallow dish, whisk together the flour, cornstarch, and all the spices. The cornstarch is the secret to a shatteringly crisp crust.
- Remove a piece of chicken from the buttermilk, let the excess drip off, then dredge it thoroughly in the flour mixture, pressing the flour into the meat to create those signature craggy bits.
- Heat 2 inches of oil in a heavy pot to 350°F (175°C). Use a kitchen thermometer to maintain this temperature; if it’s too low, the chicken will be greasy; if it’s too high, the outside will burn before the inside is cooked.
- Fry the chicken in batches for 5-7 minutes per side until the internal temperature reaches 165°F. Drain on a wire rack rather than paper towels to keep the bottom from getting soggy.
How to make chocolate lava?

Why we love this
The chocolate lava cake is the crown jewel of the food board, offering a dramatic and decadent finale. The exterior is a light, airy sponge that gives way to a thick, flowing river of warm, dark chocolate ganache when sliced open. It’s an intense chocolate experience that hits every pleasure point, especially when the warm cake is paired with a cold scoop of vanilla bean ice cream or a handful of tart raspberries.
Ingredients
- 4 oz high-quality semi-sweet chocolate
- 1/2 cup unsalted butter
- 2 large eggs + 2 egg yolks
- 1/4 cup granulated sugar
- 2 tbsp all-purpose flour
- 1 tsp vanilla extract
How to make it
- Preheat your oven to 425°F (218°C). Generously grease two 6-ounce ramekins with butter and dust them with cocoa powder, tapping out any excess.
- In a heat-proof bowl, melt the chocolate and butter together in the microwave in 30-second intervals, stirring until completely smooth. Let it cool slightly.
- In a separate bowl, beat the eggs, egg yolks, sugar, and vanilla at high speed for about 2 minutes until the mixture is thick and pale yellow.
- Gently fold the melted chocolate mixture into the egg mixture using a spatula. Sift the flour over the top and fold it in just until combined—do not overmix, as you want to keep the batter light.
- Divide the batter between the ramekins. Bake for 12-14 minutes. The sides should be firm, but the center should still have a slight jiggle. Let them sit for 1 minute before inverting onto a plate.
How to prep taco bowls?
Why we love this
Taco bowls bring a vibrant, customizable energy to the board, overflowing with colors, textures, and zesty flavors. From the creamy richness of ripe avocado to the sharp bite of pickled red onions and the crunch of fresh corn, every bowl is a celebration of freshness. It’s a fun, interactive way to eat that allows everyone to build their own perfect bite, making it a social highlight of any gathering.
Ingredients
- 2 cups cooked cilantro-lime rice
- 1 can black beans, rinsed and warmed
- 1 cup charred corn
- 1 cup cherry tomatoes, halved
- 1 avocado, sliced
- Pickled jalapeños and lime wedges
- Your choice of protein (shredded chicken or seasoned beef)
How to make it
- Start with a base of warm cilantro-lime rice. To make the rice, toss freshly cooked basmati with lime juice, zest, and a handful of chopped cilantro.
- Prepare your protein by sautéing it with cumin, chili powder, and garlic. Keep it warm until assembly time.
- Char the corn in a dry skillet over high heat for 3-4 minutes until some kernels are blackened; this adds a smoky depth to the bowl.
- Arrange the ingredients in sections over the rice base. This ‘deconstructed’ look makes the bowls visually appealing on the food board.
- Top with the fresh elements—avocado, tomatoes, and jalapeños—just before serving to keep them from wilting. Serve with a side of chipotle crema or salsa verde for drizzling.
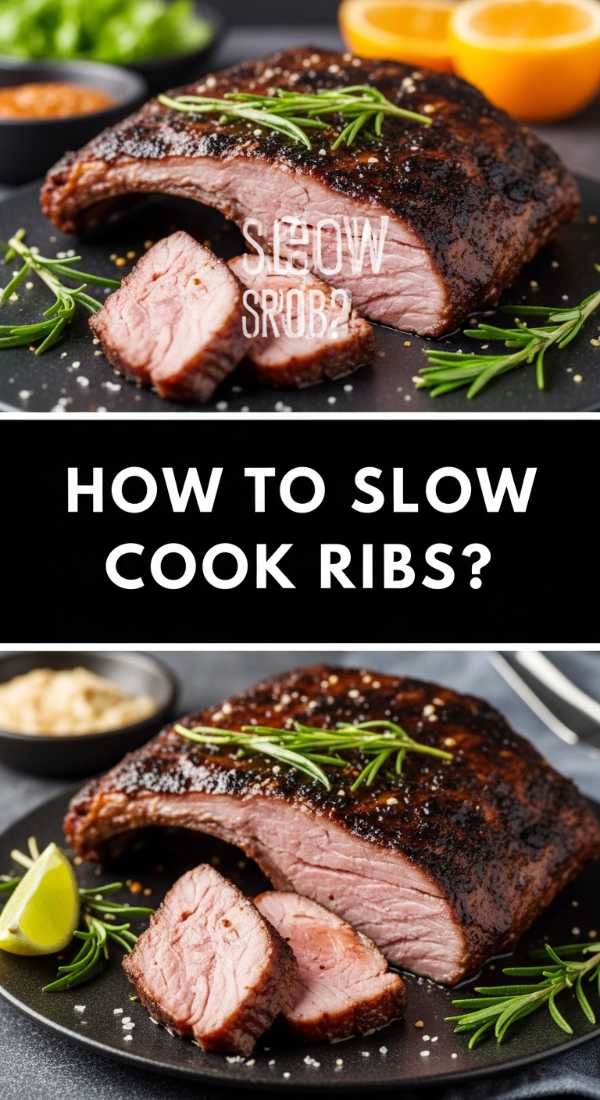
How to slow cook ribs?
[IMAGE_10]
Why we love this
Slow-cooked ribs are the definition of ‘fall-off-the-bone’ perfection, coated in a sticky, sweet, and smoky glaze that requires multiple napkins and zero regrets. The long, slow cooking process breaks down the connective tissue, turning the meat into a tender, succulent treat that absorbs the deep spices of the dry rub. There is something primal and satisfying about pulling a rib from the rack and enjoying that deep, woodsy flavor that only time and patience can produce.
Ingredients
- 1 rack Baby Back Ribs
- 1/2 cup brown sugar
- 2 tbsp paprika
- 1 tbsp garlic powder
- 1 tsp cayenne pepper
- 1 cup BBQ sauce
- 1/4 cup apple cider vinegar
How to make it
- Preheat your oven to 275°F (135°C). Remove the thin membrane (silverskin) from the back of the ribs by gripping it with a paper towel and pulling it away; this ensures the ribs are tender.
- Combine the brown sugar and spices to create a dry rub. Massage the rub generously into both sides of the ribs.
- Lay out a large piece of heavy-duty aluminum foil. Place the ribs on the foil and drizzle with apple cider vinegar. Wrap the foil tightly around the ribs to create a sealed packet that locks in the moisture.
- Bake the ribs for 2.5 to 3 hours. When you gently lift the rack with tongs, the meat should start to crack slightly, showing it is tender.
- Remove from the foil and brush a thick layer of BBQ sauce over the top. Turn the oven to broil and cook for 3-5 minutes until the sauce is bubbly and slightly charred. Let rest for 10 minutes before slicing.
Putting It All Together
The beauty of the Viral Simple Food Board is that it doesn’t have to be perfect to be amazing. By combining these ten elements, you’re offering a landscape of flavors that caters to every mood. Start with your larger items like the pot roast and ribs, then fill the gaps with the crispy chicken and steak bites. Place the creamy pasta and taco bowls in smaller vessels, and nestle the carrots and cookies in the remaining spaces. The result is a stunning, edible tapestry that will have your guests reaching for their phones—and then their forks!