

There is something inherently magical about the moment a heavy, artisan wooden board is placed in the center of a table, overflowing with a tapestry of colors, textures, and aromas. It is more than just a meal; it is an invitation to slow down, to reach across the table, and to share in the simple joy of gathering. I remember the first time I set out a spread like this—the room instantly felt warmer, the conversation flowed more freely, and the pressure of a formal plated dinner simply evaporated into the steam of the fresh dishes.
The ‘Viral Simple Food Board’ isn’t about perfection; it is about abundance and the celebration of comfort foods that everyone actually wants to eat. Whether you are hosting a festive Saturday night with friends or looking to elevate a family Sunday, this board serves as a communal centerpiece that turns eating into an experience. Today, I’m sharing the secret recipes behind the ten most-requested components that make this board a viral sensation, from savory seared steaks to the sweetest fruit-topped toasts.
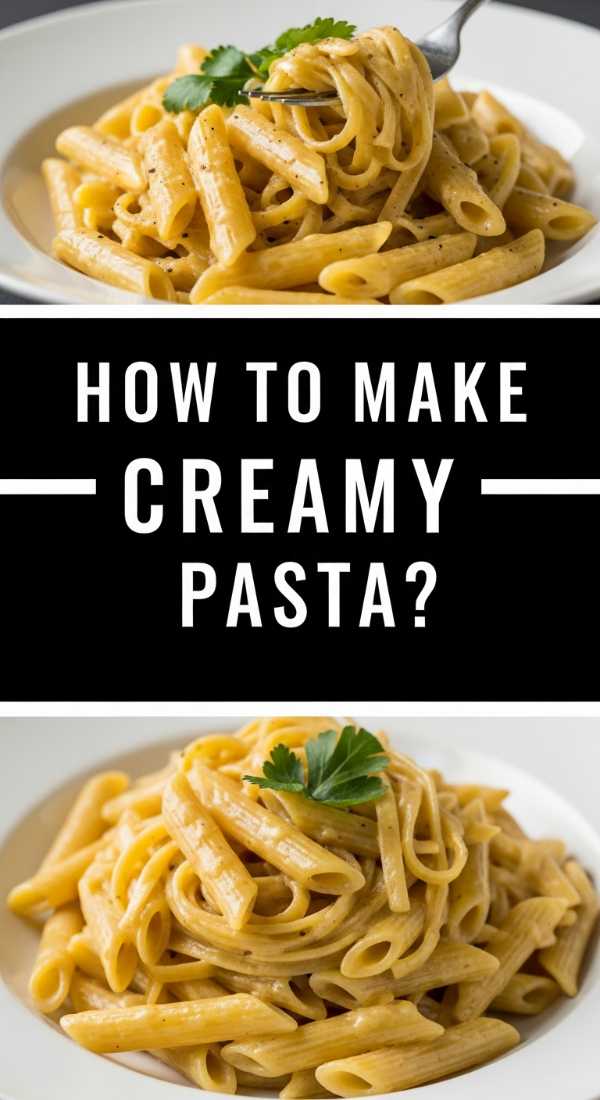
How to make creamy garlic pasta?
Why we love this
The way the velvet-smooth cream clings to every curve of the pasta is nothing short of a culinary embrace. As the pan sizzles, the pungent, earthy aroma of sautéed garlic fills the kitchen, promising a depth of flavor that is both sharp and mellowed by rich, melted butter. With every bite, you experience the perfect al dente texture followed by a salty, nutty finish from the freshly aged parmesan, making it the ultimate comfort dish that grounds the entire food board spread.
Ingredients
- 1 lb Fettuccine or Linguine
- 6 cloves garlic, minced
- 1/2 cup unsalted butter
- 1 cup heavy cream
- 1/2 cup freshly grated Parmesan cheese
- 1/2 teaspoon red pepper flakes
- Fresh parsley for garnish
- Salt and black pepper to taste
How to make it
- Bring a large pot of heavily salted water to a rolling boil. Add the pasta and cook for 8-10 minutes, or until just al dente. Reserve 1 cup of the starchy pasta water before draining.
- In a large skillet over medium-low heat, melt the butter until it begins to foam. Add the minced garlic and sauté for 1-2 minutes. You are looking for a golden hue and a fragrant aroma; do not let it brown or burn as it will turn bitter.
- Slowly whisk in the heavy cream and red pepper flakes. Increase the heat slightly to medium and bring to a gentle simmer for 3-5 minutes until the sauce begins to thicken slightly and reduce.
- Turn the heat to low and gradually stir in the Parmesan cheese. Whisk constantly in a circular motion until the cheese is completely melted and the sauce is silky and glossy.
- Add the drained pasta directly into the skillet. Toss vigorously with tongs, adding splashes of the reserved pasta water as needed to help the sauce emulsify and coat every strand of pasta perfectly.
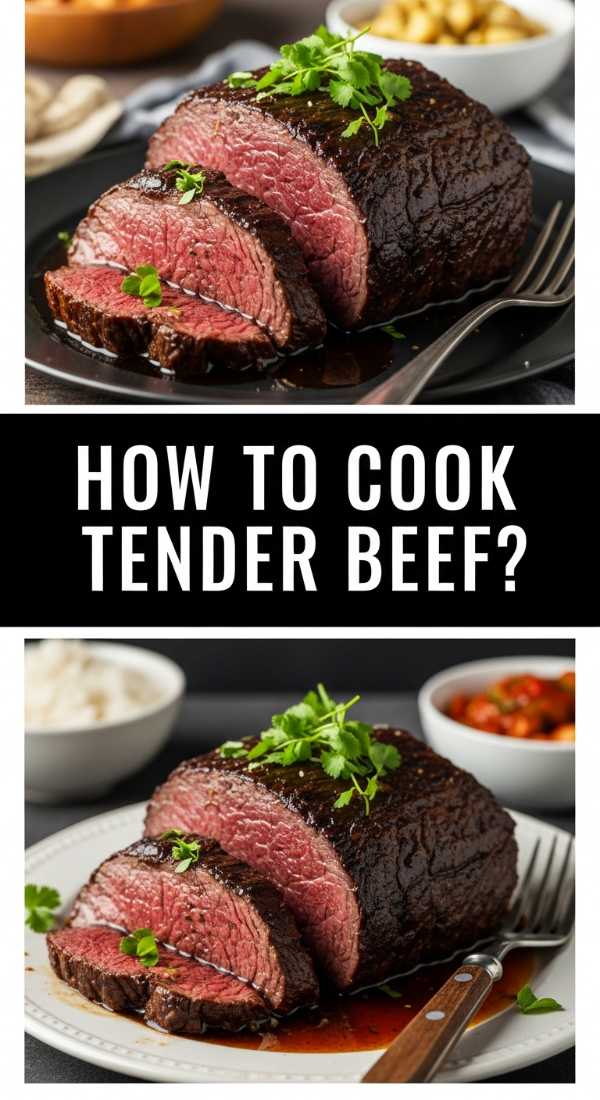
How to cook tender crock pot beef?
Why we love this
There is a profound sense of satisfaction in a dish that transforms a humble cut of meat into a melt-in-your-mouth masterpiece while you go about your day. This beef carries a deep, savory umami profile, with fibers that effortlessly pull apart at the mere suggestion of a fork. The rich, mahogany-colored gravy that forms in the slow cooker smells of rosemary and slow-simmered onions, providing a rustic, hearty element to your board that feels like a warm hug on a plate.
Ingredients
- 3 lb beef chuck roast
- 2 cups beef bone broth
- 1 large yellow onion, sliced
- 3 cloves garlic, smashed
- 2 tablespoons Worcestershire sauce
- 2 sprigs fresh rosemary
- Salt and cracked black pepper
- 2 tablespoons olive oil
How to make it
- Pat the beef roast completely dry with paper towels and season aggressively with salt and pepper on all sides. This dryness is crucial for achieving a proper sear.
- Heat olive oil in a heavy skillet over high heat until shimmering. Sear the beef for 4-5 minutes per side until a dark, crusty brown bark forms. Transfer the meat to the slow cooker.
- In the same skillet, add a splash of broth to deglaze, scraping up all the browned bits (fond) from the bottom. Pour this liquid over the beef in the crock pot.
- Add the sliced onions, smashed garlic, Worcestershire sauce, and rosemary sprigs around the sides of the beef. Pour in the remaining beef broth until the liquid reaches halfway up the meat.
- Cover and cook on the ‘Low’ setting for 8 to 10 hours. The beef is done when it is fork-tender and registers at least 195°F internally. Shred gently into large chunks before serving on the board.
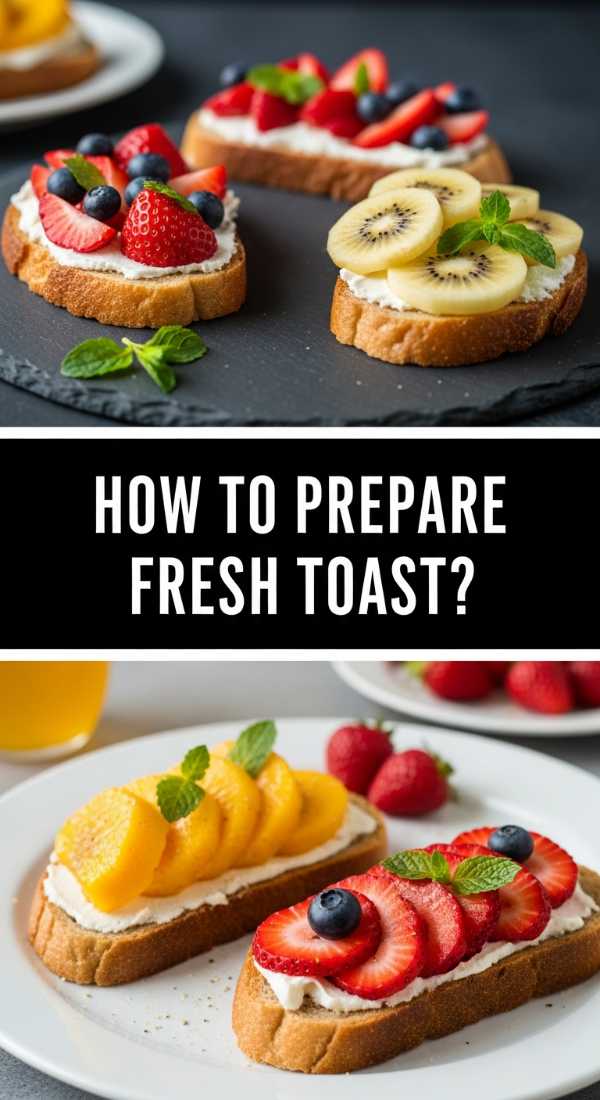
How to prepare fresh fruit toast?
Why we love this
This dish provides a bright, acidic, and sweet counterpoint to the heavier savory items on the board, acting as both a side and a palate cleanser. The crunch of charred sourdough provides a robust base for the cloud-like whipped ricotta, which acts as a canvas for the burst of fresh berry juices. It is a sensory delight of textures—crispy, creamy, and succulent—finished with a drizzle of floral honey that makes the fruit literally sparkle under the dining room lights.
Ingredients
- 1 loaf sourdough bread, sliced thick
- 1 cup whole milk ricotta cheese
- 1 tablespoon lemon zest
- 1 cup fresh strawberries and blueberries
- 2 tablespoons wildflower honey
- Small bunch of fresh mint leaves
- Salted butter for toasting
How to make it
- In a small bowl, whisk the ricotta cheese with the lemon zest until it is light and airy. Set aside at room temperature to make spreading easier.
- Generously butter both sides of the sourdough slices. Heat a griddle or cast-iron pan over medium-high heat and toast the bread for 2 minutes per side until the edges are charred and the center is golden-brown.
- While the toast is still warm, spread a thick, generous layer of the whipped ricotta from edge to edge. The slight heat from the bread will soften the cheese just enough.
- Slice the strawberries into thin rounds and arrange them artfully over the ricotta, tucking blueberries into the gaps for a mosaic effect.
- Finish with a heavy drizzle of honey from a high vantage point to ensure even distribution, and garnish with torn mint leaves for a refreshing herbaceous aroma.
How to roast crispy golden potatoes?

Why we love this
A tray of perfectly roasted potatoes is the crown jewel of any viral food board, offering a shatteringly crisp exterior that gives way to a center as fluffy as a cloud. The scent of roasted rosemary and garlic infused into the olive oil creates a fragrance that is utterly nostalgic and irresistible. These golden gems catch the salt perfectly, providing a savory crunch that balances the softer elements of the board and keeps everyone reaching for “just one more.”
Ingredients
- 2 lbs Yukon Gold potatoes, chopped into 1-inch cubes
- 1/4 cup extra virgin olive oil
- 1 teaspoon garlic powder
- 1 tablespoon fresh rosemary, chopped
- 1 teaspoon sea salt
- 1/2 teaspoon smoked paprika
How to make it
- Preheat your oven to 425°F (220°C) and place a large rimmed baking sheet inside while it heats. A preheated pan ensures the potatoes sizzle and crisp immediately upon contact.
- Place the cubed potatoes in a large pot of salted water. Bring to a boil and parboil for exactly 5 minutes. This softens the exterior and releases starches that lead to maximum crunch.
- Drain the potatoes and give them a vigorous shake in the colander to roughen up the edges. This “fuzz” on the outside will turn into the crispy crust.
- In a bowl, toss the potatoes with olive oil, salt, garlic powder, rosemary, and paprika until thoroughly coated.
- Carefully spread the potatoes onto the hot baking sheet in a single layer. Roast for 25-30 minutes, flipping halfway through, until they are deep golden brown and audibly crunchy when tapped with a spatula.
How to make stuffed cheesy shells?

Why we love this
Stuffed shells are a visual and textural masterpiece, acting as little edible vessels of molten cheese and rich marinara. The pasta shells offer a firm, chewy structure that holds a decadent mixture of creamy ricotta and stretchy mozzarella, creating a pull-apart experience that is the hallmark of a great social meal. Infused with hints of nutmeg and fresh spinach, they offer a sophisticated flavor profile that feels much more complex than their simple preparation suggests.
Ingredients
- 1 box jumbo pasta shells
- 15 oz ricotta cheese
- 2 cups shredded mozzarella cheese
- 1/2 cup grated Parmesan
- 1 egg, lightly beaten
- 1 cup chopped fresh spinach, sautéed and squeezed dry
- 24 oz marinara sauce
- 1/2 teaspoon ground nutmeg
How to make it
- Boil the jumbo shells in salted water for 2 minutes less than the package directions. They should be flexible but still quite firm so they don’t tear during the stuffing process. Drain and rinse with cool water to stop the cooking.
- In a medium bowl, combine the ricotta, 1 cup of mozzarella, Parmesan, egg, sautéed spinach, and nutmeg. Mix until well incorporated; the egg acts as a binder to keep the filling from running.
- Spread a thin layer of marinara sauce across the bottom of a 9×13 inch baking dish to prevent sticking and provide moisture.
- Using a small spoon or a piping bag, generously fill each shell with the cheese mixture and place them open-side up in the baking dish.
- Top with the remaining marinara and mozzarella. Cover with foil and bake at 375°F for 20 minutes, then remove the foil and bake for another 10 minutes until the cheese is bubbling and slightly browned on top.
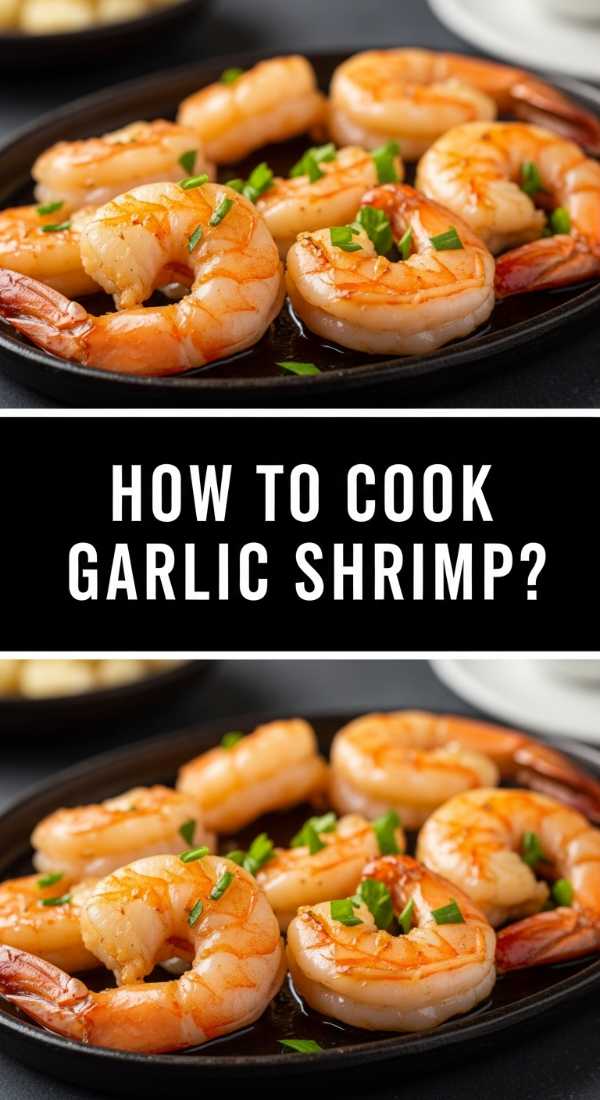
How to cook garlic butter shrimp?
Why we love this
Shrimp cooked in garlic butter is the epitome of effortless luxury, providing a succulent, snappy texture that breaks up the richer meats on the board. The sauce is a liquid gold of emulsified butter, bright lemon juice, and spicy red pepper flakes that begs to be mopped up with a piece of crusty bread. It’s a dish that appeals to the senses instantly—the pink curl of the shrimp against the vibrant green of fresh parsley creates a stunning visual pop.
Ingredients
- 1 lb large shrimp, peeled and deveined
- 4 tablespoons unsalted butter
- 4 cloves garlic, minced
- Juice of half a lemon
- 1/4 teaspoon red pepper flakes
- Fresh parsley, finely chopped
- Salt to taste
How to make it
- Pat the shrimp dry with a paper towel to ensure they sear rather than steam. Season lightly with salt.
- In a large skillet over medium-high heat, melt 2 tablespoons of butter. Once the butter is bubbling, add the shrimp in a single, non-crowded layer.
- Sear the shrimp for about 1-2 minutes per side. You are looking for them to turn opaque and pink with a slight golden char on the edges. Do not overcook, or they will become rubbery.
- Remove the shrimp from the pan and lower the heat to medium. Add the remaining 2 tablespoons of butter and the minced garlic. Sauté for 30 seconds until the garlic is fragrant but not brown.
- Stir in the lemon juice and red pepper flakes, then return the shrimp to the pan. Toss quickly to coat in the sauce, garnish with parsley, and serve immediately while the butter is still shimmering.
How to slow cook pulled chicken?
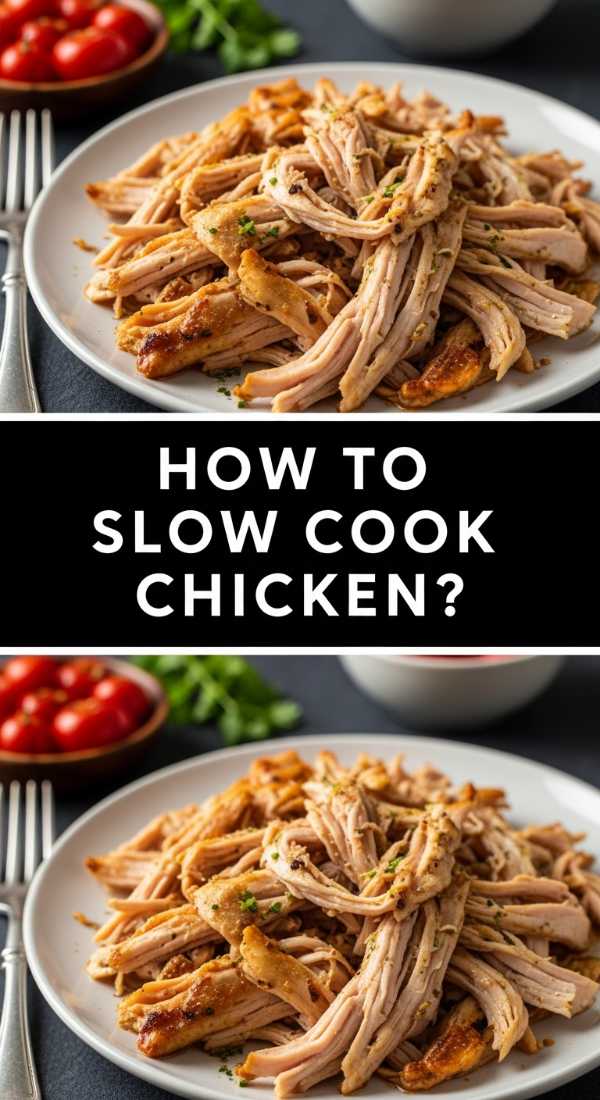
Why we love this
This pulled chicken is a testament to the power of low-and-slow cooking, resulting in strands of poultry so tender they practically dissolve. The flavor is a perfect balance of tangy vinegar, sweet brown sugar, and smoky spices, creating a versatile protein that pairs beautifully with everything else on the board. It adds a wonderful rustic texture and a pile of savory goodness that guests can heap onto sliders or eat straight with a fork.
Ingredients
- 2 lbs boneless skinless chicken breasts
- 1 cup BBQ sauce (your favorite brand)
- 1/4 cup apple cider vinegar
- 2 tablespoons brown sugar
- 1 teaspoon onion powder
- 1 teaspoon smoked paprika
- Salt and pepper to taste
How to make it
- Place the chicken breasts in the bottom of the slow cooker in a single layer. Season both sides with salt, pepper, onion powder, and smoked paprika.
- In a small bowl, whisk together the BBQ sauce, apple cider vinegar, and brown sugar. This mixture provides the acidity needed to break down the chicken fibers and the sugar for a sticky finish.
- Pour the sauce over the chicken, ensuring each breast is fully submerged or coated.
- Cover and cook on ‘High’ for 3-4 hours or ‘Low’ for 6-7 hours. The chicken is ready when it reaches an internal temperature of 165°F and pulls apart easily with a fork.
- Remove the chicken to a large bowl and shred using two forks. Return the shredded meat to the slow cooker and toss with the remaining juices for 10 minutes on the ‘Warm’ setting to allow the meat to soak up all the flavor.
How to sear a juicy steak?

Why we love this
A perfectly seared steak is the undisputed star of a high-end food board, offering a sophisticated, beefy depth that nothing else can match. The contrast between the salty, caramelized crust and the tender, ruby-red center is a culinary thrill. Basting the meat in foaming butter infused with garlic and thyme adds a layer of richness that coats the palate, making every thin slice feel like a decadent treat.
Ingredients
- 1.5 lb Ribeye or New York Strip steak (at least 1.5 inches thick)
- 2 tablespoons high-smoke point oil (like grapeseed or avocado oil)
- 3 tablespoons unsalted butter
- 3 sprigs fresh thyme
- 2 cloves garlic, smashed
- Flaky sea salt for finishing
How to make it
- Remove the steak from the refrigerator 45 minutes before cooking to bring it to room temperature. This ensures even cooking through the center. Pat it extremely dry and season heavily with salt.
- Heat a cast-iron skillet over high heat until it is smoking slightly. Add the oil and swirl to coat.
- Place the steak in the pan. Press down slightly to ensure contact. Sear for 3-4 minutes without moving it until a deep brown crust forms. Flip the steak and sear the other side for another 3 minutes.
- Reduce the heat to medium and add the butter, thyme, and garlic. Once the butter melts and foams, tilt the pan and use a large spoon to continuously baste the steak with the hot fat for 2-3 minutes.
- Remove the steak when it reaches 130°F for medium-rare. Crucially, let the steak rest on a cutting board for at least 10 minutes before slicing against the grain to keep the juices inside.
How to bake loaded sweet potatoes?

Why we love this
These sweet potatoes bring a wonderful earthy sweetness and vibrant orange hue to your board, acting as a natural bowl for a variety of savory toppings. The skins become slightly crisp and caramelized in the oven, while the interior transforms into a velvety puree. When loaded with black beans, corn, and a zesty lime crema, they provide a satisfying, fiber-rich component that feels both indulgent and wholesome at the same time.
Ingredients
- 4 medium sweet potatoes
- 1 can black beans, rinsed and drained
- 1 cup roasted corn kernels
- 1/2 cup sour cream or Greek yogurt
- 1 tablespoon lime juice
- Fresh cilantro for garnish
- Olive oil and salt
How to make it
- Preheat oven to 400°F (200°C). Scrub the sweet potatoes clean and prick them several times with a fork to allow steam to escape.
- Rub the skins with olive oil and a generous pinch of salt. Place them directly on the oven rack (with a tray underneath to catch drips) and bake for 45-60 minutes until they are soft when squeezed.
- While potatoes bake, whisk together the sour cream, lime juice, and a pinch of salt to create the lime crema.
- Once the potatoes are done, slice them down the center and fluff the insides with a fork.
- Stuff each potato with a generous heap of black beans and corn. Place back in the oven for 5 minutes to warm the toppings, then finish with a drizzle of lime crema and a sprinkle of fresh cilantro before placing on the board.
How to make sticky honey ribs?
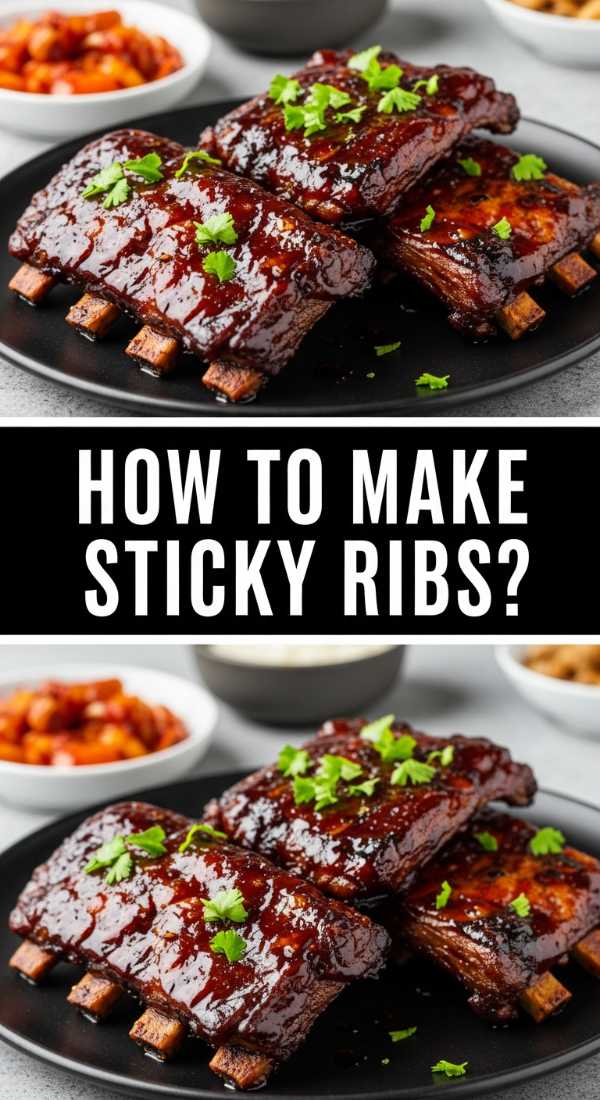
Why we love this
There is an undeniable primal joy in eating ribs that are so tender the meat slides off the bone with the slightest tug. These ribs are coated in a high-gloss, sticky glaze that balances the heat of ginger with the floral sweetness of honey and the salt of soy sauce. They add a dark, lacquered aesthetic to the food board and a finger-licking experience that encourages everyone to dig in and get a little messy.
Ingredients
- 1 rack Baby Back Ribs
- 1/2 cup honey
- 1/4 cup soy sauce
- 2 tablespoons brown sugar
- 1 tablespoon grated fresh ginger
- 3 cloves garlic, minced
- 1 teaspoon toasted sesame oil
- Green onions for garnish
How to make it
- Preheat oven to 300°F (150°C). Remove the thin membrane from the back of the ribs. Season with salt and pepper, wrap tightly in heavy-duty aluminum foil, and bake for 2.5 to 3 hours until very tender.
- In a small saucepan, combine honey, soy sauce, brown sugar, ginger, garlic, and sesame oil. Simmer over medium heat for 5-10 minutes until the sauce reduces and becomes thick and syrupy.
- Carefully remove the ribs from the foil and place them on a parchment-lined baking sheet. Increase the oven temp to 425°F or turn on the broiler.
- Brush a thick layer of the honey glaze over the top of the ribs. Bake for 5 minutes, then apply another layer of glaze and bake for an additional 3-5 minutes.
- Watch closely! You want the sugar to caramelize and bubble into a sticky, dark coating without burning. Slice into individual ribs and garnish with sliced green onions.
Conclusion: The Art of the Shared Board
Recreating the viral simple food board is about more than just following recipes; it’s about the spirit of hospitality. By combining these ten diverse dishes, you create a landscape of flavors that caters to every craving. Remember to fill the small gaps on your board with handfuls of nuts, sprigs of fresh herbs, or extra slices of lemon to give it that “overflowing” viral look. Your guests will remember the warmth of the table and the richness of the food long after the last crumb is gone.