
Why This Simple Food Board is the Only Appetizer You Need This Season
There is a certain magic that happens during the golden hour of a spring evening, when the air is soft and the light turns everything into a hazy, honey-colored dream. It’s the time of year when we finally shed our heavy coats and open our windows, inviting the fresh scent of blooming jasmine and damp earth into our homes. I’ve always found that the best gatherings aren’t the ones with five-course meals and formal settings, but the ones where we simply gather around a table, sharing stories and picking at a beautiful spread of food that feels as effortless as the season itself.
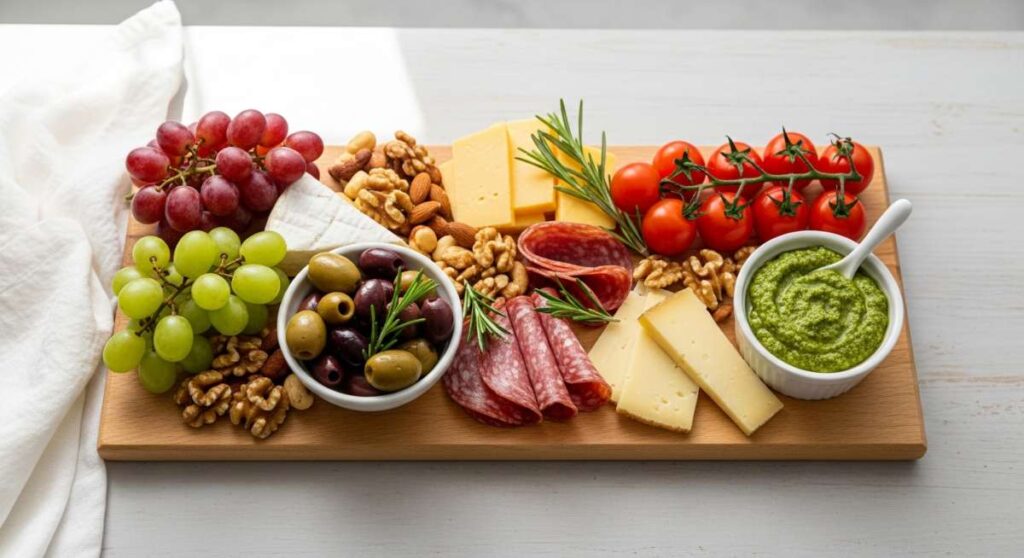
This viral simple food board is more than just a trend; it’s a lifestyle shift toward intentional, slow living. It’s about taking the freshest ingredients—the snap peas from the farmer’s market, the first strawberries of the season, and the crusty bread still warm from the oven—and arranging them in a way that feels like art. Whether you’re hosting a backyard soirée or just enjoying a quiet Tuesday on the patio, this board is the ultimate invitation to linger just a little longer and savor the flavors of the moment.
7 Best Healthy Spring Dinners (Step-by-Step Guide)

Why we love this
There is something deeply restorative about a spring dinner that prioritizes vibrancy and lightness over heavy, winter comfort. We love this Lemon Herb Salmon because it tastes like a fresh start; the bright citrus notes dance against the rich, buttery texture of the fish, while the aroma of freshly chopped dill and parsley fills the kitchen with a garden-fresh scent. Every bite feels clean and nourishing, leaving you satisfied but energized enough for a sunset walk. It is the perfect centerpiece for a spring-themed board or a standalone meal that celebrates the season’s renewal.
Ingredients
- 2 lbs fresh Atlantic salmon fillet (skin-on)
- 3 tablespoons extra virgin olive oil
- 2 large lemons (one sliced, one juiced)
- 4 cloves garlic, minced
- 1/4 cup fresh dill, finely chopped
- 1/4 cup fresh Italian parsley, chopped
- 1 teaspoon sea salt
- 1/2 teaspoon cracked black pepper
- 1 bunch asparagus, trimmed
How to make it
- Preheat your oven to 400°F (200°C) and line a large rimmed baking sheet with parchment paper to ensure even heat distribution and easy cleanup.
- Place the salmon fillet in the center of the sheet and pat it completely dry with paper towels; removing moisture is crucial for achieving a slightly crisp exterior rather than a steamed texture.
- In a small glass bowl, whisk together the olive oil, lemon juice, minced garlic, salt, and pepper until the emulsion is slightly thickened and opaque.
- Drizzle two-thirds of the herb mixture over the salmon, using a pastry brush or the back of a spoon to ensure every inch of the flesh is coated, then top with thin lemon slices.
- Arrange the trimmed asparagus around the salmon, drizzling them with the remaining herb oil and tossing lightly with tongs to coat.
- Roast for 12-15 minutes; you’ll know it’s done when the salmon flakes easily with a fork and reached an internal temperature of 145°F, and the asparagus is tender-crisp with slightly charred tips.
- Garnish generously with the fresh dill and parsley immediately after removing from the oven to let the residual heat release the herbs’ essential oils.
10 Best Summer Pasta Salads (Step-by-Step Guide)

Why we love this
Nothing screams summer picnic like a Mediterranean Orzo Salad that has been chilling in the fridge, allowing all those bold flavors to meld into a cohesive masterpiece. We are obsessed with the textural contrast here: the silky smoothness of the orzo, the sharp crunch of cucumbers, and the creamy, salty crumbles of high-quality feta cheese. The aroma is a heady mix of red wine vinegar and dried oregano, transporting your senses straight to a seaside taverna in Greece. It is refreshing, incredibly portable, and only gets better as it sits, making it the ultimate stress-free addition to your food board.
Ingredients
- 16 oz orzo pasta
- 1 cup English cucumber, diced
- 1 cup cherry tomatoes, halved
- 1/2 cup Kalamata olives, pitted and sliced
- 1/2 cup red onion, finely minced
- 6 oz herb-marinated feta cheese
- 1/4 cup fresh mint, chiffonade
- 3 tablespoons red wine vinegar
- 1/2 cup extra virgin olive oil
How to make it
- Bring a large pot of heavily salted water to a rolling boil—it should taste like the sea to properly season the pasta from the inside out.
- Add the orzo and cook for 8-9 minutes, or until just al dente; do not overcook, as the pasta will continue to absorb the dressing later and you want it to retain a firm bite.
- Drain the orzo and immediately rinse it under cold running water to stop the cooking process and wash away excess starch, which prevents the pasta from clumping together.
- In a large mixing bowl, whisk the olive oil, red wine vinegar, and a pinch of oregano until fully integrated and slightly bubbly.
- Toss the cooled orzo into the dressing, stirring thoroughly to ensure every grain is coated before adding the vegetables.
- Gently fold in the diced cucumbers, halved tomatoes, olives, and red onion, followed by the crumbled feta and fresh mint.
- Cover and refrigerate for at least 30 minutes before serving; this rest period is vital for the starch in the pasta to bond with the acidity of the vinegar and the richness of the oil.
5 Top Easy Grilling Recipes (Step-by-Step Guide)

Why we love this
The smoky, charred aroma of Balsamic Glazed Chicken Skewers is the quintessential scent of a summer afternoon spent outdoors. We love this recipe because the balsamic reduction creates a sticky, sweet, and savory lacquer that clings to the tender chicken, providing a complex flavor profile with very little effort. The heat of the grill caramelizes the natural sugars in the glaze, creating those beautiful, dark grill marks that signify peak summer cooking. It’s a finger-food-friendly option that adds a rustic, charred element to any simple food board, appealing to both kids and adults alike.
Ingredients
- 1.5 lbs boneless skinless chicken thighs, cut into 1-inch pieces
- 1/2 cup balsamic vinegar
- 2 tablespoons honey
- 1 tablespoon Dijon mustard
- 2 cloves garlic, smashed
- 1 red bell pepper, cut into chunks
- 1 red onion, cut into wedges
- Wooden or metal skewers
How to make it
- If using wooden skewers, soak them in water for at least 30 minutes prior to use to prevent them from igniting on the high heat of the grill.
- In a small saucepan over medium heat, simmer the balsamic vinegar, honey, and mustard for 5-7 minutes until it reduces by half and coats the back of a spoon with a syrupy consistency.
- Thread the chicken pieces onto the skewers, alternating with the bell pepper and red onion chunks, ensuring they are packed snugly but not too tightly to allow airflow.
- Preheat your grill to medium-high heat (about 400°F) and lightly oil the grates using a folded paper towel dipped in vegetable oil held by tongs.
- Place the skewers on the grill and sear for 5 minutes on the first side without moving them, which allows the proteins to set and prevents sticking.
- Flip the skewers and immediately brush the grilled side generously with the balsamic reduction using a heat-resistant brush.
- Continue cooking for another 5-7 minutes, turning occasionally and applying more glaze, until the chicken reaches an internal temperature of 165°F and the vegetables are softened and charred.
8 Best Fresh Strawberry Recipes (Step-by-Step Guide)

Why we love this
Strawberry Balsamic Bruschetta is the unexpected star of the board that bridge the gap between sweet and savory in the most sophisticated way. We love how the bright, juicy sweetness of peak-season strawberries is grounded by the earthy tang of goat cheese and the acidic punch of balsamic. The visual of ruby-red berries against a snowy white cheese base is stunning, and the scent of fresh basil chiffonade added at the last second is intoxicatingly summery. It’s a light, crunchy, and incredibly elegant bite that proves strawberries belong on the dinner table just as much as the dessert table.
Ingredients
- 1 baguette, sliced into 1/2 inch rounds
- 1 pint fresh strawberries, hulled and finely diced
- 4 oz honey goat cheese
- 2 tablespoons high-quality balsamic glaze
- 10 fresh basil leaves, thinly sliced
- 2 tablespoons olive oil
- Sea salt flakes
How to make it
- Arrange the baguette slices on a baking sheet and brush both sides lightly with olive oil to encourage a golden, even toast.
- Broil the bread for 1-2 minutes per side until the edges are crispy and deep golden brown; watch closely as broiler temperatures vary and can burn bread in seconds.
- In a small bowl, gently toss the diced strawberries with a teaspoon of olive oil and a tiny pinch of salt to draw out their natural juices.
- Spread a generous layer of the honey goat cheese onto each warm baguette slice, allowing it to soften slightly from the residual heat.
- Spoon the strawberry mixture over the cheese, pressing down slightly so the berries stay in place.
- Drizzle the balsamic glaze in a zigzag pattern over the assembled bruschetta for a professional, bistro-style finish.
- Top with the fresh basil ribbons and a sprinkle of sea salt flakes to enhance the contrast between the sugar in the fruit and the creaminess of the cheese.
6 Top Summer Pasta Recipes (Step-by-Step Guide)

Why we love this
There is a specific kind of joy found in a Lemon Zucchini Linguine—it feels like sunshine on a plate. We love this dish because it’s surprisingly light, utilizing the seasonal abundance of zucchini to add volume and a delicate, earthy flavor without the heaviness of a cream sauce. The aroma of sizzling garlic and lemon zest hitting the pan is enough to bring everyone into the kitchen. The texture is a perfect harmony of silky pasta and tender-crisp vegetable ribbons, making it an ideal choice for a warm evening when you want something comforting yet fresh.
Ingredients
- 12 oz linguine pasta
- 2 medium zucchinis, julienned or spiralized
- 3 cloves garlic, thinly sliced
- 1/2 teaspoon red pepper flakes
- 1/4 cup extra virgin olive oil
- Zest and juice of 1 large lemon
- 1/2 cup grated Pecorino Romano cheese
- Fresh cracked black pepper
How to make it
- Boil the linguine in salted water until it is just shy of al dente; reserve exactly 1 cup of the starchy pasta water before draining—this is the secret to a glossy sauce.
- In a large skillet, heat the olive oil over medium-low heat and add the sliced garlic and red pepper flakes, cooking slowly for 3 minutes until the garlic is golden but not brown.
- Increase the heat to medium and add the zucchini ribbons, sautéing for only 2 minutes; you want them to soften slightly while retaining their vibrant green color.
- Add the cooked linguine directly into the skillet with the zucchini and garlic oil.
- Pour in half of the reserved pasta water along with the lemon juice and zest, tossing vigorously with tongs to create a light emulsion.
- Sprinkle in the Pecorino Romano while continuing to toss; if the pasta looks dry, add more pasta water a tablespoon at a time until the sauce is silky and coats every strand.
- Serve immediately with an extra grating of cheese and a final crack of black pepper for a sharp, aromatic finish.
10 Refreshing Summer Drink Recipes (Step-by-Step Guide)

Why we love this
A Sparkling Hibiscus Limeade is the ultimate thirst-quencher that looks as good as it tastes, boasting a deep magenta hue that makes any board pop. We love the sophisticated tartness of the hibiscus flower paired with the zingy, bright acidity of fresh lime juice. The effervescence of the sparkling water makes it feel celebratory, while the floral aroma provides a spa-like sensory experience with every sip. It’s a non-alcoholic option that feels grown-up and intentional, ensuring that everyone at the gathering has something beautiful and refreshing in their glass.
Ingredients
- 4 hibiscus tea bags (or 1/4 cup dried hibiscus flowers)
- 2 cups boiling water
- 1/2 cup agave nectar or simple syrup
- 1 cup fresh squeezed lime juice
- 1 liter chilled sparkling mineral water
- Fresh lime wheels and mint sprigs for garnish
- Ice cubes
How to make it
- Steep the hibiscus tea bags or dried flowers in 2 cups of boiling water for at least 10 minutes to create a very concentrated, dark red base.
- Remove the tea bags or strain out the flowers, then stir in the agave nectar while the liquid is still hot to ensure it dissolves completely.
- Allow the hibiscus concentrate to cool to room temperature, then refrigerate until it is thoroughly chilled.
- In a large pitcher, combine the chilled hibiscus base with the fresh lime juice, stirring well to integrate the flavors.
- Just before serving, pour in the sparkling mineral water; do this slowly to preserve as much carbonation as possible.
- Fill tall glasses with plenty of ice and pour the limeade over, leaving a little room at the top.
- Garnish each glass with a lime wheel and a sprig of mint—slap the mint between your palms before adding it to release the fragrant oils.
7 Easy Sourdough Discard Recipes (Step-by-Step Guide)

Why we love this
Herb and Sea Salt Sourdough Crackers are the ultimate way to reduce waste while adding a gourmet, artisanal touch to your food board. We love the complex, fermented tang that only sourdough can provide, coupled with the shatteringly crisp texture of a perfectly baked cracker. The scent of dried rosemary and sea salt toasting in the oven is reminiscent of a high-end bakery. These crackers are sturdy enough for the thickest dips but delicate enough to eat on their own, making them a versatile and impressive addition to any spread.
Ingredients
- 1 cup sourdough discard (unfed)
- 1 cup all-purpose flour
- 1/4 cup whole wheat flour
- 1/4 cup olive oil
- 1 tablespoon dried rosemary, crushed
- 1 teaspoon sea salt (plus more for topping)
- 1/2 teaspoon garlic powder
How to make it
- In a medium bowl, mix the sourdough discard, flours, olive oil, rosemary, salt, and garlic powder until a stiff dough forms.
- Turn the dough out onto a lightly floured surface and knead for 1-2 minutes until it is smooth and no longer sticky.
- Divide the dough into two equal portions, wrap in plastic, and let rest in the refrigerator for at least 30 minutes to relax the gluten, making it easier to roll out thin.
- Preheat your oven to 350°F (175°C) and place a piece of parchment paper on your work surface.
- Roll the dough directly onto the parchment paper until it is paper-thin—roughly 1/16th of an inch; the thinner the dough, the crispier the cracker.
- Brush the surface lightly with water or a bit of extra olive oil and sprinkle with additional sea salt, then use a pizza cutter to score the dough into squares or rectangles.
- Transfer the parchment to a baking sheet and bake for 15-20 minutes, rotating halfway through, until the edges are brown and the centers are firm; let cool completely on a wire rack to reach maximum crunch.
5 Quick Summer Crockpot Recipes (Step-by-Step Guide)

Why we love this
Hawaiian Pulled Pork is the low-effort, high-reward protein that makes summer entertaining a breeze without heating up your house. We love how the slow-cooking process transforms a tough cut of meat into tender, juicy shreds that melt in your mouth, infused with the tropical sweetness of pineapple and the smoky depth of liquid smoke. The aroma that wafts through the house all day is sweet and savory, building anticipation for the meal ahead. It’s perfect for sliding into mini brioche buns on your food board, offering a hearty, satisfying element that feels like a backyard luau.
Ingredients
- 3-4 lb pork shoulder (butt) roast
- 1 can (20 oz) crushed pineapple in juice
- 1/2 cup brown sugar
- 1/4 cup soy sauce
- 1 tablespoon liquid smoke
- 1 tablespoon ginger, freshly grated
- 3 cloves garlic, minced
How to make it
- Trim any excessive thick layers of fat from the exterior of the pork shoulder, but leave enough for moisture during the long cook time.
- Place the pork in the slow cooker and pierce it several times with a large fork to allow the marinade to penetrate the meat.
- In a bowl, whisk together the crushed pineapple (including the juice), brown sugar, soy sauce, liquid smoke, ginger, and garlic.
- Pour the mixture over the pork, ensuring the top is covered, then put the lid on and secure it tightly.
- Cook on LOW for 8-10 hours; using the low setting is essential for breaking down the tough connective tissues without drying out the protein.
- Once the meat is falling apart, remove it from the crockpot and place it on a large tray, shredding it with two forks while removing any remaining large pieces of fat.
- Strain the liquid from the crockpot into a saucepan and boil for 10 minutes to reduce it into a thick glaze, then toss the shredded pork back into the glaze before serving.
8 Best Spring Dessert Recipes (Step-by-Step Guide)

Why we love this
Lavender Honey Shortbread cookies are the definition of botanical elegance, offering a flavor profile that is floral, sweet, and intensely buttery all at once. We love the way these cookies crumble delicately on the tongue, followed by the lingering, soothing scent of culinary lavender and the golden warmth of honey. They are not overly sweet, making them a sophisticated palate cleanser to include on a seasonal board. The visual of tiny purple lavender buds speckled throughout the pale, golden cookies makes them look like something plucked straight from a fairytale garden party.
Ingredients
- 1 cup unsalted butter, softened to room temperature
- 1/2 cup granulated sugar
- 2 tablespoons honey
- 2 cups all-purpose flour
- 1 tablespoon dried culinary lavender, lightly crushed
- 1/2 teaspoon vanilla extract
- Pinch of salt
How to make it
- In a large bowl, cream together the softened butter, sugar, and honey until the mixture is pale, light, and fluffy, which usually takes about 3-4 minutes with an electric mixer.
- Add the vanilla extract and crushed lavender, mixing briefly to distribute the botanicals evenly throughout the fat.
- Gradually fold in the flour and salt on low speed until just combined; do not overmix, as this will develop the gluten and result in a tough cookie rather than a short, crumbly one.
- Shape the dough into a log about 2 inches in diameter, wrap tightly in parchment paper, and chill in the freezer for 20 minutes to firm up for clean slicing.
- Preheat your oven to 325°F (160°C)—a lower temperature is key for shortbread to prevent the butter from melting too fast and losing the cookie’s shape.
- Slice the log into 1/2 inch thick rounds and place them on a parchment-lined baking sheet, spaced about an inch apart.
- Bake for 15-18 minutes until the edges are just barely beginning to turn a pale golden color; let them cool on the pan for 10 minutes before moving to a rack to set completely.
9 Top Healthy Summer Dinners (Step-by-Step Guide)
[IMAGE_10]
Why we love this
Sesame Ginger Tofu Bowls are a masterclass in balance, featuring a mix of warm, savory protein and cold, crunchy vegetables. We love this dish because it feels incredibly intentional; the tofu is pressed and seared until it achieves a satisfyingly crisp exterior, while the inside remains silken and soft. The aroma of toasted sesame oil and spicy ginger is revitalizing, making this a go-to meal for those hot summer nights when you want something substantial but not heavy. It’s a colorful, nutrient-dense option that brings a global flair to your seasonal rotation, making healthy eating feel like a true indulgence.
Ingredients
- 1 block (14 oz) extra-firm tofu, pressed and cubed
- 2 cups cooked quinoa or brown rice
- 1 cup shredded carrots
- 1 cup edamame, shelled
- 1 avocado, sliced
- 2 tablespoons sesame oil
- For Sauce: 3 tbsp soy sauce, 1 tbsp rice vinegar, 1 tsp grated ginger, 1 tsp maple syrup
How to make it
- Press the tofu for at least 30 minutes using a tofu press or a heavy skillet weighted down with cans to remove all excess moisture; this is the only way to get a truly crispy texture.
- Cut the pressed tofu into 1-inch cubes and toss them lightly in a teaspoon of cornstarch if you want an extra-crunchy shell.
- Heat the sesame oil in a non-stick skillet over medium-high heat until it shimmers.
- Add the tofu cubes in a single layer, ensuring they aren’t crowded, and sear for 3-4 minutes per side until every surface is golden brown and crispy.
- While the tofu cooks, whisk together the soy sauce, rice vinegar, ginger, and maple syrup in a small bowl.
- Once the tofu is crisp, pour half the sauce into the pan and toss for 30 seconds until the liquid reduces and glazes the tofu cubes with a sticky, dark coating.
- Assemble the bowls by layering the grains on the bottom, followed by the glazed tofu, carrots, edamame, and avocado, then drizzle with the remaining sauce and a sprinkle of sesame seeds.
Creating Your Perfect Seasonal Gathering
As the seasons shift and the days grow longer, remember that the goal of any food board or meal is connection. It’s not about perfection; it’s about the laughter shared over a platter of strawberries, the stories told while the grill sizzles, and the quiet moments of gratitude for the fresh ingredients we have. Use these recipes as a foundation, but don’t be afraid to make them your own. Swap out herbs, try new fruits, and most importantly, enjoy the process of creating something beautiful for the people you love.