

We’ve all been there—scrolling through our feeds and coming across those breathtakingly beautiful food spreads that look like they belong in a high-end magazine. There’s something inherently magnetic about a perfectly curated table, but the secret that the best hosts won’t tell you is that it doesn’t have to be complicated. The viral ‘Food Board’ aesthetic is less about professional culinary training and more about the art of gathering hearty, soul-warming components and presenting them with a bit of love and a lot of style.
In this guide, I’m pulling back the curtain on the most popular, most requested recipes that serve as the anchor for any viral food board. Whether you’re hosting a cozy Sunday dinner or a loud, laughter-filled backyard gathering, these techniques are designed to give you maximum aesthetic impact with minimal stress. We are talking about deep aromas that fill your hallway, textures that pop in photos, and flavors that keep your guests coming back for ‘just one more bite.’
How to make tender pot roast in a crock pot

Why we love this
There is nothing quite like the scent of a slow-cooking pot roast wafting through the house on a rainy afternoon. It’s the ultimate comfort food, offering a rich, deep umami flavor and a texture so tender it literally falls apart at the mere suggestion of a fork. The way the juices mingle with the root vegetables creates a glossy, mahogany glaze that looks stunning on a rustic wooden serving board, promising a meal that is as visually grounding as it is delicious.
Ingredients
- 3-4 lb Chuck roast
- Salt and black pepper
- 2 tbsp Olive oil
- 1 lb Carrots, peeled and chopped
- 1 lb Baby potatoes
- 1 Large onion, quartered
- 3 cups Beef broth
- 2 tbsp Worcestershire sauce
- 3 cloves Garlic, smashed
- 2 sprigs Fresh rosemary
How to make it
- Begin by generously seasoning every side of your chuck roast with salt and pepper; do not be shy, as this creates the foundation of the flavor.
- Heat olive oil in a large skillet over medium-high heat until it begins to shimmer. Sear the roast for 4-5 minutes per side until a dark, caramelized crust forms. This step is vital for locking in juices.
- Place the quartered onions, carrots, and potatoes at the bottom of your slow cooker to act as a natural rack for the meat.
- Set the seared roast on top of the vegetables. Pour the beef broth and Worcestershire sauce around the sides of the meat, ensuring you don’t wash off that beautiful crust you just built.
- Add the smashed garlic cloves and rosemary sprigs to the liquid. Cover and cook on the ‘Low’ setting for 8 to 10 hours. The slow, gentle heat breaks down the tough connective tissues into melt-in-your-mouth goodness.
- Check for doneness by pulling at the center with a fork; if it shreds effortlessly, it is ready to be plated and served.
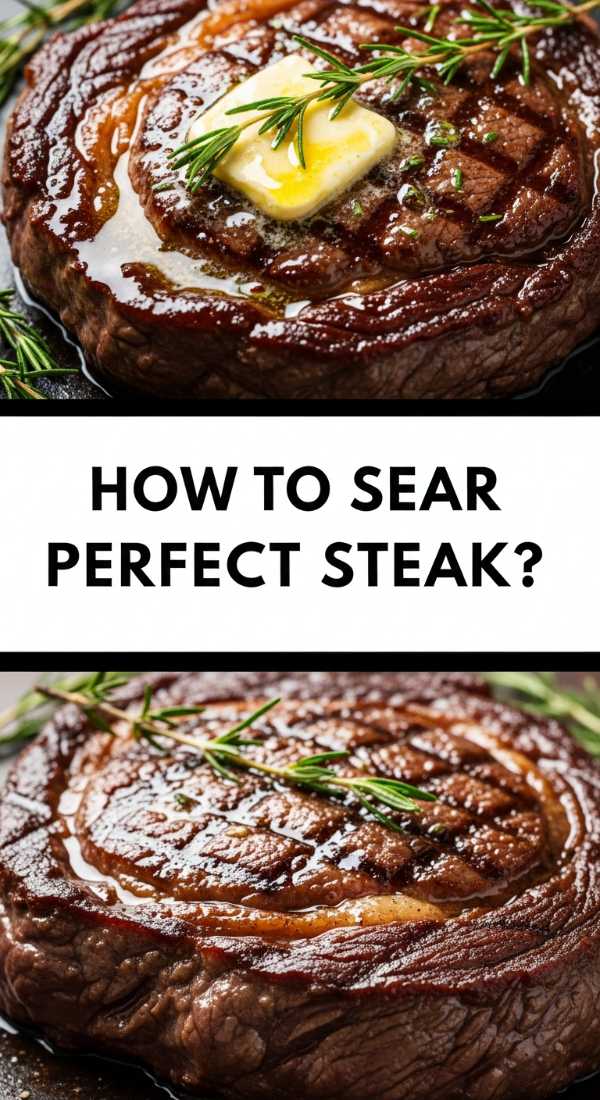
How to sear a perfect steak for dinner
Why we love this
The perfect sear is a rite of passage for any home cook, resulting in a steak that boasts a mahogany-brown, crispy crust contrasting against a tender, pink, buttery interior. When you slice into a perfectly seared steak, the release of savory juices and the aroma of browned butter and garlic create a sensory experience that feels incredibly luxurious. It’s the centerpiece of any high-end food board, looking sophisticated and tasting like a five-star meal.
Ingredients
- 2 Thick-cut steaks (Ribeye or New York Strip)
- Kosher salt
- Coarse black pepper
- 2 tbsp High-smoke point oil (Grapeseed or Canola)
- 3 tbsp Unsalted butter
- 3 sprigs Fresh thyme
- 2 cloves Garlic, skin on and crushed
How to make it
- Remove your steaks from the refrigerator at least 30-45 minutes before cooking to allow them to reach room temperature, ensuring even cooking throughout.
- Pat the steaks extremely dry with paper towels; moisture is the enemy of a good sear. Season heavily with salt and pepper on all sides, including the fat caps.
- Place a heavy cast-iron skillet over high heat until it is screaming hot and just starting to smoke. Add the oil and swirl to coat the bottom.
- Carefully lay the steaks in the pan, laying them away from you to avoid splashes. Press down lightly to ensure total surface contact. Sear undisturbed for 3 minutes until a deep crust develops.
- Flip the steaks and immediately add the butter, garlic, and thyme to the pan. As the butter melts and foams, tilt the pan and use a large spoon to continuously baste the steaks with the flavored butter for another 3 minutes.
- Use a meat thermometer to check for your desired doneness (130°F for medium-rare). Remove from the pan and let the steaks rest for at least 10 minutes to allow the juices to redistribute before slicing.
How to bake extra creamy pasta sauce

Why we love this
Baking your pasta sauce is a game-changer that results in a concentrated, velvety texture that stove-top simmering simply cannot replicate. As the heat of the oven surrounds the pan, the sugars in the tomatoes caramelize, and the fats emulsify into a thick, luxurious coat that clings to every noodle. It creates a rustic, bubbly aesthetic with charred edges that look absolutely viral-worthy when served straight from a ceramic baking dish.
Ingredients
- 2 cans (28 oz) San Marzano whole peeled tomatoes
- 1 head Garlic, top sliced off
- 1/2 cup Extra virgin olive oil
- 1 tsp Red pepper flakes
- 1 cup Heavy cream
- 1/2 cup Grated Parmesan cheese
- Fresh basil leaves
- Salt and pepper to taste
How to make it
- Preheat your oven to 375°F (190°C). In a large, oven-safe baking dish or Dutch oven, pour in the whole tomatoes and crush them gently with a wooden spoon.
- Nestle the head of garlic (exposed side up) into the center of the tomatoes. Drizzle the entire dish generously with olive oil and sprinkle with salt, pepper, and red pepper flakes.
- Bake for 45-50 minutes. The tomatoes should look slightly shriveled and darkened, and the garlic should be soft and golden.
- Carefully remove the garlic head, squeeze the roasted cloves back into the tomato mixture, and discard the skins.
- Stir in the heavy cream and Parmesan cheese. The residual heat will melt the cheese and create a silky, orange-hued sauce.
- For a smoother texture, use an immersion blender directly in the dish until you reach your desired consistency. Toss with al dente pasta and garnish with fresh basil before serving.
How to cook slow chili for family dinner

Why we love this
A great chili is like a warm hug in a bowl, characterized by its thick, hearty texture and a complex profile of smoky, spicy, and savory notes. The long, slow simmer allows the spices to bloom and the beans to become tender without breaking, resulting in a cohesive dish that tastes even better the next day. It’s a communal favorite, perfect for a ‘build-your-own’ food board where guests can customize their bowls with bright toppings like lime, cilantro, and radishes.
Ingredients
- 2 lbs Ground beef or chuck roast cubes
- 2 onions, diced
- 3 cloves Garlic, minced
- 2 cans Kidney beans, drained
- 1 can Tomato paste
- 1 can Diced tomatoes
- 3 tbsp Chili powder
- 1 tbsp Ground cumin
- 1 cup Beef broth
- Salt and pepper
How to make it
- In a large heavy-bottomed pot or Dutch oven, brown the beef over medium-high heat. Break it into small crumbles and cook until no pink remains. Drain the excess fat.
- Add the diced onions and cook for 5 minutes until translucent, then stir in the minced garlic for 1 minute until fragrant.
- Stir in the tomato paste, chili powder, and cumin. Toasting the spices with the meat and aromatics for 2 minutes before adding liquids intensifies the flavor.
- Pour in the diced tomatoes (with their juice), the drained kidney beans, and the beef broth. Stir well to combine, scraping any brown bits from the bottom of the pot.
- Reduce the heat to low, cover the pot, and let it simmer gently for at least 2 hours. The liquid should reduce and thicken into a rich, dark sauce.
- Taste and adjust seasoning with salt and pepper. If the chili is too thick, add a splash more broth; if too thin, simmer uncovered for the final 20 minutes to evaporate excess moisture.
How to fry crispy chicken at home

Why we love this
There is a specific, audible crunch that comes with perfect fried chicken—a sound that signals a flawlessly seasoned, golden-brown crust and succulent, steaming-hot meat. Achieving that viral-level ‘shaggy’ crust at home is incredibly satisfying. When piled high on a board with some pickles and hot honey, it becomes an instant showstopper that appeals to every sense, from the salty aroma to the jagged, crispy textures.
Ingredients
- 1 kg Chicken thighs (bone-in or out)
- 2 cups Buttermilk
- 2 cups All-purpose flour
- 1/2 cup Cornstarch
- 2 tbsp Smoked paprika
- 1 tbsp Garlic powder
- 1 tsp Cayenne pepper
- Neutral oil for frying (Peanut or Vegetable)
How to make it
- Place chicken in a large bowl and submerge in buttermilk. Refrigerate for at least 4 hours, or ideally overnight; the acid in the buttermilk tenderizes the meat perfectly.
- In a shallow dish, whisk together the flour, cornstarch, paprika, garlic powder, and cayenne. The cornstarch is the secret to an extra-crispy, non-greasy crust.
- Drizzle 2-3 tablespoons of the buttermilk soak into the flour mixture and stir with a fork to create small clumps—these clumps will stick to the chicken and create those desirable crispy bits.
- Dredge each piece of chicken in the flour mixture, pressing firmly to ensure a thick coating. Let the coated chicken rest on a wire rack for 10 minutes before frying to help the coating adhere.
- Heat 2 inches of oil in a deep skillet to 350°F (175°C). Use a kitchen thermometer to maintain this temperature.
- Fry the chicken in batches, being careful not to overcrowd the pan. Cook for 6-8 minutes per side until the internal temperature reaches 165°F and the exterior is deep golden brown. Drain on a clean wire rack to keep the bottom from getting soggy.
How to roast garlic veggies for meal prep

Why we love this
Roasting vegetables at high heat transforms them from humble ingredients into candy-like morsels with charred, caramelized edges and tender centers. The addition of whole garlic cloves creates a mellow, buttery sweetness that permeates the entire tray, making this the most aesthetic and delicious way to get your greens. Arranged by color on a large platter, these veggies look like a vibrant piece of art that makes healthy eating feel like an indulgence.
Ingredients
- 1 head Broccoli, cut into florets
- 1 lb Brussels sprouts, halved
- 2 large Carrots, sliced into coins
- 10-12 whole Garlic cloves, peeled
- 3 tbsp Extra virgin olive oil
- 1 tsp Dried thyme
- Sea salt and cracked black pepper
How to make it
- Preheat your oven to 425°F (220°C). High heat is essential for achieving caramelization without turning the vegetables into mush.
- Place all the prepared vegetables and the whole garlic cloves on a large sheet pan. Ensure you do not crowd the pan; if the veggies are too close, they will steam instead of roast. Use two pans if necessary.
- Drizzle with olive oil and sprinkle with thyme, salt, and pepper. Toss with your hands to ensure every single surface is lightly coated in oil.
- Spread the vegetables out in a single layer, ensuring the cut sides of the Brussels sprouts are facing down against the pan for maximum browning.
- Roast for 20-25 minutes. At the halfway mark, use a spatula to toss the vegetables quickly to ensure even cooking.
- Remove when the edges are crispy and dark brown and the garlic cloves are soft enough to spread like butter. Serve warm or at room temperature.
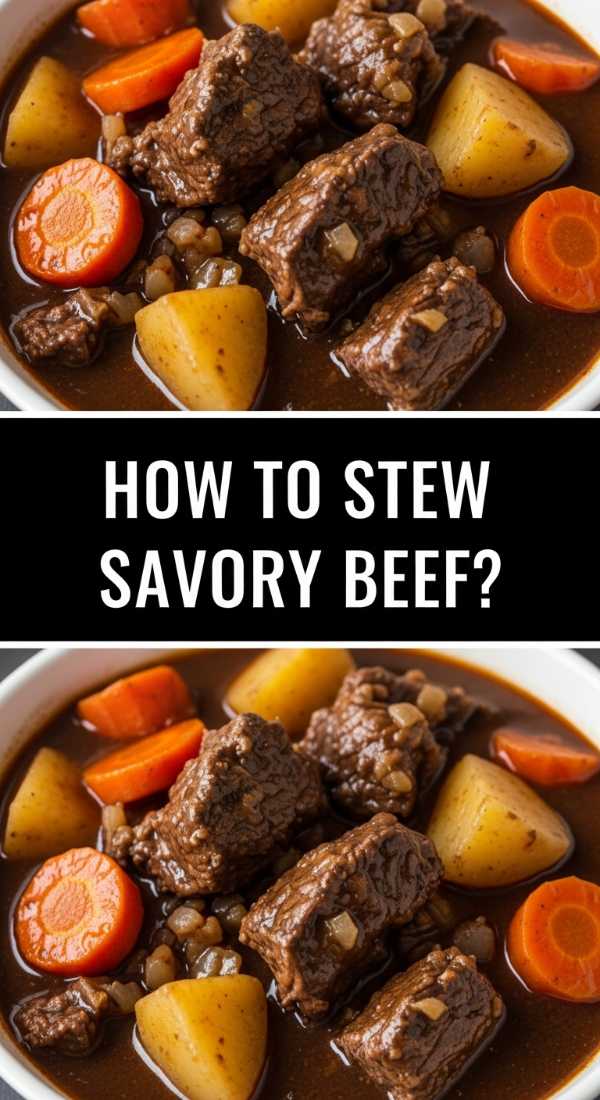
How to stew savory beef in a slow cooker
Why we love this
Beef stew is the epitome of rustic elegance, featuring chunks of meat that have surrendered to a long, slow bath in a wine-infused gravy. The deep, glossy brown of the sauce against the bright pops of peas or herbs makes for a stunning visual. It’s a dish that feels timeless, evoking memories of family dinners and slow Sundays, making it a powerful emotional anchor for any food-focused gathering.
Ingredients
- 2 lbs Beef stew meat (chuck), cut into 1-inch chunks
- 1/4 cup All-purpose flour
- 2 cups Beef broth
- 1 cup Dry red wine (Cabernet or Merlot)
- 2 tbsp Tomato paste
- 3 Carrots, sliced
- 2 Celery stalks, sliced
- 1 Yellow onion, chopped
- 1 tsp Dried thyme
How to make it
- Toss the beef chunks in a bowl with the flour, salt, and pepper until evenly coated. This flour will eventually thicken your stew into a rich gravy.
- Brown the beef in a skillet with a little oil over medium-high heat until all sides have a nice crust. Transfer the meat to the slow cooker.
- Add the chopped onion, carrots, and celery to the slow cooker.
- In a separate bowl, whisk together the beef broth, red wine, tomato paste, and thyme. Pour this mixture over the meat and vegetables.
- Set the slow cooker to ‘Low’ and cook for 7 to 8 hours. The low temperature allows the collagen in the beef to melt, creating that signature silky texture.
- About 30 minutes before serving, give the stew a gentle stir. If you want it thicker, leave the lid off for the final half-hour to let some moisture evaporate.
How to make fresh pesto from scratch

Why we love this
Store-bought pesto can’t even begin to compete with the electric green hue and the punchy, aromatic explosion of a fresh, homemade version. The contrast between the peppery basil, the creamy pine nuts, and the sharp bite of aged Parmesan creates a profile that is bright, herbaceous, and incredibly fresh. It’s the perfect ‘finishing touch’ sauce to drizzle over a food board, adding a pop of color and a professional flair to everything it touches.
Ingredients
- 2 cups Fresh basil leaves, packed
- 1/2 cup Freshly grated Parmesan cheese
- 1/3 cup Pine nuts (lightly toasted)
- 3 cloves Garlic, minced
- 1/2 cup Extra virgin olive oil
- Pinch of salt and pepper
- Squeeze of lemon juice
How to make it
- Place the pine nuts in a small dry skillet over medium heat. Toast them for 2-3 minutes, shaking the pan constantly, until they are fragrant and golden. Do not walk away, as they burn quickly!
- In a food processor or blender, combine the toasted pine nuts, garlic, and basil leaves. Pulse several times until everything is coarsely chopped.
- Add the grated Parmesan cheese and pulse a few more times to incorporate.
- With the processor running on low, slowly stream in the olive oil. This slow addition creates an emulsion, resulting in a creamy, stable sauce rather than an oily mess.
- Stop the processor and stir in a pinch of salt, pepper, and a tiny squeeze of lemon juice (the acid helps maintain that vibrant green color).
- Serve immediately for the best flavor, or store in a jar with a thin layer of olive oil on top to prevent oxidation.
How to whip fluffy cake batter

Why we love this
The sight of a pale, silky cake batter being folded into a pan is pure culinary therapy. A perfectly whipped batter is the secret to a cake with a fine, tender crumb and an airy lift that feels like biting into a cloud. There’s a beautiful, sweet aroma of vanilla and creamed butter that fills the kitchen, signaling the start of something celebratory. It’s the essential first step for any dessert board that aims to impress.
Ingredients
- 1 cup Unsalted butter, softened to room temperature
- 1 1/2 cups Granulated sugar
- 3 Large eggs, room temperature
- 1 tbsp Vanilla extract
- 2 1/2 cups Cake flour
- 1 tbsp Baking powder
- 1 cup Whole milk, room temperature
How to make it
- Ensure all your ingredients, especially the butter and eggs, are at room temperature. This is the most critical step for a smooth, emulsified batter.
- In a large bowl, cream the softened butter and sugar together using a stand mixer or hand mixer on medium-high speed for at least 5 minutes. The mixture should become pale yellow and look significantly fluffier.
- Add the eggs one at a time, beating well after each addition. This allows the fat to bond with the moisture of the eggs without curdling.
- Whisk your dry ingredients (flour and baking powder) together in a separate bowl.
- Turn the mixer to low speed. Add 1/3 of the dry ingredients, followed by 1/2 of the milk. Repeat, ending with the final 1/3 of the dry ingredients. Mix only until just combined—overmixing at this stage will develop gluten and make the cake tough.
- Finish by folding the batter a few times with a silicone spatula to ensure no flour pockets remain at the bottom of the bowl. The batter should be thick, smooth, and full of tiny air bubbles.
How to grill juicy burgers for a crowd

Why we love this
A tray of sizzling, char-marked burgers is the ultimate symbol of a successful outdoor gathering. The smell of woodsmoke combined with the savory drippings of beef hitting the flames creates an atmosphere of pure joy. When done right, a burger is a masterpiece of contrast: a smoky, salty exterior giving way to a rich, juicy center. Arranged on a board with melted cheese and toasted buns, they are the undisputed kings of the casual viral food spread.
Ingredients
- 2 lbs Ground beef (80/20 fat ratio is essential)
- Kosher salt and black pepper
- 1 tbsp Worcestershire sauce
- Sliced cheese (Cheddar or American)
- Brioche buns
- Melted butter for toasting
How to make it
- Keep your ground beef cold until the moment you are ready to form the patties. Cold fat stays inside the meat rather than melting onto your hands.
- Gently form the beef into 6-ounce patties. Do not overwork the meat; a loose pack leads to a more tender burger. Make each patty about 1 inch wider than the bun to account for shrinkage.
- Use your thumb to make a deep indentation in the center of each patty. This prevents the burger from puffing up into a ball while cooking, keeping it flat for toppings.
- Preheat your grill to high heat (around 450°F). Season the patties generously with salt, pepper, and a dash of Worcestershire sauce right before they hit the grates.
- Grill for 4 minutes on the first side without pressing down with a spatula—pressing squeezes out all the delicious juices! Flip once and grill for another 3-4 minutes.
- In the final minute, place a slice of cheese on each burger and close the grill lid to melt. Simultaneously, brush the buns with butter and toast them on the cooler side of the grill until golden brown.
The Art of the Finished Board
Once you’ve mastered these individual components, the magic happens in the assembly. A viral food board isn’t just about the recipe; it’s about the story you tell with the arrangement. Place your main proteins in the center, surround them with the vibrant roasted veggies, and tuck small bowls of fresh pesto or creamy sauces into the gaps. Use different heights, textures, and colors to guide the eye across the table. Remember, the goal is to create a space where people feel comfortable reaching in, sharing stories, and enjoying the simple, beautiful pleasure of a meal made from scratch.