
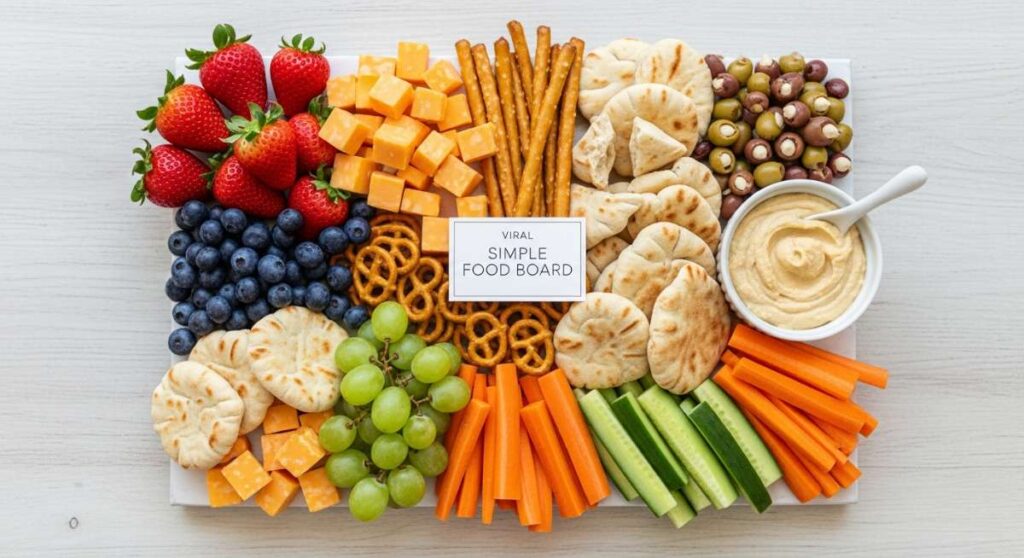
Move Over Charcuterie: This Simple Food Board is Going Viral
I remember the first time I hosted a summer brunch and spent nearly a hundred dollars on three tiny blocks of artisanal cheese and a handful of specialized crackers. I spent the whole morning arranging every grape with surgical precision, only for my guests to be too intimidated to touch the ‘masterpiece.’ It felt stiff, formal, and frankly, a little exhausting. That’s when it hit me: the best gatherings aren’t about the price tag of the cheddar; they are about the accessibility and joy of the food itself.
Lately, the internet has shifted away from the stuffy charcuterie boards of years past and toward something much more relatable: the ‘Simple Food Board.’ It’s a celebration of ease, flavor, and visual abundance without the pretension. Whether it’s a pile of perfectly rolled wraps or a rainbow of grilled skewers, these boards invite people to dig in with their hands and truly enjoy the moment.
This new trend is all about taking your favorite summer staples and presenting them in a way that feels lush and generous. Today, I’m sharing ten incredible ways to jump on this viral trend, from savory main-course boards to refreshing dessert spreads that will make your next backyard hangout unforgettable. Let’s dive into the simple recipes that are reclaiming the art of hosting.
5 Best Ways to Make Chicken Caesar Wraps (Step-by-Step Guide)

Why we love this
There is something undeniably satisfying about the crunch of cold, crisp romaine lettuce paired with the savory richness of roasted chicken and a tangy, garlicky dressing. As you bite into a perfectly rolled wrap, the textures shift from the soft, yielding flour tortilla to the sharp snap of parmesan and the occasional salty burst of a crushed crouton. The aroma is fresh and herbaceous, evoking memories of breezy outdoor lunches where the food is light enough to keep you going but filling enough to satisfy. It’s the ultimate handheld comfort food that looks stunning when sliced on a bias and stacked high on a wooden board.
Ingredients
- Large flour tortillas (burrito size)
- Grilled chicken breast, sliced into strips
- Fresh Romaine lettuce, shredded
- Shaved Parmesan cheese
- Creamy Caesar dressing
- Seasoned croutons, lightly crushed
- Freshly cracked black pepper
How to make it
- Warm the tortillas in a large skillet over medium-low heat for about 15 seconds per side. You want them pliable and soft, not toasted or crisp, so they don’t crack during the rolling process.
- In a large mixing bowl, toss the shredded romaine lettuce with just enough Caesar dressing to coat every leaf. Do not over-saturate, or the wrap will become soggy within minutes.
- Lay a warm tortilla flat and spread a thin layer of extra dressing across the center. Place a generous handful of the dressed lettuce in the middle, leaving about two inches of space on the sides.
- Layer the grilled chicken strips on top of the lettuce, followed by a sprinkle of shaved parmesan and the crushed croutons for added texture.
- Fold the left and right sides of the tortilla inward toward the center, then tightly roll from the bottom up, tucking the filling as you go to ensure a compact wrap.
- Place the wrap seam-side down on a cutting board and slice it diagonally with a sharp serrated knife. This visual ‘bias cut’ shows off the layers and makes for a beautiful presentation on your food board.
10 Quick No-Bake Summer Desserts (Step-by-Step Guide)

Why we love this
When the sun is blazing, the last thing anyone wants is a hot oven heating up the house. These no-bake desserts are the cool, creamy heroes of the season, offering a velvety mouthfeel that melts away the summer heat. Imagine the scent of macerated strawberries and heavy cream wafting through the kitchen, combined with the buttery, salty scent of a crushed graham cracker crust. Each bite is a delicate balance of sweetness and chill, providing a refreshing end to a meal without any of the heavy, cakey textures that can feel overwhelming in July.
Ingredients
- Graham cracker crumbs
- Melted unsalted butter
- Cream cheese, softened
- Powdered sugar
- Heavy whipping cream
- Assorted fresh berries (strawberries, blueberries, raspberries)
- Vanilla extract
How to make it
- Create a base by mixing 2 cups of graham cracker crumbs with 6 tablespoons of melted butter until the mixture resembles wet sand. Press this firmly into the bottom of individual jars or a tart pan and chill in the freezer for 10 minutes to set.
- In a chilled metal bowl, beat 1 cup of heavy cream until stiff peaks form. Set this aside to maintain its airy volume.
- In a separate large bowl, cream together 8 ounces of softened cream cheese, 1/2 cup of powdered sugar, and a teaspoon of vanilla extract until the mixture is completely smooth and free of lumps.
- Gently fold the whipped cream into the cream cheese mixture using a rubber spatula. Use a slow ‘over-and-under’ motion to keep as much air in the mousse as possible.
- Spoon the creamy filling over your chilled crusts, smoothing the tops with the back of a spoon.
- Refrigerate for at least 4 hours, or ideally overnight. The chilling time is crucial for the fats to solidify and create a sliceable, stable texture.
- Just before serving, top with fresh berries. For a professional look, glaze the berries with a tiny bit of warmed apricot jam to give them a high-gloss finish.
7 Best Picnic Side Dishes You’ll Love (Step-by-Step Guide)

Why we love this
Picnic sides should be vibrant, durable, and bursting with the flavors of the garden. A classic watermelon and feta salad is the crown jewel here, offering a stunning contrast between the ruby-red fruit and the snow-white cheese. The aroma is an invigorating mix of sweet melon and garden-fresh mint, while the flavor profile hits every note: sweet, salty, and acidic. It feels like a cool breeze on a humid afternoon, providing a hydrating crunch that cleanses the palate between bites of heavier picnic fare. It’s simple, elegant, and looks like a work of art on any serving platter.
Ingredients
- Seedless watermelon, cubed
- Feta cheese, crumbled
- Fresh mint leaves, chiffonade
- Extra virgin olive oil
- Lime juice and zest
- Flaky sea salt
How to make it
- Start by cubing your watermelon into uniform 1-inch squares. For the best texture, ensure the watermelon has been thoroughly chilled in the refrigerator for at least 6 hours before cutting.
- Place the cubes in a large colander over a bowl for 10 minutes to allow excess juice to drain. This prevents the salad from becoming a soup by the time you reach the park.
- In a small jar, whisk together 3 tablespoons of olive oil, the juice of one lime, and the zest. The zest is where the essential oils live, providing that punchy citrus aroma.
- Gently transfer the watermelon to a wide, shallow serving bowl. Drizzle the lime vinaigrette over the top and toss very lightly using your hands or large spoons.
- Sprinkle the crumbled feta and the fresh mint over the top. Do not over-mix after adding the feta, as the cheese can cloud the red juices of the melon.
- Finish with a generous pinch of flaky sea salt right before serving. The salt draws out the sweetness of the melon and balances the tang of the feta.
8 Easy Summer Crockpot Recipes to Try (Step-by-Step Guide)

Why we love this
The magic of a summer crockpot recipe is the ‘set it and forget it’ freedom it grants you while the house stays perfectly cool. Pulled pork sliders are the ultimate board-filler, filling the air with the intoxicating scent of smoky paprika, brown sugar, and slow-rendered fat. The texture is incredibly tender—the meat should literally fall apart at the touch of a fork—contrasting beautifully with the snap of a fresh coleslaw topping. It’s hearty, soul-warming food that feels like a backyard barbecue without you having to stand over a flaming grill for hours on end.
Ingredients
- Pork butt or shoulder (3-4 lbs)
- Dry rub (brown sugar, garlic powder, onion powder, smoked paprika, salt)
- Apple cider vinegar
- Your favorite BBQ sauce
- Brioche slider buns
- Prepared coleslaw
How to make it
- Pat the pork shoulder dry with paper towels. Rub the dry spice mixture into every crevice of the meat, pressing firmly so the spices adhere and form a flavorful bark during cooking.
- Place the pork in the slow cooker and pour 1/2 cup of apple cider vinegar around the base. The acidity helps break down the tough connective tissues over time.
- Cover and cook on LOW for 8 to 10 hours. Avoid the temptation to use the ‘High’ setting; the low temperature is essential for the fat to render properly and keep the meat succulent.
- Once the meat reaches an internal temperature of about 205°F, remove it from the crockpot and let it rest on a cutting board for 15 minutes.
- Use two forks to shred the pork into long, thin strands. Remove any large pieces of unrendered fat or gristle.
- Toss the shredded meat back into the slow cooker with a cup of BBQ sauce and the remaining juices. Stir well and let it warm through for another 20 minutes to absorb the flavors.
- Serve on toasted brioche buns topped with a heap of cold coleslaw for the perfect temperature and texture contrast.
6 Refreshing Summer Cocktails to Make (Step-by-Step Guide)

Why we love this
Nothing says ‘summer party’ like the sound of ice clinking in a crystal-clear glass. A signature gin and elderflower spritz is a sensory delight, with its pale golden hue and the floral, botanical aroma that reminds you of a garden in full bloom. The first sip is a fizzy explosion of citrus and sweetness, followed by the clean, crisp finish of a good tonic. It looks breathtaking on a board surrounded by sliced citrus wheels and sprigs of fresh rosemary, inviting your guests to slow down and enjoy the golden hour with a sophisticated drink in hand.
Ingredients
- Dry Gin
- Elderflower liqueur (like St-Germain)
- Fresh lemon juice
- Club soda or sparkling water
- Cucumber ribbons and fresh mint for garnish
- Ice cubes
How to make it
- Start by chilling your glassware in the freezer for 10 minutes. A cold glass is the secret to keeping your drink carbonated and refreshing for longer.
- Using a vegetable peeler, create long, thin ribbons of cucumber. Press them against the inside walls of your glass; they will stick to the glass and create a beautiful green spiral.
- Fill the glass to the very brim with large, solid ice cubes. Using small or crushed ice will cause the drink to dilute too quickly in the summer heat.
- In a cocktail shaker (without ice), combine 2 ounces of gin, 1 ounce of elderflower liqueur, and 1/2 ounce of fresh lemon juice. Stir gently to combine.
- Pour the mixture over the ice in your prepared glass.
- Top the glass with chilled club soda, pouring slowly down the side of the glass to preserve the bubbles.
- Garnish with a sprig of mint—give the mint a sharp ‘slap’ between your palms before adding it to the glass to release the aromatic oils.
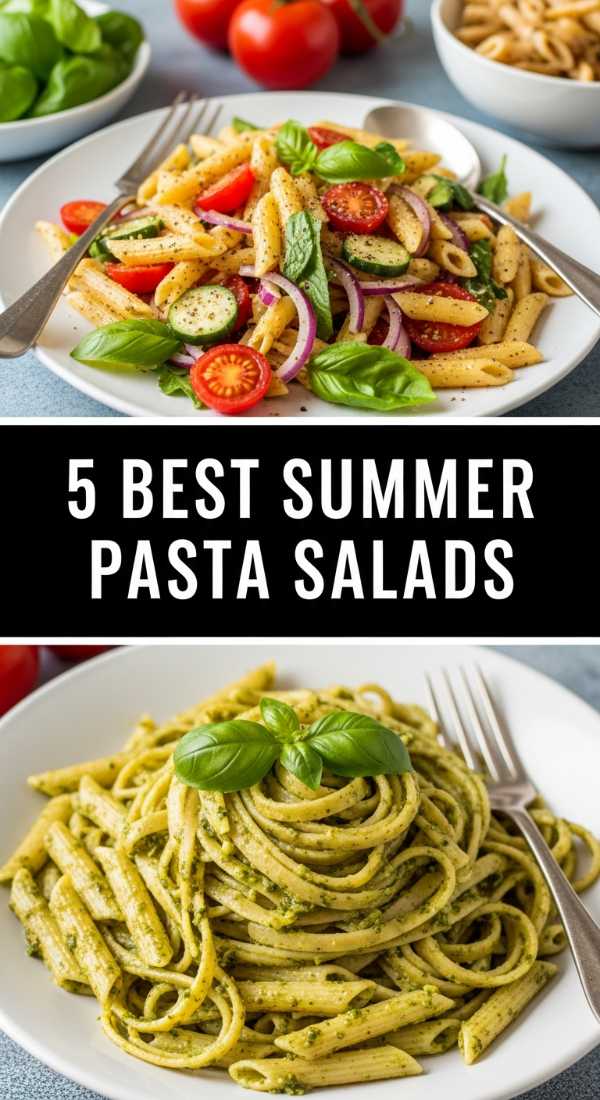
5 Best Summer Pasta Salads (Step-by-Step Guide)
Why we love this
A great pasta salad is a symphony of colors and textures that only gets better as it sits. The scent of fresh basil pesto and sun-dried tomatoes is enough to make anyone’s mouth water, while the al dente pasta provides a satisfying chew that anchors the dish. It’s a versatile board addition that feels both rustic and refined, with small balls of fresh mozzarella adding a creamy richness that balances the acidity of the vinaigrette. Every forkful offers a different combination of garden flavors, making it a reliable crowd-pleaser that looks vibrant and plentiful.
Ingredients
- Fusilli or Rotini pasta
- Basil pesto (store-bought or homemade)
- Cherry tomatoes, halved
- Fresh mozzarella pearls
- Kalamata olives, pitted
- Pine nuts, toasted
- Fresh lemon zest
How to make it
- Boil a large pot of heavily salted water. Cook the pasta until it is just past ‘al dente.’ For cold salads, you want the pasta slightly softer than usual because it will firm up significantly once chilled.
- Drain the pasta and immediately rinse it under cold running water. This stops the cooking process and washes away excess starch, preventing the noodles from sticking together.
- While the pasta is still slightly damp, toss it with a tablespoon of olive oil to keep the coils separated.
- In a large bowl, combine the cooled pasta with 1/2 cup of basil pesto. Stir thoroughly until every groove in the rotini is filled with green sauce.
- Fold in the halved cherry tomatoes, mozzarella pearls, and olives. The variety of shapes makes the salad visually interesting on your food board.
- In a small dry pan, toast the pine nuts over medium heat for 2-3 minutes until they are golden brown and fragrant. Watch them closely, as they burn in an instant.
- Top the salad with the toasted pine nuts and a fresh grating of lemon zest just before serving to add a bright, aromatic finish.
10 Best Kabobs on the Grill (Step-by-Step Guide)

Why we love this
Kabobs are the quintessential summer food, offering charred, smoky goodness on a stick. The aroma of searing meat and caramelizing peppers over hot coals is the universal signal that the party has started. Each skewer is a colorful parade of ingredients, with the juices from the meat basting the vegetables as they cook, resulting in a sweet and savory harmony. The texture of a perfectly grilled kabob—tender on the inside with crispy, blackened edges—is incredibly addictive and makes for a fun, interactive eating experience when arranged in a sunburst pattern on a large platter.
Ingredients
- Sirloin steak or chicken thighs, cut into 1.5-inch cubes
- Bell peppers (red, green, and yellow), cut into chunks
- Red onion, cut into wedges
- Zucchini, sliced into thick rounds
- Marinade (olive oil, soy sauce, honey, minced garlic)
- Wooden or metal skewers
How to make it
- If using wooden skewers, soak them in water for at least 30 minutes. This prevents them from catching fire on the grill.
- Place your meat cubes in a bowl with the marinade for at least 2 hours. The honey in the marinade is key; it helps create those beautiful charred grill marks through caramelization.
- Thread the ingredients onto the skewers, alternating between meat and vegetables. Do not pack them too tightly; leaving a tiny bit of space between pieces ensures that heat can circulate and cook everything evenly.
- Preheat your grill to medium-high (about 400°F). Clean the grates thoroughly and wipe them with an oil-soaked paper towel to create a non-stick surface.
- Place the skewers on the grill. Let them sear undisturbed for 4-5 minutes until they release easily from the grates. If they stick, they aren’t ready to turn yet.
- Rotate the skewers 90 degrees and continue cooking for another 10-12 minutes, turning occasionally, until the meat reaches your desired doneness and the vegetables are tender-crisp.
- Remove from the grill and let the meat rest on the skewers for 5 minutes before serving to allow the juices to redistribute.
7 Healthy Summer Salad Recipes (Step-by-Step Guide)

Why we love this
A healthy summer salad should feel like an abundance of energy in a bowl. A kale and quinoa power salad brings deep, earthy greens together with nutty grains and a zesty tahini dressing that feels indulgent without being heavy. The aroma is clean and bright, dominated by fresh lemon and parsley. The texture is a delightful mix of the sturdy, massaged kale and the pop of protein-packed quinoa, punctuated by the occasional sweetness of dried cranberries or pomegranate seeds. It’s a nutrient-dense masterpiece that stays fresh for hours, making it the perfect centerpiece for a wellness-focused food board.
Ingredients
- Curly kale, stems removed and chopped
- Cooked quinoa, cooled
- Chickpeas, drained and rinsed
- Cucumber, diced
- Tahini dressing (tahini, lemon juice, maple syrup, water)
- Toasted sunflower seeds
How to make it
- Place the chopped kale in a very large bowl. Drizzle with a teaspoon of olive oil and a pinch of salt. Use your hands to ‘massage’ the kale for 2-3 minutes. This breaks down the tough cellulose fibers, making the leaves tender and sweet rather than bitter.
- Add the cooked, cooled quinoa to the kale. Quinoa acts like tiny sponges, soaking up the flavors of the dressing.
- In a small bowl, whisk together 1/4 cup of tahini, the juice of half a lemon, and a teaspoon of maple syrup. Add water one tablespoon at a time until the dressing is thin enough to drizzle but thick enough to coat a spoon.
- Toss the chickpeas and diced cucumber into the kale mixture. The cucumber adds a necessary water content that keeps the salad feeling light.
- Pour the tahini dressing over the salad and toss thoroughly with tongs to ensure every leaf is coated.
- Top with toasted sunflower seeds for a nutty crunch that contrasts with the soft quinoa.
- Let the salad sit for 15 minutes before serving. Unlike lettuce salads, kale salads actually improve as they marinate.
8 Easy Refreshing Pool Snacks (Step-by-Step Guide)

Why we love this
When you’re lounging by the water, snacks need to be hydrating, mess-free, and ice-cold. Frozen yogurt-covered blueberries are the ultimate viral pool snack, offering a satisfying snap followed by a creamy, fruity center. The scent is subtle and sweet, and the cooling sensation is instant. They look like little frosted gems when served in a chilled bowl, providing a healthy alternative to sugary popsicles. It’s the kind of snack that you can graze on all afternoon without feeling weighed down, making it a staple for any summer food board intended for the patio.
Ingredients
- Fresh giant blueberries
- Greek yogurt (plain or vanilla)
- Honey or stevia (optional, for sweetness)
- Baking sheet and parchment paper
- Toothpicks
How to make it
- Wash the blueberries and pat them completely dry. If the berries are wet, the yogurt will slide right off instead of adhering.
- Line a small baking sheet with parchment paper. Ensure it fits in your freezer before you start the dipping process.
- In a small bowl, stir the Greek yogurt until it is completely smooth. If you are using plain yogurt, add a drizzle of honey to taste.
- Using a toothpick, pierce a blueberry and dip it into the yogurt until it is fully submerged. Lift it out and let any excess yogurt drip off.
- Place the coated blueberry on the parchment paper. Repeat this process until all berries are coated. This is a great task for kids or a relaxing solo activity.
- Place the tray in the freezer for at least 2 hours. The yogurt needs to be rock-solid to the touch.
- Transfer the frozen berries to a freezer-safe bag or container. Serve them directly from the freezer in a chilled bowl to keep them from melting in the sun.
9 Best Cookout Side Dishes (Step-by-Step Guide)

Why we love this
A cookout isn’t complete without the smoky, buttery goodness of grilled corn on the cob. The smell of husks charring over an open flame is pure nostalgia, evoking memories of state fairs and family reunions. When you peel back the charred leaves to reveal golden, blistered kernels, the sight is mouthwatering. The texture is a perfect combination of juicy, sweet ‘pop’ and the rich, velvety coating of herb-infused butter. It’s a rustic, hands-on side dish that brings a beautiful height and texture to your food board, acting as a delicious anchor for the rest of your grilled meats.
Ingredients
- Fresh ears of corn, husks on
- Unsalted butter, softened
- Fresh chives and parsley, minced
- Smoked paprika
- Salt and lime wedges
How to make it
- Soak the entire ears of corn (husks and all) in a bucket of cold water for at least 20 minutes. This creates steam inside the husk, which cooks the kernels while preventing the leaves from burning too quickly.
- While the corn soaks, mix the softened butter with the minced herbs and a pinch of smoked paprika. This ‘compound butter’ is the secret to elevating simple corn.
- Preheat your grill to medium-high. Place the damp corn directly on the grates.
- Grill for about 15-20 minutes, turning every 5 minutes. The outer husks should become blackened and charred.
- Carefully remove the corn from the grill. Using heat-resistant gloves or a towel, peel back the husks (you can leave them attached at the base for a handle).
- Return the peeled corn to the grill for 2-3 minutes, turning constantly, to get a few direct char marks on the kernels themselves.
- Immediately slather with the herb butter and a squeeze of lime. The residual heat will melt the butter into every crevice of the cob.
Wrapping Up the Viral Food Board Trend
As we’ve seen, the ‘Simple Food Board’ isn’t about fancy ingredients; it’s about the heart of summer—sharing delicious, accessible food with the people you love. Whether you’re piling up chicken wraps for a quick lunch or arranging frozen blueberries for a pool day, these boards remove the stress of hosting and replace it with a sense of abundance and ease. So, put away the expensive marble cheese slicer and grab your biggest wooden board. This summer, we’re celebrating the simple, the fresh, and the viral recipes that make every gathering feel like a special occasion.