
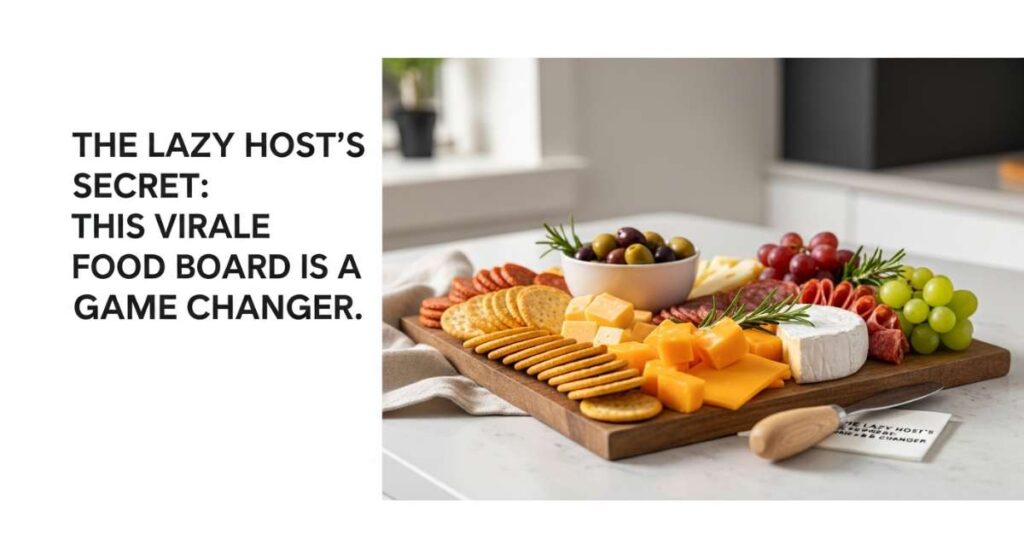
The Lazy Host’s Secret: This Viral Simple Food Board is a Game Changer
We’ve all been there: the sun is setting, the patio lights are twinkling, and your friends are about to arrive, but you’re still sweating in the kitchen over a complicated three-course meal. There is a specific kind of hosting anxiety that comes from trying too hard to impress, and honestly, life is too short to miss out on the conversation because you’re tied to the oven. That is exactly why I fell in love with the ‘Viral Simple Food Board’ trend—it’s not just a meal; it’s an effortless lifestyle choice that prioritizes joy over labor.
The magic of this approach lies in its visual abundance and communal feel. By spreading out a variety of fresh, vibrant components on a large wooden board, you invite your guests to graze, linger, and build their own perfect bites. It creates a relaxed atmosphere where the pressure to be a ‘perfect’ chef evaporates, replaced by the simple pleasure of sharing good food. Below, I’ve rounded up the ultimate components to make your next gathering an absolute breeze, featuring everything from savory dips to sweet summer finishes.
How to make creamy rotel dip?

Why we love this
This dip is the ultimate nostalgic comfort food, boasting a velvety, molten texture that clings perfectly to every chip it touches. The aroma of melted cheese infused with the zesty, slightly spicy scent of green chilies and vine-ripened tomatoes creates an instant watering of the mouth for everyone in the room. It feels like a warm hug in a bowl, offering a rich, savory depth that balances perfectly with the sharp, salty crunch of a classic tortilla chip. It’s the centerpiece of any board that guarantees guests will be scraping the bottom of the bowl within minutes.
Ingredients
- 1 lb Velveeta cheese, cubed
- 1 can (10 oz) Ro-Tel Diced Tomatoes and Green Chilies, undrained
- 1/2 lb ground sausage or beef (optional)
- 1/2 cup sour cream for extra creaminess
- 1 tsp garlic powder
- Fresh cilantro for garnish
How to make it
- If you are using meat, begin by browning the ground sausage or beef in a heavy-bottomed skillet over medium-high heat. Use a wooden spoon to break the meat into small, uniform crumbles, cooking until no pink remains and the edges are slightly crispy for added texture.
- Drain the excess grease from the skillet thoroughly to ensure the dip doesn’t become oily or separated later on.
- In a slow cooker or a medium saucepan over low heat, add the cubed Velveeta cheese and the entire can of Ro-Tel (do not drain the liquid, as it provides essential acidity and flavor).
- Stir the mixture constantly with a silicone spatula. The key here is low and slow; if the heat is too high, the cheese will scorch and lose its silky consistency.
- Once the cheese is about 80% melted, stir in the browned meat, sour cream, and garlic powder. Continue stirring until the mixture is completely homogenous and glossily smooth.
- Keep the dip on the ‘warm’ setting of your slow cooker or transfer it to a pre-warmed ceramic bowl. Garnish with a sprinkle of fresh cilantro just before placing it in the center of your food board.
How to make hummingbird food?

Why we love this
While not for the guests to eat, having hummingbirds darting around your garden is the ultimate ‘vibe’ for a summer food board party. The sight of these iridescent jewels hovering near a feeder adds a layer of magical, natural theater to your outdoor hosting space that no decoration can match. This simple nectar is clean, clear, and mimics the natural sweetness of flowers, inviting a sense of peace and wonder to your patio. It transforms a simple lunch into an immersive outdoor experience where nature feels like it’s part of the guest list.
Ingredients
- 1 cup granulated white sugar
- 4 cups filtered water
How to make it
- Combine the water and the granulated white sugar in a medium pot. It is crucial to use only plain white sugar, as honey or organic sugars can contain iron or pathogens that are harmful to hummingbirds.
- Place the pot over medium-high heat and bring the mixture to a rolling boil. Stir occasionally to ensure the sugar crystals are fully dissolved into the liquid.
- Boil the mixture for exactly two minutes. This step is essential because it helps neutralize any impurities in the water and ensures the sugar is completely integrated, creating a stable syrup.
- Remove the pot from the heat and allow the nectar to cool completely to room temperature. Never put hot nectar into a feeder, as it can warp the plastic and harm the birds.
- Once cooled, fill your clean hummingbird feeders. Store any extra nectar in a sealed glass jar in the refrigerator for up to one week.
- Hang your feeder in a shaded area near your food board setup to enjoy the sights while you eat. Remember to clean the feeder every few days to keep the birds healthy.
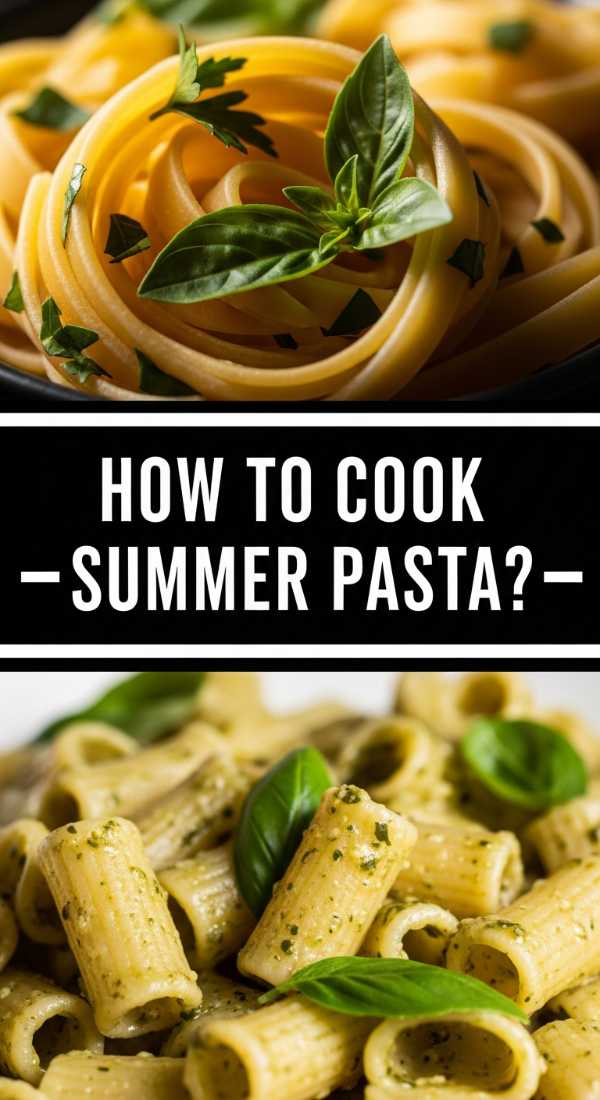
How to cook summer pasta?
Why we love this
Summer pasta is all about celebrating the harvest, featuring a light, zesty profile that won’t leave you feeling weighed down in the heat. Imagine the scent of toasted garlic and fresh basil wafting through the air, combined with the bright acidity of burst cherry tomatoes that create their own natural sauce. The texture is a delightful contrast between the firm, al dente bite of the pasta and the soft, juicy sweetness of the vegetables. It’s a vibrant, colorful addition to any board that looks just as good as it tastes, capturing the essence of a sun-drenched garden in every forkful.
Ingredients
- 12 oz Linguine or Farfalle
- 2 cups cherry tomatoes, halved
- 3 cloves garlic, thinly sliced
- 1/4 cup extra virgin olive oil
- 1/2 cup fresh basil leaves, torn
- 1/4 cup grated Parmesan cheese
- Red pepper flakes and lemon zest
How to make it
- Bring a large pot of heavily salted water to a boil. Use at least one tablespoon of salt per gallon of water; it should taste like the sea to properly season the pasta from the inside out.
- Add the pasta and cook for approximately 8-9 minutes, or until it reaches a perfect al dente texture. Always check the package instructions but start tasting 2 minutes early to ensure it still has a slight resistance to the bite.
- While the pasta cooks, heat the olive oil in a large skillet over medium-low heat. Add the sliced garlic and a pinch of red pepper flakes. Sauté gently for 2-3 minutes until the garlic is golden and fragrant, but be careful not to let it brown, or it will turn bitter.
- Increase the heat to medium and add the halved cherry tomatoes. Sauté for 5-7 minutes, pressing down on some of them with the back of a spoon to release their juices, creating a light, emulsified sauce.
- Reserve 1/2 cup of the starchy pasta water before draining the noodles. Add the drained pasta directly into the skillet with the tomatoes.
- Toss the pasta vigorously with the sauce, adding the reserved pasta water a tablespoon at a time to help the sauce coat every strand. Turn off the heat and fold in the fresh basil, lemon zest, and Parmesan cheese before serving warm or at room temperature on your board.
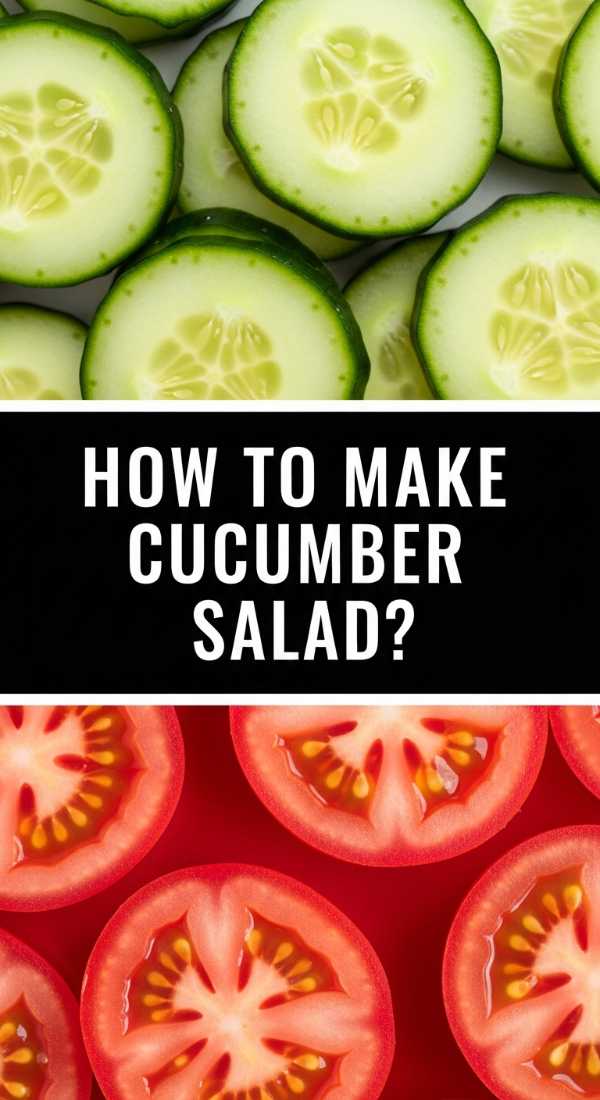
How to make cucumber salad?
Why we love this
This salad is the ultimate palate cleanser, offering a crisp, cooling snap that balances out richer board items like dips or grilled meats. The aroma is incredibly refreshing, dominated by the clean scent of cucumber and the sharp, herbaceous notes of fresh dill and white vinegar. Its watery, crunchy texture provides a sensory relief on a hot day, making it an essential side for any outdoor gathering. The translucent green slices look like emeralds scattered across the board, bringing a much-needed pop of brightness and a tang that keeps you coming back for more.
Ingredients
- 2 large English cucumbers, thinly sliced
- 1/2 small red onion, paper-thinly sliced
- 1/3 cup white wine vinegar
- 1 tbsp sugar
- 2 tbsp fresh dill, chopped
- 1/2 tsp sea salt and cracked black pepper
How to make it
- Begin by slicing your English cucumbers into very thin rounds. Using a mandoline slicer is highly recommended to achieve that uniform, professional-looking translucency that allows the dressing to penetrate quickly.
- Place the cucumber slices in a colander and sprinkle with a half teaspoon of salt. Let them sit for about 15 minutes. This process, called ‘degorging,’ draws out excess moisture, ensuring your salad stays crunchy and the dressing doesn’t get watered down.
- In a small glass bowl, whisk together the white wine vinegar, sugar, and black pepper until the sugar is completely dissolved.
- Pat the cucumbers dry with a clean kitchen towel and place them in a large mixing bowl along with the thinly sliced red onions.
- Pour the vinegar mixture over the vegetables and toss gently to coat. The onions will soften slightly and lose their sharp bite as they macerate in the vinegar.
- Fold in the freshly chopped dill just before serving. For the best flavor, let the salad chill in the refrigerator for at least 30 minutes, allowing the flavors to meld into a bright, zesty harmony.
How to grill summer kabobs?

Why we love this
Kabobs are the quintessential summer food, offering a smoky, charred aroma that instantly signals a party is in progress. There is something deeply satisfying about the charred, caramelized edges of the vegetables paired with succulent, juicy pieces of marinated meat. The textures vary with every bite—from the snap of a bell pepper to the melt-in-your-mouth tenderness of a grilled mushroom. They are naturally portioned for a board, making them the perfect ‘grab-and-go’ item that adds height and a rustic, flame-kissed aesthetic to your display.
Ingredients
- 1 lb sirloin steak or chicken breast, cut into 1-inch cubes
- 1 red bell pepper and 1 zucchini, sliced into chunks
- 1 red onion, cut into wedges
- 1/4 cup soy sauce, 2 tbsp olive oil, and 1 tbsp honey (for marinade)
- 2 cloves garlic, minced
- Wooden or metal skewers
How to make it
- If using wooden skewers, soak them in water for at least 30 minutes prior to grilling to prevent them from catching fire or splintering.
- Prepare your marinade by whisking together the soy sauce, olive oil, honey, and minced garlic in a bowl. Place the meat cubes in a zip-top bag, pour in the marinade, and refrigerate for at least 1-2 hours to ensure the flavors penetrate the fibers of the meat.
- Preheat your grill to medium-high heat (about 400°F). Clean the grates thoroughly and lightly oil them to prevent sticking.
- Thread the skewers, alternating between meat, peppers, onions, and zucchini. Do not pack the items too tightly; leaving a tiny bit of space between pieces allows the heat to circulate, ensuring the meat cooks through while the vegetables get those beautiful char marks.
- Place the kabobs on the grill. Cook for 8-10 minutes, turning them every 2-3 minutes using tongs. You are looking for a deep brown sear on the meat and softened, slightly blackened edges on the vegetables.
- Use an instant-read thermometer to check the meat: 145°F for medium-rare beef or 165°F for chicken. Remove from the grill and let them rest for 5 minutes before placing them on your board to keep the juices locked in.
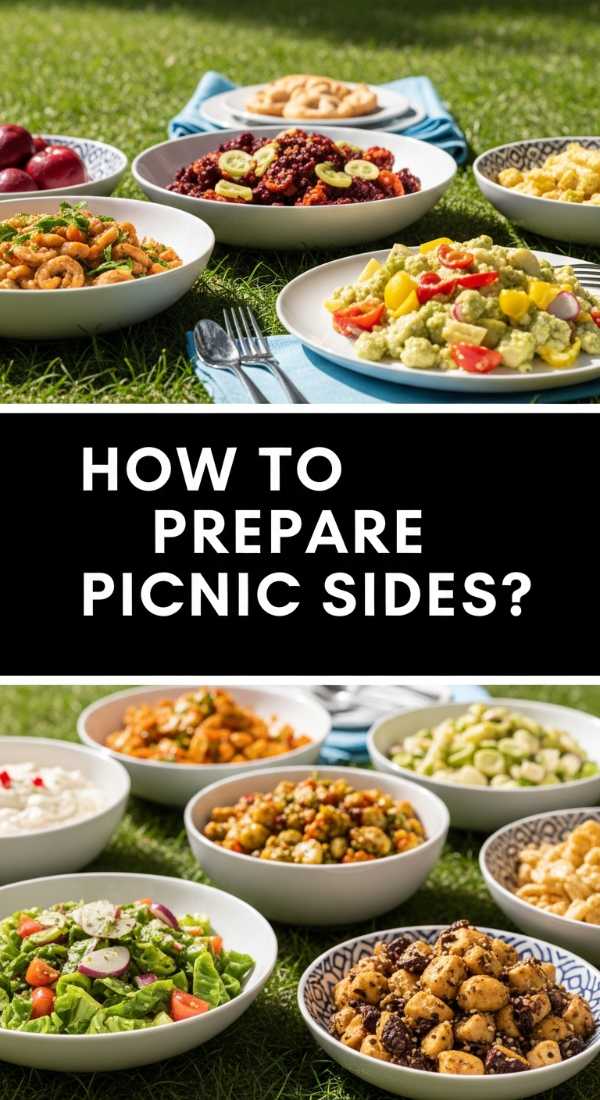
How to prepare picnic sides?
Why we love this
A well-prepared picnic side is the backbone of a successful grazing board, providing familiar, comforting textures that anchor the more adventurous flavors. Whether it’s a creamy potato salad or a tangy coleslaw, these sides offer a creamy, satisfying mouthfeel that balances the acidity of pickles and salads. They bring a sense of abundance and tradition to the table, with aromas of mustard, celery seed, and fresh herbs that evoke memories of childhood summers. They are designed to be served cold, making them incredibly practical for outdoor hosting where food needs to stand up to the heat.
Ingredients
- 1 lb baby gold potatoes (for potato salad)
- 1/2 cup mayonnaise and 1 tbsp Dijon mustard
- 2 stalks celery, finely diced
- 1/4 cup chopped pickles or relish
- 2 hard-boiled eggs, chopped
- Fresh chives and paprika for garnish
How to make it
- For a classic potato salad side, place the baby gold potatoes in a large pot of cold, salted water. Bring to a boil and cook for 10-12 minutes until fork-tender but not falling apart. Starting with cold water ensures the potatoes cook evenly from the center to the skin.
- Drain the potatoes and let them cool slightly. While still warm (but not hot), slice them into halves or quarters. Adding dressing to warm potatoes allows them to absorb the flavors more deeply than cold potatoes.
- In a large bowl, whisk together the mayonnaise, Dijon mustard, and a splash of pickle juice for acidity.
- Gently fold in the diced celery, chopped pickles, and hard-boiled eggs. These provide the necessary ‘crunch’ and ‘cream’ contrast that makes a side dish interesting.
- Add the potatoes to the dressing and toss gently with a large spoon to avoid mashing the potatoes into a paste.
- Season generously with salt and pepper. Refrigerate for at least 2 hours before the party. Just before adding to the board, sprinkle with fresh chives and a dusting of paprika for a professional, colorful finish.
How to make summer desserts?

Why we love this
Summer desserts should be an explosion of natural sweetness, leaning heavily on the peak-season ripeness of berries and stone fruits. There is nothing quite like the scent of macerated strawberries mixed with the light, airy aroma of whipped cream or a buttery shortbread crust. The textures are a dream: the soft give of a ripe peach, the burst of a blueberry, and the cool, silky finish of a cream-based topping. They provide the perfect ‘grand finale’ to your food board, offering a light and refreshing way to satisfy a sweet tooth without the heaviness of a baked cake.
Ingredients
- 2 cups fresh berries (strawberries, blueberries, raspberries)
- 1 tbsp sugar and 1 tsp lemon juice
- 1 cup heavy whipping cream
- 1 tsp vanilla extract
- Shortbread cookies or angel food cake cubes
- Fresh mint for garnish
How to make it
- Start by preparing your fruit ‘carpaccio.’ Slice the strawberries thinly and toss them in a bowl with the sugar and lemon juice. Let them sit for 20 minutes; this ‘macerating’ process creates a beautiful, natural syrup and softens the fruit.
- For the whipped cream, place a metal mixing bowl and whisk in the freezer for 10 minutes. Cold tools are the secret to achieving maximum volume and stable peaks.
- Pour the heavy cream and vanilla into the chilled bowl. Whisk by hand or with an electric mixer on medium-high speed until soft peaks form. Do not over-beat, or the cream will turn grainy and buttery.
- To assemble on the board, create a ‘dessert corner.’ Place the shortbread cookies or cake cubes in a neat pile.
- Place the macerated berries in a beautiful glass bowl and the whipped cream in another.
- Garnish the entire section with fresh mint leaves and perhaps some edible flowers. This allows guests to build their own ‘deconstructed’ shortcakes, choosing their own ratios of fruit to cream.
How to cook summer soup?

Why we love this
Summer soup, like a chilled Gazpacho or a golden corn chowder, is an unexpected delight on a food board that adds a sophisticated, gourmet touch. It offers a smooth, cooling sensation that contrasts beautifully with the crunch of bread or crackers. The aroma is garden-fresh—think pureed bell peppers, cucumbers, and a hint of lime. It’s light, hydrating, and incredibly vibrant in color, serving as both a dish and a decorative element. Serving it in small shot glasses or ramekins makes it easy to handle, allowing guests to sip on the flavors of summer while they mingle.
Ingredients
- 4 large tomatoes, cored and chopped
- 1 cucumber, peeled and chopped
- 1 red bell pepper, seeded and chopped
- 1/4 cup red onion
- 2 tbsp sherry vinegar and 1/3 cup olive oil
- Salt, pepper, and a dash of cumin
How to make it
- Place all the chopped vegetables—tomatoes, cucumber, bell pepper, and onion—into a high-powered blender. If you want a truly refined soup, peel the tomatoes first by blanching them in boiling water for 30 seconds.
- Add the sherry vinegar, salt, pepper, and cumin. The cumin adds a subtle earthy depth that rounds out the bright acidity of the tomatoes.
- Blend on high speed until the mixture is completely liquefied and smooth.
- While the blender is running on low, slowly drizzle in the extra virgin olive oil. This ’emulsification’ process creates a creamy, luxurious mouthfeel without the need for dairy.
- Pour the soup through a fine-mesh strainer into a large pitcher. This removes any leftover bits of skin or seeds, resulting in a silky-smooth texture.
- Chill the soup in the refrigerator for at least 4 hours—or overnight—as the flavors develop significantly over time. Serve in small glasses on the board with a garnish of diced cucumber or a drizzle of herb oil.
How to cook summer dinner?

Why we love this
A summer dinner should feel effortless and celebratory, often featuring a ‘hero’ protein that has been kissed by the grill or roasted with fragrant herbs. The aroma of rosemary, lemon, and roasting juices creates an inviting atmosphere that draws everyone to the table. The texture is all about succulence—perfectly cooked fish or chicken that flakes easily, paired with vegetables that have retained their bright color and snap. It’s a wholesome, complete meal that feels special without requiring hours of labor, making it the perfect anchor for a communal food board where everyone can help themselves.
Ingredients
- 1 lb Salmon fillet or Chicken thighs
- 1 bunch asparagus, trimmed
- 1 lemon, thinly sliced
- 2 tbsp butter or olive oil
- Fresh rosemary and thyme
- Salt and cracked black pepper
How to make it
- Preheat your oven to 400°F (200°C). Line a large sheet pan with parchment paper for easy cleanup, which is essential for the ‘lazy host’ philosophy.
- Place your protein (salmon or chicken) in the center of the pan. If using chicken, ensure the pieces are of similar size for even cooking. Pat the skin dry with paper towels to ensure it gets crispy.
- Arrange the trimmed asparagus around the protein. Drizzle everything generously with olive oil or melted butter.
- Season with salt, pepper, and the fresh herbs. Lay the lemon slices directly on top of the protein; as they bake, the juice will steam the meat and infuse it with a bright, citrusy aroma.
- Roast in the oven. Salmon will take 12-15 minutes (until it flakes easily), while chicken thighs will take 25-30 minutes (until the internal temperature hits 165°F).
- Once cooked, let the meat rest for 5 minutes. Transfer the entire sheet pan contents to the center of your food board, surrounding it with your other sides and dips for a stunning, rustic presentation.
How to prep beach snacks?

Why we love this
Beach snacks bring a playful, casual energy to a food board, emphasizing salty, portable, and non-melting treats that stand up to the sun. The aroma is a mix of sea salt, roasted nuts, and the subtle sweetness of dried fruits. These snacks provide a satisfying, rhythmic crunch that is perfect for mindless grazing while chatting. They add various shapes and sizes to your board, filling in the gaps with interesting textures like chewy dried mango or brittle pretzels. They are the ultimate low-maintenance addition that ensures there is always something to nibble on throughout the entire afternoon.
Ingredients
- 1 cup salted pretzels or pita chips
- 1/2 cup roasted almonds or cashews
- 1/2 cup dried apricots or mango slices
- 1 cup frozen grapes (the ultimate cooling hack)
- Small container of hummus or nut butter
How to make it
- The key to beach snacks is temperature and durability. Start by washing a bunch of green or red grapes, removing them from the stems, and freezing them in a single layer on a tray for at least 4 hours. These act as delicious, edible ice cubes on your board.
- Select a variety of nuts and toast them in a dry skillet over medium heat for 3-5 minutes until they smell fragrant. This extra step brings out their oils and makes them much more flavorful than raw nuts.
- Choose dried fruits that are chewy but not sticky. Slice them into bite-sized strips to make them easier for guests to grab with one hand.
- Arrange the dry items (pretzels, nuts, dried fruit) in small clusters directly on the board or in small decorative bowls to prevent them from rolling around.
- Place the frozen grapes in a bowl at the last possible second. As they thaw slightly, they maintain a sorbet-like consistency that is incredibly refreshing.
- Add a small bowl of high-quality hummus in the corner of this section to provide a creamy dipping option for the pretzels and chips, completing the snack experience.
Conclusion: The Art of the Effortless Gathering
Hosting doesn’t have to be a chore, and the viral simple food board is proof that the best memories are made when the host is actually present at the party. By focusing on fresh ingredients, simple techniques, and a communal presentation, you create an environment where the food is a catalyst for connection rather than a source of stress. So, the next time you feel the urge to overcomplicate your menu, remember the board. Fill it with color, variety, and love, and watch as your guests dive into the most relaxed and delicious evening of the summer.