
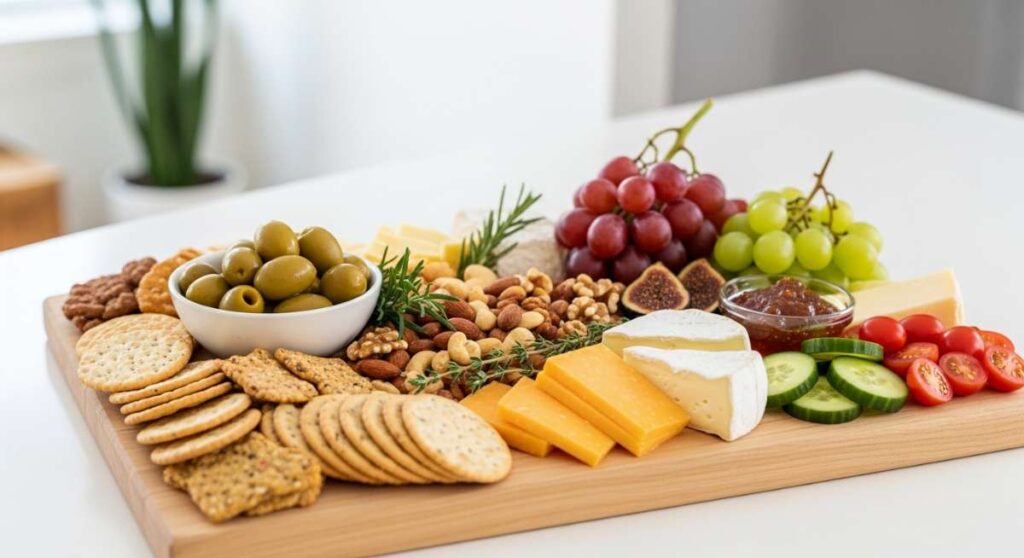
Level Up Your Hosting with This Low-Effort, High-Impact Snack Board
There is something truly magical about a golden hour gathering where the conversation flows as easily as the chilled wine. As a host, I used to find myself stuck in the kitchen, missing the punchlines of jokes and the warmth of the sunset while I fussed over complex appetizers. I realized that the best memories aren’t made over a five-course meal that leaves the cook exhausted; they are built around shared boards and simple, vibrant flavors that invite everyone to dig in together.
This ‘Viral Simple Food Board’ philosophy is all about maximizing impact while minimizing stress. By focusing on a few high-quality, colorful components, you create a visual feast that feels luxurious but takes less time than a grocery run. It’s about that sigh of relief when you set a beautiful tray down and finally take your own seat at the table, knowing everything is prepared and ready for your friends to enjoy.
How to make creamy rotel dip?

Why we love this
There is a deep, nostalgic comfort in a bowl of warm, velvety Rotel dip that instantly breaks the ice at any party. The aroma of melted cheese mingling with the zesty, spicy kick of green chilies and tomatoes creates an irresistible scent that draws people to the snack table like a magnet. Its texture is incredibly smooth and indulgent, providing the perfect contrast to a salty, crunchy tortilla chip, making it the ultimate crowd-pleaser that disappears within minutes of being served.
Ingredients
- 16 oz Velveeta or processed cheese, cubed
- 1 can (10 oz) Ro-Tel Diced Tomatoes and Green Chilies
- 1/2 lb ground breakfast sausage or lean ground beef
- 1/2 tsp taco seasoning
- Fresh cilantro for garnish
How to make it
- Begin by browning your choice of meat in a medium skillet over medium-high heat. Use a spatula to break the meat into very small crumbles, ensuring even cooking. Cook until no pink remains and the edges are slightly crispy.
- Carefully drain the excess fat from the skillet to ensure the dip stays creamy and doesn’t become oily.
- In a slow cooker or a heavy-bottomed saucepan over low heat, add the cubed cheese and the entire can of Ro-Tel (do not drain the liquid from the can, as it provides essential flavor and moisture).
- Stir in the cooked meat and the taco seasoning. If using a stovetop, stir constantly with a wooden spoon to prevent the cheese from scorching on the bottom of the pan.
- Continue heating until the cheese is completely melted and the mixture is bubbling slightly. This should take about 10-15 minutes on the stove or 1 hour on high in a slow cooker.
- Serve immediately in a warmed bowl, topped with a sprinkle of fresh cilantro to add a pop of color and brightness.
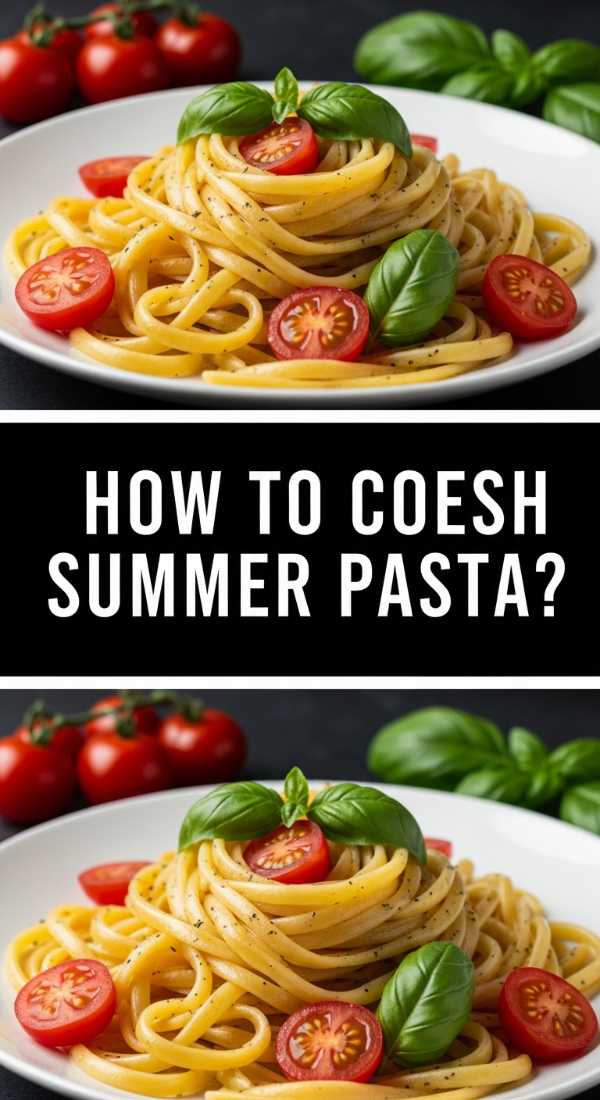
How to cook fresh summer pasta?
Why we love this
Fresh summer pasta is like capturing sunshine in a bowl, offering a lightness that traditional heavy sauces simply can’t match. The scent of aromatic basil leaves and pungent garlic sautéing in high-quality olive oil fills the kitchen with a Mediterranean dreaminess that feels both sophisticated and rustic. Every bite is a balance of textures—the al dente snap of the pasta, the burst of juicy cherry tomatoes, and the bright, acidic finish of fresh lemon zest that cleanses the palate and leaves you feeling refreshed.
Ingredients
- 12 oz Linguine or Spaghetti
- 1 pint cherry tomatoes, halved
- 3 cloves garlic, thinly sliced
- 1/4 cup extra virgin olive oil
- 1/2 cup fresh basil leaves, chiffonade
- 1 lemon (zest and juice)
- Grated Parmesan cheese
How to make it
- Bring a large pot of heavily salted water to a rolling boil. Add your pasta and cook for 1-2 minutes less than the package instructions to ensure a perfect al dente texture. Reserve 1/2 cup of pasta water before draining.
- While the pasta cooks, heat the olive oil in a large skillet over medium-low heat. Add the sliced garlic and cook for about 2 minutes until fragrant and translucent; do not let it brown or it will turn bitter.
- Increase the heat to medium and add the halved cherry tomatoes. Sauté for 4-5 minutes until the tomatoes begin to soften and release their juices, creating a natural sauce.
- Add the cooked pasta directly into the skillet with the tomatoes. Pour in the reserved pasta water and the lemon juice.
- Toss everything together vigorously for 2 minutes over medium heat. The starch in the water will emulsify with the oil to create a silky coating on the noodles.
- Turn off the heat and fold in the lemon zest and fresh basil. Serve immediately with a generous dusting of Parmesan cheese.
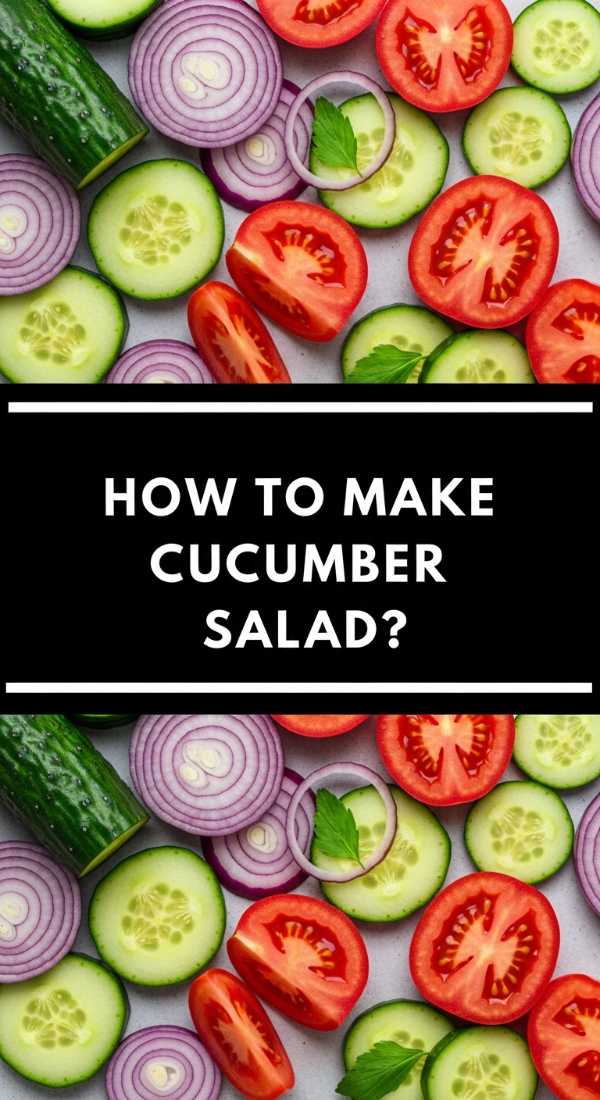
How to make cucumber salad?
Why we love this
A crisp cucumber salad is the ultimate palate cleanser, offering a cool, watery crunch that is incredibly revitalizing on a humid afternoon. The aroma is sharp and clean, dominated by the tang of white vinegar and the earthy fragrance of fresh dill. It provides a beautiful visual contrast on a snack board with its vibrant greens and translucent white onions, offering a healthy, low-calorie option that satisfies the craving for something acidic and bright alongside richer, savory components.
Ingredients
- 2 large English cucumbers, thinly sliced
- 1/2 red onion, shaved into thin rings
- 1/2 cup white wine vinegar
- 2 tbsp granulated sugar
- 1/2 cup fresh dill, chopped
- 1 tsp sea salt
- 1/2 tsp black pepper
How to make it
- Wash the cucumbers thoroughly and slice them as thinly as possible using a mandoline or a sharp chef’s knife. Thin slices are crucial for allowing the marinade to penetrate the vegetable.
- Place the sliced cucumbers in a colander and sprinkle with the sea salt. Let them sit for about 10 minutes to draw out excess moisture, then pat them dry with a paper towel. This ensures the salad doesn’t become watery.
- In a large glass bowl, whisk together the white wine vinegar, sugar, and black pepper until the sugar is completely dissolved.
- Add the cucumbers and the shaved red onions to the bowl, tossing gently to ensure every slice is coated in the dressing.
- Stir in the fresh dill. Cover the bowl with plastic wrap and refrigerate for at least 30 minutes. This chilling time allows the flavors to meld and the onions to soften slightly.
- Give the salad a final toss before serving to redistribute the dressing that may have settled at the bottom.
How to grill perfect kabobs?

Why we love this
There is nothing quite like the smoky, charred aroma of kabobs hitting a hot grill to signal that the party has truly started. The visual appeal of colorful bell peppers, purple onions, and perfectly seared proteins threaded onto a skewer makes them an instant centerpiece. Each bite offers a variety of textures, from the tender, juicy interior of the meat to the slightly blackened, caramelized edges of the vegetables, all infused with the deep, rustic flavor of an open flame.
Ingredients
- 1 lb sirloin steak or chicken breast, cut into 1-inch cubes
- 2 bell peppers (mixed colors), cut into 1-inch pieces
- 1 red onion, cut into wedges
- 1/4 cup soy sauce
- 2 tbsp olive oil
- 1 tbsp honey
- 2 cloves garlic, minced
How to make it
- If using wooden skewers, soak them in water for at least 30 minutes to prevent them from burning on the grill.
- In a bowl, whisk together the soy sauce, olive oil, honey, and minced garlic to create a marinade. Reserve two tablespoons of this mixture for basting later.
- Place your cubed meat in a zip-top bag with the remaining marinade and let it sit in the refrigerator for at least 1 hour (up to 4 hours for steak).
- Thread the meat and vegetables onto the skewers, alternating colors and textures. Avoid packing them too tightly; leave a tiny bit of space between items so the heat can circulate and cook everything evenly.
- Preheat your grill to medium-high heat (about 400°F). Lightly oil the grates to prevent sticking.
- Place the kabobs on the grill. Cook for 8-10 minutes, turning every 2-3 minutes. Use the reserved marinade to baste the kabobs during the final 2 minutes of cooking for a glossy, flavorful finish.
- Check the internal temperature (165°F for chicken, 145°F for medium steak) before removing them from the grill to rest for 5 minutes.
How to mix summer drinks?

Why we love this
A perfectly mixed summer drink is a celebration in a glass, offering a refreshing explosion of citrus and effervescence that instantly cools the core. The sound of ice clinking against glass and the fizz of sparkling water pouring over fresh fruit creates an auditory experience that is pure summer bliss. These drinks are visually stunning, often adorned with bright garnishes and colorful infusions, making them feel like a special treat that elevates a simple gathering into a true event.
Ingredients
- 1 cup fresh berries or fruit slices (strawberries, peaches, or limes)
- 1 bunch fresh mint leaves
- 2 cups sparkling mineral water or club soda
- 1/4 cup simple syrup (equal parts sugar and water)
- Ice cubes
- Optional: 2 oz of your favorite spirit
How to make it
- Begin by preparing your fruit and herbs. Hand-tear the mint leaves to release their essential oils without bruising them too harshly.
- In a sturdy pitcher or individual glasses, place the fruit and mint. Use a muddler or the back of a wooden spoon to gently press down on the ingredients, releasing the juices and aromatics.
- Add the simple syrup to the muddled mixture. If you are adding spirits, pour them in at this stage and stir well to combine the flavors.
- Fill the glasses to the brim with large ice cubes. Large cubes melt slower, preventing your drink from becoming diluted too quickly in the heat.
- Slowly pour the sparkling mineral water over the ice. Stir gently with a long spoon using an upward motion to bring the fruit and syrup up from the bottom without losing the carbonation.
- Garnish with a fresh sprig of mint or a slice of citrus on the rim for a professional, inviting look.
How to bake summer desserts?

Why we love this
Summer desserts should feel effortless and airy, focusing on the natural sweetness of peak-season produce rather than heavy chocolate or spice. The aroma of buttery pastry baking alongside bubbling fruit filling is the scent of pure comfort and home. These treats offer a delightful contrast between a crisp, golden-brown crust and a soft, juicy fruit center, often finished with a dollop of cold cream that melts into the warm layers, creating a decadent yet light finale to any meal.
Ingredients
- 1 sheet pre-made puff pastry, thawed
- 2 cups fresh strawberries or blueberries
- 1/4 cup granulated sugar
- 1 tsp vanilla extract
- 1 egg (for egg wash)
- Whipped cream for serving
How to make it
- Preheat your oven to 400°F (200°C) and line a baking sheet with parchment paper to prevent sticking and make cleanup easier.
- In a medium bowl, toss the fresh berries with the sugar and vanilla extract. Let them sit for 5 minutes so the sugar can draw out a bit of the natural juices.
- Unfold the puff pastry onto the baking sheet. Use a knife to lightly score a 1-inch border around the edge, being careful not to cut all the way through. This allows the edges to rise while the center stays flat.
- Pile the fruit mixture into the center of the pastry, staying within the scored border.
- Beat the egg with a tablespoon of water and brush the outer edges of the pastry with the egg wash. This will result in a professional, glossy, golden-brown finish.
- Bake for 15-20 minutes, or until the pastry is puffed and deeply golden. Let it cool for at least 10 minutes to allow the fruit juices to set before slicing. Serve with a generous dollop of whipped cream.
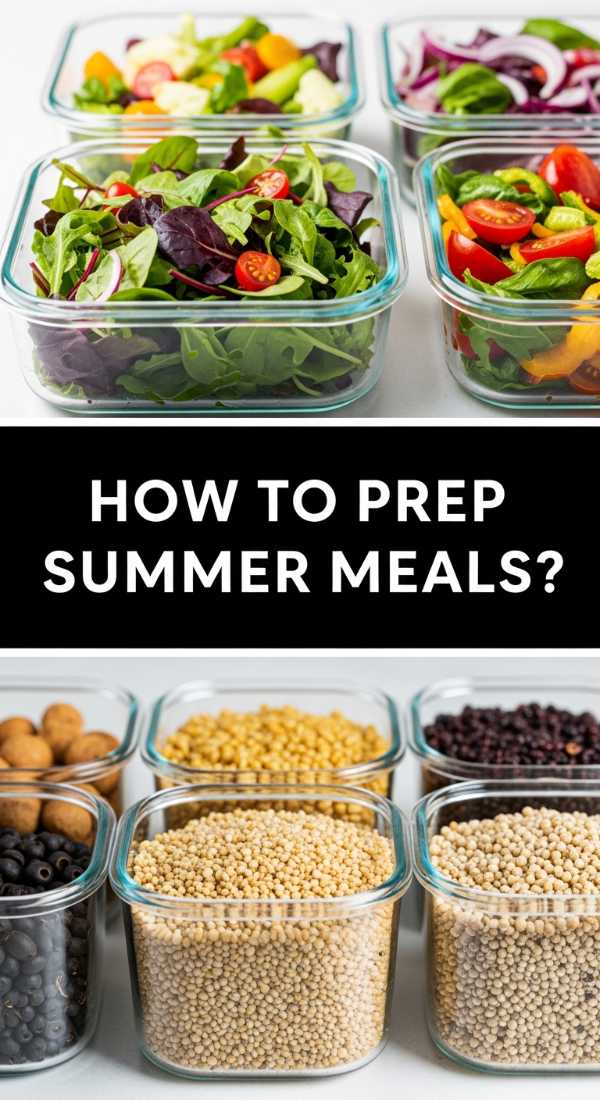
How to prep summer meals?
Why we love this
Prepping summer meals is the ultimate gift to your future self, ensuring that you can spend your evenings enjoying the weather rather than standing over a stove. There is a profound sense of satisfaction in seeing a refrigerator filled with colorful, organized containers of pre-chopped vegetables and marinated proteins. This method focuses on fresh, raw ingredients and quick-cooking techniques that preserve the nutritional integrity and vibrant flavors of the season, making healthy eating feel convenient and delicious.
Ingredients
- 2 cups cooked quinoa or farro
- 1 bunch kale or spinach, washed and chopped
- 3 grilled chicken breasts or tofu blocks, sliced
- 1 cup roasted chickpeas
- Assorted raw veggies (carrots, radishes, cucumbers)
- Lemon-tahini dressing
How to make it
- Dedicate a 90-minute window on a Sunday to batch-cook your grains. Simmer the quinoa or farro in vegetable broth instead of water to infuse them with extra flavor from the start.
- While the grains cook, roast your chickpeas and protein. Season them simply with olive oil, salt, and pepper to ensure they can be used in various flavor profiles throughout the week.
- Wash and thoroughly dry your greens using a salad spinner. Damp greens will wilt quickly, so ensuring they are dry is the key to longevity in the fridge.
- Chop your hardy vegetables like carrots and radishes, but wait to slice watery vegetables like cucumbers until the day you plan to eat them to maintain their crunch.
- Store each component in separate airtight glass containers. Keeping the wet and dry ingredients separate prevents everything from becoming soggy.
- When ready to eat, simply scoop a portion of grains, top with protein and veggies, and drizzle with your pre-made dressing for a meal that takes 30 seconds to assemble but tastes gourmet.
How to make chilled soup?

Why we love this
Chilled soup, like a traditional gazpacho, is a sophisticated and unexpected addition to a snack board that offers a burst of garden-fresh flavor. The texture is incredibly smooth yet complex, with a lingering heat from garlic and peppers that is immediately balanced by the cooling temperature of the soup. It is an aromatic powerhouse, smelling of vine-ripened tomatoes and high-quality olive oil, serving as a refreshing liquid salad that is both hydrating and deeply savory.
Ingredients
- 4 large ripe tomatoes, cored and chopped
- 1 English cucumber, peeled and chopped
- 1 red bell pepper, seeded and chopped
- 1 small red onion, chopped
- 2 cloves garlic
- 2 tbsp sherry vinegar
- 1/2 cup extra virgin olive oil
- Salt and pepper to taste
How to make it
- Place the chopped tomatoes, cucumber, bell pepper, red onion, and garlic into a high-speed blender.
- Add the sherry vinegar and a generous pinch of salt and pepper. Blend on high until the mixture is completely smooth and liquefied.
- With the blender running on low, slowly stream in the extra virgin olive oil. This process, known as emulsification, creates a creamy, luxurious texture without the need for dairy.
- Taste the soup and adjust the seasoning. You may need more vinegar for acidity or more salt to bring out the tomato flavor.
- Pour the soup into a glass pitcher and refrigerate for at least 4 hours. Chilling is mandatory, as the flavors need time to develop and the soup must be served ice-cold to be effective.
- To serve, pour into small shooters or ramekins and finish with a tiny drizzle of olive oil and a crack of black pepper.
How to make mini sandwiches?

Why we love this
Mini sandwiches bring a sense of whimsical charm to a snack board, offering a perfectly portioned bite that feels refined yet approachable. The aroma of freshly sliced sourdough and herbed butter is comforting and inviting, reminding guests of classic tea parties but with a modern, savory twist. They provide a vital structural element to your board, offering a more substantial bite that grounds the lighter fruit and vegetable components, all while remaining easy to eat with one hand while socializing.
Ingredients
- 1 loaf thin-sliced sourdough or brioche
- 4 oz softened butter mixed with 1 tbsp chopped chives
- 1/2 lb thinly sliced deli turkey or ham
- 1 cup microgreens or alfalfa sprouts
- 1 small jar of honey mustard
- 4 thin slices of provolone cheese
How to make it
- Lay out your bread slices in pairs on a clean cutting board. Spread a very thin, even layer of the chive butter on every slice; this acts as a moisture barrier to prevent the bread from getting soggy.
- On one side of each pair, spread a thin layer of honey mustard.
- Layer the meat and cheese carefully, ensuring they do not hang over the edges of the bread. Precision here results in a much cleaner final look.
- Top the meat with a small handful of microgreens for a fresh, peppery crunch.
- Close the sandwiches and use a very sharp serrated knife to remove the crusts. Cutting the crusts off makes them feel more like an intentional ‘finger food.’
- Slice each large sandwich into four small squares or triangles. Arrange them on your board with the cut sides facing up to showcase the colorful layers of meat, greens, and cheese.
How to make hummingbird food?

Why we love this
While not for the human guests, making hummingbird food is a beautiful way to invite nature’s most vibrant visitors to join your outdoor gathering. Watching these tiny, iridescent creatures hovering near your patio adds a layer of enchantment and life to your hosting space that no decoration can match. The process is incredibly simple and clean, avoiding the harmful dyes found in store-bought mixes, and provides a sustainable way to support your local ecosystem while creating a stunning visual display for your guests to admire.
Ingredients
- 1 cup granulated white sugar
- 4 cups water
How to make it
- In a medium saucepan, combine the 1 cup of white sugar and 4 cups of water. It is vital to use only plain white sugar, as honey, brown sugar, or sugar substitutes can be fatal to hummingbirds.
- Place the pan over medium-high heat and bring the mixture to a boil. Stir occasionally to ensure the sugar is completely dissolved.
- Let the mixture boil for 2 minutes. This helps to slow down the growth of bacteria and mold in the feeder later on.
- Remove the pan from the heat and let the syrup cool completely to room temperature. Never put hot nectar into a plastic feeder, as it can warp the plastic and release chemicals.
- Once cooled, fill your hummingbird feeder. Do not add red food coloring; the red parts of the feeder itself are enough to attract the birds, and the dye is unhealthy for them.
- Store any extra nectar in a clean jar in the refrigerator for up to two weeks. Hang your feeder in a shaded area near your snack board to enjoy the show!
Conclusion: The Art of the Effortless Board
At the end of the day, hosting is about the people, not the perfection. By utilizing these simple, high-impact recipes, you’re not just serving food; you’re creating an environment where everyone feels welcome and relaxed. This viral snack board approach proves that with a little bit of prep and a focus on fresh, seasonal ingredients, you can be the ‘host with the most’ without ever breaking a sweat. So, pour yourself a drink, grab a plate, and enjoy the beautiful summer evening you’ve created.