

The Viral Food Board That’s Taking Over My Feed (And My Kitchen!)
You know that feeling when you’re scrolling through your feed at 10 PM and suddenly you see it—the most beautiful, vibrant grazing board that looks like a literal work of art? It’s not just about the food; it’s about the aesthetic, the colors, and the promise of a long, lazy afternoon spent with friends under a sun-drenched patio. Lately, my kitchen has been transformed into a laboratory for these viral ‘Food Board’ trends, and honestly, it has brought so much joy back into my cooking routine.
There is something deeply soulful about assembling a meal that invites people to linger. Whether it’s the way a creamy dip swirls next to crisp veggies or the perfect char on a grilled kabob, these dishes are designed to be shared. I’ve spent the last few weeks perfecting these viral staples, and I can’t wait to show you how to recreate this magic at home without the stress. Grab a glass of iced tea, and let’s dive into the recipes that are making my summer unforgettable!
How to make the best rotel dip

Why we love this
This dip is the ultimate comfort food, striking that perfect balance between nostalgic processed goodness and zesty, spicy flair. Every scoop is a velvety explosion of melted cheese and savory sausage, with the bright, acidic pop of green chilies cutting through the richness. It’s the kind of dish that disappears within minutes at a party because the texture is so incredibly smooth and the aroma of browned meat mixed with melted cheddar is simply irresistible to any guest.
Ingredients
- 1 lb ground pork sausage (mild or hot)
- 2 blocks (16 oz each) of Velveeta cheese, cubed
- 2 cans (10 oz each) Ro-Tel Diced Tomatoes and Green Chilies
- 1/2 cup whole milk (optional, for thinning)
- 1/4 cup fresh cilantro, chopped for garnish
- Tortilla chips for serving
How to make it
- Place a large, heavy-bottomed skillet or Dutch oven over medium-high heat. Add the ground sausage and use a wooden spoon to break it into small, uniform crumbles. Cook for 7–9 minutes until the meat is thoroughly browned and no pink remains, ensuring you get those crispy, caramelized bits at the bottom for maximum flavor.
- Drain the excess grease from the pan to prevent the dip from becoming oily. Lower the heat to medium-low.
- Add the cubed Velveeta cheese directly into the skillet with the sausage. Stir constantly with a silicone spatula as the cheese begins to melt. Maintaining a low heat is crucial here; if the heat is too high, the cheese can scorch or become grainy.
- Once the cheese is about 75% melted, pour in both cans of Ro-Tel (do not drain the liquid—the juices provide essential acidity and flavor). Continue to stir until the mixture is completely smooth and homogeneous.
- If the dip feels too thick, slowly whisk in the milk until you reach your desired consistency. The dip should be pourable but thick enough to coat a chip heavily.
- Transfer to a warm slow cooker on the ‘Keep Warm’ setting to serve, garnishing with fresh cilantro right before the guests arrive.
How to make hummingbird food at home

Why we love this
There is something incredibly peaceful about sitting on the porch and watching those tiny, iridescent wings flutter around a feeder you filled yourself. Making your own nectar ensures it is free from harmful red dyes and preservatives, giving these little gems the pure energy they need. The process is simple, clean, and creates a clear, sweet syrup that mimics the natural nectar found in flowers, turning your backyard into a bustling sanctuary for nature’s most delicate aviators.
Ingredients
- 1 cup white granulated sugar
- 4 cups filtered water
How to make it
- In a medium saucepan, combine the 4 cups of filtered water and 1 cup of granulated white sugar. It is vital to use only white granulated sugar; honey can cause fungal infections in birds, and brown sugar contains too much iron.
- Place the pan over medium heat and stir constantly until the sugar is completely dissolved. Bring the mixture to a light boil for about 1–2 minutes; this helps to slow down the growth of bacteria or mold in the feeder later on.
- Remove the pan from the heat immediately. Do not over-boil, as this changes the water-to-sugar ratio by evaporating too much liquid.
- Allow the nectar to cool completely to room temperature. This is a non-negotiable step—filling a feeder with hot liquid can warp the plastic or harm the birds.
- Once cooled, pour the clear nectar into your cleaned hummingbird feeder. Store any leftover nectar in a sealed glass jar in the refrigerator for up to one week.
- Clean your feeder every 3 to 5 days, or more often in extreme heat, to ensure the nectar stays fresh and safe.
How to make summer pasta salad
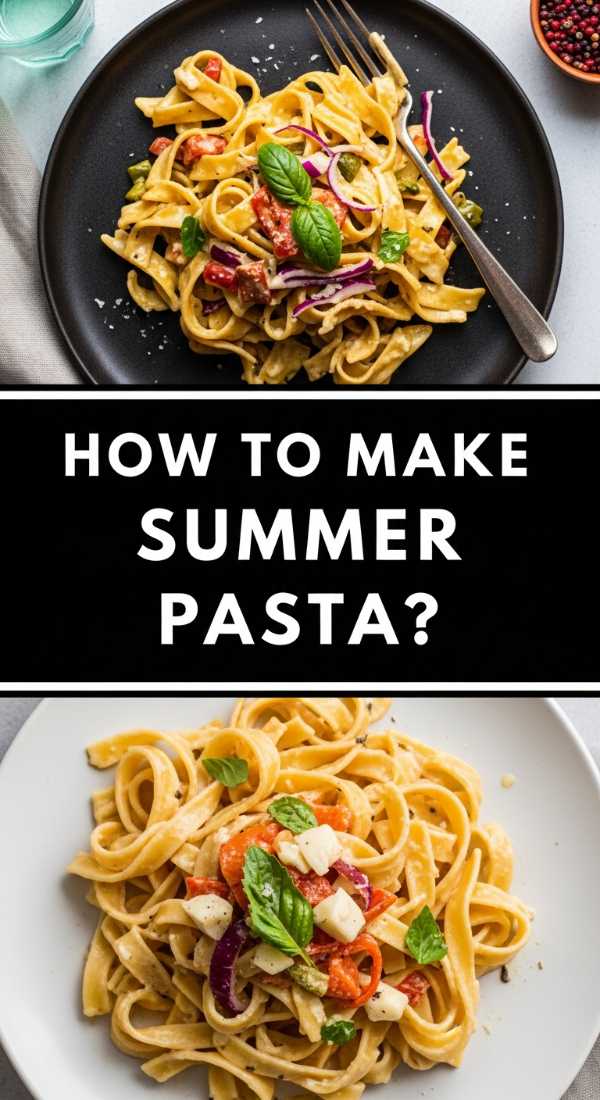
Why we love this
This pasta salad is like a garden party in a bowl, featuring a medley of textures that dance on the palate—from the chewy bite of al dente rotini to the crunch of bell peppers and the creamy richness of fresh mozzarella pearls. The vinaigrette is sharp and herbal, soaking into the ridges of the pasta to ensure every single bite is zesty and refreshing. It’s the perfect side dish because it actually tastes better as it sits, allowing the flavors to marry into a harmonious, cold summer delight.
Ingredients
- 1 lb rotini or fusilli pasta
- 1 pint cherry tomatoes, halved
- 1 English cucumber, diced
- 8 oz fresh mozzarella pearls
- 1/2 cup red onion, finely minced
- 1/2 cup sliced black olives
- 1 cup Italian herb vinaigrette
- 1/4 cup grated Parmesan cheese
- Fresh basil leaves for garnish
How to make it
- Bring a large pot of salted water to a rolling boil. Add the pasta and cook for exactly one minute less than the package directions for ‘al dente.’ This ensures the pasta won’t become mushy after absorbing the dressing.
- Drain the pasta and immediately rinse it under cold running water to stop the cooking process and remove excess starch. Let it drain thoroughly in a colander until completely cool to the touch.
- In a massive mixing bowl, combine the cooled pasta with the halved tomatoes, cucumbers, mozzarella pearls, red onion, and olives.
- Pour 3/4 cup of the Italian vinaigrette over the mixture. Use a large spoon to toss the ingredients gently until every piece of pasta is glistening.
- Cover the bowl with plastic wrap and refrigerate for at least 2 hours. This chilling phase is where the magic happens as the pasta absorbs the acidity of the dressing.
- Just before serving, add the remaining 1/4 cup of dressing, the Parmesan cheese, and fresh basil. Toss one last time to refresh the shine and flavor profile.
How to make summer salad with tomatoes
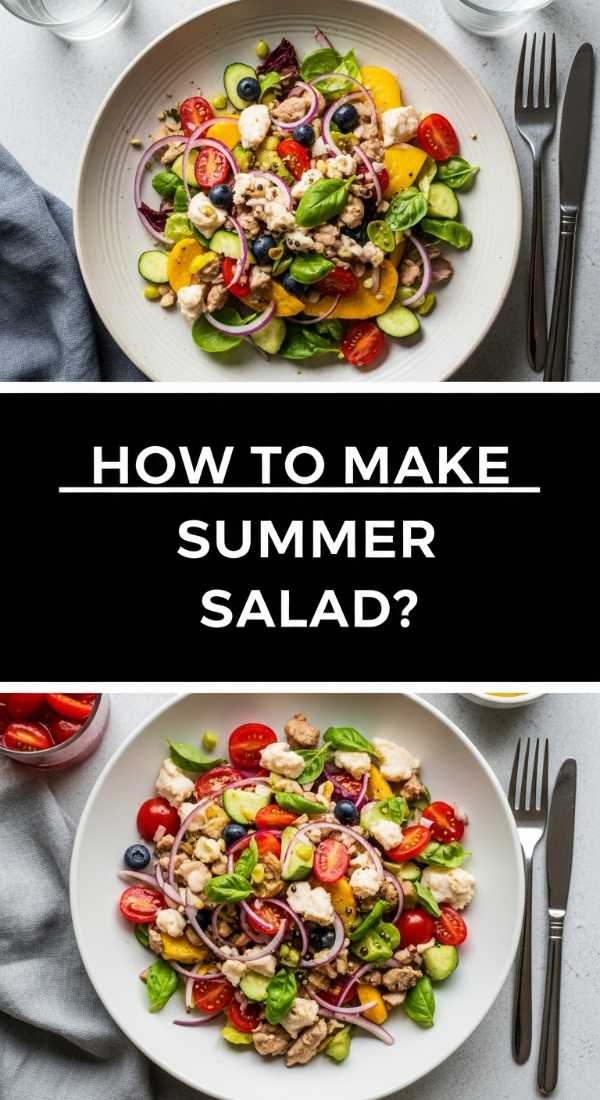
Why we love this
When tomatoes are at their peak, they deserve to be the star of the show. This salad celebrates the sun-warmed, juicy sweetness of heirloom varieties, paired with the earthy aroma of fresh basil and a drizzle of rich, syrupy balsamic. The texture is soft yet substantial, with the salt pulling out the natural juices of the tomatoes to create a built-in dressing that is light, healthy, and quintessentially summer. It feels like a bite of pure sunshine on a plate.
Ingredients
- 3 lbs assorted heirloom tomatoes (different colors and sizes)
- 1/2 red onion, very thinly sliced into half-moons
- 1/4 cup extra virgin olive oil (high quality)
- 2 tbsp balsamic glaze
- 1 cup fresh basil leaves, torn
- Flaky sea salt and freshly cracked black pepper
How to make it
- Begin by prepping your tomatoes. Slice the larger heirlooms into thick wedges and cut the smaller cherry or grape tomatoes in half. Using a variety of shapes creates a more visually stunning and textured salad.
- Arrange the tomato pieces on a large, shallow platter rather than a deep bowl; this prevents the tomatoes from being crushed under their own weight.
- Scatter the thinly sliced red onions over the tomatoes. If you want a milder onion flavor, soak the slices in ice water for 10 minutes before adding them.
- Generously season the tomatoes with flaky sea salt and cracked black pepper. Let them sit for about 5 minutes; you will notice the tomatoes starting to release their beautiful clear juices.
- Drizzle the high-quality extra virgin olive oil evenly across the platter, followed by the thick balsamic glaze.
- Top with a handful of torn basil leaves. Serve immediately while the tomatoes are at room temperature to preserve their delicate cell structure and full flavor.
How to grill perfect kabobs

Why we love this
There is nothing quite like the smoky charred edges of a perfectly grilled kabob. The contrast between the tender, marinated meat and the snap of fire-roasted vegetables provides a sensory experience that is both rustic and refined. As the fat renders over the open flame, it bastes the vegetables, infusing them with a savory depth that you just can’t get from roasting in an oven. It’s an interactive, fun way to eat that screams backyard barbecue perfection.
Ingredients
- 1.5 lbs top sirloin or chicken breast, cut into 1-inch cubes
- 2 large bell peppers (red and green), cut into chunks
- 1 large red onion, cut into wedges
- 1 cup whole button mushrooms
- 1/2 cup olive oil
- 3 tbsp soy sauce
- 2 tbsp lemon juice
- 3 cloves garlic, minced
- Wooden or metal skewers
How to make it
- If using wooden skewers, soak them in water for at least 30 minutes to prevent them from burning on the grill.
- In a medium bowl, whisk together the olive oil, soy sauce, lemon juice, and minced garlic to create a marinade. Reserve 1/4 cup of this for later.
- Place the cubed meat into a gallon-sized zip-top bag and pour in the remaining marinade. Seal and refrigerate for at least 1 hour (for chicken) or up to 4 hours (for beef) to tenderize the proteins.
- Thread the meat and vegetables onto the skewers, alternating colors and textures. Don’t pack them too tightly; leave a tiny bit of space between items so the heat can circulate and cook everything evenly.
- Preheat your grill to medium-high heat (about 400°F). Lightly oil the grates to prevent sticking.
- Place the kabobs on the grill and cook for 10–12 minutes. Turn them every 3 minutes using tongs to ensure a consistent char on all sides. Brush with the reserved marinade during the last 2 minutes of cooking for a glossy, flavorful finish. Check for an internal temp of 165°F for chicken or 145°F for medium-rare beef.
How to make easy summer desserts

Why we love this
Summer desserts should be effortless, highlighting the natural sugar of seasonal fruits without spending hours in a hot kitchen. This particular fruit galette is the ‘lazy person’s pie’—it’s rustic, imperfect, and incredibly charming. The crust is buttery and flaky, folding over a bubbling, jammy center of berries or peaches. Served warm with a scoop of melting vanilla bean ice cream, it creates a temperature contrast that is pure bliss on a warm evening.
Ingredients
- 1 pre-made refrigerated pie crust
- 3 cups fresh berries (blueberries, raspberries, or sliced peaches)
- 1/4 cup granulated sugar
- 1 tbsp cornstarch
- 1 tsp lemon zest
- 1 egg (for egg wash)
- Turbinado sugar for sprinkling
How to make it
- Preheat your oven to 400°F and line a large baking sheet with parchment paper to prevent sticking and catch any fruit drips.
- In a medium bowl, gently toss your chosen fruit with the 1/4 cup of sugar, cornstarch, and lemon zest. The cornstarch is essential as it thickens the fruit juices into a glossy sauce during baking.
- Unroll the pie crust onto the parchment paper. It doesn’t need to be a perfect circle; the rustic ‘vibe’ is part of the appeal.
- Mound the fruit mixture into the center of the crust, leaving a 2-inch border all the way around the edge.
- Fold the edges of the crust inward over the fruit, pleating the dough as you go. The center will remain open, showing off the vibrant fruit.
- Whisk the egg with a splash of water and brush it onto the crust. Sprinkle the crust generously with turbinado (coarse) sugar for a professional-looking crunch.
- Bake for 20–25 minutes until the crust is a deep golden brown and the fruit filling is bubbling vigorously in the center. Let it cool for 15 minutes before slicing so the juices can set.
How to prep easy summer meals

Why we love this
Sheet pan meals are the unsung heroes of busy summer nights. This shrimp and asparagus bake is light, zesty, and takes less than 15 minutes to cook, meaning you spend less time over a stove and more time enjoying the sunset. The shrimp become snappy and succulent, while the asparagus takes on a lovely nutty char. Everything is tied together with garlic butter and lemon, creating a high-protein meal that feels gourmet but requires minimal cleanup.
Ingredients
- 1 lb large shrimp, peeled and deveined
- 1 bunch thin asparagus, woody ends trimmed
- 2 tbsp olive oil
- 3 cloves garlic, minced
- 1 lemon, thinly sliced into rounds
- 1/2 tsp crushed red pepper flakes
- Fresh parsley for garnish
How to make it
- Preheat your oven to 425°F. This high temperature is necessary to sear the shrimp and vegetables quickly without overcooking the delicate interiors.
- On a large rimmed baking sheet, spread out the asparagus and the shrimp in a single layer. Overcrowding the pan will cause the food to steam rather than roast.
- Drizzle the olive oil over everything and sprinkle on the minced garlic, red pepper flakes, salt, and pepper. Use your hands to toss the ingredients directly on the pan until everything is evenly coated.
- Nestle the lemon slices among the shrimp and asparagus. These will caramelize in the oven and release a mellow, sweet citrus juice.
- Roast for 8–10 minutes. Watch closely: the shrimp are done when they turn opaque and form a ‘C’ shape. Do not let them curl into a tight ‘O,’ as that indicates they are overcooked.
- Remove from the oven and garnish with fresh parsley. Serve immediately, perhaps over a bed of quick-cooking couscous or quinoa.
How to make homemade summer soup

Why we love this
When it’s 90 degrees outside, a steaming bowl of soup is the last thing you want—unless it’s a chilled Gazpacho. This soup is a vibrant, liquid salad, packed with the hydrating crunch of cucumbers and the garden-fresh sweetness of bell peppers. It is incredibly refreshing, with a sharp vinegary kick that wakes up your taste buds. The texture is complex—thickened slightly with bread but still light and drinkable—making it the ultimate sophisticated appetizer for a summer brunch.
Ingredients
- 2 lbs very ripe tomatoes, cored and chopped
- 1 English cucumber, peeled and chopped
- 1 red bell pepper, seeded and chopped
- 1 small red onion, chopped
- 1 clove garlic
- 2 tsp sherry vinegar
- 1/2 cup extra virgin olive oil
- 1 slice of stale white bread, crusts removed
How to make it
- Place the chopped tomatoes, cucumber, pepper, onion, and garlic into a high-powered blender.
- Soak the slice of stale bread in a little bit of water for a minute, squeeze out the excess liquid, and add it to the blender. This is the traditional Spanish method to give the soup a silky, creamy body without adding dairy.
- Blend the mixture on high until it is completely liquified and smooth.
- With the blender running on low, slowly stream in the olive oil and sherry vinegar. This creates an emulsion, giving the soup a beautiful orange-red hue and a luxurious mouthfeel.
- Season generously with salt and pepper. Pour the soup through a fine-mesh strainer into a large glass pitcher if you want a perfectly smooth ‘sip-able’ texture, or leave it as-is for a more rustic feel.
- Chill in the refrigerator for at least 4 hours. Gazpacho must be served ice-cold to be truly authentic. Garnish with a drizzle of oil and tiny cubes of cucumber before serving.
How to make party summer dips

Why we love this
Whipped feta has taken the internet by storm for a reason: it’s the perfect canvas for summer flavors. The texture is airy and cloud-like, contrasting the naturally salty, tangy bite of the feta cheese. When topped with a drizzle of honey and some toasted nuts, it hits every single flavor note—salty, sweet, creamy, and crunchy. It looks incredibly expensive and high-end on a food board but takes only minutes to pulse together in a food processor.
Ingredients
- 8 oz high-quality feta cheese (in brine)
- 1/2 cup Greek yogurt (full fat is best)
- 1 small clove garlic, grated
- 1 tbsp lemon juice
- 2 tbsp honey for drizzling
- 1 tsp dried oregano or fresh thyme
- Warm pita bread for dipping
How to make it
- Crumble the feta cheese into the bowl of a food processor. Using feta from a block (stored in brine) results in a much creamier dip than the pre-crumbled variety.
- Add the Greek yogurt, grated garlic, and lemon juice to the processor.
- Pulse the mixture several times to break down the cheese, then turn the processor on high and let it run for 2–3 minutes. You are looking for the mixture to transition from grainy to completely smooth and aerated.
- If the mixture feels too stiff, add a teaspoon of water or olive oil and blend for another 30 seconds.
- Spread the whipped feta onto a shallow bowl or plate, using the back of a spoon to create ‘swirls’ and ‘divots’ for toppings to settle into.
- Drizzle generously with honey and sprinkle with oregano or thyme. Serve at room temperature with toasted pita triangles or crunchy cucumber slices.
How to prep healthy beach snacks

Why we love this
Beach snacks need to be three things: portable, sand-proof, and hydrating. These Mason jar fruit and nut cups are the ultimate solution. The vertical layering keeps the juicy fruit at the bottom and the crunchy nuts or granola at the top, preventing anything from getting soggy in the cooler. They are vibrant, packed with vitamins, and provide that perfect hit of natural sugar and healthy fats to keep your energy up while you’re swimming or lounging by the waves.
Ingredients
- 2 cups cubed watermelon or pineapple
- 1 cup blueberries or grapes
- 1/2 cup raw almonds or walnuts
- 1/4 cup pumpkin seeds
- 1 lime (juice only)
- Mint leaves
How to make it
- Start with clean, dry pint-sized Mason jars. Ensuring the jars are dry prevents the nuts from losing their crunch.
- Layer the heaviest, juiciest fruit at the bottom. Cubed watermelon or pineapple works best here as they won’t be crushed by other ingredients.
- Squeeze a little lime juice over the fruit layer and add a couple of torn mint leaves. This adds a bright, mojito-like freshness that is incredibly cooling.
- Add a layer of smaller berries, like blueberries or grapes, which act as a barrier between the wet fruit and the dry toppings.
- Top the jar with your nuts and seeds. By keeping them at the very top, away from the fruit juices, they stay perfectly crisp until you’re ready to eat.
- Seal the lids tightly and keep the jars in a cooler packed with ice. When you’re ready for a snack, just shake the jar and eat directly from it with a fork—no plates needed, and no sand in your food!
Wrapping Up My Food Board Journey
Creating these dishes has reminded me that food is so much more than just fuel—it’s an expression of the season and a way to connect with the people we love. Whether you’re whipping up a batch of nectar for the birds or assembling a massive summer salad for a neighborhood BBQ, I hope these recipes inspire you to get into the kitchen and make something beautiful. Life is too short for boring meals, so let’s keep the food boards coming!