
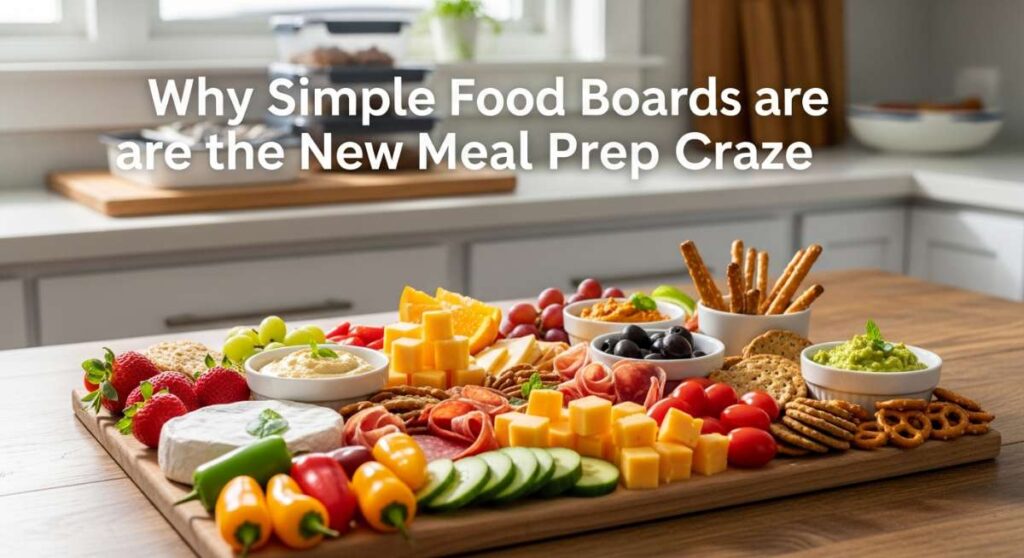
There’s something almost magical about the shift from the frantic ‘What’s for dinner?’ to the serene ‘Let’s just graze.’ We’ve all been there—standing in front of an open fridge at 6 PM on a Tuesday, overwhelmed by the components of a meal that hasn’t been started. The traditional meal prep, with its uniform plastic containers and repetitive flavors, has started to feel a bit like a chore rather than a lifestyle choice. Enter the simple food board: the viral trend that is reclaiming our dinner tables one artisan cracker at a time.
As a lifelong fan of the ‘snack dinner,’ seeing the world embrace the food board as a legitimate meal prep strategy has been a revelation. It’s not just about aesthetics; it’s about the sensory experience of choosing your own adventure. Imagine a spread where the colors pop, the textures vary from crunchy to velvety, and the aroma of fresh herbs fills the kitchen. It’s a way to feed your family—or just yourself—that feels like a celebration of ingredients rather than a task to be checked off a list.
The beauty of these boards is their versatility. Whether you’re utilizing your slow cooker for tender proteins or assembling the ultimate summer salad, the goal is to create a visual and culinary feast that encourages slow eating and better conversation. Today, I’m sharing my favorite ways to turn standard recipes into stunning, board-style meals that will make your meal prep the highlight of your week.
10 Summer Crockpot Recipes You’ll Love
Why we love this
There is nothing quite like the aroma of a slow-cooked carnitas filling the house, reminding you that dinner is taking care of itself while you enjoy the sunshine. We love this board approach because it takes heavy, warm proteins and lightens them up with vibrant, cold accompaniments like pickled onions, fresh cilantro, and lime wedges. The texture of the meat is perfectly tender with crispy, charred edges from a quick broiler finish, providing a smoky depth that pairs beautifully with a chilled glass of rosé on a humid evening.
Ingredients
- 3 lbs Pork Shoulder, cubed
- 4 cloves Garlic, minced
- 1 tbsp Ground Cumin
- 1 cup Fresh Orange Juice
- 2 tsp Dried Oregano
- Corn Tortillas
- Sliced Radishes
- Pickled Red Onions
- Fresh Cilantro
- Lime Wedges
How to make it
- Begin by patting your pork shoulder cubes dry with a paper towel; this is a critical step to ensure the seasoning sticks and you get a better sear later. In a small bowl, whisk together the cumin, oregano, salt, pepper, and minced garlic to create a dry rub.
- Rub the spice mixture thoroughly over all sides of the pork. Place the seasoned meat into the crockpot and pour the fresh orange juice over the top, which provides the necessary acidity to break down the fibers during the long cook time.
- Set your slow cooker to the ‘Low’ setting for 8 hours. This low-and-slow approach allows the collagen to melt into a buttery consistency. Avoid opening the lid during the process, as this releases steam and extends the cooking time.
- Once the meat is fork-tender, carefully remove it from the pot and shred it using two forks. For a professional finish, spread the meat on a baking sheet and broil for 3-5 minutes until the tips become dark and crispy.
- Arrange the crispy meat in the center of a large wooden board, surrounding it with warm tortillas, radishes, onions, and lime to create an interactive taco board experience.
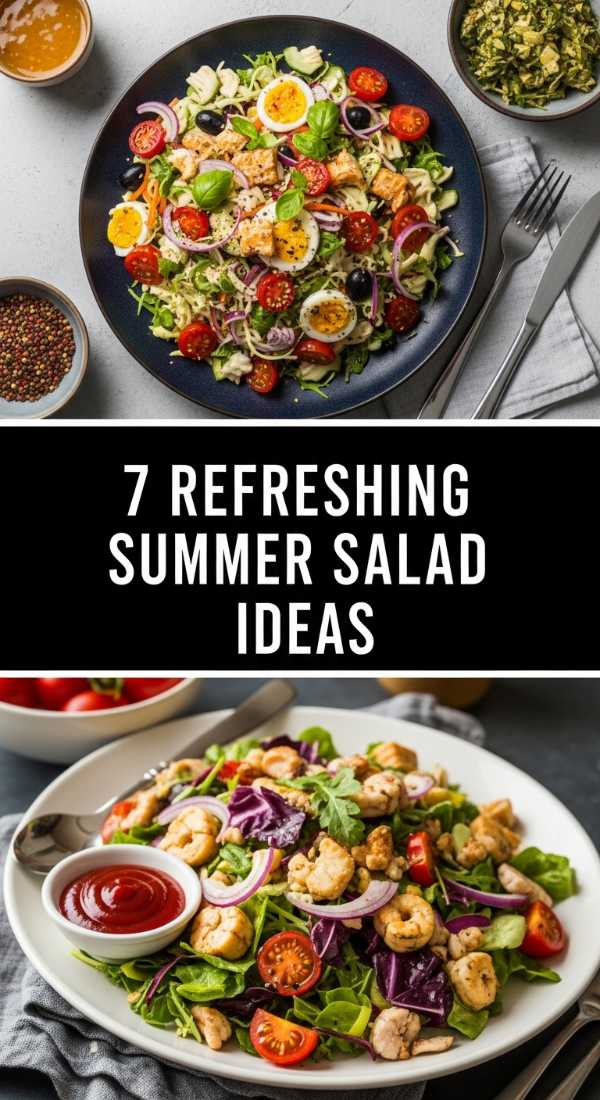
7 Best Summer Salad Recipes Ever

Why we love this
Summer is the season of peak produce, and a salad board allows every ingredient to shine without getting soggy under a heavy dressing. We adore this deconstructed Caprese board for its vibrant red hues and the intoxicating scent of fresh basil that fills the room the moment you start assembling. Each bite offers a different combination: the creamy, milky richness of fresh burrata, the acidic snap of heirloom tomatoes, and the thick, syrupy sweetness of a high-quality balsamic glaze that clings to the tongue.
Ingredients
- 3-4 Large Heirloom Tomatoes, sliced
- 2 balls of Fresh Burrata Cheese
- 1 cup Fresh Basil Leaves
- 1/2 cup Extra Virgin Olive Oil
- 1/4 cup Balsamic Glaze
- Flaky Sea Salt
- Toasted Baguette Slices
How to make it
- Select tomatoes of various sizes and colors to provide visual interest and a spectrum of acidity levels. Slice them into 1/2-inch thick rounds and arrange them in a fan pattern across a marble or wooden board.
- Place the burrata balls in the center of the tomato arrangement. Use a sharp knife to gently score the top of the cheese, allowing the creamy stracciatella interior to slightly spill out, creating a luxurious focal point.
- Tear the fresh basil leaves by hand rather than chopping them; this prevents the edges from bruising and releases the aromatic oils more effectively. Scatter the leaves generously over the tomatoes.
- Drizzle the entire board with a high-quality extra virgin olive oil. Look for a ‘peppery’ finish to contrast with the sweet tomatoes. Follow this with a zig-zag drizzle of balsamic glaze for a hit of concentrated sweetness.
- Finish with a heavy pinch of flaky sea salt. Serve immediately with warm, toasted baguette slices placed directly on the board to soak up the juices and olive oil.
5 Top Cookout Side Dishes Today

Why we love this
Cookout sides often get relegated to messy bowls, but putting them on a ‘Street Corn Board’ turns them into the star of the show. We love the way the charred, smoky aroma of grilled corn mingles with the salty, pungent kick of cotija cheese and the spicy warmth of chili powder. It’s a tactile eating experience that feels quintessentially summer, offering a crunch that gives way to juicy sweetness, all balanced by a creamy, lime-infused sauce that keeps you reaching for more.
Ingredients
- 6 ears of Fresh Sweet Corn
- 1/2 cup Mexican Crema or Sour Cream
- 1/2 cup Crumbled Cotija Cheese
- 2 tsp Chili Powder or Ancho Powder
- 1/4 cup Chopped Cilantro
- Lime Wedges for serving
How to make it
- Preheat your grill to medium-high heat (about 400°F). Shuck the corn completely, removing all silk. Lightly brush each ear with a neutral oil to prevent sticking and to facilitate even charring.
- Place the corn directly on the grill grates. Grill for about 10-12 minutes, turning occasionally with tongs. You are looking for a deep golden color with specific spots of black charring on the kernels; this provides the essential smoky flavor.
- While the corn grills, whisk together the crema and a squeeze of lime juice in a small bowl until it reaches a drizzling consistency.
- Once the corn is done, lay the ears side-by-side on a long rectangular board. Immediately drizzle the crema over the hot corn so it slightly melts into the crevices.
- Generously sprinkle the cotija cheese and chili powder over the top. The heat from the corn will help the cheese adhere. Garnish the entire board with fresh cilantro and extra lime wedges for guests to use as they please.
8 Simple Summer Pasta Salad Ideas

Why we love this
Pasta salad is a staple, but an ‘Antipasto Pasta Board’ is a game changer for entertaining. It’s a sensory delight of briny olives, salty cured meats, and tender rotini that holds onto a zesty herb vinaigrette. We love how the different shapes and colors create a mosaic on the board, offering a variety of textures from the chew of the pasta to the snap of fresh bell peppers. It’s the perfect make-ahead dish that actually tastes better as the flavors meld together under the summer sun.
Ingredients
- 1 lb Rotini or Fusilli Pasta
- 1 cup Salami, cubed
- 1 cup Fresh Mozzarella Pearls
- 1/2 cup Black and Green Olives
- 1/2 cup Roasted Red Peppers, sliced
- 1/2 cup Italian Vinaigrette
- Fresh Parsley for garnish
How to make it
- Bring a large pot of salted water to a rolling boil. Cook the pasta until it is just past ‘al dente’—slightly softer than usual. This ensures that as the pasta cools and absorbs the dressing, it doesn’t become too hard or rubbery.
- Drain the pasta and immediately rinse it under cold running water to stop the cooking process and remove excess starch. This prevents the pasta from sticking together on the board.
- Transfer the pasta to a large bowl and toss with half of the Italian vinaigrette while still slightly damp. Let it sit for 10 minutes to absorb the base flavor.
- On a large circular board, create a ‘wreath’ of the pasta. In the center and in small clusters around the pasta, place the salami, mozzarella pearls, olives, and roasted peppers.
- Drizzle the remaining dressing over the entire spread and garnish with chopped parsley. This allows guests to mix their own proportions of pasta to ‘mix-ins’ directly on their plates.
6 Fun Summer Drink Ideas Now

Why we love this
The ‘Garnish Board’ is the new cocktail hour essential that turns a simple drink into a viral moment. We love the way a board filled with sliced citrus, fresh berries, and sprigs of mint looks—it’s like an artist’s palette for beverages. The aroma is incredibly refreshing, with the zesty oils of lemon and lime hanging in the air. It invites guests to interact and customize their drinks, turning a standard lemonade or gin and tonic into a personalized masterpiece of flavor and fragrance.
Ingredients
- 2 Lemons and 2 Limes, sliced into wheels
- 1 cup Fresh Raspberries
- 1 cup Blueberries
- 1 bunch Fresh Mint
- 1 Cucumber, thinly sliced
- Carafe of Iced Tea or Sparkling Water
How to make it
- Use a very sharp mandoline or chef’s knife to slice your citrus and cucumbers into uniform, paper-thin rounds. Consistency is key for a high-end look.
- Wash and thoroughly dry your berries. Wet berries will bleed color onto the board and soften too quickly in the heat.
- To prep the mint, give the bunch a ‘smack’ against your hand before placing it on the board; this ‘wakes up’ the aromatic oils so the scent is more prominent for your guests.
- Arrange the ingredients on a small slate or wooden board in ombre patterns—grouping the greens, then yellows, then reds. This visual gradient is what makes the board ‘viral-worthy.’
- Place the board next to your beverage dispenser or carafes. Encourage guests to muddle the fruit in their glasses before pouring their drink to release the maximum amount of fresh summer flavor.
10 Healthy Summer Meals To Try

Why we love this
A ‘Mediterranean Power Board’ is the ultimate answer to healthy summer eating without feeling deprived. We love the combination of warm, fluffy quinoa paired with crisp cucumbers and creamy hummus. The textures are incredibly satisfying, offering a hearty base with light, refreshing toppings. It feels like a spa day on a plate—clean, bright, and deeply nourishing. The contrast between the earthy grains and the sharp, tangy feta creates a flavor profile that is both complex and incredibly easy to assemble.
Ingredients
- 2 cups Cooked Quinoa
- 1 cup Hummus (Original or Roasted Garlic)
- 1 cup Cherry Tomatoes, halved
- 1 English Cucumber, diced
- 1/2 cup Kalamata Olives
- 1/4 cup Crumbled Feta Cheese
- Lemon Tahini Dressing
How to make it
- Cook the quinoa in vegetable broth instead of water to infuse it with extra savory depth. Once cooked, fluff it with a fork and spread it out on a tray to cool to room temperature; this prevents the other vegetables on the board from wilting.
- Place a large bowl of hummus in the corner of your board. Use the back of a spoon to create a ‘swirl’ in the hummus and fill the well with a little olive oil and a dash of paprika.
- Mound the cooled quinoa in the center of the board. Surround the grain base with distinct piles of cherry tomatoes, cucumbers, and olives. This ‘deconstructed’ look allows for a beautiful color contrast between the red, green, and purple.
- Sprinkle the feta cheese specifically over the tomatoes and cucumbers to add a salty pop to the fresh produce.
- Serve with a side of lemon tahini dressing. This board works perfectly for meal prep—you can keep the components prepped in the fridge and ‘build’ your board in under five minutes for a healthy lunch.
5 Best Summer Dips For Parties

Why we love this
Nothing says ‘summer party’ like a ‘Whipped Feta and Crudité Board.’ We love this because it elevates the humble veggie tray into something sophisticated and decadent. The whipped feta is airy, salty, and incredibly smooth, providing a luxurious landing spot for crunchy snap peas and radishes. The visual of the bright green vegetables against the snowy white dip is stunning, and the flavor is a perfect balance of rich dairy and garden-fresh lightness that keeps guests hovering around the table all night.
Ingredients
- 8 oz Feta Cheese, crumbled
- 1/2 cup Greek Yogurt
- 1 clove Garlic
- 2 tbsp Lemon Juice
- Assorted veggies (Snap peas, baby carrots, radishes)
- Pita Chips or Crackers
How to make it
- In a food processor, combine the feta cheese, Greek yogurt, lemon juice, and garlic. Process on high for at least 2-3 minutes. This duration is vital—you want to break down the feta crumbles until the mixture becomes completely smooth and aerated.
- If the mixture is too thick, add a teaspoon of cold water at a time until it reaches a spreadable, whipped consistency. Taste and adjust with black pepper (usually, no extra salt is needed due to the feta).
- Spread the whipped feta onto a shallow ceramic plate or directly onto a marble board, using a spatula to create decorative swooshes and peaks.
- Drizzle the dip with honey and a sprinkle of red pepper flakes for a ‘sweet heat’ finish that cuts through the richness of the cheese.
- Arrange your washed and trimmed vegetables and pita chips around the dip, ensuring a variety of shapes and colors to make the board look bountiful and inviting.
7 Sweet Summer Dessert Recipes Today

Why we love this
A ‘Summer Berry and Chocolate Fondue Board’ is the low-stress way to do dessert. We love the indulgence of warm, melted chocolate paired with the tart, juicy explosion of a perfect summer strawberry. It’s a romantic, communal way to end a meal, where the scent of cocoa and vanilla lingers. The textures range from the snap of the chocolate shell as it cools to the soft, pillowy marshmallows, making every bite a decadent treat that feels much more special than a standard bowl of fruit.
Ingredients
- 1 cup Semi-sweet Chocolate Chips
- 1/2 cup Heavy Cream
- Fresh Strawberries, Blackberries, and Raspberries
- Marshmallows
- Shortbread Cookies
- Pretzel Rods
How to make it
- Create a simple ganache by heating the heavy cream in a small saucepan until it just begins to simmer (do not let it boil). Pour the hot cream over the chocolate chips in a heat-proof bowl and let sit for 5 minutes.
- Gently whisk the chocolate and cream together until a glossy, smooth sauce forms. Transfer this to a small fondue pot or a decorative ceramic bowl that holds heat well.
- Place the chocolate bowl in the center of a circular board. Around it, arrange the berries in clusters. Ensure the fruit is completely dry; water is the enemy of chocolate and will cause it to seize.
- Add ‘dippers’ with different textures, such as the buttery crunch of shortbread and the salty snap of pretzels. Fill in any gaps with fluffy marshmallows.
- Provide small bamboo skewers or fondue forks so guests can easily dip their treats into the warm chocolate without making a mess.
9 Easy Summer Dinner Recipes Weekly

Why we love this
The ‘Grilled Chicken Souvlaki Board’ is our go-to for a fast, impressive weeknight dinner. We love the charred, lemon-herb aroma of the chicken skewers and how they look nestled among piles of warm pita and cool tzatziki. It’s a meal that feels like a Mediterranean vacation, offering a satisfying mix of warm protein and cold, crisp sides. The simplicity of the preparation belies the depth of flavor, making it a viral favorite for those who want ‘fancy’ results with minimal actual cooking time.
Ingredients
- 1.5 lbs Chicken Breast, cubed
- 1/4 cup Olive Oil
- 3 tbsp Lemon Juice
- 1 tbsp Dried Oregano
- Tzatziki Sauce
- Warm Pita Bread
- Sliced Onions and Tomatoes
How to make it
- Marinate the chicken cubes in a mixture of olive oil, lemon juice, oregano, salt, and pepper for at least 30 minutes. The acidity of the lemon tenderizes the meat while the oregano provides that classic Greek flavor profile.
- Thread the chicken onto wooden skewers (soak the skewers in water for 20 minutes first to prevent them from burning on the grill).
- Grill the skewers over medium-high heat for 4-5 minutes per side. You are looking for internal temperature of 165°F and distinct grill marks that indicate a good sear and caramelization of the marinade.
- While the chicken rests, lightly toast the pita bread on the grill for 30 seconds until it is soft and pliable.
- Lay the skewers on a large board alongside the toasted pita. Add a bowl of tzatziki and piles of fresh sliced onions and tomatoes, allowing everyone to build their own wraps right at the table.
12 Best Picnic Side Dishes Ever
[IMAGE_10]
Why we love this
A ‘Portable Charcuterie Board’ is the ultimate picnic companion. We love the sophisticated blend of aged cheeses, cured meats, and dried fruits that travel well and require no reheating. The textures are a delight—the crunch of a Marcona almond, the jammy sweetness of a dried fig, and the sharp bite of an aged white cheddar. It’s a sophisticated way to dine outdoors, turning a simple park outing into a gourmet experience that looks as good in photos as it tastes on the palate.
Ingredients
- Aged Cheddar and Brie Cheese
- Prosciutto and Salami
- Dried Figs or Apricots
- Marcona Almonds
- Grapes
- Crackers and Breadsticks
How to make it
- When prepping for a picnic, choose hard cheeses like cheddar or manchego that won’t lose their shape in the heat, along with one creamy option like Brie for variety.
- Fold the prosciutto slices into ‘ribbons’ or ‘roses’—this increases the surface area and makes the board look more professional while preventing the meat from sticking together in one big clump.
- Place the cheeses and meats on the board first as your ‘anchors.’ Then, fill in the larger gaps with clusters of grapes and piles of crackers.
- Use the dried fruits and nuts as ‘fillers’ to tuck into the tiny remaining spaces. This ‘no-gap’ policy is the secret to a professional-looking board that doesn’t shift during transport.
- If traveling, wrap the entire board tightly in plastic wrap and then foil to keep the temperature stable. Pack the crackers separately in a container to ensure they stay crisp until you reach your picnic destination.
Conclusion: Embracing the Board Lifestyle
The transition to food boards isn’t just a passing trend; it’s a shift toward a more mindful and joyful way of eating. By focusing on quality ingredients, beautiful presentation, and the communal nature of sharing a meal, we turn the chore of dinner into the highlight of our day. Whether you’re whipping up a healthy Mediterranean spread or a decadent chocolate dessert board, the key is to keep it simple, colorful, and uniquely yours. So, put away the plastic containers this week and let your creativity take center stage on a wooden board. Happy grazing!