
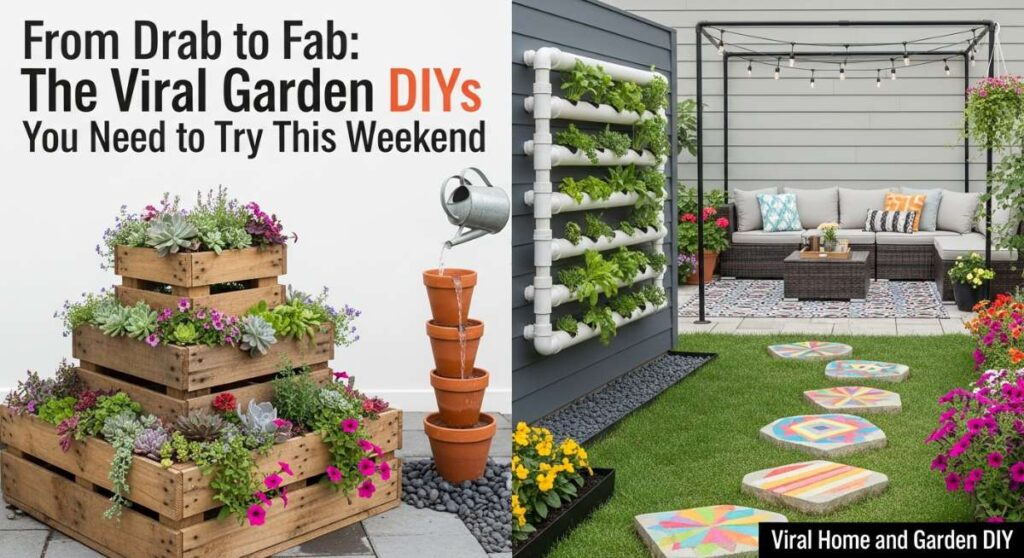
From Drab to Fab: The Viral Garden DIYs You Need to Try This Weekend
There is something truly magical about the way a simple Saturday morning can transform into a journey of creative discovery right in your own backyard. We’ve all scrolled through those mesmerizing social media feeds, watching ordinary spaces turn into ethereal sanctuaries with just a few tools and a splash of inspiration, and honestly? It’s your turn to feel that spark of accomplishment. This weekend isn’t just about chores; it’s about breathing life into the corners of your home that have been waiting for a little extra love and attention.
Imagine walking out onto your porch and feeling a rush of pride as you see a space that reflects your personality—a blend of texture, color, and soul. Whether you’re looking to boost your home’s first impression or create a sensory-rich playground for the kids, these viral DIYs are designed to be accessible yet deeply impactful. Let’s roll up our sleeves, grab a cold drink, and dive into these projects that promise to turn your home from drab to fab before the sun sets on Sunday.
How to Design Front Yard Landscaping for Instant Curb Appeal
Why we love this
There is nothing quite like the crisp, earthy scent of fresh cedar mulch and the tactile satisfaction of pressing vibrant perennials into rich, dark soil under the morning sun. This project transforms your home’s entrance into a welcoming embrace, utilizing the visual contrast between emerald foliage and sharp, clean lawn edges to create a professional look. The feeling of pulling into your driveway and seeing a curated tapestry of colors—lavender, boxwood, and stone—provides an immediate sense of peace and home-ownership pride that is simply unmatched.
Essential Elements:
- Fresh cedar or hemlock mulch
- Low-maintenance perennials (Hostas, Lavender, Daylilies)
- Structured evergreens for height
- Garden edging (metal or stone)
- Landscape fabric and garden staples
- Sharp spade and gardening gloves
How to make it
- Begin by sketching a curved layout for your garden beds; curves look more organic and high-end than straight lines. Use a garden hose to mark the shape on the grass.
- Using a sharp spade, cut a deep, 4-inch trench along your marked line to create a clean edge, removing all grass and weeds within the designated area.
- Lay down a heavy-duty landscape fabric to suppress future weed growth, securing it tightly with metal garden staples every 12 inches.
- Arrange your plants while they are still in their nursery pots to visualize the height and spacing; place taller shrubs in the back and shorter groundcovers in the front.
- Cut an ‘X’ in the fabric for each plant, dig a hole twice as wide as the root ball, and mix in some organic compost before planting at the same depth as the pot.
- Apply a generous 3-inch layer of mulch across the entire bed, smoothing it out with a rake but keeping it a few inches away from the stems of your plants to prevent rot.
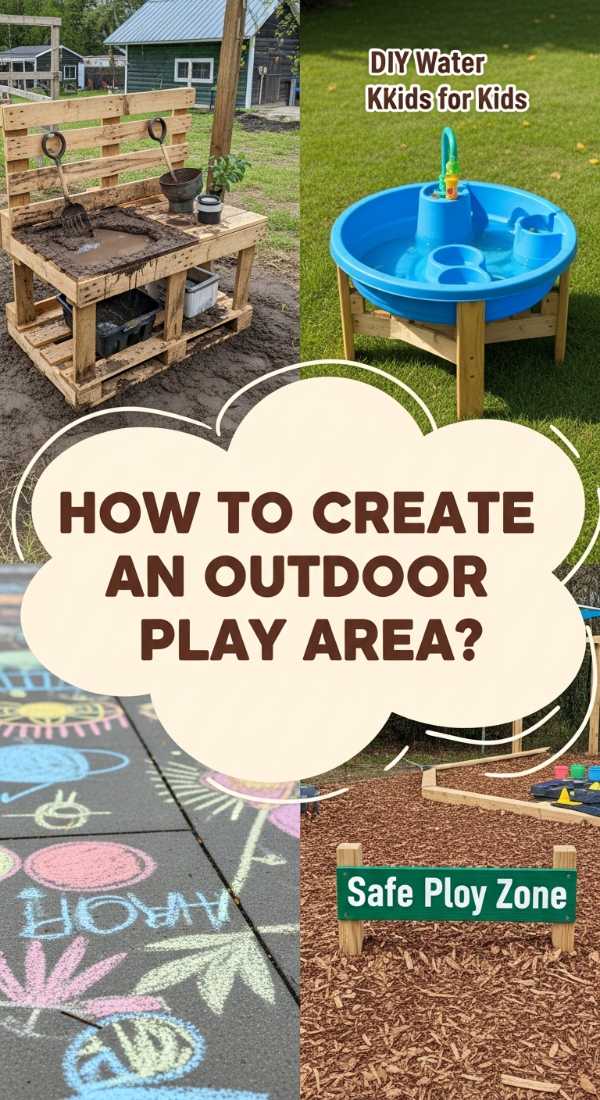
How to Create an Outdoor Play Area for Ultimate Childhood Memories

Why we love this
Creating a dedicated play zone is like building a portal to another world where the only limit is a child’s imagination. The scent of sun-warmed wood and the soft, bouncy texture of rubber mulch underfoot create a safe haven for laughter and exploration. This isn’t just a play area; it’s a sensory-rich environment where the cool touch of metal slides meets the rough texture of climbing ropes, offering a tactile playground that encourages movement and the pure joy of being outdoors in the fresh air.
Essential Elements:
- Pressure-treated timber for framing
- Play-grade rubber mulch or wood chips
- Heavy-duty landscape weed barrier
- Modular play equipment (swing set, slide, or climbing wall)
- Solar-powered outdoor string lights
- Weatherproof storage bins for toys
How to make it
- Select a level area in your yard with partial shade and mark out a large rectangle using stakes and string to define the play zone.
- Excavate the top 3-4 inches of grass and soil to create a recessed pit, ensuring the ground is as level as possible using a long 2×4 and a spirit level.
- Build a perimeter frame using 4×4 pressure-treated timbers, securing the corners with long galvanized lag bolts to keep the mulch contained.
- Lay down a double layer of professional-grade weed barrier across the entire excavated area, overlapping the seams by at least 6 inches to prevent grass breakthrough.
- Assemble your play equipment (like a swing set or playhouse) according to the manufacturer’s instructions, ensuring all anchors are deeply buried and secure.
- Fill the framed area with at least 6 inches of play-grade mulch to provide a certified fall-zone depth, then hang string lights around the perimeter for evening play.
How to Style a Teen Room for the Perfect Nostalgic Vibe

Why we love this
Stepping into a room styled with a nostalgic vibe feels like a warm hug from the past, blending the cozy aesthetics of the 90s with modern comfort. The soft glow of neon signs reflects off velvet textures and glossy vinyl records, creating a sanctuary that feels both curated and lived-in. It’s about the aroma of a vanilla candle mingling with the sight of polaroid walls and checkered patterns, offering a space where a teenager can truly retreat, reflect, and feel a deep sense of belonging among their favorite things.
Essential Elements:
- Warm-toned LED strip lights or neon signage
- Velvet floor pillows and throw blankets
- Record player and vinyl display shelves
- Photo clip string lights for polaroids
- Macrame wall hangings or vintage posters
- Modular shelving units
How to make it
- Start by choosing a color palette that feels retro yet fresh, such as dusty rose, mustard yellow, and sage green, and apply a fresh coat of matte paint to the walls.
- Install floating ‘U’ shelves to display a curated collection of vinyl records, ensuring they are at eye level to act as functional wall art.
- Create a ‘memory wall’ by stringing copper wire lights horizontally and using mini wooden clothespins to hang a mix of polaroids and ticket stubs.
- Layer the flooring with a high-pile shag rug and add several oversized velvet floor cushions in a corner to create a low-profile lounge area for reading or gaming.
- Mount a custom neon sign or a series of retro-style LED strips behind the headboard or desk to provide a soft, ambient glow that hides harsh shadows.
- Incorporate vintage-style storage, like milk crates or metal lockers, to keep the space organized while reinforcing the nostalgic, industrial-chic aesthetic.
How to Install Rock Landscaping for a Sophisticated Modern Garden
Why we love this
There is a profound, architectural beauty in the way smooth river stones and jagged slate contrast against the organic softness of ornamental grasses. This project brings a sense of permanence and ‘Zen’ to the garden, where the cool, grey tones of the rocks shimmer after a light rain, and the sound of wind whistling through the stones creates a tranquil atmosphere. It’s a sophisticated, low-maintenance solution that feels incredibly high-end, offering a clean, structured aesthetic that stays beautiful through every season without the need for constant watering or weeding.
Essential Elements:
- River rocks, Mexican beach pebbles, or crushed slate
- Large accent boulders for focal points
- Heavy-duty landscape fabric
- Plastic or metal deep-profile edging
- Drought-tolerant plants (Agave, Blue Fescue, or Yucca)
- Tamper or plate compactor (optional)
How to make it
- Clear the area of all vegetation and rake the soil smooth, creating a slight slope away from your home’s foundation to ensure proper water drainage.
- Install a deep-profile metal edging to create sharp, defined boundaries between your rock garden and other landscape features, securing it with 12-inch stakes.
- Lay down a high-quality, non-woven geotextile fabric; this is crucial for rock gardens as it prevents rocks from sinking into the mud over time.
- Place your large accent boulders first, burying the bottom third of each rock into the ground to make them look like natural outcroppings rather than just ‘dropped’ on top.
- Cut holes in the fabric to plant your structural greenery, then backfill with native soil mixed with grit for drainage before tucking the fabric back around the base.
- Pour your chosen decorative stones over the fabric, spreading them to a depth of 2-3 inches. Use a garden rake to level the stones and rinse them with a hose to reveal their true colors.
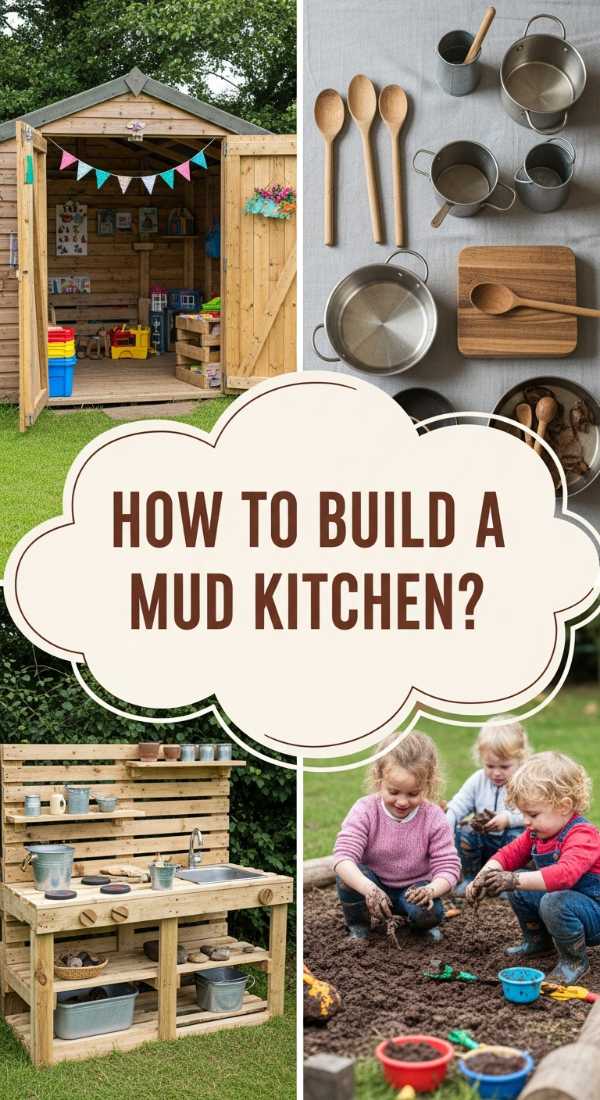
How to Build a Pallet Mud Kitchen for Endless Sensory Play
Why we love this
The mud kitchen is the ultimate tribute to childhood curiosity, where the scent of damp earth and crushed mint leaves becomes the ‘special of the day.’ There is a wonderful rusticity to the weather-worn wood of the pallets, paired with the clinking of old stainless steel pots and the squelch of mud between fingers. It’s a project that celebrates the messy, beautiful reality of play, providing a sturdy, eco-friendly hub where kids can ‘cook’ up memories that smell like rain and taste like pure imagination.
Essential Elements:
- Two heat-treated (HT) wooden pallets
- Stainless steel mixing bowls (for sinks)
- Old kitchen utensils, pots, and pans
- Outdoor wood screws and a drill
- Jigsaw for cutting sink holes
- Sandpaper (various grits)
How to make it
- Select pallets marked with ‘HT’ (Heat Treated) to ensure they are safe for children and free of harmful chemicals; sand all surfaces thoroughly to remove splinters.
- Stand one pallet vertically to act as the backboard and lay the second pallet horizontally as the countertop, supporting it with 2×4 legs cut to the child’s waist height.
- Trace the circumference of your stainless steel bowls onto the horizontal pallet, then use a jigsaw to cut out circles slightly smaller than the bowl rims.
- Drop the bowls into the holes to create ‘sinks’—you can leave them removable for easy cleaning or secure them with a bead of outdoor silicone.
- Screw the backboard pallet into the countertop frame, then add small hooks to the backboard for hanging whisks, spoons, and measuring cups.
- Install a shelf on the bottom pallet for ‘oven’ storage and consider painting on ‘burners’ using outdoor chalkboard paint so the kids can draw their own stove dials.
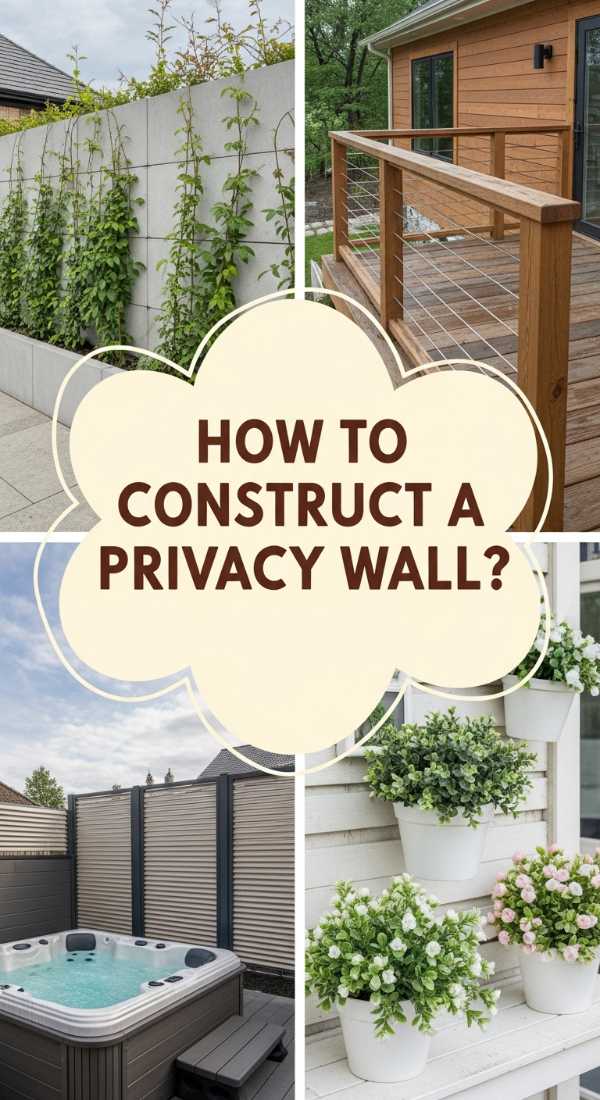
How to Construct a Planter Privacy Wall for a Serene Backyard Sanctuary
Why we love this
This DIY is the perfect marriage of form and function, offering a living screen that smells of jasmine and cedar while shielding you from the outside world. The visual of lush green vines climbing up a warm wood trellis creates an intimate ‘outdoor room’ feel that is both sophisticated and incredibly cozy. It’s about the gentle rustle of leaves in the breeze and the feeling of complete privacy as you sip your morning coffee in a space that feels like a secret garden hidden away from the neighborhood hustle.
Essential Elements:
- Cedar 4×4 posts and 2×4 framing timber
- Pre-made wooden trellis panels
- Large rectangular wooden planter boxes
- Exterior wood stain or sealant
- Climbing plants (Clematis, Star Jasmine, or Ivy)
- Concrete mix (if anchoring posts)
How to make it
- Measure the area where you want the screen and determine if you will anchor the posts in the ground with concrete or attach them directly to the large planter boxes.
- Build or buy two large, heavy planter boxes to act as the base; if the wall is long, you will need a box every 4 to 6 feet for stability.
- Attach 4×4 cedar posts to the back of the planters using heavy-duty carriage bolts, ensuring they are perfectly plumb using a level.
- Frame the space between the posts with 2x4s and secure your trellis panels into the frame with exterior screws to create the vertical climbing surface.
- Apply a high-quality UV-resistant wood stain to all surfaces to protect the cedar from graying and water damage over time.
- Fill the planters with premium potting soil and plant your climbers at the base of the trellis, gently weaving the first few tendrils through the lattice to encourage upward growth.
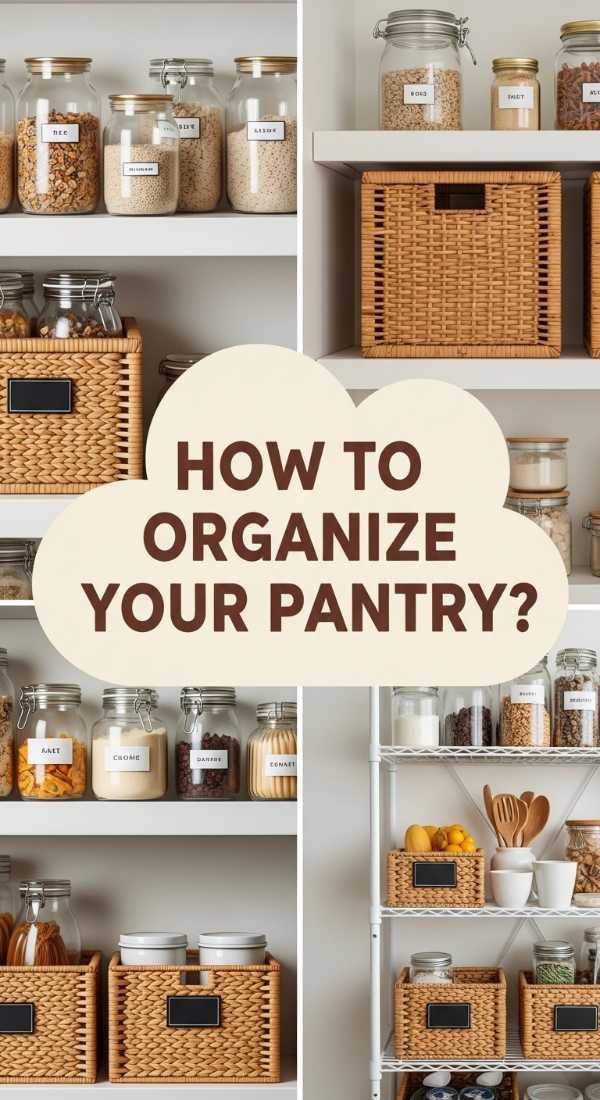
How to Achieve Realistic Pantry Organization for a Stress Free Kitchen
Why we love this
There is a unique kind of kitchen-induced Zen that comes from opening a pantry door to see perfect rows of glass jars and the warm, grainy texture of wicker baskets. The subtle scent of dried herbs and toasted grains fills the air, replacing the chaos of crinkly plastic bags and half-empty boxes. This project isn’t just about looking pretty for the ‘gram; it’s about the tactile ease of a smoothly rotating lazy Susan and the visual clarity of knowing exactly what you have, making meal prep feel like a calm, creative ritual rather than a frantic search.
Essential Elements:
- Airtight glass or BPA-free plastic canisters
- Wicker or wire baskets for bulk items
- A label maker or custom vinyl decals
- Tiered shelving for canned goods
- Lazy Susans for oils and vinegars
- Uniform spice jars
How to make it
- Empty your entire pantry and wipe down the shelves with a vinegar-based cleaner; this is the time to check expiration dates and toss anything past its prime.
- Group your items into ‘zones’: baking, breakfast, snacks, dinner staples, and backstock (the extra stuff you aren’t using yet).
- Decant dry goods like flour, sugar, pasta, and cereal into airtight clear containers to keep them fresh and eliminate visual clutter from branded packaging.
- Place smaller, loose items like snack bars or onion packets into wicker baskets, using bin clips to label each basket clearly.
- Utilize a tiered ‘staircase’ shelf for canned goods so you can see the labels on the back row without having to move the front ones.
- Install a lazy Susan in the corner or on a high shelf for tall bottles of oils, vinegars, and sauces, allowing you to reach everything with a simple spin.
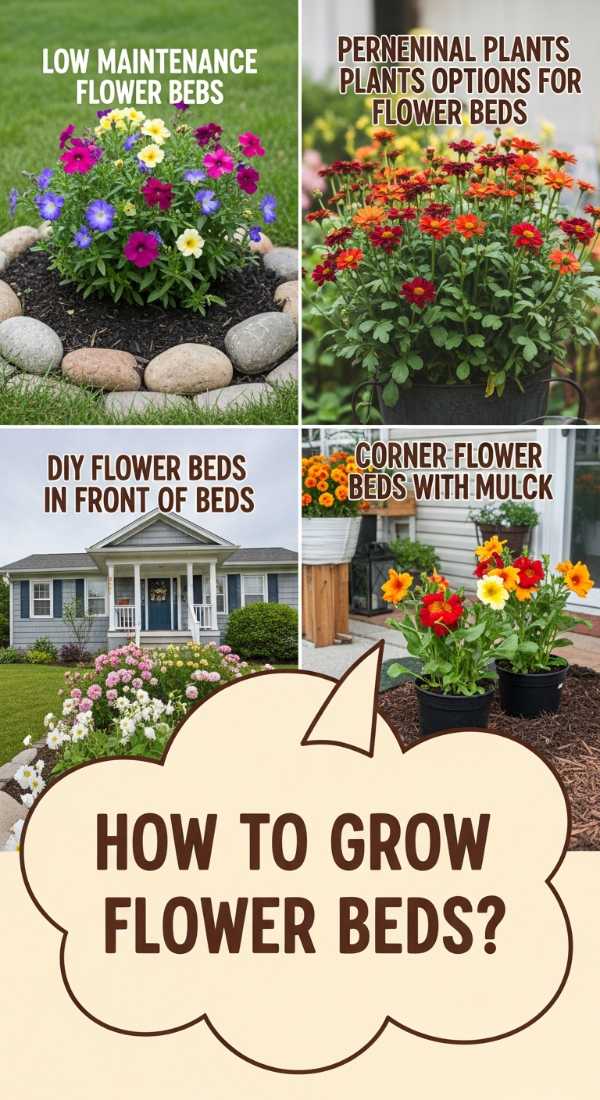
How to Grow Low Maintenance Flower Beds for a Beautiful Year Round Garden
Why we love this
Imagine a garden that looks like a lush, Impressionist painting but requires only a fraction of the work. The soft, silvery leaves of lamb’s ear and the bold, nectar-rich blooms of coneflowers create a haven for butterflies, filling the air with the quiet hum of nature. We love this because it honors the rhythm of the seasons—where the skeletal beauty of ornamental grasses in winter gives way to the vibrant explosions of spring bulbs, all while you spend more time enjoying the view from your hammock than pulling weeds.
Essential Elements:
- Native perennial plants (Coneflowers, Black-eyed Susans, Sedum)
- Slow-release organic fertilizer
- Soaker hoses for efficient watering
- Pre-emergent weed preventer
- Shredded bark mulch
- Spring-blooming bulbs (Tulips, Daffodils)
How to make it
- Research ‘Native’ plants for your specific hardiness zone; these are naturally adapted to your climate and will require significantly less water and fertilizer.
- Incorporate ‘Evergreen’ perennials like Hellebores or certain sedums so the garden bed doesn’t look completely empty during the winter months.
- Install a soaker hose system underneath the mulch layer to deliver water directly to the roots, which reduces evaporation and prevents leaf diseases.
- Plant in ‘drifts’ or groups of three to five of the same plant; this creates a high-impact, professional look and makes it easier for pollinators to find the blooms.
- Top the soil with a pre-emergent weed preventer in early spring, then cover with a thick 3-inch layer of shredded bark mulch to lock in moisture.
- Each autumn, tuck a few dozen bulbs between your perennials; they will pop up in spring before the perennials fill out, giving you two seasons of color in one spot.
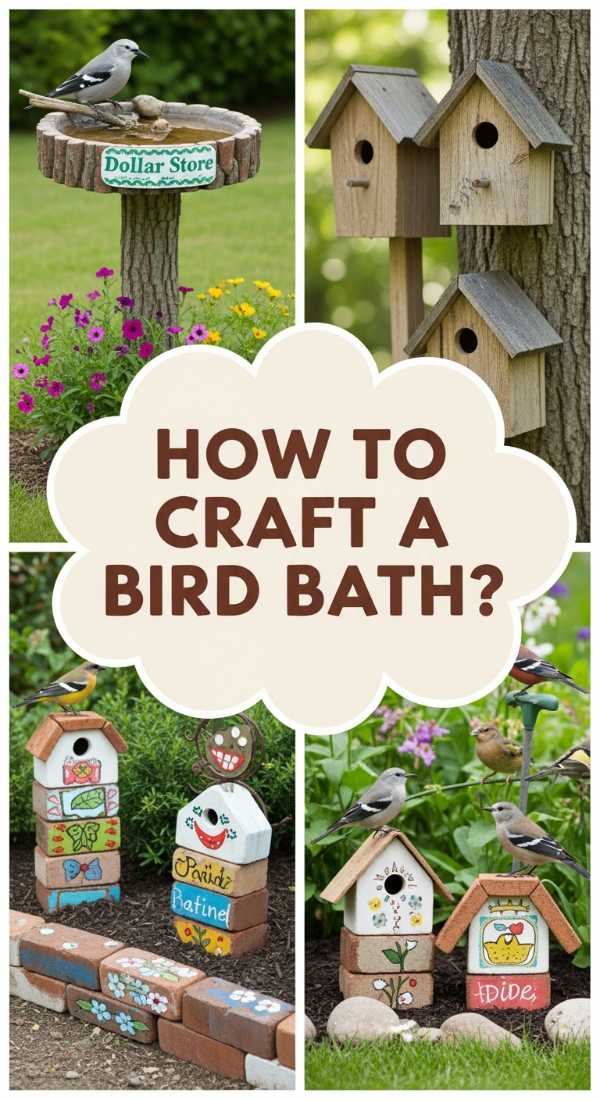
How to Craft a DIY Bird Bath for a Charming Garden Haven
Why we love this
The gentle splashing of water and the sight of a blue jay taking a dip bring a soul-stirring energy to any garden. This DIY bird bath, with its smooth ceramic basin and the cool, damp moss growing around its base, creates a focal point that is as melodic as it is beautiful. It transforms your backyard into a sanctuary where the air feels fresher, and the simple sound of trickling water provides a peaceful soundtrack to your outdoor life, connecting you to the wild world just beyond your back door.
Essential Elements:
- A large ceramic or terracotta saucer
- A decorative base (an old urn, a stack of flat stones, or a wooden stump)
- Water-safe construction adhesive (like E6000 or silicone)
- Smooth river stones or glass gems
- Optional: A small solar-powered fountain pump
- Outdoor sealant
How to make it
- Clean your base and the underside of the saucer thoroughly with rubbing alcohol to ensure a strong bond for the adhesive.
- Apply a generous amount of waterproof construction adhesive to the top rim of your base, then center the saucer on top and press down firmly.
- Let the adhesive cure for at least 24 hours in a dry area before adding any water or moving it into the garden.
- If using terracotta, apply a clear, non-toxic outdoor sealant to the inside of the saucer to prevent water from seeping through the porous clay.
- Place several smooth river stones in the bottom of the basin; these provide ‘landing pads’ for smaller birds and bees so they can drink without the risk of drowning.
- Add a solar-powered fountain disk to the center; the moving water will attract more birds and prevent mosquitoes from laying eggs in the basin.
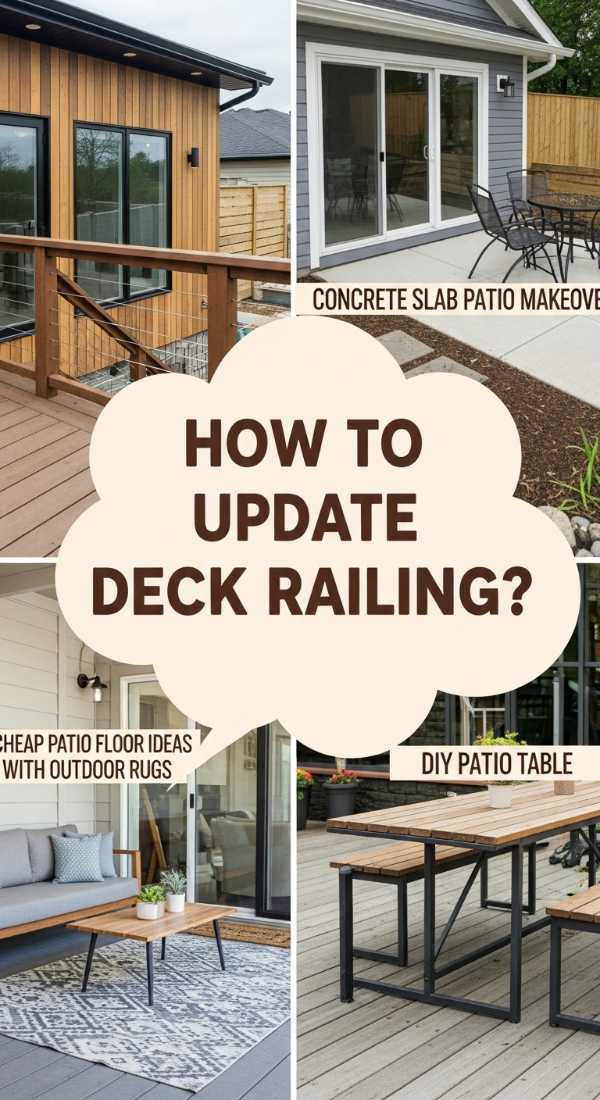
How to Update Wood Deck Railing for a Fresh Outdoor Aesthetic
[IMAGE_10]
Why we love this
Updating your deck railing is like giving your outdoor living room a facelift. The warmth of freshly stained wood combined with the sleek, modern lines of black metal balusters creates a look that is both timeless and trendy. There’s a tactile joy in running your hand along a smooth, finished top rail while the afternoon sun highlights the deep grain of the timber. It opens up your view to the garden, making the whole deck feel more expansive, airy, and ready for a summer evening of entertaining friends.
Essential Elements:
- New 2×4 and 2×6 pressure-treated lumber
- Black metal or aluminum baluster kits
- Power drill and specialized baluster connectors
- Wood stain or exterior paint
- Level and miter saw
- Sandpaper
How to make it
- Remove your old, dated wooden pickets carefully, leaving the main 4×4 posts in place if they are still structurally sound and rot-free.
- Cut your new 2×4 ‘bottom rails’ and ‘top rails’ to fit perfectly between the existing posts, ensuring a tight fit for stability.
- Screw the plastic baluster connectors onto the top of the bottom rail and the underside of the top rail, spacing them exactly 4 inches apart to meet safety codes.
- Slide the black metal balusters onto the bottom connectors, then place the top rail over them, locking the balusters into the top connectors simultaneously.
- Secure the rail sections to the 4×4 posts using heavy-duty deck screws, checking frequently with a level to ensure everything is perfectly horizontal.
- Install a 2×6 ‘cap rail’ flat across the top of the entire railing system to create a wide, functional surface for resting drinks or small planter boxes.
Conclusion
Transforming your home from ‘drab to fab’ doesn’t require a professional crew or a massive budget—it just takes a little bit of time and a whole lot of heart. These viral DIYs are more than just weekend projects; they are ways to reclaim your space and make it truly your own. From the sensory delight of a mud kitchen to the modern lines of a rock garden, each project adds a layer of personality and comfort to your home. So, pick one (or two!) and start building your own backyard sanctuary today.
FAQ
Q: Do I need expensive power tools for these garden DIYs?
A: Most of these projects can be completed with basic tools like a power drill, a level, and a spade. For more complex cuts, a simple jigsaw or miter saw is helpful but often can be rented from a local hardware store.
Q: How do I keep my low-maintenance flower beds looking good in the winter?
A: The secret is incorporating structure. Use evergreens, ornamental grasses that keep their shape when dried, and leave the seed heads on plants like coneflowers for visual interest and to feed the birds.
Q: Is the pallet mud kitchen safe for toddlers?
A: Yes, as long as you use ‘HT’ (Heat Treated) pallets and sand them thoroughly to remove any splinters. Always supervise water play and ensure the kitchen is stable and won’t tip over.
Q: How often should I re-stain my wood deck railing or privacy wall?
A: Typically, a high-quality outdoor stain should be reapplied every 2-3 years, depending on how much sun and rain your area receives. This keeps the wood protected and looking fresh.