
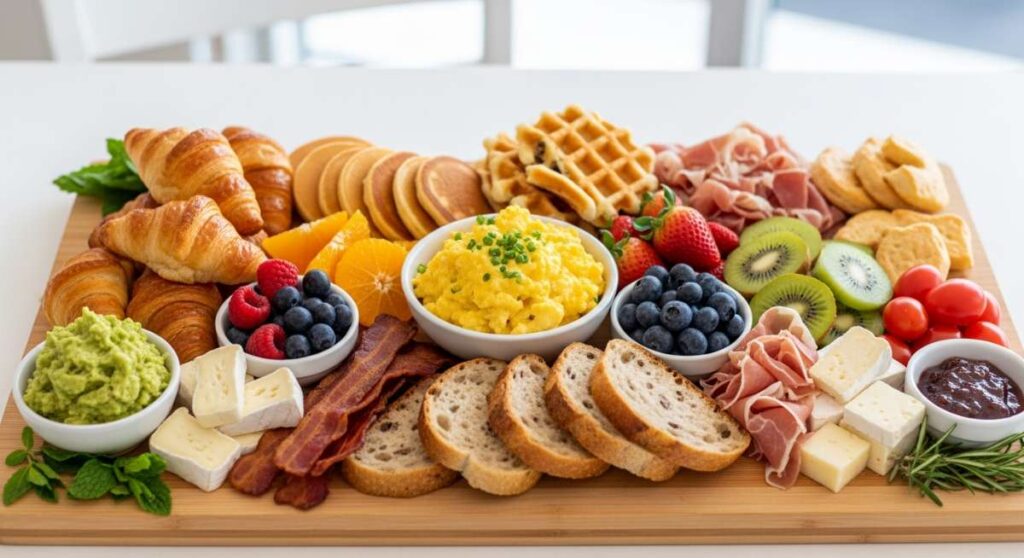
Elevate Your Next Brunch with This Viral Simple Food Board Secret
There is something truly magical about those slow, sun-drenched Saturday mornings when the house is quiet and the scent of fresh coffee begins to drift through the air. For years, I struggled with the pressure of hosting brunch, often finding myself stuck in the kitchen flipping pancakes while my friends laughed in the living room. That all changed when I discovered the viral secret to the ‘Simple Food Board’—a grazing-style masterpiece that looks like a work of art but takes half the effort of a traditional multi-course meal.
This isn’t just about throwing crackers on a tray; it’s about a curated experience where every element is prepped to perfection. By focusing on a balance of textures, colors, and temperatures, you can create a centerpiece that invites everyone to linger, share stories, and truly enjoy the meal. Today, I’m sharing my ultimate guide to the components that make these boards go viral, from the juiciest proteins to the crispiest greens, so you can host your next gathering with total ease and a lot of style.
How to prep juicy chicken

Why we love this
There is nothing quite like the aroma of herb-crusted chicken hitting a hot pan, filling your kitchen with a savory, comforting scent that promises a delicious meal. When done correctly, the exterior forms a thin, golden-brown crust that yields to an incredibly tender and moist interior that practically melts in your mouth. This protein is the versatile backbone of any food board, offering a satisfying heartiness that pairs beautifully with both bright citrus dressings and rich, earthy grains.
Ingredients
- 2 large boneless, skinless chicken breasts
- 2 tablespoons extra-virgin olive oil
- 1 teaspoon sea salt
- 1/2 teaspoon cracked black pepper
- 1 teaspoon dried oregano
- 1/2 lemon, juiced
- 2 cloves garlic, smashed
How to make it
- Begin by patting your chicken breasts completely dry with paper towels; moisture is the enemy of a good sear, and this step ensures a golden finish.
- Place the chicken between two sheets of parchment paper and use a meat mallet or heavy rolling pin to pound them to an even thickness of about half an inch, ensuring they cook at the same rate.
- Whisk the olive oil, salt, pepper, oregano, lemon juice, and smashed garlic in a small bowl, then coat the chicken thoroughly and let it marinate at room temperature for 15 minutes.
- Heat a heavy-bottomed stainless steel or cast-iron skillet over medium-high heat until a drop of water sizzles and evaporates instantly.
- Place the chicken in the pan (it should hiss loudly) and cook undisturbed for 5-6 minutes until the edges turn opaque and a deep golden crust forms.
- Flip the chicken and reduce the heat to medium; cook for another 4-5 minutes until the internal temperature reaches 165°F (74°C).
- Remove the chicken from the pan and let it rest on a cutting board for at least 8 minutes before slicing; this allows the juices to redistribute so the meat stays succulent.
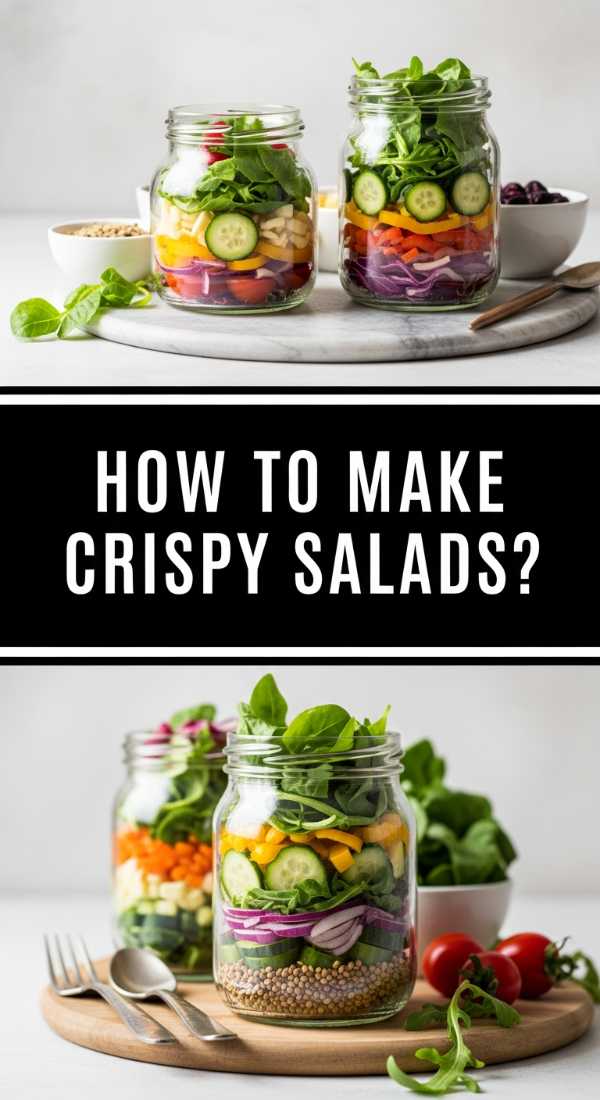
How to make crispy salads
Why we love this
A truly crispy salad is a sensory delight, providing that essential refreshing snap that cuts through the richer elements of a brunch spread. We love the vibrant, emerald-green hues of farm-fresh kale and romaine, and the way a light, acidic dressing makes every leaf shimmer under the light. It’s the ultimate palate cleanser, offering a cold, hydrating crunch that feels both indulgent and incredibly nourishing at the same time.
Ingredients
- 1 head of Romaine lettuce or bunch of Tuscan Kale
- Bowl of ice water
- 1 tablespoon Apple cider vinegar
- Salad spinner
- Pinch of flaky sea salt
How to make it
- Chop your greens into bite-sized pieces, removing any woody stems or bruised outer leaves to ensure every bite is premium quality.
- Submerge the chopped greens in a large bowl filled with ice-cold water and a splash of vinegar for 10 minutes; the cold shock tightens the cell structure of the leaves for maximum crispness.
- Drain the greens and place them into a salad spinner, spinning vigorously until every single drop of moisture is removed; wet leaves will make your dressing slide off and turn the salad soggy.
- If you are using kale, sprinkle with a tiny bit of salt and massage the leaves with your hands for 60 seconds to break down the tough fibers until they turn dark green and tender.
- Wrap the dried greens in a clean flour sack towel and place them in the refrigerator for 20 minutes before serving to give them an extra chill and snap.
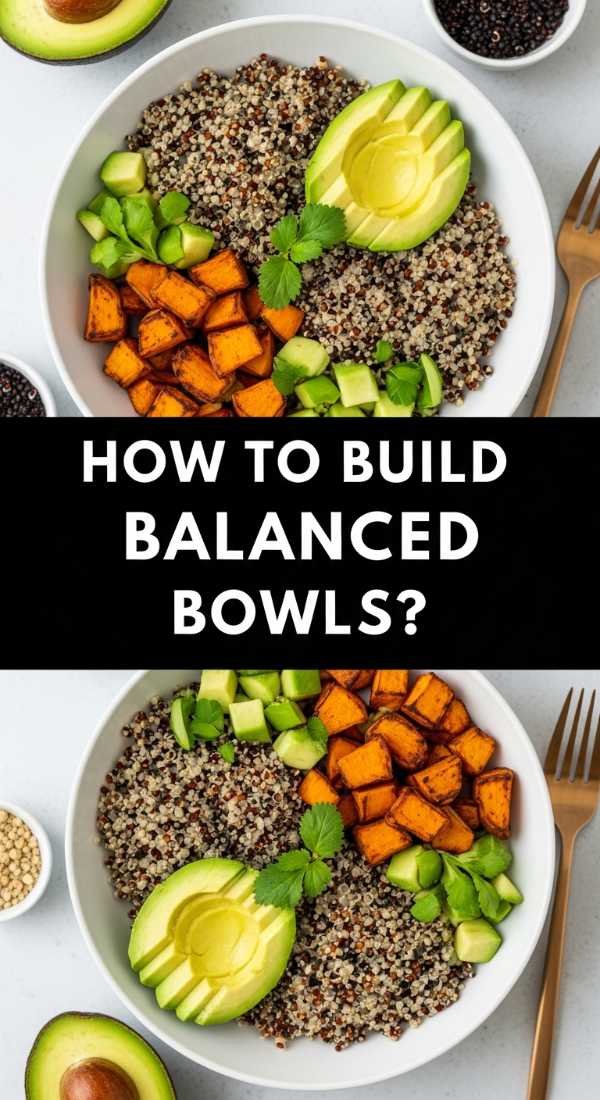
How to build balanced bowls
Why we love this
Building a balanced bowl is like composing a symphony of flavor; it’s about the harmony between creamy fats, crunchy fibers, and hearty grains. We love the visual appeal of a bowl where every ingredient has its place, creating a rainbow of nutrients that look just as good as they taste. There’s a deep sense of satisfaction in taking a bite that contains a little bit of everything—the silkiness of avocado, the bite of a grain, and the zing of a pickled onion.
Ingredients
- 1 cup cooked base (Quinoa, Farro, or Brown Rice)
- 1/2 cup roasted protein (Chicken or Chickpeas)
- 1/2 cup fresh greens
- 1/4 avocado, sliced
- 2 tablespoons fermented element (Kimchi or Pickled Ginger)
- Tahini or Lemon-tahini dressing
How to make it
- Start with your base layer of warm, fluffy grains, spreading them across the bottom of the bowl to act as an absorbent foundation for your dressing.
- Place your protein in one dedicated quadrant of the bowl, ensuring it is sliced into manageable, bite-sized pieces for easy eating.
- Add your fresh greens and roasted vegetables in the neighboring sections, creating a color contrast that makes the bowl visually enticing.
- Nestle your healthy fats, like sliced avocado or a dollop of hummus, in the center to serve as the creamy bridge between the various textures.
- Drizzle your dressing using a zigzag motion to ensure even coverage, then finish with a sprinkle of seeds or microgreens for an added layer of delicate crunch.
How to roast perfect veggies

Why we love this
Roasting transforms humble vegetables into caramelized gems of concentrated flavor, bringing out a natural sweetness that raw veggies simply can’t match. We love the contrast between a tender, buttery interior and those slightly charred, crispy edges that provide a smoky depth to your food board. The earthy aroma of roasting broccoli or carrots wafting from the oven is enough to make anyone’s mouth water, signaling a meal that is both wholesome and gourmet.
Ingredients
- 1 lb assorted vegetables (Broccoli florets, sliced carrots, or Brussels sprouts)
- 2 tablespoons high-smoke point oil (Avocado or Grapeseed oil)
- 1 teaspoon garlic powder
- 1/2 teaspoon smoked paprika
- Coarse Kosher salt
How to make it
- Preheat your oven to a high temperature of 425°F (220°C); a hot oven is crucial for achieving caramelization before the vegetables turn mushy.
- Cut all vegetables into uniform sizes to ensure they roast at the same speed; for example, keep broccoli florets roughly the size of a golf ball.
- In a large mixing bowl, toss the vegetables with enough oil to coat them thinly but thoroughly; too much oil will lead to steaming rather than roasting.
- Spread the vegetables onto a large, rimmed baking sheet in a single layer, ensuring there is space between each piece; crowding the pan will cause the veggies to steam in their own moisture.
- Roast for 20-25 minutes, using a spatula to flip them halfway through the cooking time to ensure even browning on all sides.
- Look for the visual cue of deep golden-brown spots and edges that look slightly shriveled and crisp before removing them from the oven.
How to prep cheap meals

Why we love this
There is a unique kind of pride that comes from creating a restaurant-quality meal on a shoestring budget. We love the challenge of taking pantry staples like dried beans and bulk grains and elevating them with smart seasoning and beautiful presentation. It proves that luxury living is a mindset, not a price tag, and that some of the most comforting and flavorful dishes are born from simple, affordable ingredients handled with care.
Ingredients
- Dried lentils or black beans
- Bulk bag of jasmine rice
- Seasonal root vegetables (potatoes, onions, carrots)
- Store-brand olive oil
- Salt and basic pepper
How to make it
- Focus on bulk-buying dry goods like lentils and rice, which cost pennies per serving and have a shelf life of years when stored in airtight containers.
- Soak your dried beans overnight in plenty of water; this reduces cooking time significantly and helps with digestibility.
- Sauté finely diced onions and carrots (the ‘mirepoix’ base) in a little oil until soft and translucent to create a deep flavor foundation for your cheap meals.
- Cook your grains using a 2:1 water-to-grain ratio, adding a bouillon cube or a pinch of salt to the water to infuse the base with savory flavor from the start.
- Batch-cook these components on a Sunday, storing them in clear containers so you can easily see what you have, preventing food waste and saving you money during the week.
How to make creamy oats

Why we love this
Creamy oats are the ultimate morning hug, providing a velvety, warm texture that feels incredibly indulgent yet secretly healthy. We love the way the oats swell and soften, absorbing the richness of the milk and the sweetness of the maple syrup until they reach a custard-like consistency. Garnished with fresh berries and a sprinkle of cinnamon, they add a sweet, comforting element to your food board that balances out the savory components perfectly.
Ingredients
- 1/2 cup old-fashioned rolled oats
- 1 cup milk of choice (Oat milk makes it extra creamy!)
- 1/2 teaspoon vanilla extract
- Pinch of salt
- 1 tablespoon maple syrup
How to make it
- Combine the oats, milk, and salt in a small saucepan over medium heat; adding the salt at the beginning is essential for unlocking the oat’s nutty flavor.
- Bring the mixture to a gentle simmer, never a rolling boil, as high heat can make the oats gummy rather than creamy.
- Stir frequently with a wooden spoon—this agitation helps release the natural starches in the oats, which is the secret to achieving that silky, porridge-like texture.
- Once the liquid has mostly absorbed (usually 5-7 minutes), stir in the vanilla extract and maple syrup, then remove from the heat immediately.
- Cover the pot with a lid and let the oats sit for 2 minutes before serving; this final rest allows the residual heat to finish the thickening process perfectly.
How to pack protein lunches

Why we love this
Packing a protein-rich lunch is the best gift you can give your future self, ensuring you stay energized and focused throughout the afternoon. We love the variety of a protein pack—the firm texture of a hard-boiled egg, the saltiness of lean turkey, and the nutty crunch of roasted chickpeas. It’s a organized, efficient way to eat that feels much more sophisticated than a standard sandwich, especially when arranged neatly on a mini-board for your desk.
Ingredients
- 2 hard-boiled eggs
- 3 oz deli-sliced turkey or chicken breast
- 1/4 cup roasted chickpeas
- String cheese or cheddar cubes
- Handful of almonds
How to make it
- Boil your eggs for exactly 9 minutes for a ‘jammy’ yolk or 11 minutes for a fully set yolk, then immediately plunge them into an ice bath to make peeling effortless.
- Roll your deli meats into tight cylinders; this not only looks more appetizing but also helps keep the meat from drying out in the container.
- Use a bento-style container with dividers to keep your ‘wet’ proteins (like meat and eggs) separate from your ‘dry’ proteins (like nuts and chickpeas) to maintain textures.
- Place a small square of parchment paper or a paper towel at the bottom of the container to absorb any excess moisture that might accumulate during refrigeration.
- Keep your protein lunch at the back of the fridge, which is the coldest part, until the moment you are ready to leave for work or school.
How to prep tasty stirfry

Why we love this
Stir-fry is the king of quick-fix meals, offering a burst of umami and a satisfying variety of textures in every single bite. We love the sizzle of the ginger and garlic as they hit the hot oil, creating a fragrance that is instantly appetizing. It’s a wonderful way to use up whatever veggies you have left over, turning them into a high-energy, colorful addition to your meal prep board with very little cleanup required.
Ingredients
- 1 cup sliced bell peppers and snap peas
- 1 tablespoon fresh ginger, minced
- 2 cloves garlic, minced
- 2 tablespoons soy sauce or tamari
- 1 teaspoon toasted sesame oil
- High-heat oil (Canola or Peanut)
How to make it
- Perform all your ‘mise en place’ (prep work) before turning on the stove; stir-frying happens so fast that you won’t have time to chop as you go.
- Heat your wok or a large skillet over high heat until it just begins to smoke; the high heat is what creates the ‘wok hei’ or breath of the wok flavor.
- Add a tablespoon of high-heat oil and immediately toss in your aromatics (ginger and garlic), stirring constantly for 30 seconds so they brown but do not burn.
- Add the densest vegetables first (like carrots or broccoli stems) and stir-fry for 2 minutes before adding the softer leafy greens or peppers.
- Pour your sauce mixture over the vegetables and toss rapidly for 1 minute; the high heat will thicken the sauce into a glossy glaze that coats every piece.
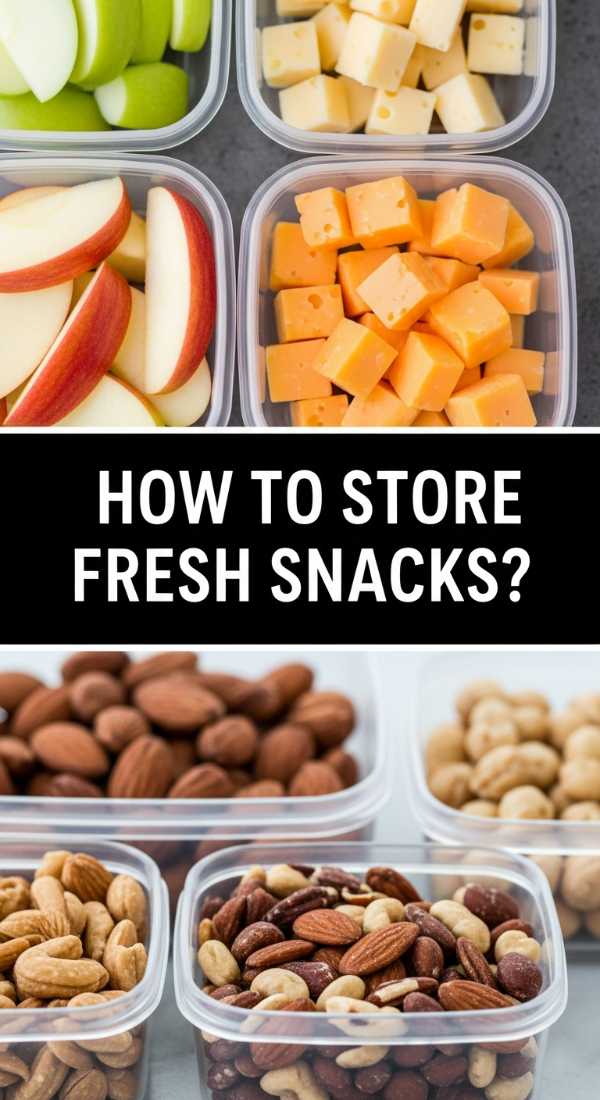
How to store fresh snacks
Why we love this
There is nothing more satisfying than opening your fridge to find perfectly preserved, ready-to-eat snacks that look as fresh as the day you bought them. We love the organization of glass jars filled with colorful berries and crisp veggie sticks, making healthy choices the easiest choices. Proper storage isn’t just about aesthetics; it’s about honoring the food you’ve bought and ensuring that every bite remains crunchy, sweet, and vibrant for as long as possible.
Ingredients
- Fresh berries (Strawberries, Blueberries)
- Cucumber slices or baby carrots
- Glass airtight jars
- Paper towels
- Filtered water
How to make it
- For berries, wash them in a solution of 3 parts water and 1 part white vinegar to kill mold spores, then dry them completely on a clean towel before storing.
- Line the bottom of a glass jar with a folded paper towel to catch any moisture that settles, which is the primary cause of fruit spoilage.
- For vegetables like carrots or celery, store them submerged in filtered water inside a sealed jar; this keeps them incredibly crisp for up to two weeks.
- Avoid storing fruits and vegetables in the same drawer, as some fruits release ethylene gas which can cause vegetables to ripen and rot prematurely.
- Check your containers every two days and replace any damp paper towels to maintain the optimal humidity level for your snacks.
How to season meal preps

Why we love this
Seasoning is the soul of cooking, the magical element that turns a bland chicken breast or a plain potato into a culinary experience. We love the complexity of a well-balanced spice blend—the warmth of cumin, the smokiness of paprika, and the bright pop of citrus zest. Learning to season properly allows you to keep your meal preps exciting and diverse, ensuring that you never get bored of your healthy routine because every meal tastes like a new adventure.
Ingredients
- Smoked paprika
- Cumin powder
- Nutritional yeast (for a cheesy flavor)
- Fresh lemon or lime zest
- Dried red pepper flakes
How to make it
- Always season your proteins at least 15 minutes before cooking; salt needs time to penetrate the fibers of the meat to season it from the inside out.
- ‘Toast’ your dry spices in a dry pan for 30-60 seconds before adding them to your dish; the heat releases the essential oils and significantly intensifies the flavor.
- Use the ‘layering’ technique: season your base components during cooking, but save ‘bright’ seasonings like citrus zest and fresh herbs for the final 2 minutes.
- Balance your flavors using the four pillars: Salt (sea salt), Acid (lemon juice), Fat (olive oil), and Heat (chili flakes). If a dish tastes flat, it usually needs acid, not more salt.
- Store your spices in a cool, dark place away from the stove, as heat and light will dull their potency and flavor over time.
Conclusion
Creating a viral-worthy food board is all about embracing the beauty of simple, well-prepared ingredients. Whether you are hosting a festive brunch or just prepping for a busy week ahead, these techniques will ensure your food is as delicious as it is beautiful. Remember, the secret isn’t in complicated recipes, but in the care you take with each element—the crunch of the salad, the juiciness of the chicken, and the creaminess of the oats. Now, go grab your favorite board and start building!
FAQ Section
Q: How do I keep my food board from getting soggy?
A: The key is to keep ‘wet’ ingredients like dressings, dips, or juicy fruits in small separate bowls or ramekins on the board rather than placing them directly on the surface.
Q: Can I prep the food board the night before?
A: You can prep individual components like roasted veggies, grains, and washed greens the night before, but I recommend assembling the board itself right before serving to keep everything at its peak texture.
Q: What is the best board to use for a brunch display?
A: A large wooden butcher block or a marble slab works beautifully. Just ensure it is food-safe and has been properly seasoned with mineral oil if it’s wood.