
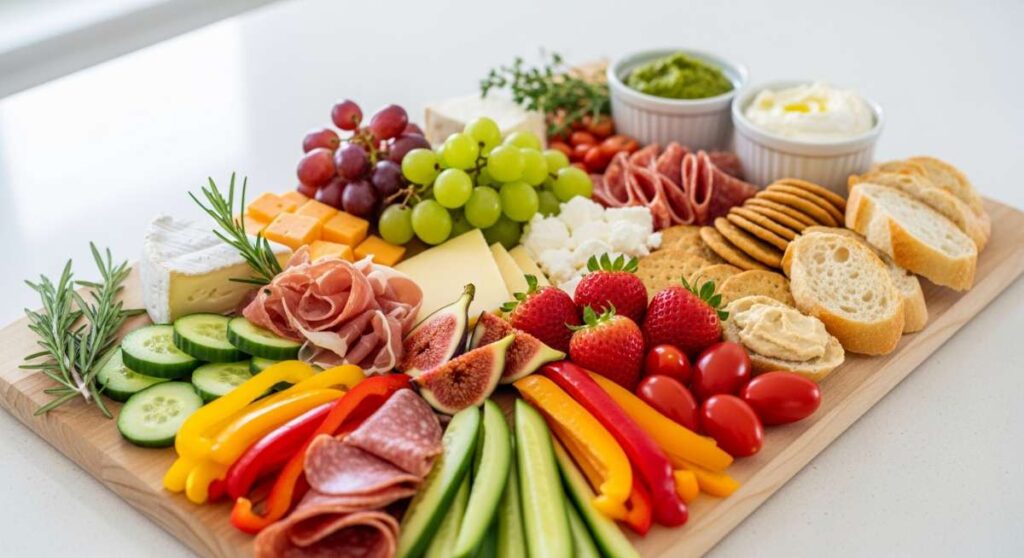
Why This Viral Simple Food Board Is the Only Recipe You Need This Week
We’ve all been there: staring into the abyss of the refrigerator at 6:00 PM, weary from the day, and wondering how on earth we’re going to pull together a meal that feels both nourishing and exciting. I used to spend hours scrolling through complicated recipes only to end up ordering takeout because the effort felt like climbing a mountain. That changed the moment I discovered the concept of the ‘Simple Food Board’—a viral, modular approach to eating that prioritizes prep over pressure. It’s not just a meal; it’s a lifestyle shift that celebrates the beauty of fresh, accessible ingredients laid out like a feast for the eyes and the soul.
This week, I’m sharing the ultimate guide to mastering the elements of this viral board. Whether you’re hosting a casual Sunday brunch or just trying to survive the Monday-through-Friday hustle, these components are designed to mix and match seamlessly. Imagine walking into your kitchen and seeing a spread of vibrant roasted vegetables, perfectly seared proteins, and creamy grains all ready to be assembled into whatever your heart desires. It’s about reclaiming your time and rediscovering the joy of simple, honest cooking that tastes even better than it looks.
How to meal prep chicken?
Why we love this
There is something deeply comforting about the savory, herbal aroma of perfectly prepped chicken breast resting on your counter. When done right, the meat is incredibly succulent and tender, resisting the typical dryness of leftovers with a juicy interior that yields effortlessly to your fork. The subtle golden-brown sear provides a slight textural contrast that makes every bite feel like it was cooked to order, rather than pulled from a container. It’s the ultimate versatile canvas, ready to absorb the bright notes of a lemon vinaigrette or the deep warmth of a spicy peanut sauce.
Ingredients
- 2 lbs boneless, skinless chicken breasts
- 2 tablespoons extra-virgin olive oil
- 1 teaspoon sea salt
- 1/2 teaspoon cracked black pepper
- 1 teaspoon garlic powder
- 1 teaspoon dried oregano or thyme
How to make it
- Start by patting the chicken breasts completely dry with paper towels; removing surface moisture is the secret to getting a beautiful golden sear rather than steaming the meat.
- Place the chicken on a clean cutting board and slice the thicker lobes horizontally (butterfly style) or pound them to an even half-inch thickness to ensure they cook at the same rate.
- In a large bowl, whisk together the olive oil, salt, pepper, garlic powder, and herbs until combined, then toss the chicken in the mixture until every inch is coated.
- Heat a large heavy-bottomed skillet or cast-iron pan over medium-high heat for 2-3 minutes until it’s shimmering but not smoking.
- Place the chicken in the pan, ensuring they aren’t crowded; you may need to work in batches to maintain the heat level of the pan.
- Sear for 5-6 minutes on the first side without moving them, which allows a flavorful crust to form, then flip and cook for another 4-5 minutes until the internal temperature reaches exactly 165°F (74°C).
- Remove the chicken from the pan and let it rest on a cutting board for at least 10 minutes before slicing; this allows the juices to redistribute back into the fibers for maximum moistness.
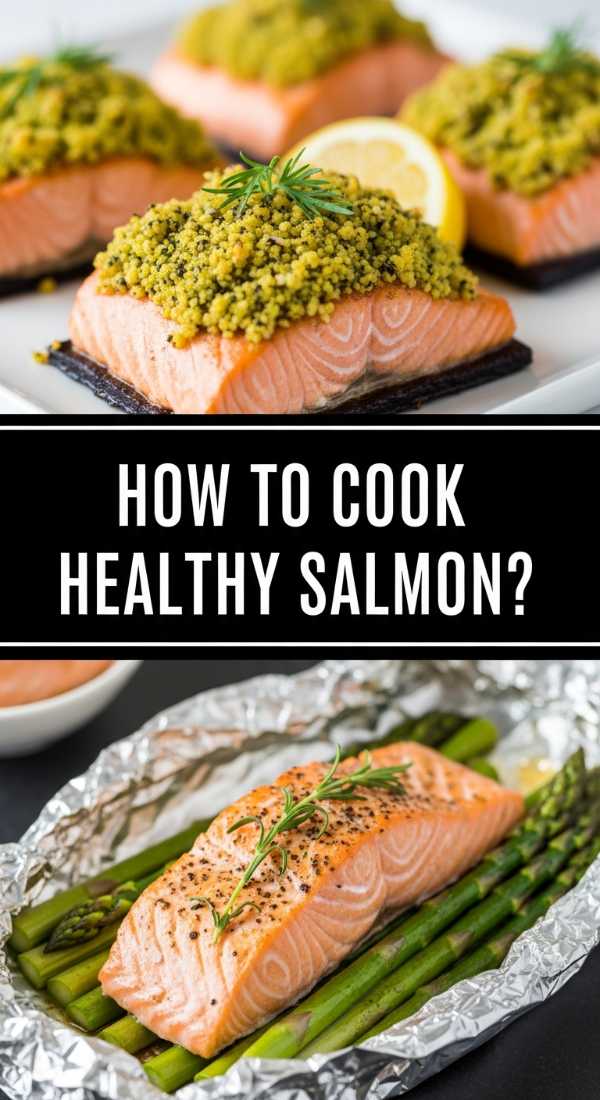
How to cook healthy salmon?

Why we love this
Nothing compares to the buttery, melt-in-your-mouth texture of a salmon fillet that has been cooked to flaky perfection. The aroma is clean and oceanic, topped with the bright, citrusy zing of fresh lemon that cuts through the rich, healthy fats of the fish. As your fork slides through the layers, the salmon should almost fall apart in delicate, translucent pink shards that feel incredibly indulgent yet light. It’s the kind of meal that makes you feel energized and pampered, providing a sophisticated centerpiece for your food board that requires very little effort to shine.
Ingredients
- 4 salmon fillets (6 oz each)
- 1 tablespoon avocado oil (high smoke point)
- Zest of one lemon
- Kosher salt and black pepper
- Fresh dill for garnish
How to make it
- Remove your salmon fillets from the refrigerator about 15 minutes before cooking to take the chill off, which helps the fish cook evenly through to the center.
- Pat the skin and flesh sides very dry with a paper towel; moisture is the enemy of a crisp exterior.
- Season the flesh side generously with salt, pepper, and fresh lemon zest, pressing the seasonings into the meat so they adhere during the cooking process.
- Heat a non-stick or well-seasoned cast-iron skillet over medium-high heat and add the avocado oil, swirling to coat the bottom of the pan.
- Carefully place the salmon fillets flesh-side down into the hot oil; listen for a vigorous sizzle, which indicates the sear is happening immediately.
- Cook undisturbed for 4 minutes to develop a golden crust, then use a flexible fish spatula to carefully flip the fillets onto the skin side.
- Reduce the heat to medium and continue cooking for another 3-4 minutes; the salmon is done when it is opaque on the outside but still slightly translucent in the very center, or reaches an internal temp of 135°F for medium.
How to make veggie bowls?
Why we love this
The magic of a veggie bowl lies in the symphony of textures and the vibrant, rainbow-like presentation that makes you want to dive in immediately. You get the crisp, refreshing snap of raw radishes and cucumbers contrasting against the creamy richness of a perfectly ripe avocado and the earthy bite of pickled onions. Every spoonful offers a different sensation—some bites are crunchy and bright, while others are soft and savory, all tied together by a velvety dressing that coats the palate. It’s a celebratory way to eat your greens that feels like a reward, not a chore.
Ingredients
- 2 cups shredded kale or spinach
- 1 cup shredded red cabbage
- 1 cucumber, sliced into half-moons
- 1 large avocado, sliced
- 1/2 cup shredded carrots
- Pickled ginger or red onions
- Tahini or lemon-tahini dressing
How to make it
- Begin by ‘massaging’ your kale or sturdy greens; place the shredded leaves in a bowl with a tiny pinch of salt and a drizzle of lemon, then squeeze the leaves with your hands for 60 seconds until they become dark green and tender.
- Create a base layer in your bowl with the massaged greens, spreading them out to create a lush, leafy foundation.
- Arrange the other vegetables in distinct sections or ‘wedges’ around the bowl; this creates the visual appeal characteristic of viral food boards.
- Place the heavier items, like the sliced avocado and cucumber, toward the edges so they don’t weigh down the lighter greens in the center.
- Add a pop of acidity by nesting a small pile of pickled onions or ginger in one corner; the fermentation adds a complex depth of flavor to the fresh vegetables.
- Drizzle your dressing in a zig-zag motion across the entire bowl, ensuring you hit every component, and finish with a sprinkle of sesame seeds or hemp hearts for extra texture.
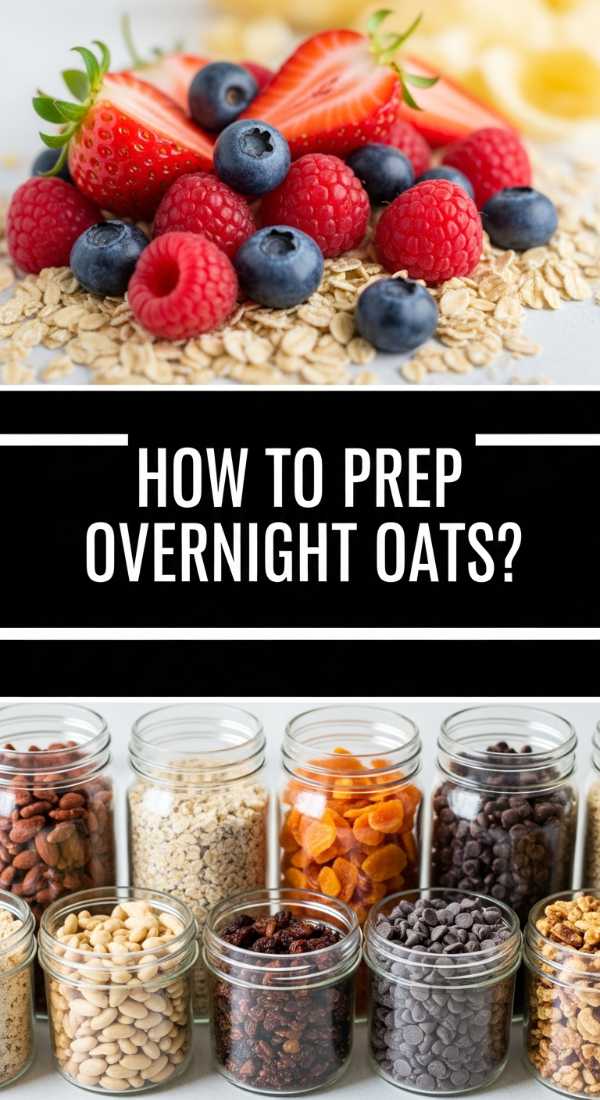
How to prep overnight oats?
Why we love this
Imagine waking up to a breakfast that tastes like a decadent, chilled vanilla pudding but is actually packed with fiber and sustained energy. Overnight oats have this wonderful, silky consistency where the oats have softened perfectly, absorbing the creamy almond milk and the subtle sweetness of maple syrup. The aroma of cinnamon greets you the moment you twist off the lid, and every spoonful is a delight of textures, especially when topped with juicy berries or crunchy nuts. It is the ultimate morning luxury for someone who wants to start their day with zero stress and a lot of flavor.
Ingredients
- 1/2 cup rolled oats (old-fashioned)
- 2/3 cup unsweetened almond or oat milk
- 1 tablespoon chia seeds
- 1 teaspoon maple syrup or honey
- 1/4 teaspoon vanilla extract
- Pinch of cinnamon
How to make it
- Select a wide-mouth glass jar (like a Mason jar) which makes it easier to stir the ingredients and eat directly from the container the next morning.
- Pour the dry rolled oats and chia seeds into the jar first; the chia seeds are essential as they absorb liquid and create that signature thick, pudding-like texture.
- Add the liquid milk of your choice, the sweetener, vanilla extract, and cinnamon, ensuring there is enough room at the top of the jar for the oats to expand.
- Use a long spoon to stir the mixture vigorously for at least 30 seconds, making sure no clumps of chia seeds are stuck to the bottom or sides of the glass.
- Secure the lid tightly and place the jar in the refrigerator for at least 4 hours, though 8 to 12 hours (overnight) yields the best, most creamy results.
- In the morning, give the oats one final stir to redistribute the moisture; if it’s too thick for your liking, splash in another tablespoon of milk.
- Add your fresh toppings—like blueberries, sliced almonds, or a dollop of almond butter—just before serving to keep them from getting soggy.
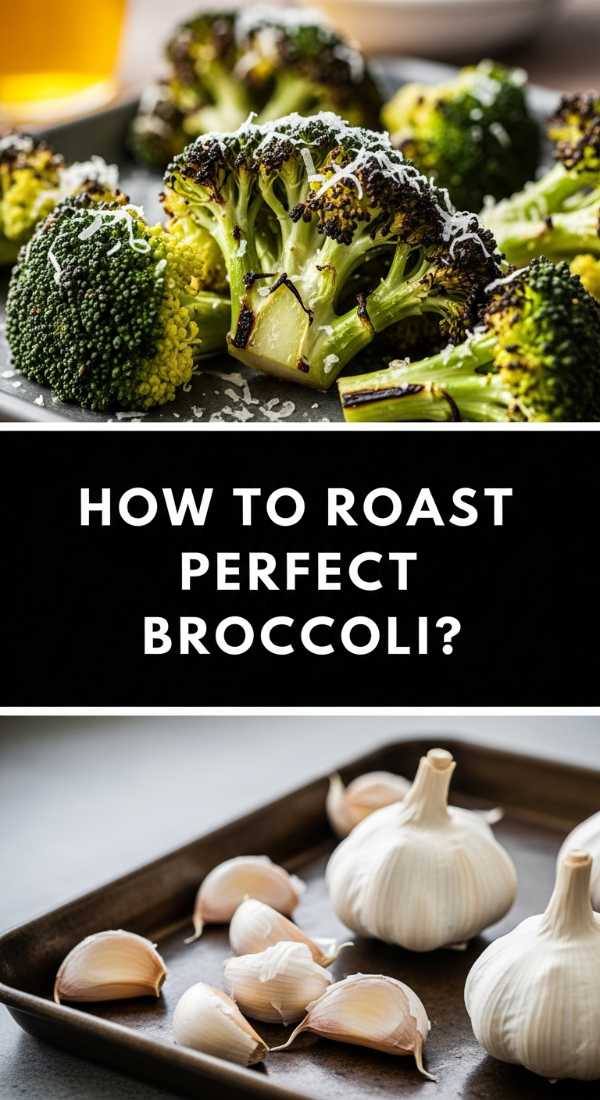
How to roast perfect broccoli?
Why we love this
Roasted broccoli is the ultimate glow-up for a vegetable that many of us grew up dreading in its steamed form. When roasted at high heat, the florets transform into something magical: the ‘trees’ get crispy and charred at the tips, tasting almost nutty and caramelized, while the stems remain tender and sweet. The scent of toasted garlic and hot olive oil fills the kitchen, creating an irresistible craving for something green. It’s savory, salty, and has a satisfying crunch that makes it feel more like a snack than a side dish, and it adds a sophisticated, smoky depth to your food board.
Ingredients
- 2 large heads of broccoli, cut into bite-sized florets
- 3 tablespoons extra-virgin olive oil
- 3 cloves garlic, minced
- 1/2 teaspoon red pepper flakes (optional)
- Salt and pepper to taste
- Freshly grated Parmesan cheese
How to make it
- Preheat your oven to 425°F (220°C); a very hot oven is the only way to achieve those crispy, charred edges without turning the broccoli into mush.
- Make sure the broccoli florets are completely dry after washing; any water left on the vegetables will create steam in the oven, preventing them from browning.
- Toss the florets on a large rimmed baking sheet with the olive oil, minced garlic, salt, pepper, and red pepper flakes, using your hands to ensure every nook and cranny is coated.
- Spread the broccoli out in a single layer, ensuring there is space between the pieces; if the pan is crowded, the broccoli will steam instead of roast.
- Slide the tray into the middle rack of the oven and roast for 15-20 minutes.
- Halfway through the cooking time, use a spatula to toss the broccoli so that different sides get contact with the hot metal sheet.
- Remove when the tips are dark brown and crispy, then immediately sprinkle with Parmesan cheese while the oil is still bubbling so it melts into the florets.
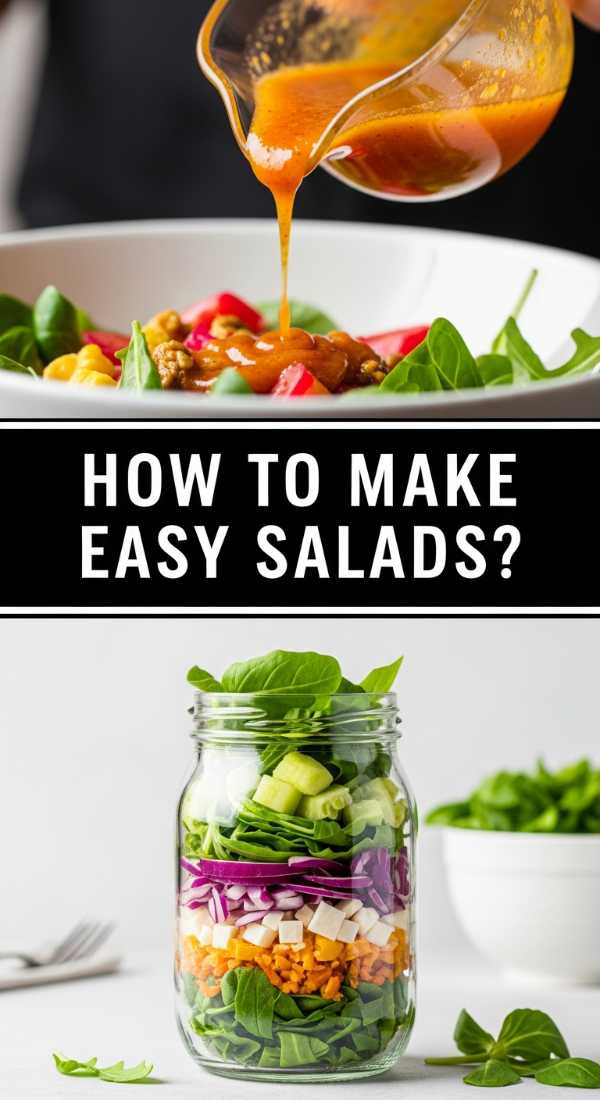
How to make easy salads?

Why we love this
A truly great salad should feel like a fresh breeze on a warm day—bright, crisp, and incredibly revitalizing. We love this approach because it moves away from sad, wilted lettuce and focuses on a balance of acidity, crunch, and herbaceous notes that wake up the taste buds. The aroma of torn basil and zesty lemon dressing creates an immediate sense of wellness. It provides the necessary ‘lift’ to the heavier proteins on your food board, acting as a palate cleanser that makes every other component taste even better. It’s simple, elegant, and effortlessly chic.
Ingredients
- 4 cups mixed baby greens or arugula
- 1/2 red onion, thinly shaved
- 1/2 cup cherry tomatoes, halved
- 1/4 cup toasted sunflower seeds
- Dressing: 3 tbsp olive oil, 1 tbsp lemon juice, 1 tsp Dijon mustard
How to make it
- Start with a large, shallow bowl which allows the ingredients to spread out rather than getting buried at the bottom.
- Wash your greens in ice-cold water to ensure they are at their maximum crispness, then dry them thoroughly in a salad spinner.
- Prepare the dressing in a small jar by shaking the olive oil, lemon juice, and Dijon mustard together until an emulsion forms; this ensures the fat and acid don’t separate on the leaves.
- Layer the greens in the bowl first, then scatter the shaved red onions and tomatoes across the top like jewels.
- Wait to dress the salad until the very moment you are ready to serve; pouring dressing too early will cause the delicate cell walls of the greens to collapse and wilt.
- Drizzle the dressing around the perimeter of the bowl and toss gently with your hands or large tongs to ensure a light, even coating.
- Finish with a handful of toasted seeds for a nutty crunch that provides a structural contrast to the soft leaves.
How to prep quinoa bowls?
Why we love this
Quinoa bowls are the hearty, grounding anchor of any great food board, offering a satisfying fluffiness that feels substantial without being heavy. The quinoa itself has a mild, slightly nutty flavor that serves as a perfect sponge for whatever spices or dressings you pair it with. There’s a wonderful tactile quality to the tiny, pearl-like grains as they pop slightly between your teeth, mixed with the creamy texture of beans or the crunch of fresh peppers. It’s a bowl of pure comfort that leaves you feeling full and fueled, providing a reliable base that ties all your meal prep together.
Ingredients
- 1 cup dry quinoa (rinsed)
- 2 cups vegetable broth or water
- 1 can chickpeas, rinsed and drained
- 1/2 cup chopped parsley
- 1/2 cup crumbled feta cheese
- Lemon juice and olive oil
How to make it
- Rinse the dry quinoa in a fine-mesh strainer under cold water for 30 seconds; this removes the saponin, a natural coating that can make quinoa taste bitter or soapy.
- In a medium saucepan, combine the rinsed quinoa and the vegetable broth; using broth instead of water is a pro tip for infusing the grain with flavor from the inside out.
- Bring the liquid to a rolling boil, then immediately turn the heat down to the lowest setting and cover the pot with a tight-fitting lid.
- Simmer for exactly 15 minutes without lifting the lid; this ‘low and slow’ method allows the grains to absorb the liquid and ‘pop’ open into fluffy spirals.
- Remove from heat and let the pot sit, still covered, for 5 more minutes to let the steam finish the job.
- Fluff the quinoa with a fork, then fold in the chickpeas, chopped parsley, and crumbled feta while the grain is still warm so the flavors meld together.
- Drizzle with a bit of olive oil and a squeeze of fresh lemon to keep the grains separate and vibrant.
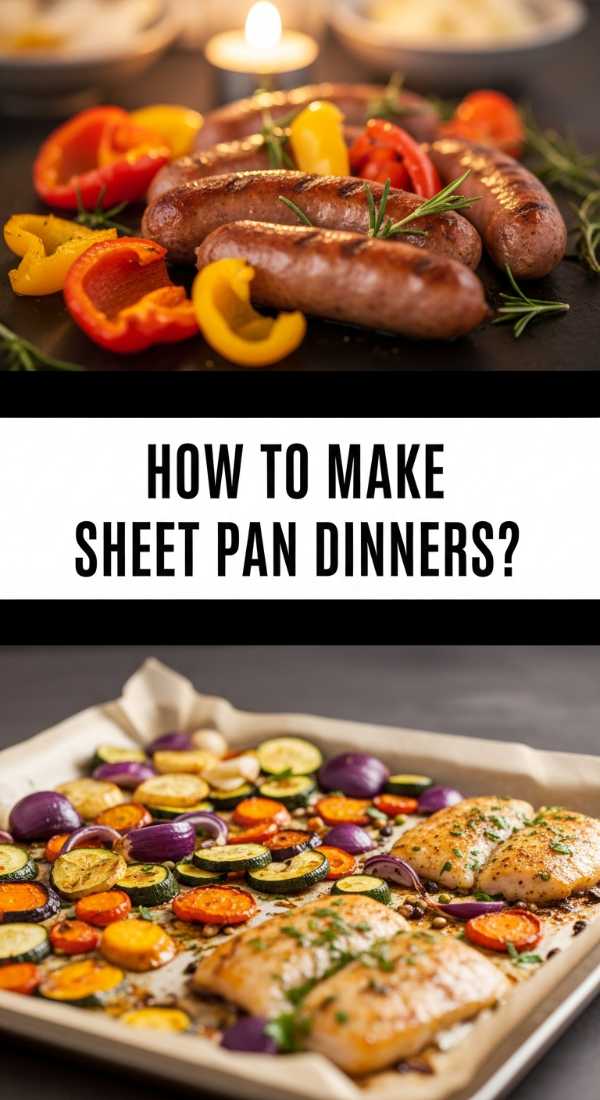
How to make sheet pan dinners?

Why we love this
The beauty of a sheet pan dinner is the harmony that develops when different ingredients roast together in their own juices. There’s a rustic, homey aroma of caramelizing onions and roasting meats that makes the whole house feel cozy. You get these incredible ‘bits’—the little pieces of vegetables that have browned against the pan and become intensely sweet, contrasted with the savory richness of the protein. It’s the ultimate low-maintenance way to achieve high-flavor results, resulting in a meal that looks artisanal and feels like a warm hug at the end of a long day.
Ingredients
- 1 lb sausages or chicken thighs
- 2 bell peppers, sliced into strips
- 1 red onion, cut into wedges
- 1 lb baby potatoes, halved
- 3 tablespoons olive oil
- 1 tablespoon smoked paprika and dried oregano
How to make it
- Preheat your oven to 400°F (200°C) and line a large, heavy-duty baking sheet with parchment paper for easy cleanup and to prevent sticking.
- Cut your vegetables into uniform sizes; the potatoes should be small enough to cook in the same amount of time as the meat, while the onions and peppers can be slightly larger.
- Place all the vegetables and the protein directly on the sheet pan, drizzle with olive oil, and sprinkle the smoked paprika, oregano, salt, and pepper over everything.
- Use your hands to toss the ingredients directly on the tray, making sure the spices are evenly distributed across both the meat and the veg.
- Spread everything out so that nothing is overlapping; if the tray is too crowded, the ingredients will release moisture and ‘boil’ rather than roasting to a crisp.
- Roast for 25-30 minutes, using a spatula to flip the potatoes and peppers halfway through to ensure even browning.
- The dinner is ready when the potatoes are fork-tender and the meat is browned and cooked through; the juices from the meat will have created a natural sauce on the bottom of the pan.
How to prepare lean protein?
Why we love this
Mastering lean protein is about finding that perfect balance between health-conscious eating and pure, savory satisfaction. When prepared correctly, lean meats like turkey or pork tenderloin have a clean, focused flavor and a firm yet tender texture that feels incredibly substantial. The aroma is savory and inviting, often enhanced by woody herbs like rosemary or the sharpness of black pepper. It’s the backbone of the food board, providing the satiety that keeps you full for hours without the heaviness of fattier cuts. It feels intentional, clean, and completely delicious.
Ingredients
- 1 lb pork tenderloin or turkey breast tenderloin
- 2 tablespoons Dijon mustard
- 1 tablespoon honey
- 2 cloves garlic, minced
- 1 tablespoon fresh rosemary, chopped
- Salt and pepper
How to make it
- Begin by removing any ‘silver skin’ (the tough, white connective tissue) from the meat using a sharp paring knife; this ensures the protein stays tender and doesn’t curl during cooking.
- In a small bowl, mix the Dijon mustard, honey, minced garlic, and rosemary to create a thick, flavor-packed wet rub.
- Generously coat the lean protein with the rub, massaging it into the meat and letting it marinate for at least 20 minutes at room temperature.
- Heat a tablespoon of oil in an oven-safe skillet over medium-high heat and sear the protein on all sides for 2-3 minutes per side until a golden crust develops.
- Transfer the entire skillet into a preheated oven at 375°F (190°C).
- Roast for 15-20 minutes, or until an internal thermometer reads 145°F for pork or 165°F for turkey.
- Crucially, let the meat rest for 10 full minutes under a loose tent of foil before carving; this is the difference between a dry piece of meat and a perfectly juicy one.
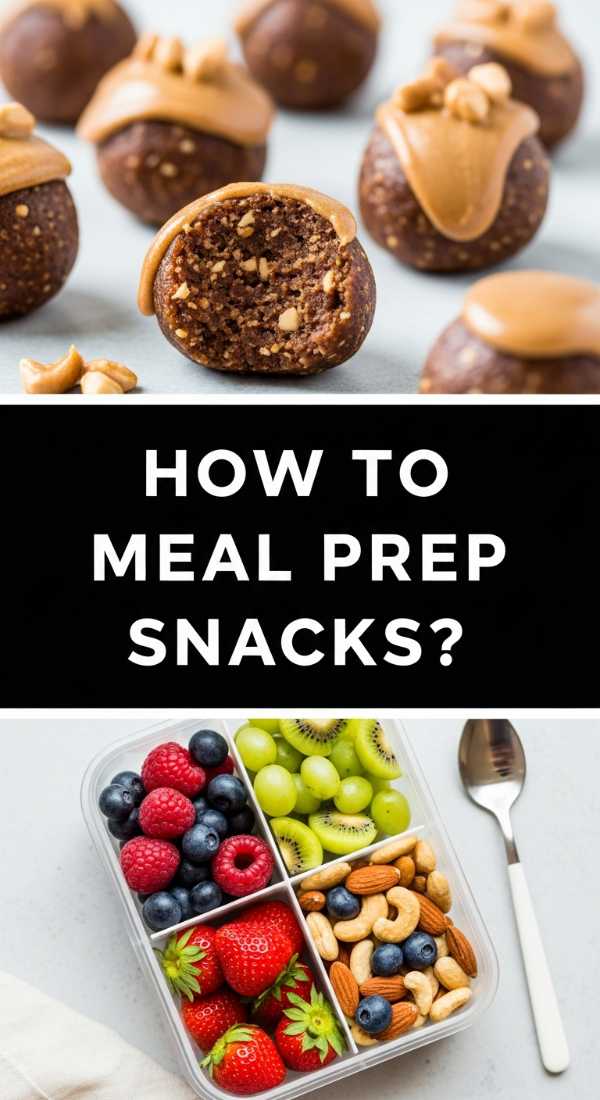
How to meal prep snacks?
[IMAGE_10]
Why we love this
There is a unique kind of joy in opening your fridge to find a curated selection of snack-sized treats ready for the taking. Prepped snacks provide a delightful variety of textures—the snap of a cold carrot, the creamy density of a hard-boiled egg, and the crunch of roasted nuts. It’s about more than just hunger; it’s about having a ‘mini-feast’ ready for those moments when you need a quick boost of energy. The sight of these colorful, bite-sized components arranged in containers is incredibly satisfying and helps prevent the mindless grazing that often happens when we’re tired.
Ingredients
- 6 large eggs
- 1 cup hummus or tzatziki
- 2 cups sliced bell peppers and celery
- 1 cup raw almonds or walnuts
- 1 cup grapes or berries
- Cheese cubes or string cheese
How to make it
- Start by boiling your eggs: place them in a pot of cold water, bring to a boil, then immediately turn off the heat and cover for 10 minutes. Transfer to an ice bath for 5 minutes before peeling for perfectly centered, creamy yolks.
- Wash and dry your vegetables thoroughly, then slice them into long ‘batons’ or sticks that are easy to dip into hummus.
- Portion out the hummus or dip into small, 2-ounce containers to keep the veggies from getting soggy and to make them easy to grab on the go.
- Divide the nuts and cheese into small silicone bags or containers; the fat and protein in these will provide long-lasting satiety.
- Wash your fruit and dry it completely before packing; any residual moisture will cause berries to mold faster in the fridge.
- Arrange all your components in a dedicated ‘snack zone’ in your refrigerator so they are the first thing you see when you open the door.
- Keep the snacks in clear glass containers so you can see the vibrant colors, which makes you more likely to reach for them over processed alternatives.
The Art of the Simple Board
In the end, the ‘Viral Simple Food Board’ isn’t about following a rigid set of rules—it’s about creating a kitchen environment that works for you. By mastering these ten essential meal prep components, you are giving yourself the gift of choice and the luxury of time. You can mix the roasted broccoli with the quinoa one day, and pair the salmon with the easy salad the next. It’s a sustainable, beautiful, and delicious way to eat that honors your health and your busy schedule. So, clear off your counter, put on your favorite playlist, and start building your board. Your future self will thank you!