
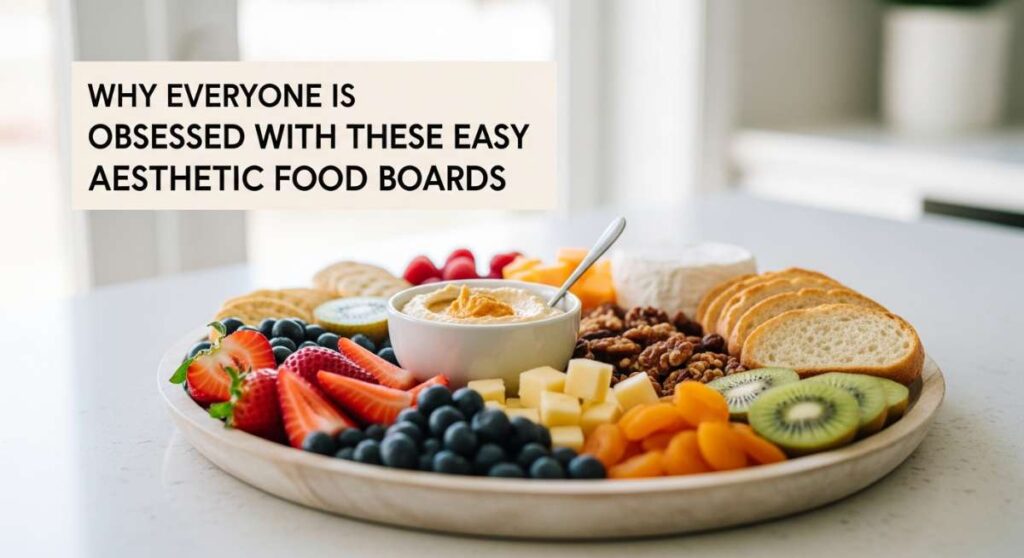
Why Everyone is Obsessed with These Easy Aesthetic Food Boards
There is something incredibly intentional about gathering around a beautifully curated food board. It’s more than just a meal; it’s an experience that speaks to our desire for connection and visual harmony. We’ve all seen those viral images—vibrant colors, perfectly sliced proteins, and bowls of sauces that look like a work of art—and wondered if we could ever recreate that magic at home without spending hours in the kitchen.
The secret isn’t in professional culinary training; it’s in the art of the ‘prep-and-plate.’ By focusing on a few high-quality, aesthetic components, you can turn a standard Tuesday night dinner into a social-media-worthy spread. Whether you’re hosting a small gathering or just trying to romanticize your daily life, these food board staples are the ultimate way to bring warmth and style back to your dining table.
Today, I’m sharing ten of my absolute favorite, foolproof components that will make your next food board look like it was designed by a professional stylist. From sizzling garlic butter chicken to vibrant Mediterranean bowls, these recipes are designed to be as delicious as they are beautiful.
How to prep garlic butter chicken?

Why we love this
The aroma of fresh garlic hitting a hot, buttered skillet is enough to bring anyone into the kitchen with high expectations. This chicken is all about that golden-brown crust and the succulent, tender interior that practically melts in your mouth. The richness of the butter perfectly balances the bite of the garlic, creating a silky sauce that coats every morsel and makes the chicken glisten under your dining room lights. It’s a rustic, comforting classic that adds a sophisticated savory note to any food board.
Ingredients
- 1.5 lbs chicken thighs, boneless and skinless
- 4 tablespoons unsalted butter
- 5 cloves garlic, minced
- 1 teaspoon dried oregano
- Salt and cracked black pepper to taste
- Fresh parsley for garnish
- 1 tablespoon olive oil
How to make it
- Begin by patting your chicken thighs completely dry with paper towels; removing moisture is the key to getting that professional-grade golden sear.
- Season both sides generously with salt, pepper, and oregano. Ensure the spices are pressed into the meat so they don’t fall off in the pan.
- Heat your olive oil in a large heavy-bottomed skillet over medium-high heat. Once the oil is shimmering (but not smoking), add the chicken in a single layer, ensuring they aren’t crowded.
- Sear the chicken for about 5-7 minutes per side. You are looking for a deep golden-brown crust and an internal temperature of 165°F. Remove the chicken from the pan and let it rest on a cutting board.
- Lower the heat to medium and add the butter to the same pan. Once it foam melts, add the minced garlic. Stir constantly for about 1 minute until the garlic is fragrant and light golden—be careful not to burn it, as it will turn bitter.
- Slice the rested chicken into thick, aesthetic strips and return them to the pan for 30 seconds to toss in the garlic butter sauce. Garnish with fresh parsley before plating.
How to make caprese pasta salad?

Why we love this
This dish is the embodiment of summer on a plate, offering a refreshing explosion of textures and flavors that feel incredibly light yet satisfying. Imagine the smooth, creamy pearls of fresh mozzarella contrasting with the snappy, juicy burst of sun-ripened cherry tomatoes. The herbaceous perfume of fresh basil leaves ties everything together, while a drizzle of balsamic glaze adds a sophisticated, tangy sweetness. It’s a colorful, vibrant addition that brings a pop of bright red and green to your food board layout.
Ingredients
- 1 lb fusilli or rotini pasta
- 1 cup cherry tomatoes, halved
- 8 oz fresh mozzarella pearls
- 1/2 cup fresh basil leaves, chiffonade
- 1/4 cup extra virgin olive oil
- 2 tablespoons balsamic glaze
- 1/2 teaspoon flaky sea salt
How to make it
- Boil a large pot of heavily salted water. Add your pasta and cook it for exactly one minute less than the package instructions for ‘al dente.’ You want the pasta to have a firm bite so it holds up against the dressing.
- Drain the pasta and immediately rinse it under cold running water. This stops the cooking process and removes excess starch, preventing the pasta from sticking together in a clump.
- In a large mixing bowl, whisk together the olive oil and half of the sea salt. Add the cooled pasta and toss thoroughly to ensure every spiral is lightly coated.
- Gently fold in the halved cherry tomatoes and the mozzarella pearls. Using a spatula, stir carefully so you don’t bruise the tomatoes or tear the cheese.
- Just before serving, sprinkle the fresh basil over the top. Drizzle the balsamic glaze in a decorative zig-zag pattern across the bowl for that signature aesthetic look, and finish with a pinch of flaky salt.
How to prep healthy summer salads?
Why we love this
A truly great summer salad is a masterclass in balance, playing with the boundaries between sweet, salty, and crunchy. The base of peppery arugula provides a sophisticated bite that is softened by the succulent sweetness of fresh berries and the creamy crumble of feta cheese. Every forkful offers a different sensory experience, from the snap of toasted pecans to the zesty brightness of a poppyseed dressing. It feels like eating sunshine, providing a clean and crisp counterpoint to the richer items on your board.
Ingredients
- 4 cups baby arugula or spring mix
- 1 cup fresh strawberries, sliced
- 1/2 cup fresh blueberries
- 1/4 cup crumbled feta cheese
- 1/4 cup toasted pecans or walnuts
- 3 tablespoons poppyseed dressing
How to make it
- Start by washing your greens in ice-cold water and drying them thoroughly using a salad spinner. Wet greens will cause your dressing to slide off and make the salad look wilted.
- Place the dried greens in a wide, shallow bowl rather than a deep one; this allows the colorful toppings to be seen rather than buried at the bottom.
- Scatter the sliced strawberries and whole blueberries across the top in a random but even distribution to ensure every bite gets some fruit.
- Sprinkle the crumbled feta and toasted pecans over the fruit. Pro tip: Toast the pecans in a dry pan over medium heat for 3 minutes until they smell nutty for maximum flavor impact.
- Do not dress the salad until the very moment you are ready to serve. Drizzle the poppyseed dressing in light ribbons over the top to maintain the crisp texture of the leaves and the integrity of the fruit.
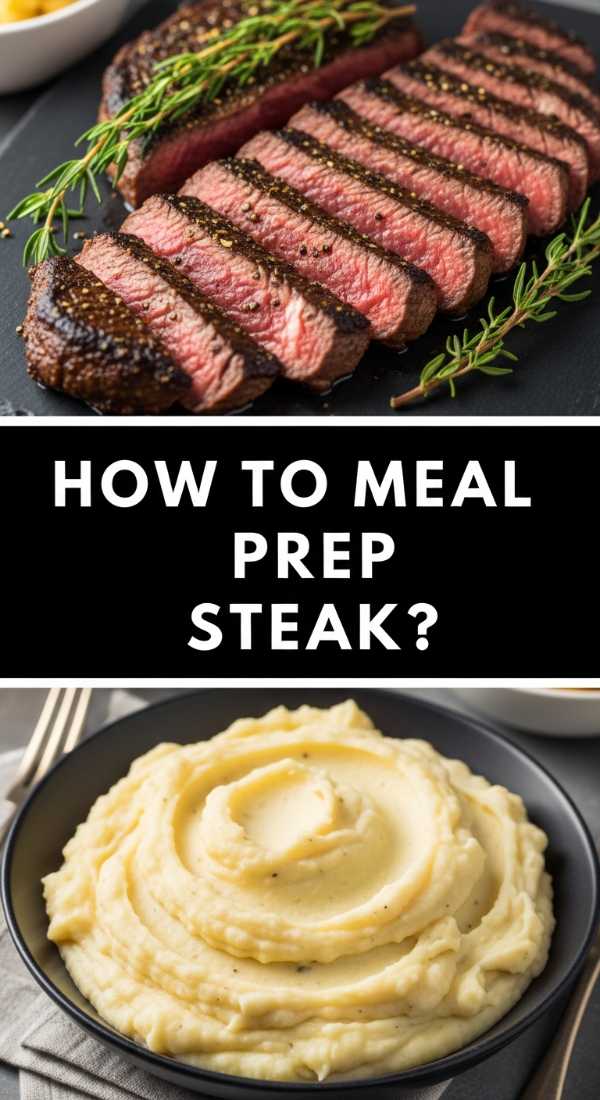
How to meal prep steak and potatoes?

Why we love this
There is a rugged elegance to perfectly seared steak and crispy roasted potatoes that never fails to impress. The steak offers a deep, savory umami flavor with a beautifully charred exterior that gives way to a tender, pink center. Paired with potatoes that have been roasted until their skins are paper-thin and crunchy while their insides remain fluffy and buttery, this combo is the ultimate crowd-pleaser. The scent of roasted rosemary and garlic wafting from the plate creates an atmosphere of hearty, home-cooked luxury.
Ingredients
- 1 lb top sirloin or ribeye steak
- 1 lb Yukon Gold potatoes, cubed small
- 3 tablespoons olive oil
- 2 sprigs fresh rosemary
- 1 teaspoon garlic powder
- Salt and coarse black pepper
How to make it
- Preheat your oven to 425°F. Toss the cubed potatoes in a bowl with 2 tablespoons of olive oil, garlic powder, salt, and pepper until heavily coated.
- Spread the potatoes on a parchment-lined baking sheet in a single layer. Roast for 25-30 minutes, tossing halfway through, until they are golden-brown and show visible crispy edges.
- While the potatoes roast, take your steak out of the fridge and let it sit at room temperature for 20 minutes. Season very generously with coarse salt and pepper on all sides.
- Heat a cast-iron skillet over high heat with the remaining tablespoon of oil. Once the pan is smoking slightly, place the steak in. Sear for 3-4 minutes per side for medium-rare.
- In the last minute of searing, drop the rosemary sprigs into the pan and spoon the hot oil over the steak to infuse it with herbal notes.
- Remove the steak and let it rest for at least 8-10 minutes before slicing. This is crucial; it allows the juices to redistribute so the meat stays moist. Slice against the grain for maximum tenderness.
How to prep roasted balsamic vegetables?

Why we love this
Roasting vegetables with a balsamic glaze transforms humble garden produce into caramelized jewels that are bursting with concentrated flavor. The high heat of the oven draws out the natural sugars in carrots and Brussels sprouts, while the balsamic vinegar reduces into a sticky, syrupy coating that is both sharp and sweet. The resulting texture is a delightful mix of tender centers and slightly charred, crispy outer leaves. These vegetables add an earthy, sophisticated depth and a rich, dark color palette to your food board.
Ingredients
- 2 cups Brussels sprouts, halved
- 2 large carrots, peeled and sliced into rounds
- 1 red bell pepper, chopped into 1-inch pieces
- 3 tablespoons olive oil
- 2 tablespoons high-quality balsamic vinegar
- 1 tablespoon honey
- Salt and pepper
How to make it
- Set your oven to 400°F. The relatively high temperature is necessary to achieve caramelization without turning the vegetables into mush.
- In a large bowl, whisk together the olive oil, balsamic vinegar, and honey until the mixture is emulsified.
- Add the prepared Brussels sprouts, carrots, and peppers to the bowl. Use your hands or a large spoon to ensure every single piece is thoroughly glistening with the balsamic mixture.
- Spread the vegetables out on a large sheet pan. Space is your friend here; if they are too crowded, they will steam instead of roast.
- Roast for 20-25 minutes. At the 15-minute mark, use a spatula to flip the vegetables so they brown evenly on all sides.
- The vegetables are done when the edges of the Brussels sprouts are dark and crispy and the carrots can be easily pierced with a fork. Serve warm or at room temperature for the best flavor profile.
How to make honey garlic salmon?

Why we love this
Salmon is the crown jewel of any aesthetic food board, and this honey garlic version is a total showstopper. The glaze creates a stunning, glossy sheen that catches the light, while the combination of sweet honey and pungent garlic builds a complex flavor profile that complements the rich, fatty nature of the fish. As it cooks, the edges of the salmon caramelize into a slightly chewy, candy-like crust that provides a wonderful contrast to the moist, flaky layers of the fillet. It’s elegant, vibrant, and tastes like a five-star meal.
Ingredients
- 2 salmon fillets (6 oz each)
- 3 tablespoons honey
- 2 tablespoons soy sauce
- 1 tablespoon lemon juice
- 3 cloves garlic, minced
- 1/2 teaspoon ginger, grated
- 1 tablespoon olive oil
How to make it
- In a small bowl, whisk together the honey, soy sauce, lemon juice, minced garlic, and ginger. This serves as both your marinade and your finishing sauce.
- Pat the salmon dry and season lightly with salt (remember the soy sauce is already salty).
- Heat olive oil in a non-stick skillet over medium heat. Place the salmon fillets in the pan, skin-side up first. Sear for about 4 minutes until a nice golden crust forms.
- Flip the salmon over so the skin side is down. Pour the honey garlic mixture into the pan around the fish.
- As the sauce begins to bubble and thicken, use a spoon to continuously baste the top of the salmon with the glaze. This coats the fish and keeps it incredibly moist.
- Cook for another 3-4 minutes until the salmon is opaque and the sauce has reduced to a thick, syrupy consistency. Serve immediately with a slice of fresh lemon for a bright visual finish.
How to prep budget friendly chicken?

Why we love this
Eating beautifully doesn’t have to break the bank, and this budget-friendly chicken prep proves that simple ingredients can produce extraordinary results. By using bone-in, skin-on thighs, you get a massive amount of flavor and juiciness for a fraction of the cost of other cuts. The skin becomes incredibly thin and shatteringly crisp, seasoned with basic pantry staples that create a warm, aromatic profile. It’s the kind of soulful, rustic food that feels deeply nourishing and looks effortlessly chic when piled high on a wooden board.
Ingredients
- 4 bone-in, skin-on chicken thighs
- 2 tablespoons olive oil or melted butter
- 1 teaspoon onion powder
- 1 teaspoon smoked paprika
- 1/2 teaspoon dried thyme
- Salt and pepper
How to make it
- Preheat your oven to 400°F. Bone-in chicken needs a steady, high heat to render the fat from the skin and keep the meat succulent.
- Mix the onion powder, paprika, thyme, salt, and pepper in a small ramekin. Rub the chicken thighs all over with olive oil, making sure to get under the skin as well.
- Apply the spice rub generously to the skin, pressing it in so it adheres. The paprika will provide a gorgeous deep orange-red color once roasted.
- Place the thighs on a wire rack set over a baking sheet. The rack allows hot air to circulate under the chicken, ensuring the bottom skin doesn’t get soggy.
- Roast for 35-40 minutes. You’ll know they are ready when the skin looks like parchment paper and the juices run clear when pierced.
- Let the chicken rest for 5 minutes before serving. This allows the internal juices to settle, ensuring the first bite is as tender as possible.
How to make overnight breakfast oats?

Why we love this
Overnight oats are the ultimate morning luxury for someone who loves aesthetics but craves convenience. There is something so satisfying about the creamy, pudding-like texture that develops as the oats soak up the almond milk and chia seeds. It’s cold, refreshing, and incredibly customizable. When layered into glass jars with vibrant berries and a drizzle of amber maple syrup, they look like a gourmet breakfast parfait. Each spoonful is a blend of silky oats and the occasional pop of a blueberry, making breakfast feel like a treat.
Ingredients
- 1/2 cup rolled oats (not instant)
- 3/4 cup almond milk or milk of choice
- 1 tablespoon chia seeds
- 1 tablespoon maple syrup or honey
- 1/4 teaspoon vanilla extract
- Fresh berries and nuts for topping
How to make it
- In a wide-mouth glass jar or a small bowl, combine the rolled oats and chia seeds. The chia seeds are essential for creating that thick, creamy consistency.
- Pour in the milk, maple syrup, and vanilla extract. Stir vigorously for at least 30 seconds to ensure the seeds are distributed and not clumping at the bottom.
- Seal the jar with a lid and place it in the refrigerator for at least 6 hours, though overnight is ideal for the best texture.
- In the morning, give the oats another quick stir. If they seem too thick, you can splash in an extra tablespoon of milk to loosen them up.
- The aesthetic magic happens in the topping: layer your fresh berries, a sprinkle of granola for crunch, and a final small drizzle of syrup right before you take your photo (or your first bite).
How to prep colorful stir fry?

Why we love this
This stir fry is a celebration of color and snap, bringing a lively energy to any meal spread. The high-heat cooking method preserves the integrity of the vegetables, leaving them vibrant and ‘tender-crisp’ rather than soft and dull. The glossy sheen of the ginger-soy sauce makes every bell pepper and broccoli floret shine, while the aromatic heat of the ginger awakens the palate. It’s a fast-paced, exciting dish to prepare, and its rainbow of colors makes it a natural focal point for an aesthetic food board.
Ingredients
- 1 head of broccoli, cut into small florets
- 2 bell peppers (different colors), sliced into strips
- 1 cup snow peas
- 2 tablespoons soy sauce
- 1 tablespoon sesame oil
- 1 tablespoon fresh ginger, minced
- 2 cloves garlic, sliced thin
How to make it
- Preparation is key for a stir fry: have all your vegetables chopped and your sauce ingredients ready next to the stove, as the actual cooking happens very fast.
- Heat a wok or a very large skillet over high heat. Add the sesame oil and once it’s shimmering, toss in the garlic and ginger. Stir-fry for just 15 seconds to release the aroma.
- Add the broccoli and peppers first, as they take the longest to soften. Toss them constantly using a spatula or by shaking the pan to mimic professional technique.
- After 3 minutes, add the snow peas. They only need about 60 seconds of heat to turn bright green and slightly tender.
- Pour the soy sauce around the edges of the pan rather than directly on the veggies; this allows the sauce to heat up and caramelize slightly before hitting the ingredients.
- Toss everything together for one final minute until the sauce has thickened and coated every piece of produce. Serve immediately while the colors are at their peak brightness.
How to meal prep mediterranean bowls?
[IMAGE_10]
Why we love this
Mediterranean bowls are a symphony of fresh, zesty flavors that feel both sophisticated and incredibly wholesome. The base of fluffy quinoa provides a neutral canvas for the salty punch of Kalamata olives, the cool crunch of Persian cucumbers, and the creamy tang of authentic feta cheese. It’s a dish that invites you to eat with your eyes first, with its distinct sections of color and texture. The addition of a dollop of smooth hummus and a side of warm, charred pita makes this a complete sensory experience that transports you to a seaside cafe.
Ingredients
- 1 cup cooked quinoa
- 1/2 cup cucumber, diced
- 1/2 cup cherry tomatoes, halved
- 1/4 cup Kalamata olives, pitted
- 1/4 cup crumbled feta
- 2 tablespoons hummus
- Lemon wedges and dried oregano
How to make it
- Start with a base of well-seasoned, fluffy quinoa. If you want a more aesthetic look, use a tri-color quinoa blend for extra visual texture.
- Instead of mixing everything together, arrange your ingredients in ‘zones’ around the bowl. This is the secret to the viral Mediterranean bowl look.
- Place the diced cucumbers and halved tomatoes in their own sections. The contrast between the cool green and bright red is naturally appealing.
- Add the olives and feta in the remaining spaces. The dark purple of the olives provides a beautiful depth to the palette.
- Place a generous, smooth dollop of hummus right in the center. Use the back of a spoon to create a small ‘well’ in the hummus and fill it with a tiny drop of olive oil and a sprinkle of paprika.
- Finish the bowl with a dusting of dried oregano over the entire surface and a fresh lemon wedge on the side for squeezing just before eating.
Conclusion
Creating these aesthetic food boards is about more than just the final photo—it’s about the joy of preparation and the satisfaction of eating food that feels special. By using these detailed recipes, you can bring a touch of ‘viral’ magic into your own home, making every meal feel like a curated event. Remember, the best food boards are the ones shared with people you love, so don’t be afraid to get creative and make these recipes your own!