
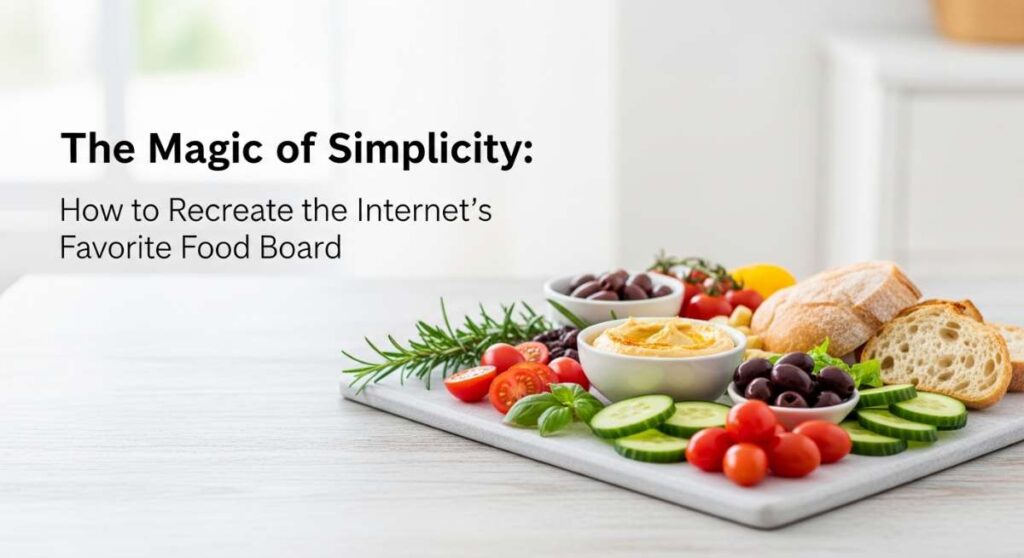
The Magic of Simplicity: How to Recreate the Internet’s Favorite Food Board
There is something deeply grounding about a kitchen filled with the scent of roasting herbs and the rhythmic sound of a knife hitting a wooden cutting board. We’ve all seen those viral food boards—the ones overflowing with vibrant colors, perfectly charred proteins, and glistening grains—and felt that immediate pull to recreate that aesthetic in our own homes. It’s not just about the social media aesthetic, though; it’s about reclaiming the joy of eating well without the stress of complicated, five-star recipes that leave you exhausted.
The magic happens when we embrace the simplicity of high-quality ingredients and basic techniques. When you assemble a food board, you aren’t just making dinner; you’re creating a palette of flavors that allows everyone to graze, linger, and enjoy. It’s a celebration of the ‘slow life’ in a fast-paced world. This guide is your roadmap to mastering the components of that viral food board, turning your meal prep into a sensory ritual that nourishes both the body and the soul.
How to prep chicken meals
Why we love this
Imagine biting into a piece of chicken that is impossibly juicy, with a golden-brown crust that shatters slightly before revealing tender, herb-infused meat. The aroma of garlic and lemon zest fills the air as you slice through the breast, making it the perfect versatile anchor for any board. Whether it’s served warm or sliced cold, this chicken carries a savory depth that balances out fresh greens and zesty dips, providing a satisfying protein punch that feels light yet indulgent at the same time.
Ingredients
- 2 lbs boneless skinless chicken breasts or thighs
- 3 tbsp olive oil
- 2 cloves minced garlic
- 1 tsp dried oregano
- 1 tsp smoked paprika
- Salt and cracked black pepper to taste
- Fresh lemon wedges
How to make it
- Pat the chicken completely dry with paper towels; moisture is the enemy of a good sear and prevents the spices from adhering properly.
- In a large bowl, whisk together the olive oil, garlic, oregano, paprika, salt, and pepper to create a thick marinade.
- Coat the chicken thoroughly and let it marinate for at least 30 minutes at room temperature, or up to 4 hours in the fridge for deeper flavor.
- Heat a heavy-bottomed cast iron skillet over medium-high heat until a drop of water sizzles instantly.
- Place chicken in the pan, ensuring they aren’t crowded; cook for 5-7 minutes without moving them to develop a deep golden crust.
- Flip the chicken and reduce heat to medium; cook for another 5-8 minutes until the internal temperature reaches 165°F (74°C).
- Remove from heat and let the meat rest on a cutting board for at least 10 minutes to allow the juices to redistribute before slicing into clean strips.
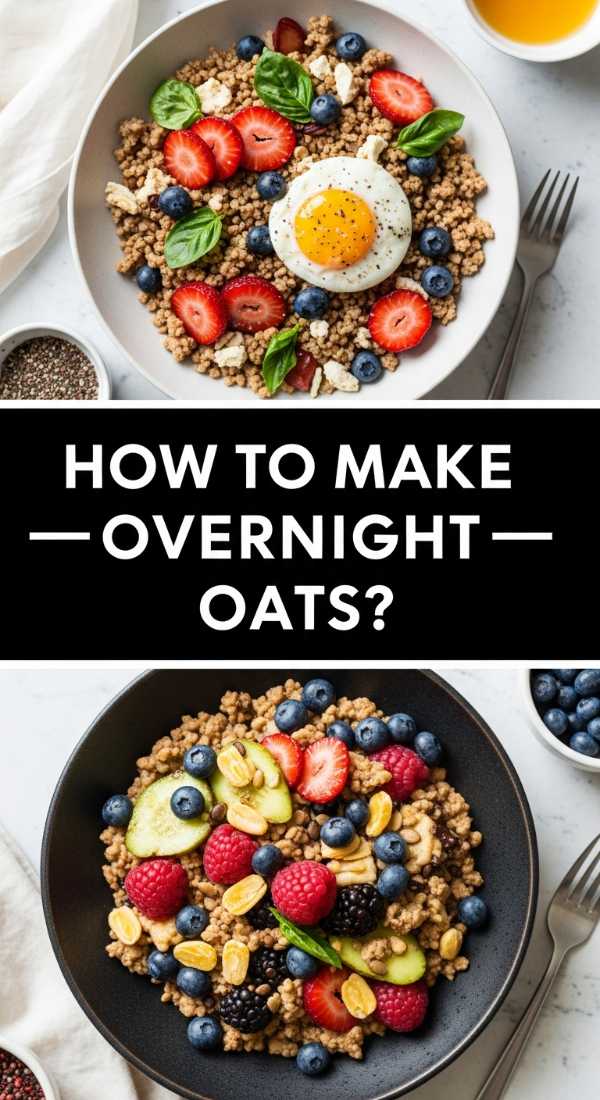
How to make overnight oats
Why we love this
There is a quiet luxury in waking up to a ready-made breakfast that feels like a decadent dessert but fuels you like a powerhouse. These oats are thick and creamy, with a velvety texture that contrasts beautifully against the crunch of chia seeds and the burst of fresh berries. As they soak overnight, the flavors meld into a harmonious blend of vanilla and almond, creating a cool, refreshing start to your morning that is both soothing to the palate and incredibly gentle on the digestive system.
Ingredients
- 1 cup rolled oats (not instant)
- 1 cup unsweetened almond or oat milk
- 1 tbsp chia seeds
- 1 tbsp maple syrup or honey
- 1/2 tsp vanilla extract
- Pinch of sea salt
- Toppings: Fresh berries, nut butter, or granola
How to make it
- In a wide-mouth glass jar or airtight container, combine the rolled oats and chia seeds, stirring to ensure the seeds are distributed evenly so they don’t clump.
- Pour in your liquid of choice, followed by the sweetener, vanilla extract, and a tiny pinch of salt to enhance the natural sweetness of the oats.
- Stir vigorously with a spoon until all the dry bits are fully submerged and the mixture looks uniform.
- Seal the lid tightly and place the jar in the refrigerator for a minimum of 6 hours, though 8-12 hours is ideal for the perfect “pudding-like” consistency.
- In the morning, give the oats a quick stir; if they are too thick, splash in a tablespoon of milk to loosen the texture.
- Layer your toppings just before serving to maintain the textural contrast between the soft oats and crunchy additions.
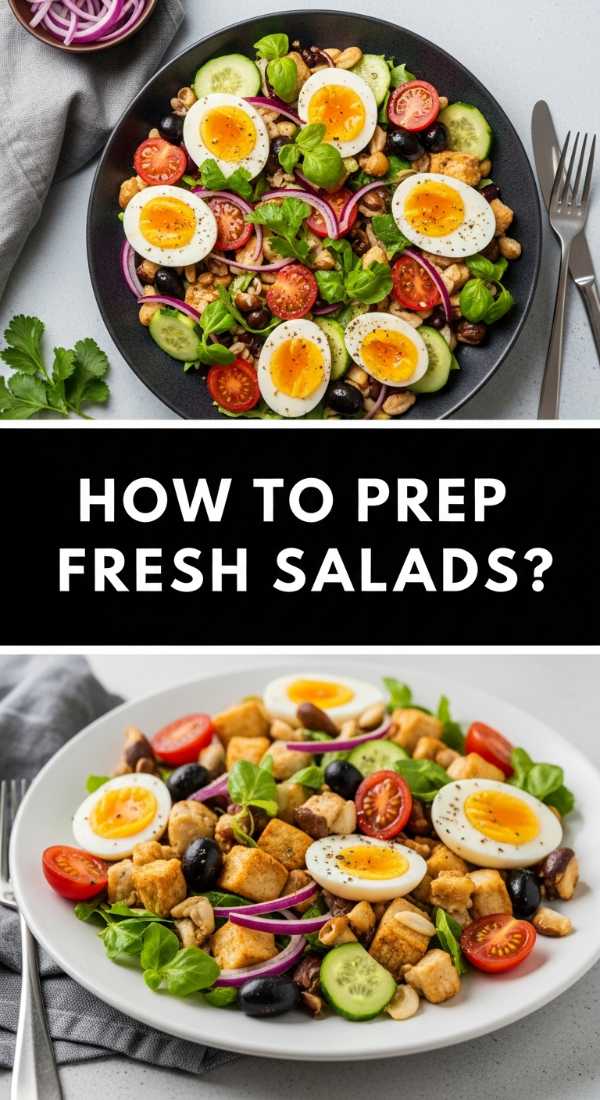
How to prep fresh salads

Why we love this
A truly great salad is an explosion of textures—the crisp snap of cucumber, the peppery bite of arugula, and the creamy richness of a well-balanced dressing. It should feel alive and vibrant, with colors that pop off the board and scents of fresh-torn basil and sharp citrus. When prepped correctly, these greens don’t just sit on the plate; they provide a refreshing palate cleanser that cuts through the richness of proteins, leaving you feeling energized and light rather than weighed down.
Ingredients
- 4 cups mixed greens (kale, spinach, or arugula)
- 1 cup sliced cucumbers
- 1/2 cup cherry tomatoes, halved
- 1/4 cup thinly sliced red onion
- Dressing: 3 parts olive oil to 1 part balsamic vinegar or lemon juice
- Flaky sea salt
How to make it
- Wash your greens in ice-cold water to crisp them up, then use a salad spinner to remove every drop of moisture; wet greens will make your dressing slide off.
- If using kale, remove the tough ribs and “massage” the leaves with a tiny drop of olive oil for 2 minutes until they soften and turn dark green.
- Slice your vegetables into uniform, bite-sized pieces so that every forkful contains a bit of everything.
- Store the dry greens and chopped vegetables in separate containers with a dry paper towel to absorb any excess humidity during the week.
- Whisk your dressing in a small jar but do not add it to the salad until the very moment you are ready to eat to prevent wilting.
- When assembling, toss the greens with half the dressing first, then top with the heavy vegetables and a final sprinkle of flaky salt for texture.
How to cook protein bowls

Why we love this
Protein bowls are the ultimate expression of customized nutrition, offering a satisfying mix of warm and cold elements that keep your taste buds dancing. The beauty lies in the layering: the earthy base of a grain, the heartiness of a protein, and the zing of a signature sauce. It’s a bowl of comfort that smells of toasted sesame and fresh lime, providing a sense of abundance and variety that makes healthy eating feel like a celebration rather than a chore.
Ingredients
- 1 base (quinoa, brown rice, or cauliflower rice)
- 1 protein (grilled chicken, tofu, or chickpeas)
- 2-3 roasted or raw vegetables
- Healthy fat (avocado or nuts)
- Sauce: Tahini, soy-ginger, or spicy mayo
How to make it
- Start with a solid base; cook your grains in vegetable broth instead of water to infuse them with savory flavor from the inside out.
- Prepare your protein using high-heat methods like searing or roasting to ensure a contrast between a crispy exterior and tender interior.
- Arrange the components in distinct “zones” rather than mixing them all at once; this keeps the textures separate and allows you to enjoy each flavor individually.
- Add a “crunch factor” like toasted pumpkin seeds or sliced radishes to provide a sensory break from the softer grains and proteins.
- Drizzle your sauce in a zigzag pattern across the top to ensure every bite gets a hint of creaminess or spice.
- Finish with a squeeze of fresh lime juice or a sprinkle of microgreens to add a bright, acidic note that lifts the entire dish.
How to roast better vegetables
Why we love this
There is a specific culinary alchemy that happens in a hot oven, turning humble broccoli and carrots into caramelized, candy-like morsels. The smell of roasting brassicas is warm and nutty, and the texture—crispy charred edges with a buttery, soft center—is addictive. Roasted vegetables bring a smoky, concentrated flavor to your food board that raw veggies simply can’t match, acting as the perfect savory sidekick to any main dish.
Ingredients
- 4 cups assorted vegetables (carrots, Brussels sprouts, sweet potatoes)
- 2 tbsp avocado oil (high smoke point)
- 1 tsp garlic powder
- 1 tsp dried thyme
- Salt and pepper
How to make it
- Preheat your oven to a high heat of 425°F (220°C); a hot oven is essential for browning before the vegetables get mushy.
- Cut all vegetables into similar sizes to ensure they cook at the same rate; smaller pieces for harder veggies like carrots, larger for broccoli.
- Toss the vegetables in a bowl with oil and spices until every single surface is lightly glistening; do not pour oil directly on the sheet pan.
- Spread the vegetables onto a large baking sheet, ensuring there is plenty of space between each piece; if they are crowded, they will steam instead of roast.
- Roast for 20-30 minutes, tossing them halfway through with a spatula to ensure even browning on all sides.
- Look for “char marks” on the edges as your visual cue for doneness; they should be easily pierced with a fork but still hold their shape.
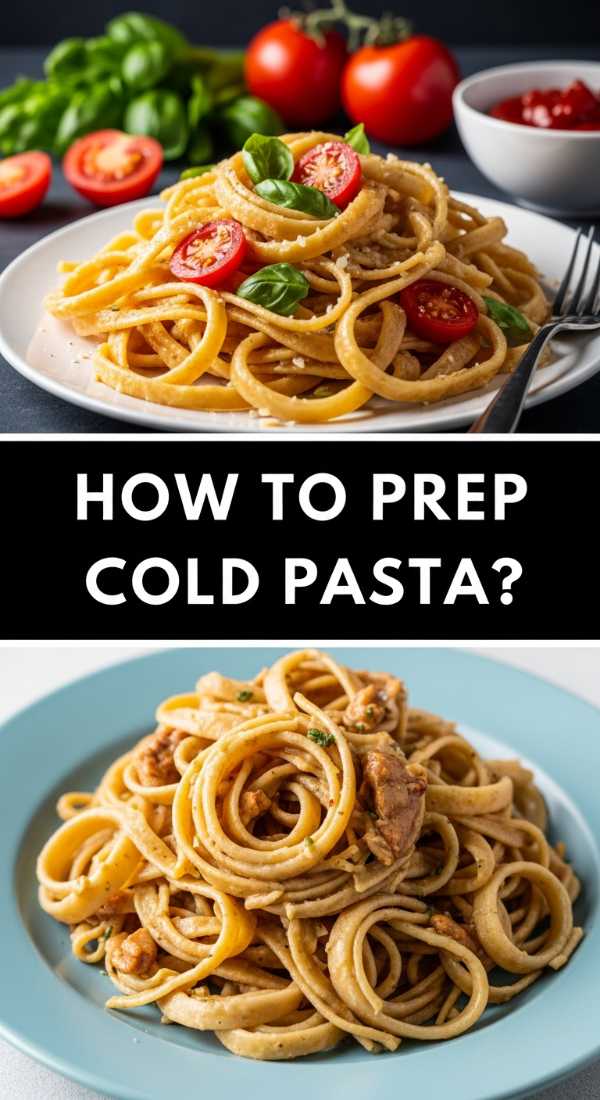
How to prep cold pasta
Why we love this
Cold pasta salad is the unsung hero of the food board, offering a zesty, chewy component that only gets better as it sits. The aroma of dried oregano and red wine vinegar takes you straight to a Mediterranean terrace. It’s satisfyingly filling yet remarkably refreshing, with the pasta acting as a sponge for the vinaigrette, ensuring that every bite is an explosion of tangy, herby goodness that pairs perfectly with salty cheeses or olives.
Ingredients
- 8 oz short pasta (rotini, farfalle, or penne)
- 1/2 cup diced bell peppers
- 1/4 cup sliced kalamata olives
- 1/4 cup crumbled feta cheese
- Dressing: Olive oil, red wine vinegar, dried oregano, and Dijon mustard
How to make it
- Boil your pasta in heavily salted water until it is just “al dente”; it should have a firm bite, as it will soften slightly once the dressing is added.
- Drain the pasta and immediately rinse it under cold running water to stop the cooking process and remove excess starch that causes sticking.
- While the pasta drains, whisk together your dressing in the bottom of a large bowl until it emulsifies into a thick, cloudy liquid.
- Add the cold pasta to the dressing while it is still slightly damp; this helps the pasta absorb the flavors more effectively.
- Gently fold in your chopped vegetables and feta, being careful not to break the pasta shapes.
- Let the salad chill in the refrigerator for at least 30 minutes before serving, allowing the flavors to marry and the dressing to thicken.
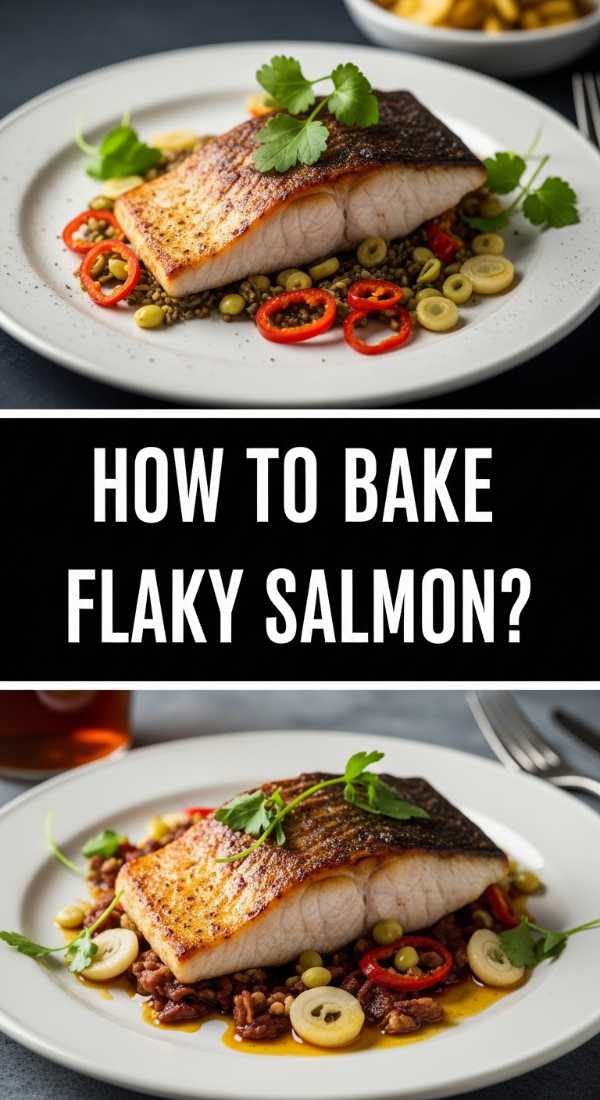
How to bake flaky salmon
Why we love this
Salmon is the jewel of any food board, with its striking coral color and rich, buttery flavor. When baked correctly, it flakes apart at the mere suggestion of a fork, releasing a delicate aroma of lemon and fresh dill. The skin becomes a savory base while the top remains moist and tender. It feels sophisticated and high-end, yet it’s one of the simplest proteins to master, providing essential omega-3s with a luxurious mouthfeel.
Ingredients
- 2 salmon fillets (6 oz each)
- 1 tbsp melted butter or olive oil
- 1/2 lemon, sliced into rounds
- 2 sprigs fresh dill or parsley
- Salt and cracked black pepper
How to make it
- Preheat your oven to 400°F (200°C) and line a baking sheet with parchment paper for easy cleanup and to prevent sticking.
- Pat the salmon fillets dry with a paper towel; this ensures the seasoning stays on and the top doesn’t get soggy.
- Place the fillets skin-side down on the parchment paper and brush the tops generously with melted butter or oil.
- Season heavily with salt and pepper, then place lemon slices and fresh herbs directly on top of the fish to infuse flavor during cooking.
- Bake for 12-15 minutes depending on the thickness; the fish is done when it is opaque throughout and flakes easily with a fork.
- For a professional finish, turn on the broiler for the last 60 seconds of cooking to slightly caramelize the lemon and crisp the edges of the herbs.
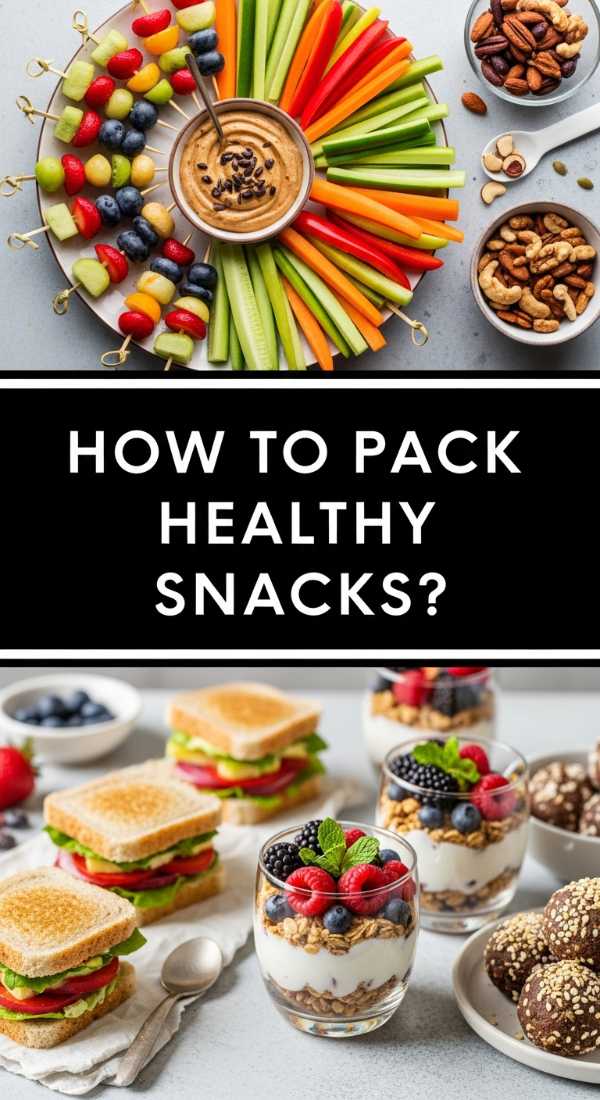
How to pack healthy snacks

Why we love this
Snacking should be an intentional pause in your day, a moment to recharge with textures that satisfy both the crunch-seekers and the sweet-tooths. A well-packed snack section on a board features the creamy pull of nut butter against the crisp snap of an apple, or the earthy saltiness of almonds paired with dark chocolate. It’s about balance—fueling your body with sustained energy while treating your senses to a variety of natural flavors.
Ingredients
- Fresh fruit (apple slices, grapes, berries)
- Crunchy elements (raw almonds, walnuts, or rice crackers)
- Creamy dips (hummus, almond butter, or Greek yogurt)
- Optional: A few squares of dark chocolate (70% cocoa or higher)
How to make it
- Slice fruit like apples or pears and toss them in a tiny bit of lemon juice to prevent browning if you aren’t eating them immediately.
- Use small, reusable silicone cups or glass ramekins to keep wet dips like hummus or yogurt from migrating into your crunchy crackers.
- Portion out nuts and seeds into small bundles; this helps with portion control and makes the board look more organized and abundant.
- Choose a variety of colors—bright red berries, green grapes, and brown nuts—to make the snack section visually enticing.
- If packing for on-the-go, use a bento-style box with dividers to maintain the integrity of each snack’s texture.
- Always include one “treat” element, like a piece of dark chocolate, to make the healthy snacking experience feel complete and satisfying.
How to make sheet pan dinners
Why we love this
Sheet pan dinners are the ultimate “set it and forget it” magic trick for busy weeknights. There is something incredibly satisfying about seeing an entire meal come together on a single tray, with the juices from the protein mingling with the roasting vegetables to create a built-in sauce. The kitchen smells of toasted spices and caramelized onions, and the best part is the minimal cleanup, leaving you more time to actually enjoy the meal you’ve created.
Ingredients
- 1 lb protein (sausage links, chicken thighs, or shrimp)
- 3 cups chopped sturdy vegetables (peppers, onions, zucchini)
- 2 tbsp olive oil
- 1 tbsp Italian seasoning or taco seasoning
- Fresh herbs for garnish
How to make it
- Line a large, rimmed baking sheet with aluminum foil or a silicone mat to catch any escaping juices and make cleanup a breeze.
- Distribute your protein and vegetables across the pan in a single layer; if using shrimp, wait to add them until the last 5-8 minutes of cooking.
- Drizzle the olive oil and seasonings over everything and use your hands to toss the ingredients directly on the pan until well-coated.
- Arrange the items so that the sturdier vegetables (like onions) are near the edges where the pan is hottest, and the protein is in the center.
- Roast at 400°F (200°C) for 20-25 minutes, or until the protein is cooked through and the vegetables have slightly charred edges.
- Finish with a flourish of fresh herbs or a squeeze of lemon to brighten the cooked flavors before serving directly from the pan.
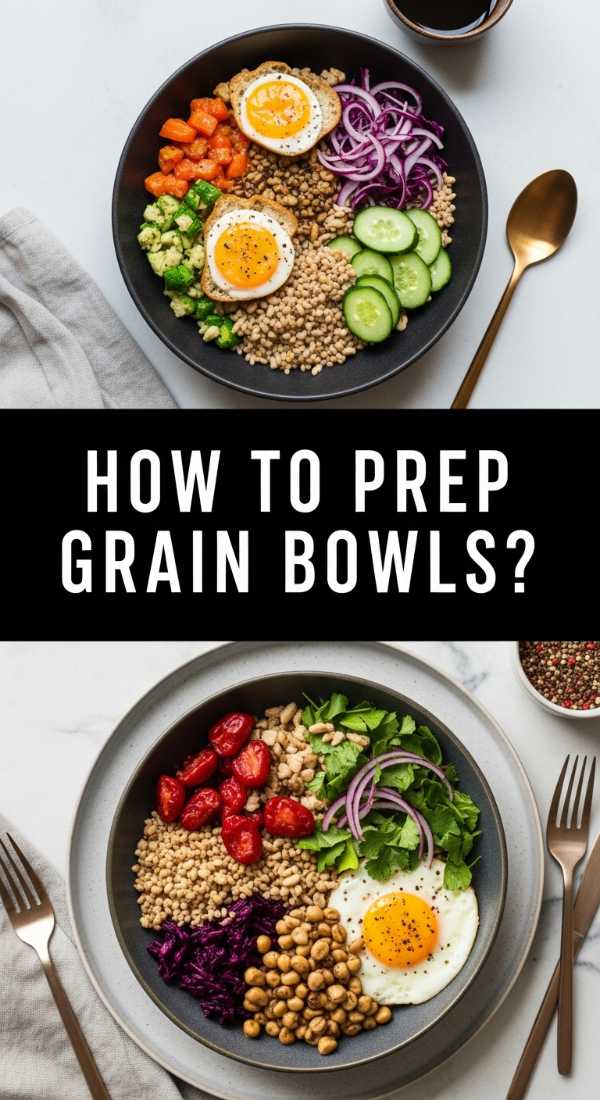
How to prep grain bowls
[IMAGE_10]
Why we love this
Grain bowls are like a warm hug in food form. They are dense, earthy, and incredibly grounding, providing a complex base that makes every other ingredient shine. We love the way the grains absorb the dressings, becoming little flavor bombs that pop in your mouth. The aroma of cooked quinoa or farro is subtly nutty and wholesome, creating a sense of deep nourishment that sustains your energy levels for hours after the meal is over.
Ingredients
- 1 cup dry grains (quinoa, farro, or bulgur)
- 2 cups liquid (water or vegetable stock)
- 1/2 tsp salt
- Toppings: Roasted chickpeas, sliced avocado, pickled onions
- Dressing: Lemon-tahini or honey-mustard
How to make it
- Rinse your grains thoroughly in a fine-mesh sieve under cold water to remove any bitter saponins (especially important for quinoa).
- Combine the grains and liquid in a pot and bring to a rolling boil over high heat.
- Once boiling, reduce the heat to the lowest setting, cover with a tight-fitting lid, and simmer for the time recommended on the package (usually 15-20 minutes).
- Turn off the heat but leave the lid on for an additional 5 minutes; this allows the grains to steam and become extra fluffy.
- Fluff the grains with a fork—never a spoon—to separate the individual kernels and prevent them from clumping into a mushy mass.
- Spread the cooked grains out on a large plate or tray to cool quickly if you are meal prepping; this keeps them from overcooking in their own residual heat.
The Art of the Final Assembly
Once you have mastered these individual components, the real fun begins. Building your food board is like painting a masterpiece where every stroke is edible. Start by placing your larger items—the chicken, the salmon, or the grain bowls—in the center. Surround them with the vibrant colors of your fresh salads and roasted vegetables. Fill the small gaps with your healthy snacks and dips. The result is a table that invites conversation, encourages exploration, and celebrates the simple beauty of real food. Remember, there are no mistakes here; the goal is to create a meal that makes you feel as good as it looks.
Frequently Asked Questions
How long do these components stay fresh? Most prepped proteins and roasted vegetables will stay fresh in airtight containers in the fridge for up to 4 days. Grains can last up to 5 days, while dressed salads should be eaten immediately.
Can I freeze any of these items? Cooked grains and sheet pan proteins like chicken or sausage freeze very well. However, fresh salads, cold pasta, and roasted vegetables are best enjoyed fresh as their texture changes significantly upon thawing.
What is the best way to reheat the proteins? To keep chicken or salmon from drying out, reheat them in a pan over low heat with a splash of water or broth and a lid on, or use a microwave at 50% power in short intervals.