

Have you ever seen a photo that just makes you stop scrolling and instantly feel a sense of home? Last week, I shared a simple, rustic dinner board on my feed, and within hours, it was everywhere. It wasn’t just about the food; it was about the way it looked—a colorful, abundant spread that promised a little something for everyone without the stress of a formal dinner party. It felt like an invitation to slow down and savor every bite.
This viral board took off because it breaks the rules of a traditional charcuterie. Instead of just crackers and cheese, it’s a full-meal experience featuring protein, roasted veggies, and healthy fats. It’s the ultimate ‘lazy-elegant’ way to host or feed your family. You don’t need fancy platters or expensive ingredients; you just need a few reliable techniques to make simple staples shine.
Today, I’m pulling back the curtain on every single component of that board. From the secret to the crispiest potatoes you’ll ever eat to the most succulent garlic chicken, I’m showing you exactly how to recreate this viral masterpiece at home. Let’s dive into the details that make these dishes pop!
How to make juicy garlic chicken?

Why we love this
There is nothing quite like the aroma of fresh garlic sizzling in butter as it coats a perfectly seared piece of chicken. We love this dish because it strikes that elusive balance between a crispy, golden-brown exterior and an incredibly moist, tender interior that practically melts in your mouth. Each bite is an explosion of savory herbs and rich, buttery goodness that feels like a warm hug on a plate. It is the kind of protein that anchors a board with both its rustic visual appeal and its undeniable, classic comfort-food flavor profile.
Ingredients
- 4 boneless, skinless chicken thighs
- 6 cloves of garlic, minced
- 3 tablespoons unsalted butter
- 1 tablespoon olive oil
- 1 teaspoon dried oregano
- Salt and cracked black pepper to taste
- Fresh parsley for garnish
How to make it
- Begin by patting the chicken thighs completely dry with paper towels; removing surface moisture is the secret to getting a deep, golden-brown sear rather than steaming the meat.
- Season both sides of the chicken generously with salt, pepper, and dried oregano, pressing the spices into the meat so they adhere during the cooking process.
- Heat the olive oil and 1 tablespoon of butter in a large heavy-bottomed skillet over medium-high heat. Wait until the butter stops foaming and begins to shimmer before adding the chicken.
- Place the chicken in the pan, ensuring they aren’t crowded, and sear for 5-7 minutes without moving them. You are looking for a thick, caramelized crust to form on the bottom.
- Flip the chicken and add the remaining butter and minced garlic to the center of the pan. Tilt the skillet slightly and use a large spoon to continuously baste the chicken with the melting garlic butter for another 5-6 minutes.
- Use a meat thermometer to ensure the internal temperature reaches 165°F (74°C). Once reached, remove from the heat and let the chicken rest for 5 minutes before slicing to allow the juices to redistribute throughout the meat.
How to cook crispy roasted potatoes?

Why we love this
The perfect roasted potato is a masterclass in texture: a glass-like, salty outer shell that shatters upon impact to reveal a fluffy, cloud-like center. These potatoes bring a satisfying earthiness to the board, acting as the ultimate vessel for dips and juices from the proteins. The way the rosemary needles become crisp and fragrant in the oven adds a sensory layer that makes your entire kitchen smell like a high-end bistro. They are addictive, nostalgic, and the first thing to disappear whenever the board hits the table.
Ingredients
- 2 lbs Yukon Gold potatoes, chopped into 1-inch cubes
- 1/4 cup extra virgin olive oil
- 2 tablespoons fresh rosemary, chopped
- 1 teaspoon sea salt
- 1/2 teaspoon garlic powder
- 1/4 teaspoon smoked paprika
How to make it
- Preheat your oven to 425°F (220°C) and place a large baking sheet inside the oven as it heats; a hot pan ensures the potatoes start crisping the moment they touch the surface.
- Place your cubed potatoes in a large pot of cold, salted water and bring to a boil. Simmer for only 5 minutes—this parboiling step creates a starchy surface that turns into a crunchier crust.
- Drain the potatoes and return them to the pot. Close the lid and shake the pot vigorously for 10 seconds to “rough up” the edges; those fuzzy, mashed-potato-like edges are what turn into crispy bits in the oven.
- Toss the roughed-up potatoes with olive oil, rosemary, salt, garlic powder, and paprika until every cube is thoroughly coated in the seasoned oil.
- Carefully spread the potatoes onto the preheated baking sheet in a single layer, ensuring they aren’t touching, which would cause them to steam instead of roast.
- Roast for 35-40 minutes, flipping them with a metal spatula halfway through. They are done when they are deep golden brown and make a distinct clicking sound against the pan.
How to bake keto zucchini boats?

Why we love this
Zucchini boats are a vibrant, colorful addition to the board that offers a refreshing lightness without sacrificing flavor. We love how the zucchini acts as a natural, edible bowl that softens just enough to be tender but retains a satisfying snap. The combination of savory ground meat and molten, bubbly cheese creates a decadent experience that feels indulgent while being completely low-carb. They add a beautiful green pop to the spread, making the entire board look balanced, healthy, and thoughtfully prepared.
Ingredients
- 3 medium zucchinis, halved lengthwise
- 1/2 lb ground beef or turkey
- 1/2 cup marinara sauce (no sugar added)
- 1 cup shredded mozzarella cheese
- 1/2 teaspoon Italian seasoning
- 1/4 cup diced onions
- Fresh basil for garnish
How to make it
- Preheat your oven to 375°F (190°C) and lightly grease a 9×13 inch baking dish with olive oil.
- Use a small metal spoon to gently scoop out the flesh of the halved zucchinis, leaving about a 1/4-inch thick shell. Chop the scooped-out flesh into small pieces and set aside.
- In a skillet over medium heat, sauté the diced onions and the chopped zucchini flesh until softened, then add the ground meat, breaking it up with a wooden spoon until browned.
- Drain any excess fat from the skillet, then stir in the marinara sauce and Italian seasoning. Simmer for 3-4 minutes until the mixture thickens slightly.
- Place the zucchini shells in the prepared baking dish and spoon the meat mixture generously into each hollowed-out center.
- Top each boat with a thick layer of shredded mozzarella and bake for 20-25 minutes. For a golden finish, turn on the broiler for the last 2 minutes until the cheese is bubbling and slightly browned.
How to sear delicious sesame tofu?
Why we love this
Sesame tofu is the ultimate plant-based star, offering a rich umami depth and a delightful contrast in textures. We love the way the sesame oil infuses the tofu with a nutty, toasted aroma that carries a hint of Asian-inspired flair to the board. The exterior becomes incredibly crispy and lacquered with a savory sauce, while the inside remains soft and custardy. It’s a sophisticated addition that proves vegetarian options can be just as hearty and flavor-packed as any meat dish on the spread.
Ingredients
- 1 block extra-firm tofu, pressed and cubed
- 2 tablespoons cornstarch
- 1 tablespoon toasted sesame oil
- 2 tablespoons soy sauce
- 1 tablespoon honey or maple syrup
- 1 tablespoon toasted sesame seeds
- 2 green onions, sliced
How to make it
- Press the tofu for at least 30 minutes using a tofu press or heavy books to remove as much water as possible; this is critical for achieving a crisp sear.
- Cut the pressed tofu into 1-inch cubes and toss them in a bowl with cornstarch until every side is lightly and evenly coated.
- Heat the sesame oil in a non-stick skillet over medium-high heat. Once the oil is shimmering, add the tofu cubes in a single layer.
- Sear the tofu for 3-4 minutes per side, using tongs to flip them carefully. You want every side to be a pale golden brown and noticeably firm to the touch.
- In a small bowl, whisk together the soy sauce and honey. Pour this mixture over the seared tofu and toss quickly as the sauce bubbles and thickens into a glaze, which should take about 60 seconds.
- Remove from the heat immediately to prevent the sugar in the glaze from burning, and garnish with sesame seeds and sliced green onions for a fresh crunch.
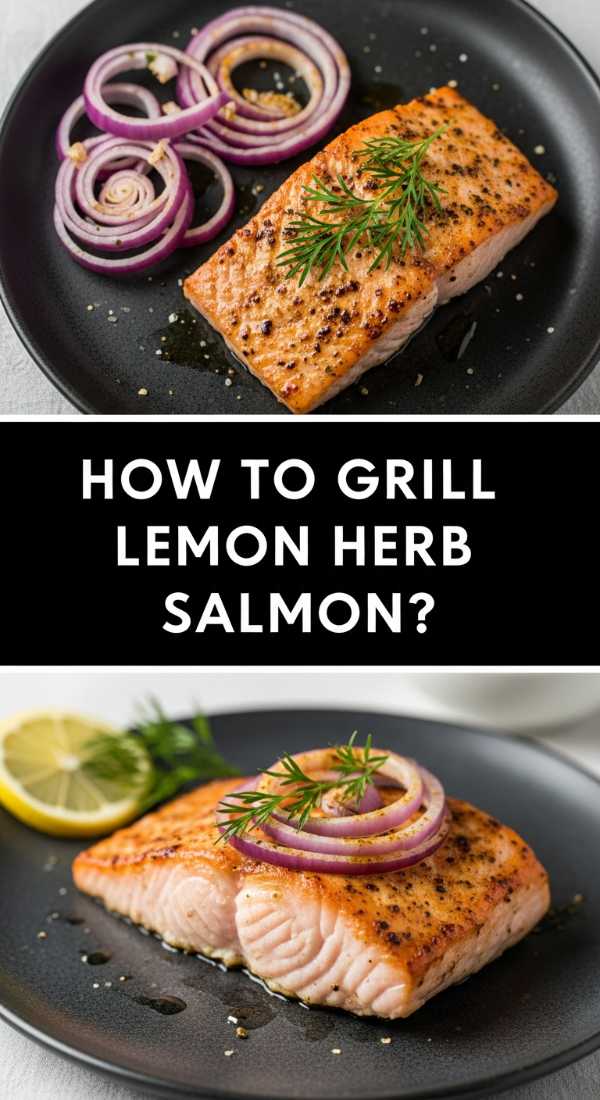
How to grill lemon herb salmon?

Why we love this
There is a certain elegance that salmon brings to a viral board, with its striking coral hue and the beautiful char marks from the grill. We love the bright, zesty lift that fresh lemon and dill provide, cutting through the richness of the fish’s natural oils. The texture is buttery and flaky, pulling apart with the slightest touch of a fork. It feels like a celebration of summer flavors, offering a light yet protein-dense option that complements the roasted vegetables and dips perfectly.
Ingredients
- 2 large salmon fillets (about 6 oz each)
- 2 tablespoons olive oil
- 1 organic lemon, thinly sliced
- 2 tablespoons fresh dill, chopped
- 1/2 teaspoon sea salt
- 1/4 teaspoon black pepper
How to make it
- Clean your grill grates thoroughly and preheat the grill to a medium-high temperature (about 400°F). Lightly oil the grates to prevent the delicate fish from sticking.
- Brush both sides of the salmon fillets with olive oil and season the flesh side generously with salt, pepper, and half of the fresh dill.
- Place the salmon on the grill, skin-side down first. This allows the skin to crisp up and creates a heat shield for the delicate meat. Close the lid and grill for 5-6 minutes.
- Carefully flip the salmon using a wide spatula. Place the thin lemon slices directly onto the grill and place the flipped salmon on top of the lemons, or just beside them.
- Grill for another 3-4 minutes. The salmon is done when it is opaque throughout and reaches an internal temperature of 145°F (63°C), though many prefer it slightly translucent in the center at 135°F.
- Remove from the grill and let it rest for 2 minutes. Squeeze the charred lemons over the fish and garnish with the remaining fresh dill before serving.
How to whip creamy avocado dip?
Why we love this
Every great board needs a center-piece dip, and this creamy avocado whip is the velvety glue that holds everything together. We love its lush, whipped-cream-like consistency that feels much more sophisticated than a standard guacamole. The tang of Greek yogurt and the brightness of lime juice create a refreshing profile that cleanses the palate between bites of savory chicken or spicy shrimp. Its vibrant green color makes the board look fresh and alive, inviting everyone to dive in with a potato or a slice of tofu.
Ingredients
- 2 ripe avocados
- 1/2 cup plain Greek yogurt
- Juice of 1 lime
- 1/4 cup fresh cilantro leaves
- 1 clove garlic, smashed
- 1/2 teaspoon salt
- A pinch of red pepper flakes
How to make it
- Scoop the flesh of the ripe avocados into a food processor or high-speed blender. Ensure the avocados are soft to the touch for the creamiest result.
- Add the Greek yogurt, lime juice, cilantro, smashed garlic, and salt to the processor. The yogurt adds a probiotic tang and helps maintain the bright green color by slowing oxidation.
- Pulse the mixture several times to break down the large chunks, then blend on high for 30-45 seconds until the mixture is completely smooth and aerated.
- Stop and scrape down the sides of the bowl with a rubber spatula to ensure no garlic chunks remain. Blend for another 10 seconds.
- Taste and adjust the seasoning; you may want an extra squeeze of lime or a touch more salt depending on the size of your avocados.
- Transfer to a small serving bowl, create a decorative swirl on top with the back of a spoon, and sprinkle with red pepper flakes and a drizzle of olive oil.
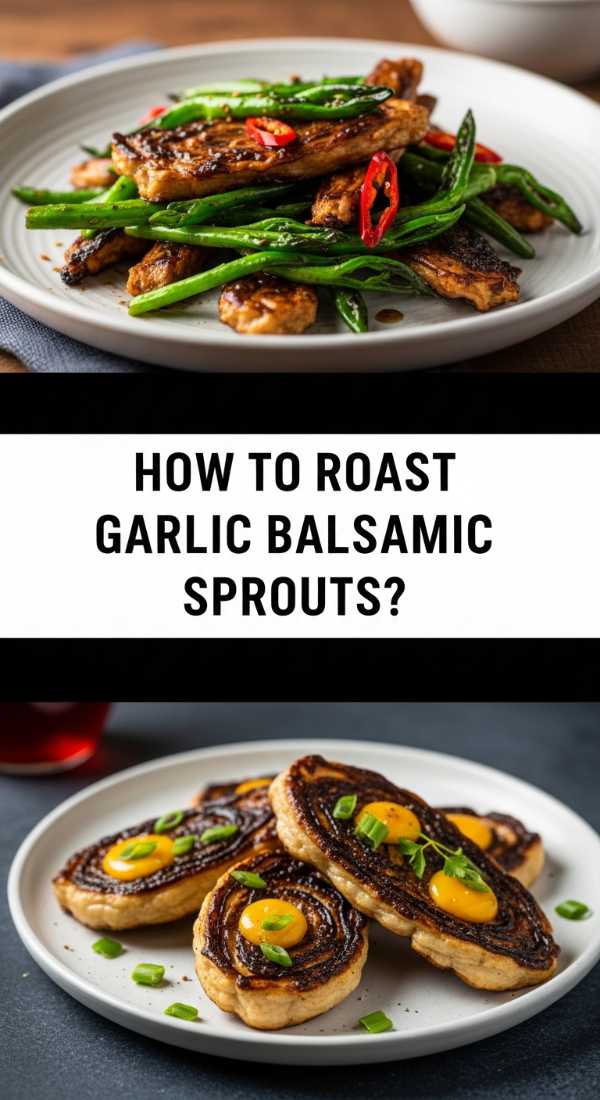
How to roast garlic balsamic sprouts?
Why we love this
Brussels sprouts undergo a magical transformation in the oven, turning from a humble vegetable into a caramelized, candy-like treat. We love the contrast between the deeply charred, paper-thin outer leaves and the tender, sweet heart of the sprout. The balsamic glaze adds a sophisticated acidity that balances the earthy garlic, making these sprouts incredibly craveable. They provide a wonderful dark visual texture to the board, looking like little forest gems nestled among the brighter components.
Ingredients
- 1 lb Brussels sprouts, trimmed and halved
- 2 tablespoons olive oil
- 2 tablespoons high-quality balsamic glaze
- 3 cloves garlic, thinly sliced
- 1/2 teaspoon kosher salt
- 1/4 teaspoon black pepper
How to make it
- Preheat your oven to 400°F (200°C) and line a rimmed baking sheet with parchment paper for easy cleanup and to prevent the balsamic from sticking.
- In a large bowl, toss the halved sprouts with olive oil, salt, pepper, and the sliced garlic. Ensure the oil gets into the nooks and crannies of the leaves.
- Arrange the sprouts on the baking sheet cut-side down. This maximizes the surface area contact with the heat, which is the key to achieving that deep, dark caramelization.
- Roast for 20-25 minutes. At the 15-minute mark, check to see if the garlic is browning too quickly; if so, give the pan a quick shake.
- Once the sprouts are tender and the bottoms are blackened in spots, remove them from the oven.
- Immediately drizzle the balsamic glaze over the hot sprouts while they are still on the pan, tossing them gently so the glaze thickens and coats them evenly as they cool slightly.
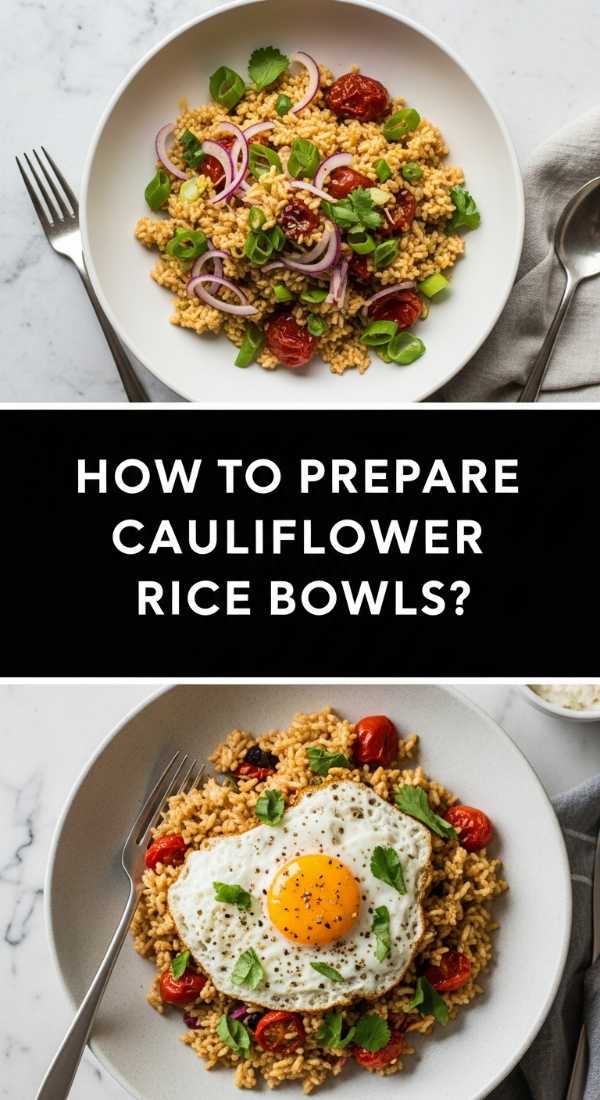
How to prepare cauliflower rice bowls?

Why we love this
Cauliflower rice is the unsung hero of the modern food board, providing a light, grain-free base that soaks up every bit of flavor from the surrounding dishes. We love its subtle, nutty undertone and the way it lightens up the overall meal, making room for more variety. When prepared correctly, it has a wonderful al dente bite that mimics traditional rice but with a fresh, vegetal finish. It’s the perfect low-carb foundation for building mini-bowls right on your plate using the other ingredients from the board.
Ingredients
- 1 head of cauliflower (or 1 bag of pre-riced cauliflower)
- 1 tablespoon coconut oil or olive oil
- 1 tablespoon fresh lime juice
- 2 tablespoons chopped cilantro
- 1/2 teaspoon salt
How to make it
- If starting with a whole head, cut the cauliflower into florets and pulse them in a food processor until they reach the consistency of small grains of rice. Do not over-process, or it will become mushy.
- Heat the oil in a large skillet or wok over medium-high heat. You want the pan quite hot to cook the cauliflower quickly without letting it release too much moisture.
- Add the cauliflower rice to the pan and spread it out. Let it sit undisturbed for about 2 minutes to allow some of the grains to lightly toast and develop a nutty flavor.
- Sauté for another 3-5 minutes, stirring frequently. The goal is “tender-crisp”—you want the raw taste gone, but you don’t want it to become soft or translucent.
- Remove the pan from the heat and immediately stir in the lime juice and salt. The acidity of the lime brightens the flavor profile significantly.
- Fold in the fresh cilantro right before serving to keep the herb vibrant and aromatic. Transfer to small bowls to nestle into the main board.
How to bake tender turkey meatballs?
Why we love this
These turkey meatballs are a revelation for anyone who thinks poultry meatballs are dry or boring. We love how succulent and herb-forward they are, providing a clean, savory protein option that feels lighter than beef but just as satisfying. The addition of parmesan cheese adds a salty, umami depth that lingers on the tongue, while the baking method ensures they stay perfectly round and evenly cooked. They are the ultimate finger food for a viral board, easy to grab and even easier to enjoy.
Ingredients
- 1 lb ground turkey (93% lean is best)
- 1/2 cup panko breadcrumbs
- 1 large egg, beaten
- 1/4 cup grated parmesan cheese
- 2 tablespoons fresh parsley, minced
- 1 teaspoon onion powder
- 1/2 teaspoon salt and 1/4 teaspoon pepper
How to make it
- Preheat your oven to 400°F (200°C) and line a baking sheet with parchment paper or a silicone mat.
- In a large mixing bowl, combine the breadcrumbs, beaten egg, parmesan, parsley, and seasonings. Mix these together first to ensure the flavors are evenly distributed before adding the meat.
- Add the ground turkey to the bowl. Using clean hands, gently fold the mixture together until just combined. Crucial tip: do not over-mix, as over-handling the meat results in tough, rubbery meatballs.
- Scoop about 2 tablespoons of the mixture at a time and roll gently between your palms to form 1-inch balls. You should get about 16-18 meatballs.
- Place the meatballs on the prepared baking sheet, leaving about an inch of space between each one to allow for air circulation and even browning.
- Bake for 15-18 minutes. To check for doneness, cut one in half; it should be opaque and juicy, or reach an internal temperature of 165°F. For extra color, you can sear them in a pan for 2 minutes after baking.
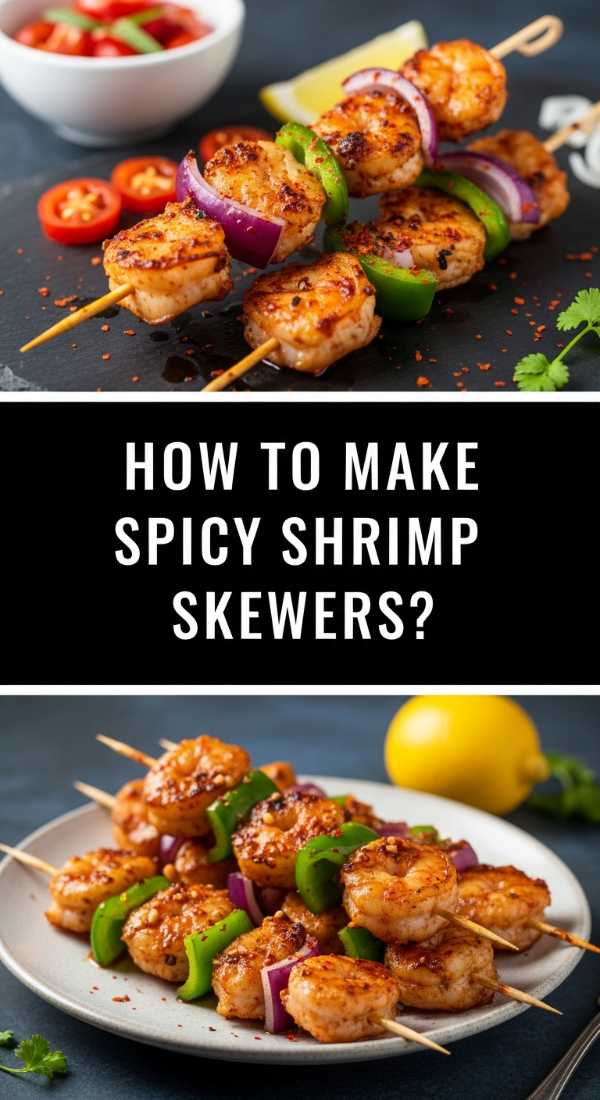
How to make spicy shrimp skewers?
[IMAGE_10]
Why we love this
Shrimp skewers add an element of fun and a touch of heat that wakes up the entire board. We love the “snap” of a perfectly cooked shrimp and the way the honey-chili glaze creates a sticky, spicy-sweet coating that is finger-licking good. They cook in mere minutes, making them a fantastic last-minute addition that looks incredibly impressive. The skewers also add height and structure to the board’s layout, drawing the eye in and making the whole spread feel like a professional catering display.
Ingredients
- 1 lb jumbo shrimp, peeled and deveined
- 2 tablespoons olive oil
- 1 teaspoon chili flakes
- 1 tablespoon honey
- 2 cloves garlic, minced
- Wooden or metal skewers
- Lime wedges for serving
How to make it
- If using wooden skewers, soak them in water for at least 30 minutes prior to cooking to prevent them from burning on the grill or pan.
- In a medium bowl, whisk together the olive oil, chili flakes, honey, and minced garlic to create a quick marinade.
- Add the shrimp to the bowl and toss until they are thoroughly coated. Let them marinate at room temperature for no more than 15 minutes; any longer and the garlic/honey can start to break down the texture.
- Thread 3-4 shrimp onto each skewer, piercing them through both the tail and the head end so they stay secure and don’t spin when flipped.
- Heat a grill pan or cast-iron skillet over high heat. Once the pan is smoking slightly, add the skewers in batches.
- Sear for 2 minutes per side. Shrimp cook very quickly; they are done as soon as they turn pink and opaque and form a “C” shape. Avoid overcooking them into an “O” shape, which indicates they will be rubbery. Serve immediately with a fresh squeeze of lime.
The Art of the Viral Board
The secret to a viral food board isn’t just the individual recipes—it’s the assembly. Start by placing your larger items, like the zucchini boats and the bowl of avocado dip, on the board first to create anchor points. Then, fill in the gaps with the chicken, potatoes, and skewers. Use the cauliflower rice and Brussels sprouts to fill any remaining small holes. The goal is to make the board look overflowing and abundant. Don’t worry about perfection; the rustic, slightly messy look is exactly what makes people want to reach in and grab a bite. Enjoy the process and the delicious meal that follows!
Frequently Asked Questions
Can I make these components ahead of time?
Yes! Most of these items, like the meatballs, chicken, and sprouts, can be prepped or even cooked a few hours ahead and kept warm in a low oven. However, the shrimp and avocado dip are best prepared right before serving to maintain their texture and color.
How do I keep the board from getting messy?
Use small ramekins or bowls for “wet” items like the avocado dip or the balsamic sprouts. This keeps the juices from soaking into the crispy potatoes or the seared tofu.
What are some good substitutions for a vegetarian board?
You can easily double the sesame tofu and add more roasted vegetables like bell peppers or asparagus. You could also substitute the turkey meatballs with plant-based meat alternatives or falafel.