
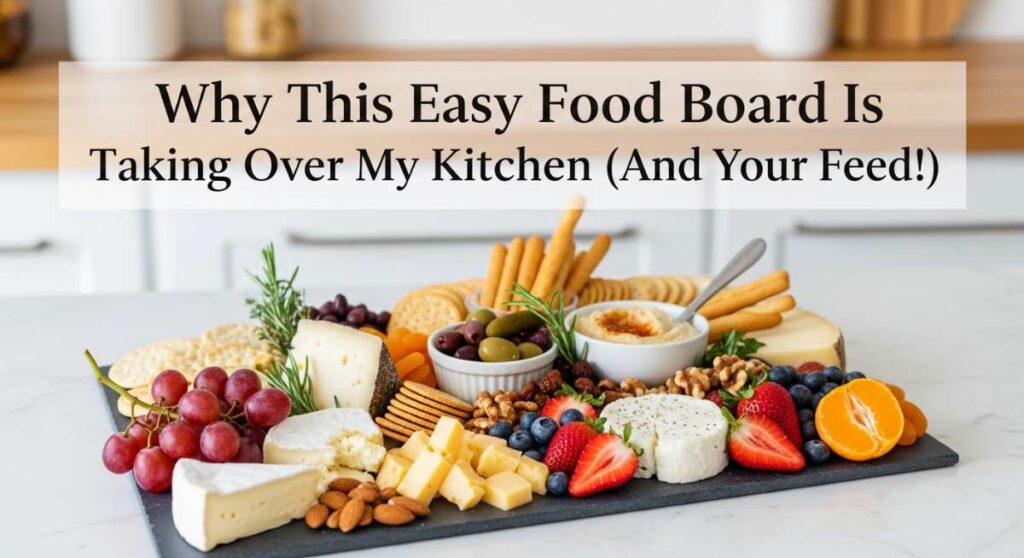
Why This Easy Food Board Is Taking Over My Kitchen (And Your Feed!)
There is something inherently magical about a meal that feels like a celebration without requiring a three-day prep list. We’ve all seen those perfectly curated, aesthetically pleasing food boards on our social feeds, and if you’re like me, you’ve probably wondered if they actually taste as good as they look. I’m here to tell you that they do, but the secret isn’t just in the arrangement—it’s in the perfectly executed staples that make every bite a mini-experience. It’s about creating a landscape of flavors that invites everyone to linger a little longer at the table.
Lately, my kitchen has become a laboratory for the ‘everything board,’ a concept that blends comfort food with high-end presentation. It’s the ultimate solution for those nights when you want to feel pampered but also want to keep things casual. Whether you are hosting your best friends for a wine night or just trying to survive a Tuesday with a bit of flair, these boards are the answer. Let’s dive into the core components that will turn your next meal into a viral sensation that tastes even better than it looks.
How to make crispy potatoes?

Why we love this
There is nothing quite as satisfying as the crunch of a perfectly roasted potato yielding to a fluffy, cloud-like interior. These golden gems carry the earthy aroma of rosemary and garlic, filling your kitchen with a scent that feels like a warm hug. When they hit the board, they provide that essential texture contrast—salty, craggy, and deeply savory—that makes them the absolute star of any spread. Every bite is a tiny explosion of texture that keeps you coming back for just one more.
Ingredients
- 2 lbs Yukon Gold potatoes, peeled and cubed
- 1/4 cup extra-virgin olive oil
- 4 cloves garlic, smashed
- 2 sprigs fresh rosemary
- 1 tsp sea salt
- 1/2 tsp black pepper
How to make it
- Start by parboiling your cubed potatoes in a large pot of heavily salted water for about 8-10 minutes. You want them tender on the outside but still firm in the center; this creates the surface area needed for maximum crunch.
- Drain the potatoes and let them steam-dry in the colander for 2 minutes. Give them a vigorous shake to roughen up the edges; those fuzzy, starchy bits are what will turn into crispy gold in the oven.
- Preheat your oven to 425°F (220°C) and place a sturdy baking sheet inside to get screaming hot. This prevents sticking and starts the searing process immediately.
- In a bowl, toss the potatoes with olive oil, salt, pepper, smashed garlic, and rosemary until every cube is glistening.
- Carefully spread the potatoes onto the hot baking sheet in a single layer, ensuring they aren’t crowded. Roast for 35-45 minutes, turning them halfway through with a metal spatula. Look for a deep mahogany color and a sound like glass clicking when you move them.
How to bake juicy chicken?

Why we love this
Forget the dry, tasteless chicken of the past; this method yields meat so succulent that it practically melts away from the fork. The skin becomes a thin, crackling veil of flavor, seasoned with herbs that permeate deep into the muscle during the roasting process. It’s the kind of comfort food that feels sophisticated yet grounded, offering a rich, savory backbone to your food board that pairs beautifully with both sharp cheeses and bright, acidic dips.
Ingredients
- 4 boneless, skin-on chicken breasts
- 2 tbsp softened butter
- 1 tsp smoked paprika
- 1 tsp dried thyme
- Salt and pepper to taste
- Lemon slices for the pan
How to make it
- Pat the chicken completely dry with paper towels; moisture is the enemy of crispy skin and juicy meat. Let the chicken sit at room temperature for 15 minutes to ensure even cooking.
- Rub the softened butter under the skin and all over the surface, then coat generously with the paprika, thyme, salt, and pepper. This creates a fat barrier that locks in the natural juices.
- Preheat your oven to 400°F (200°C). Place the chicken in a shallow baking dish lined with lemon slices, which will provide a fragrant steam as they roast.
- Bake for 20-25 minutes, or until the internal temperature reaches 160°F (71°C). The temperature will rise to the safe 165°F as it rests.
- Crucial Step: Remove the chicken from the oven and tent it loosely with foil for at least 10 minutes before slicing. This allows the fibers to relax and reabsorb the juices, ensuring every slice is moist.
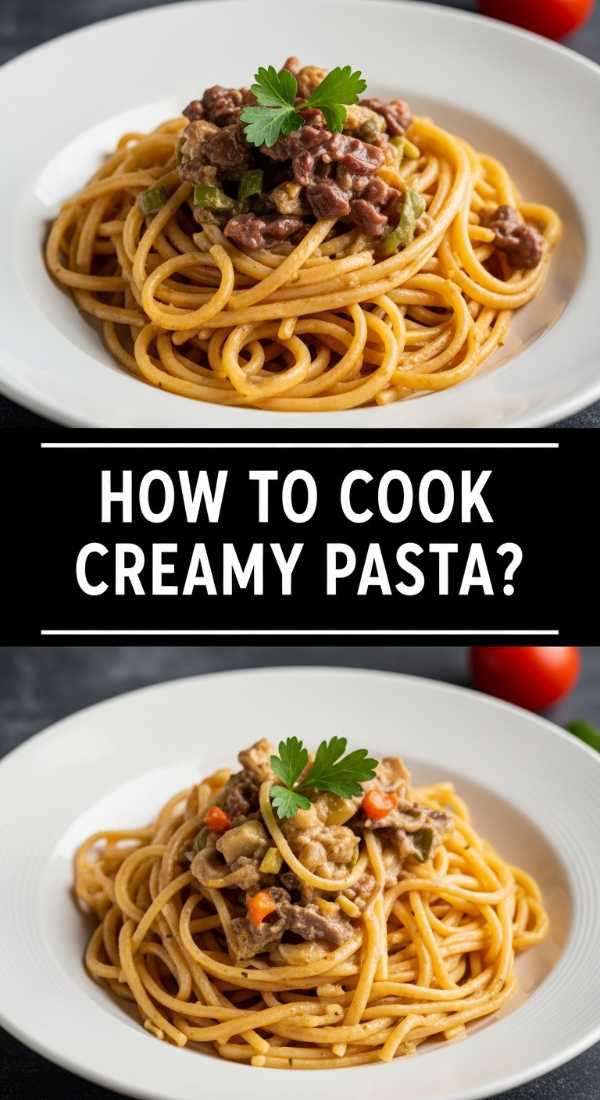
How to cook creamy pasta?
Why we love this
This pasta is a masterclass in silkiness, offering a mouthfeel that is decadent without being overly heavy. The sauce clings to every strand, shimmering with the richness of high-quality parmesan and a touch of pasta water that creates a perfect emulsion. The aroma of toasted garlic and nutmeg floats above the bowl, creating a sensory experience that feels like a fancy Italian bistro right in your own dining room.
Ingredients
- 12 oz long pasta (fettuccine or linguine)
- 1 cup heavy cream
- 1/2 cup freshly grated Parmesan cheese
- 2 tbsp butter
- 1/4 tsp ground nutmeg
- Fresh parsley for garnish
How to make it
- Boil a large pot of water and salt it until it tastes like the sea. Cook the pasta until it is ‘al dente’—slightly firm to the bite—as it will finish cooking in the sauce.
- Reserve 1 cup of starchy pasta water before draining; this liquid gold is the secret to a smooth, non-clumping sauce.
- In a wide skillet over medium-low heat, melt the butter and gently warm the cream. Do not let it boil vigorously, as high heat can cause the cream to break and become oily.
- Whisk in the Parmesan cheese a handful at a time, stirring constantly until melted and smooth. Add the nutmeg for a subtle depth of flavor.
- Toss the pasta directly into the sauce, adding splashes of the reserved pasta water while tossing. The starch and fat will emulsify, creating a glossy, thick coating that sticks to the pasta rather than pooling at the bottom of the bowl.
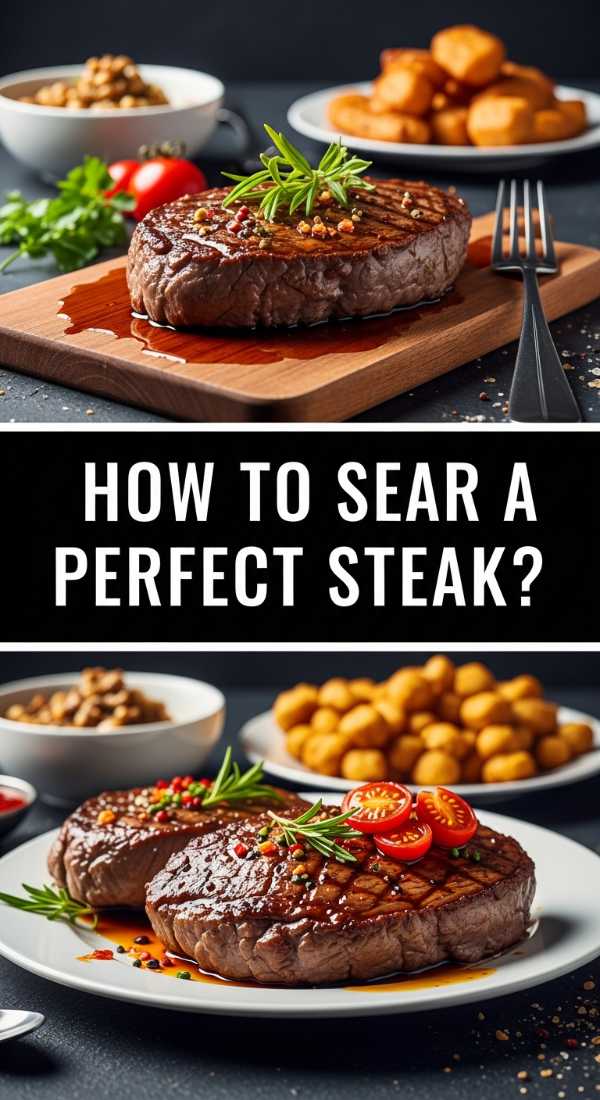
How to sear perfect steak?
Why we love this
There is an undeniable primal joy in a perfectly seared steak, with its dark, salty crust and tender, rosy interior. The smell of browning butter mixed with crushed garlic and thyme is enough to make anyone’s mouth water instantly. On a food board, sliced steak provides a luxurious, protein-packed anchor that feels indulgent and celebrates the simple beauty of high-quality ingredients prepared with precision.
Ingredients
- 2 Ribeye or New York Strip steaks (1.5 inches thick)
- 2 tbsp neutral oil (grapeseed or canola)
- 3 tbsp unsalted butter
- 3 cloves garlic, crushed
- 3 sprigs fresh thyme
- Flaky sea salt
How to make it
- Take the steaks out of the fridge 45 minutes before cooking and salt them heavily on all sides. This ‘dry brining’ draws out moisture then reabsorbs the brine, seasoning the meat to the core.
- Pat the steaks bone-dry once more before cooking. Heat a cast-iron skillet over high heat until it starts to smoke slightly. Add the oil and swirl to coat.
- Place the steaks in the pan. Press down slightly to ensure total contact with the metal. Sear for 3-4 minutes without moving them to develop a deep, Maillard-reaction crust.
- Flip the steaks and immediately add the butter, garlic, and thyme to the pan. As the butter foams, use a large spoon to continuously baste the steaks with the hot, flavored fat for another 3 minutes.
- Remove from the pan when the internal temp is 130°F (54°C) for medium-rare. Rest on a cutting board for 8 minutes to prevent the juices from running out when you slice it.
How to roast garlic salmon?

Why we love this
Salmon prepared this way is a revelation of flakey, buttery goodness, topped with a golden crust of caramelized garlic that adds a punchy, sweet-savory finish. The vibrant pink of the fish adds a pop of color to your board, while the citrusy notes of lemon zest cut through the richness of the healthy fats. It’s light, elegant, and sophisticated, making it the perfect centerpiece for a lifestyle-focused meal that feels healthy yet hedonistic.
Ingredients
- 1 large side of salmon (or 4 fillets)
- 3 tbsp melted butter
- 4 cloves garlic, minced
- 1 tbsp fresh dill, chopped
- 1 tsp lemon zest
- 1/2 tsp honey
How to make it
- Preheat your oven to 400°F (200°C) and line a baking sheet with parchment paper for easy cleanup and to prevent the delicate skin from sticking.
- Whisk together the melted butter, minced garlic, honey, lemon zest, and dill. The honey helps the garlic caramelize and provides a beautiful sheen to the finished fish.
- Brush the mixture generously over the salmon. Season with salt and pepper.
- Roast for 12-15 minutes depending on the thickness. A professional tip for doneness: press the top of the fillet gently with a fork; if the layers of the fish separate (flake) easily, it’s done.
- For an extra viral-worthy finish, switch the oven to broil for the last 60 seconds to slightly brown the garlic bits on top, but watch it like a hawk to prevent burning.
How to prepare beef tacos?

Why we love this
Tacos are the ultimate interactive food board addition, bringing a festive energy and a symphony of bold, spicy, and tangy flavors. The beef is deeply seasoned with cumin and chili, offering a juicy, savory base that begs for the crunch of a radish or the creaminess of a perfectly ripe avocado. It’s a customizable experience that allows everyone at the table to build their own perfect bite, making the meal feel personal and fun.
Ingredients
- 1 lb ground beef (80/20 for flavor)
- 1 onion, finely diced
- 2 tbsp taco seasoning (cumin, chili powder, onion powder)
- 1/4 cup beef stock
- Small corn or flour tortillas
- Lime wedges for serving
How to make it
- Heat a large skillet over medium-high heat and add the ground beef. Break it up with a wooden spoon into small, uniform crumbles.
- Cook until the beef is browned and slightly crispy in spots. Drain about 75% of the rendered fat, leaving just enough to sauté the onions.
- Add the diced onions and cook until translucent. Stir in your taco seasoning and toast the spices for 1 minute until fragrant.
- Pour in the beef stock and turn the heat to low. Simmer for 5-7 minutes until the liquid has reduced into a thick, glossy sauce that coats the meat. This ‘saucy’ finish is what separates amateur tacos from professional ones.
- Char your tortillas directly over a gas flame for 10 seconds per side until they show dark spots and become pliable before piling on the meat.
How to simmer hearty soup?

Why we love this
A bowl of hearty soup provides the ‘soul’ of a food board, offering a warm, liquid comfort that balances out the solid components. The depth of flavor achieved through a slow simmer creates a complex profile where every vegetable and herb has found its place in the harmony of the broth. It’s the kind of dish that makes your home feel cozy and lived-in, with a steam that carries the promise of a nourishing, slow-paced meal.
Ingredients
- 1 tbsp olive oil
- 2 carrots, 2 celery stalks, 1 onion (mirepoix), chopped
- 3 cups vegetable or chicken broth
- 1 can cannellini beans, rinsed
- 2 cups chopped kale
- 1 sprig rosemary
How to make it
- Start by sweating your mirepoix (onions, carrots, celery) in olive oil over medium heat. Do not brown them; you want them soft and translucent to release their natural sugars slowly.
- Add the rosemary sprig and the beans, then pour in the broth. Bring the mixture to a boil, then immediately drop the heat to the lowest setting for a gentle simmer.
- Simmer uncovered for 20 minutes to allow the flavors to concentrate. If you want a thicker soup, mash a few of the beans against the side of the pot with your spoon.
- Add the chopped kale in the last 5 minutes of cooking. You want the leaves to wilt and turn bright green, but not become mushy or gray.
- Finish with a squeeze of fresh lemon juice or a drizzle of high-quality olive oil right before serving to brighten the deep, simmered flavors.
How to saute quick veggies?

Why we love this
These veggies are all about the ‘snap’—a vibrant, fresh addition to the board that provides a necessary break from the richer proteins. Sautéed at high heat, they retain their brilliant colors and a tender-crisp texture that feels incredibly healthy and revitalizing. The slight char from the pan adds a smoky dimension, while a touch of garlic oil makes them feel like a gourmet side rather than an afterthought.
Ingredients
- 1 bunch asparagus or broccolini
- 1 tbsp olive oil
- 2 cloves garlic, thinly sliced
- Red pepper flakes
- Salt and a splash of soy sauce or balsamic glaze
How to make it
- Trim the woody ends off your vegetables and ensure they are dry. Moisture in the pan will lead to steaming rather than sautéing.
- Heat olive oil in a wide skillet over high heat. You want the oil to shimmer. Add the vegetables in a single layer; if you crowd the pan, they will lose their crunch.
- Let them sit undisturbed for 2 minutes to get a hard sear on one side. This creates those delicious charred ‘umami’ spots.
- Toss the veggies and add the sliced garlic and red pepper flakes. Cook for only 2-3 more minutes. Garlic burns quickly at high heat, so it should go in at the very end.
- Deglaze the pan with a tiny splash of soy sauce or balsamic glaze, tossing rapidly to coat. This creates a thin, savory film that seasons every inch of the vegetable.
How to grill best burgers?

Why we love this
A great burger is a icon of backyard luxury, featuring a smoky, charred exterior that hides a juicy, tender center. The way the cheese drapes over the sides and the buns toast to a perfect golden brown makes this a visual and gustatory masterpiece. It’s the ultimate crowd-pleaser on a food board, offering a familiar, nostalgic flavor profile that feels elevated through proper technique and high-quality beef.
Ingredients
- 1 lb ground chuck (80/20)
- 4 brioche buns
- 4 slices sharp cheddar cheese
- Salt and heavy black pepper
- Butter for the buns
How to make it
- Form your patties gently; overworking the meat makes for a tough, rubbery burger. Make a slight thumbprint indentation in the center of each patty to prevent them from puffing up into balls during cooking.
- Season the outside of the patties aggressively with salt and pepper right before they hit the grill. High heat is essential—aim for 450°F (230°C).
- Place patties on the grill over direct heat. Close the lid and cook for 4 minutes. Do not press down with a spatula! This squeezes out all the delicious juices.
- Flip once and immediately place the cheese on top. Cook for another 3-4 minutes for a perfect medium doneness.
- In the final minute, butter the brioche buns and place them face-down on the grill. A toasted bun provides a structural barrier that prevents the burger juices from making the bread soggy.
How to bake soft cookies?

Why we love this
No food board is complete without a sweet finish, and these cookies are the pinnacle of dessert perfection. With buttery, golden edges and centers that remain gooey and soft long after they’ve cooled, they are the ultimate treat. The smell of melting chocolate and vanilla bean wafting from the oven creates an atmosphere of pure indulgence, making these the perfect final note for your viral-worthy spread.
Ingredients
- 1 cup softened unsalted butter
- 3/4 cup brown sugar + 3/4 cup white sugar
- 2 cups semi-sweet chocolate chips
- 2 1/4 cups all-purpose flour
- 1 tsp baking soda
- 1 tsp sea salt
How to make it
- Cream the butter and both sugars for at least 3-5 minutes until the mixture is pale and fluffy. This aeration is what gives the cookies their soft, lifted structure.
- Add eggs one at a time, followed by a high-quality vanilla extract. Fold in the dry ingredients by hand until just combined; overmixing develops gluten, which leads to tough cookies.
- Crucial Tip: Chill your dough for at least 2 hours (or overnight). Cold dough spreads less in the oven, resulting in a thicker, softer center and a more concentrated flavor.
- Scoop large mounds of dough onto a parchment-lined sheet. Bake at 350°F (175°C) for 10-12 minutes. The secret is to take them out when the edges are set but the centers still look slightly ‘underdone’ and wet.
- Let them cool on the hot baking sheet for 5 minutes. They will finish cooking with residual heat, locking in that soft, fudgy texture that everyone loves.
The Art of the Everyday Board
Building a food board is more than just a culinary trend; it’s a way to slow down and appreciate the textures and flavors that make food such a vital part of our lives. By focusing on these ten foundational elements—from the crunchiest potatoes to the softest cookies—you’re not just making a meal; you’re crafting an experience. So, grab your largest wooden platter, invite your favorite people over, and start building. Your kitchen (and your feed) will thank you.