
Why Simple Food Boards are Taking Over Social Media (and How to Join the Trend)
Have you ever spent hours meticulously placing tiny pieces of cheese on a board, only to realize that nobody actually wants to eat the rosemary sprig you used for decoration? We’ve all been there. But lately, there’s been a beautiful shift in the way we share food online. The era of the ‘over-curated’ charcuterie is fading, replaced by something much more soulful: simple, themed food boards that prioritize flavor, nostalgia, and genuine connection over perfection.
It’s about that collective ‘ooh’ when you bring a tray of warm Rotel dip to the table or the way a bright red strawberry pie reminds everyone of childhood summers. These boards aren’t just about looking good for the grid; they are about creating a vibe that says, ‘help yourself.’ Whether you’re planning a beach day or a cozy night in, the magic is in the simplicity and the shared experience of digging into something delicious together.
How to make Shoneys strawberry pie

Why we love this
There is something deeply nostalgic about a Shoneys-style strawberry pie, with its towering mound of glossy, ruby-red berries encased in a crisp, buttery crust. The aroma is purely sweet and summery, cutting through the air with the scent of fresh fruit and delicate glaze. When you take a bite, you get that incredible contrast between the firm, juicy snap of a whole strawberry and the silky, cool texture of the gelatin-based glaze. It’s a bright, cheerful dessert that looks like a crown jewel on any dessert board, evoking memories of roadside diners and sun-drenched afternoons.
Ingredients
- 1 pre-baked 9-inch pie crust
- 1.5 lbs fresh whole strawberries, hulled
- 1 cup granulated sugar
- 1 cup water
- 3 tablespoons cornstarch
- 3 tablespoons strawberry flavored gelatin (like Jell-O)
- Whipped cream for topping
How to make it
- Begin by preparing your fresh strawberries. Wash them thoroughly and pat them completely dry; any excess moisture will prevent the glaze from adhering. Leave the berries whole for that iconic look.
- Place your pre-baked and cooled pie crust on a flat surface. Arrange the berries inside the crust, pointing upwards, until the shell is tightly packed.
- In a medium saucepan over medium heat, whisk together the sugar, water, and cornstarch. Continue to whisk constantly as the mixture heats up to prevent lumps from forming.
- Bring the mixture to a gentle boil. You will see it transform from a cloudy white liquid to a thick, translucent glaze. Once it is clear and bubbling, cook for one additional minute to ensure the cornstarch is fully activated.
- Remove the pan from the heat and immediately stir in the strawberry gelatin powder until it is completely dissolved and the color is a vibrant, deep red.
- Let the glaze cool for about 10-15 minutes so it thickens slightly but is still pourable. Carefully pour the glaze over the strawberries, ensuring every single berry is coated from top to bottom.
- Refrigerate the pie for at least 3-4 hours, or until the glaze is completely set and firm to the touch. Serve with a generous dollop of whipped cream.
How to make Rotel dip

Why we love this
Rotel dip is the ultimate comfort food, a warm, molten pool of cheesy goodness that smells of savory cumin, green chilies, and browned meat. The texture is velvety and thick, clinging perfectly to a salty tortilla chip without breaking it. There’s a subtle heat that lingers on the palate, balanced by the richness of the melted cheese, making it nearly impossible to stop at just one bite. It is the quintessential party board centerpiece, drawing everyone in with its steam and the promise of a satisfying, salty-spicy kick that defines a great gathering.
Ingredients
- 1 lb ground beef or breakfast sausage
- 1 block (32 oz) Velveeta or processed cheese, cubed
- 2 cans (10 oz each) Ro-Tel diced tomatoes and green chilies
- 1/2 teaspoon garlic powder
- 1/4 cup chopped cilantro (optional)
- Tortilla chips for serving
How to make it
- In a large skillet over medium-high heat, crumble and brown your ground beef or sausage. Use a wooden spoon to break the meat into very small, uniform pieces.
- Cook the meat until it is deeply browned and no pink remains. This browning adds crucial flavor (the Maillard reaction). Drain the excess grease thoroughly to ensure your dip isn’t oily.
- Turn the heat down to low. Add the cubed cheese to the skillet. It’s important to use low heat here; high heat can cause the cheese to seize or become grainy.
- Pour in both cans of Ro-Tel, including the liquid. The acidity in the tomato juice helps create a smoother emulsion with the cheese.
- Stir constantly with a heat-resistant spatula as the cheese melts. You are looking for a completely smooth, glossy consistency with the meat and tomatoes evenly distributed.
- Once fully melted, stir in the garlic powder. If the dip feels too thick, you can add a tablespoon of milk to thin it out to your liking.
- Transfer to a warm serving bowl or a small slow cooker on the ‘warm’ setting to keep it pourable throughout the party. Top with fresh cilantro if desired.
How to pack beach snacks

Why we love this
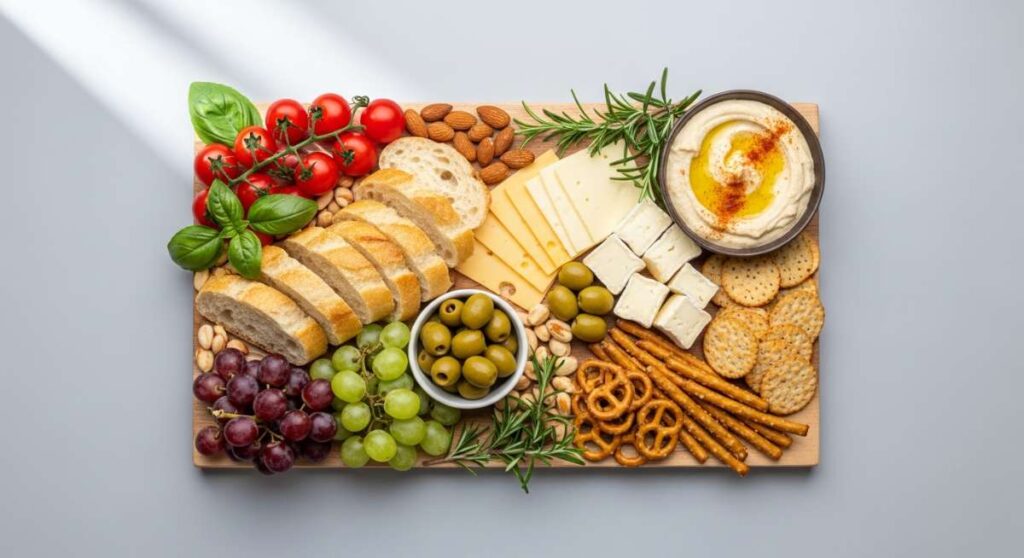
The perfect beach snack board is all about hydration, salt, and ease, designed to withstand the heat while providing a refreshing burst of energy. Imagine the crisp snap of cold grapes against the salty breeze, or the cooling hydration of sliced cucumber dusted with tajin. These snacks are visually vibrant—a rainbow of fruits and crunchy crackers that feel light and effortless. There’s a specific joy in opening a cooler to find perfectly organized, sand-free bites that taste like pure summer, keeping you fueled for hours of salt water and sunshine.
Ingredients
- Hard cheeses (cheddar or gouda, pre-sliced)
- Frozen grapes and berries
- Individual hummus pods
- Pre-cut vegetable sticks (carrots, celery, cucumbers)
- Salty pretzels or pita chips
- Beef jerky or turkey sticks
- Reusable ice packs
How to make it
- Select a hard-sided, insulated cooler rather than a soft bag to protect delicate snacks from being crushed and to provide better temperature control.
- Start by freezing your fruit (grapes work best) the night before. These act as edible ice packs, keeping the rest of the board cool while staying delicious as they slightly thaw.
- Prep all vegetables into bite-sized sticks and store them in airtight, waterproof containers. This prevents ‘beach sand’ from infiltrating your food.
- Layer your cooler strategically: place heavy ice packs at the bottom, followed by the hard cheeses and proteins which need the most cooling.
- Place the lighter items like crackers and chips in a separate dry-bag or on the very top of the cooler to ensure they stay crunchy and don’t get soggy from condensation.
- If using a board layout at the beach, keep the board inside the cooler until the exact moment of serving. Use individual silicone cupcake liners to separate different snacks on the board, preventing juices from the fruit from soaking into the crackers.
- Keep the cooler in the shade under an umbrella and minimize the amount of time it stays open to maintain the internal temperature.
How to make whipped butter
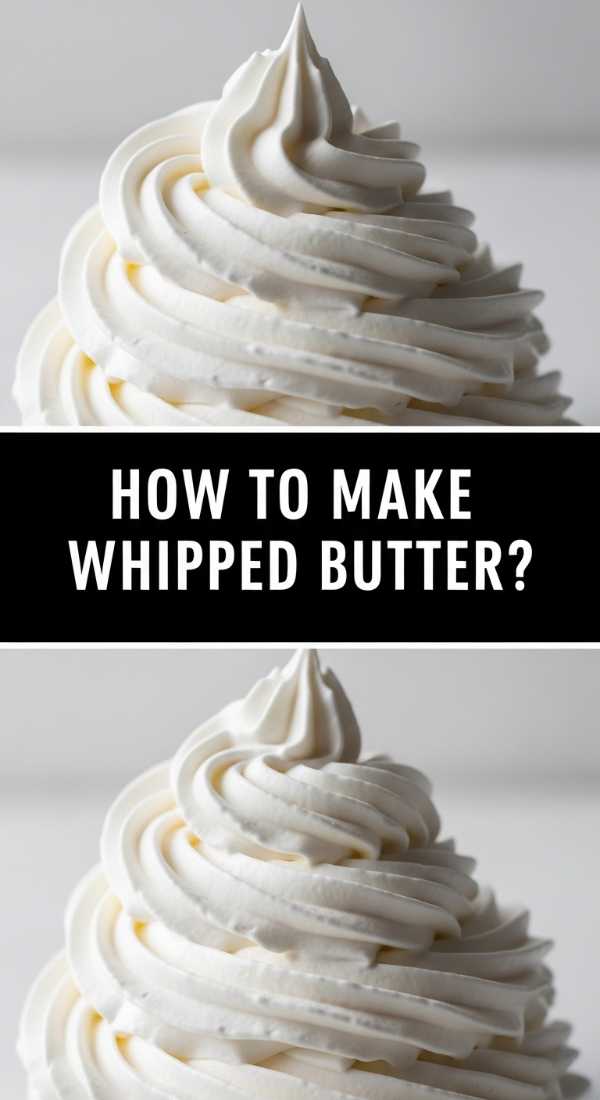
Why we love this
Whipped butter is a revelation in texture—it’s like a cloud of pure cream that melts the instant it touches warm bread. The process of whipping incorporates air, turning a dense yellow stick into a pale, voluminous, and spreadable dream. The aroma of high-quality butter becomes more pronounced as it aerates, and when topped with flaky sea salt, it creates a sensory experience that is both luxurious and comforting. It’s the ultimate addition to a bread board, offering a sophisticated feel that belies just how simple it is to prepare.
Ingredients
- 2 sticks (1 cup) high-quality unsalted butter, softened to room temperature
- 2 tablespoons heavy cream or whole milk
- 1/2 teaspoon flaky sea salt (plus more for garnish)
- Optional: Honey, minced herbs, or roasted garlic
How to make it
- Ensure your butter is perfectly softened. It should be soft enough that your finger leaves an indent easily, but it shouldn’t be oily or melting. This is the most critical step for achieving volume.
- Place the softened butter in the bowl of a stand mixer fitted with the whisk attachment (or use a hand mixer in a deep bowl).
- Start mixing on low speed to break up the butter, then gradually increase to high. Whip the butter for about 2-3 minutes. You will see it change from a yellow color to a pale, almost white ivory.
- Stop the mixer and scrape down the sides of the bowl with a spatula to ensure no dense chunks remain.
- Add the heavy cream and the sea salt. The cream adds a touch of moisture that makes the whipped texture even silkier and lighter.
- Whip on high for another 2 minutes until the butter looks fluffy and has nearly doubled in volume.
- Transfer to a small serving bowl or use a piping bag to create beautiful swirls on a board. Finish with a final sprinkle of flaky salt for texture.
How to prep camping meals
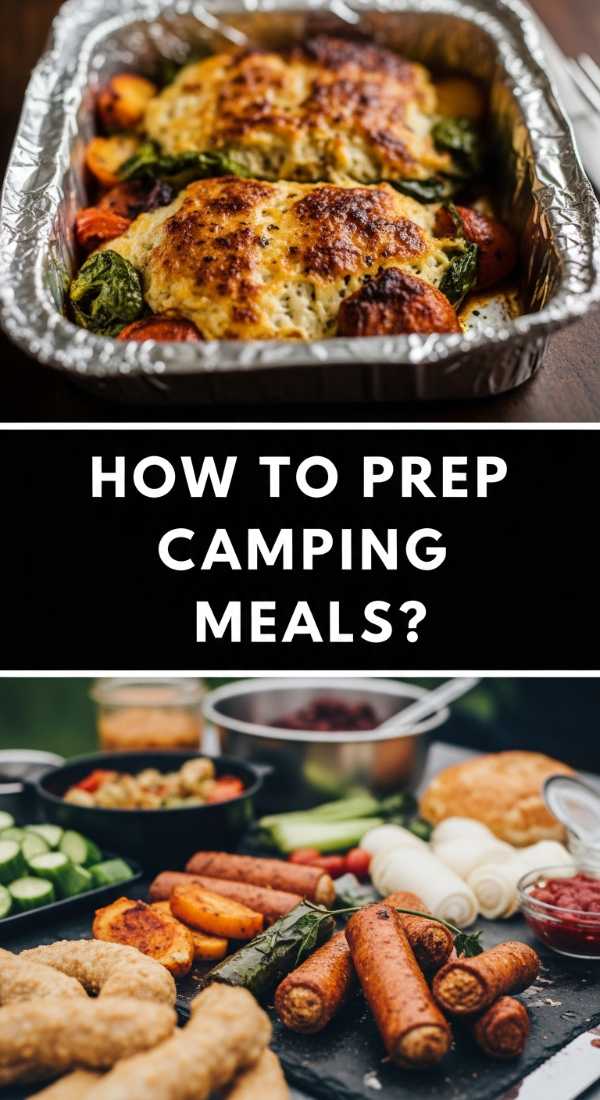
Why we love this
Camping meals are about the primal satisfaction of eating something hearty and warm while surrounded by the great outdoors. There is a specific, smoky aroma that comes from cooking over an open flame that you simply can’t replicate in a kitchen. The texture of a well-prepped camping meal is usually rustic—chunky potatoes, tender meats, and charred vegetables that feel nourishing and substantial. It’s about the ritual of the prep and the communal feeling of sharing a one-pot wonder under the stars, where every bite tastes better because of the fresh air.
Ingredients
- Pre-marinated proteins (chicken thighs, steak tips, or firm tofu)
- Par-boiled baby potatoes
- Chopped hardy vegetables (bell peppers, onions, zucchini)
- Aluminum foil or a heavy cast-iron skillet
- High-smoke point oil (avocado or grapeseed oil)
- Pre-mixed spice blends in small containers
How to make it
- Complete 90% of the prep work at home. Chop all your vegetables and store them in heavy-duty zip-top bags. This saves you from having to clean cutting boards in the wilderness.
- Par-boil your potatoes at home for about 8 minutes until they are slightly tender but not mushy. This ensures they cook at the same rate as your meat over the campfire.
- Marinate your meat in advance and freeze it in a sealed bag. This acts as an ice pack in your cooler and will be perfectly thawed and seasoned by the time you’re ready to cook on the first or second night.
- When at the campsite, build a fire and let it burn down until you have a bed of hot, glowing coals. Cooking over direct flames often results in burnt outsides and raw insides; coals provide steady, even heat.
- If using foil packets, lightly oil the foil, add your prepped ingredients, and seal them tightly to trap the steam. Place them on a grate over the coals, turning occasionally for 15-20 minutes.
- If using a cast-iron skillet, heat the oil until it shimmers before adding your meat. Sear the proteins first to develop a crust, then toss in the vegetables and par-boiled potatoes.
- Use a meat thermometer to check for doneness, and finish with a squeeze of fresh lemon or a handful of fresh herbs to brighten the smoky flavors.
How to make cucumber salad
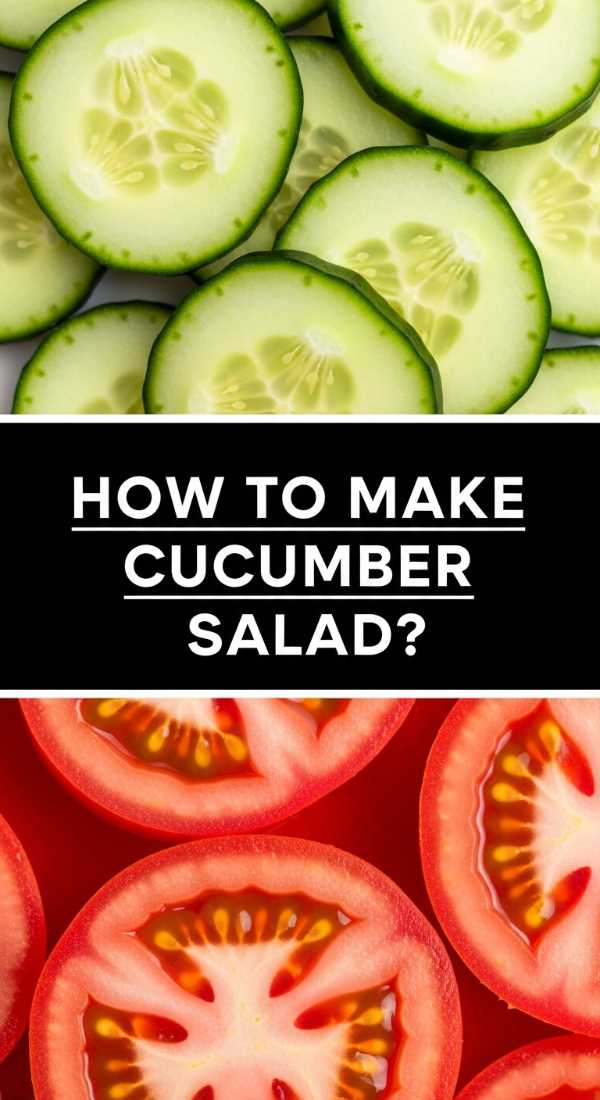
Why we love this
Cucumber salad is the ultimate palate cleanser, offering a cold, sharp, and refreshing crunch that cuts through the richness of any grilled meal. The smell of fresh dill and sharp white vinegar is immediately invigorating, signaling a side dish that is light and hydrating. The texture is a beautiful interplay between the crispness of the cucumber and the slight bite of thinly sliced red onions, all dressed in a light, acidic brine that makes your mouth water. It’s a simple, bright addition to a summer food board that brings a necessary element of zing and freshness.
Ingredients
- 2 large English cucumbers, thinly sliced
- 1/2 small red onion, paper-thinly sliced
- 1/2 cup white vinegar or apple cider vinegar
- 2 tablespoons granulated sugar
- 1 teaspoon salt
- 1/4 cup fresh dill, chopped
- 1/2 teaspoon black pepper
How to make it
- Choose English cucumbers (the long ones wrapped in plastic) because they have thinner skins and fewer seeds, which results in a better crunch and less watery salad.
- Slice the cucumbers as thinly as possible—ideally using a mandoline on a thin setting. This allows the vinegar to penetrate the slices quickly.
- In a large glass bowl, whisk together the vinegar, sugar, salt, and black pepper. Whisk until the sugar and salt are completely dissolved; you don’t want a gritty dressing.
- Add the sliced cucumbers and red onions to the bowl. Toss thoroughly with tongs or large spoons to ensure every slice is coated in the vinaigrette.
- Let the salad sit in the refrigerator for at least 30 minutes. This ‘quick pickle’ time is essential for the onions to soften and the cucumbers to absorb the flavors.
- Just before serving, toss in the fresh chopped dill. Adding herbs at the last minute keeps them vibrant and prevents them from wilting in the acid.
- Drain any excess liquid if you are placing this directly on a food board, or serve it in a shallow bowl to maintain the dressing.
How to grill summer veggies

Why we love this
Grilling summer vegetables transforms them from simple produce into something deeply flavorful, with caramelized edges and a tender, smoky interior. The aroma of charred bell peppers and balsamic-glazed zucchini is the quintessential scent of a backyard barbecue. Each vegetable brings its own unique texture—from the meaty bite of a Portobello mushroom to the sweet pop of a grilled cherry tomato. Arranged on a board, they look like an edible work of art, with vibrant greens, charred purples, and deep reds that celebrate the bounty of the season.
Ingredients
- Assorted vegetables (zucchini, bell peppers, asparagus, red onion, eggplant)
- 3 tablespoons olive oil
- 2 tablespoons balsamic glaze
- 2 cloves garlic, minced
- 1 teaspoon dried oregano
- Salt and pepper to taste
How to make it
- Preheat your grill to medium-high heat (about 400°F). Ensure the grates are clean and lightly oiled to prevent the vegetables from sticking.
- Cut your vegetables into large, flat pieces. For zucchini and eggplant, long planks work best; for peppers, large quarters. This maximizes surface area for those beautiful grill marks and prevents smaller pieces from falling through the grates.
- In a large bowl, toss the vegetables with olive oil, minced garlic, oregano, salt, and pepper. Do not add the balsamic glaze yet, as the sugar in it will burn too quickly.
- Place the heartier vegetables (like onions and peppers) on the grill first, as they take longer to cook. Place the softer items like asparagus and zucchini on a few minutes later.
- Grill the vegetables for about 3-5 minutes per side. Look for clear, dark grill marks and a slight softening of the texture. Use long-handled tongs to flip them carefully.
- Once the vegetables are tender-crisp, remove them from the grill and arrange them on your serving board while still warm.
- Drizzle the balsamic glaze over the top just before serving. The residual heat will slightly thin the glaze, allowing it to coat the vegetables perfectly.
How to cook summer meals

Why we love this
Summer cooking is all about minimalism and letting high-quality ingredients speak for themselves. The best summer meals are light on the stomach but heavy on flavor, focusing on the natural sweetness of peak-season produce and the brightness of citrus and herbs. You can almost feel the vitality in these dishes—the coolness of a gazpacho, the zest of a shrimp taco, or the earthiness of a grain salad. It’s a way of eating that feels effortless and vibrant, designed to keep you feeling energized during the long, hot days of the season.
Ingredients
- Fresh proteins (white fish, chicken breast, or chickpeas)
- Seasonal produce (tomatoes, corn, stone fruit)
- Fresh herbs (basil, mint, cilantro)
- Acids (lemon juice, lime juice, or light vinegars)
- Whole grains (quinoa, farro, or couscous)
How to make it
- Focus on ‘low-heat’ cooking methods to keep your kitchen cool. Utilize the grill, the slow cooker, or simply assemble raw ingredients for salads.
- Start with a base of grains or greens. If using grains, cook them in vegetable broth instead of water to add an extra layer of savory depth without adding fat.
- Incorporate a ‘raw element’ into every meal. Whether it’s a fresh corn salsa or sliced peaches, the raw crunch provides a necessary contrast to cooked proteins.
- Use ‘acid’ as your primary seasoning. Instead of heavy sauces, use a squeeze of charred lemon or a splash of rice vinegar to brighten the flavors of the dish.
- Keep cooking times short. Seafood like shrimp or scallops takes less than 5 minutes to cook and stays light and tender, perfect for a summer evening.
- Assemble your meal on a large platter or board. This communal style of serving encourages grazing and keeps the meal feeling informal and relaxed.
- Garnish heavily with fresh herbs. Don’t just use them as a decoration; use them as a salad leaf to add punchy, aromatic flavor to every bite.
How to bake strawberry pie

Why we love this
Unlike its chilled counterpart, a baked strawberry pie is a warm, bubbling masterpiece of concentrated fruit flavor. As the strawberries bake, they break down into a jammy, thick filling that smells like sweet preserves and warm vanilla. The crust becomes a golden-brown, flaky architecture that shatters delicately with every forkful. It’s a comforting, rustic dessert that feels like a hug on a plate, especially when served warm with a scoop of cold vanilla bean ice cream melting into the strawberry juices. It’s the perfect centerpiece for a cozy, homestyle food board.
Ingredients
- Double pie crust (homemade or store-bought)
- 5 cups fresh strawberries, hulled and halved
- 3/4 cup granulated sugar
- 1/4 cup cornstarch
- 1 tablespoon lemon juice
- 1 teaspoon vanilla extract
- 1 egg (for egg wash)
- 1 tablespoon coarse sanding sugar
How to make it
- Preheat your oven to 400°F (200°C). High heat at the start is crucial for setting the bottom crust and ensuring it doesn’t get soggy from the fruit juices.
- In a large bowl, gently toss the halved strawberries with the sugar, cornstarch, lemon juice, and vanilla. Let them macerate for about 15 minutes to release their natural juices.
- Roll out your bottom crust and fit it into a 9-inch pie plate. Fill it with the strawberry mixture, including any liquid that has pooled in the bowl.
- Roll out the second crust. You can do a full top with steam vents or a lattice pattern. A lattice is great for strawberry pie because it allows more steam to escape, which helps thicken the filling.
- Crimp the edges of the pie tightly to seal. Whisk the egg with a teaspoon of water and brush the entire top crust. Sprinkle generously with the coarse sanding sugar for a professional, crunchy finish.
- Place the pie on a parchment-lined baking sheet to catch any drips. Bake for 20 minutes, then reduce the oven temperature to 375°F.
- Continue baking for another 35-45 minutes. You are looking for the crust to be deep golden brown and the filling to be bubbling thick through the vents. Let the pie cool for at least 4 hours before slicing—this is the hardest part, but it’s essential for the filling to set!
How to make party dip

Why we love this
A well-made party dip is the ultimate social lubricant—it’s the place where everyone gathers, hovering with chips in hand as they scoop up layers of flavor. The best party dips offer a symphony of textures: the creaminess of a base layer, the crunch of fresh toppings, and the savory richness of cheese or beans. The aroma is a mix of spices and freshness that instantly makes a room feel more festive. Whether it’s a cold seven-layer dip or a baked spinach artichoke masterpiece, the dip board is a playground of flavor that invites creativity and endless snacking.
Ingredients
- Base: 16 oz cream cheese or Greek yogurt
- Flavor: 1 cup salsa, pesto, or bean puree
- Toppings: Shredded cheese, diced tomatoes, black olives, green onions
- Crunch: Toasted nuts or bacon bits
- Dipper board: Baguette slices, pita chips, celery, and bell pepper strips
How to make it
- Start by creating a ‘flavor foundation.’ If using cream cheese, whip it with a hand mixer first to make it light and easy to scoop without breaking chips.
- Layer your ingredients from ‘wet’ to ‘dry.’ If you are making a cold layered dip, put the heaviest ingredients (like refried beans or thick cream cheese) at the bottom and the lightest (like lettuce or sprouts) at the top.
- If making a hot dip, use a shallow baking dish. This increases the surface area for a cheesy crust and ensures the dip heats through evenly and stays warm longer.
- Bake hot dips at 350°F until the edges are bubbling and the cheese on top has developed small, brown toasted spots.
- For the ‘board’ presentation, place the dip bowl in the center first. This is your anchor point.
- Fan out your dippers in a circular pattern around the bowl. Group colors together—put the green celery next to the orange carrots for maximum visual impact.
- Provide a small spoon or spreader even if the dip is ‘scoopable.’ This keeps the board cleaner and accommodates guests who prefer to plate their snacks.
The Evolution of the Board Trend
In conclusion, the rise of simple food boards is a testament to our desire for authenticity and ease. We’ve moved past the need for expensive truffles and perfectly carved radishes, finding more joy in a well-seasoned cucumber salad or a warm, cheesy dip that reminds us of home. These boards are successful because they are accessible; anyone can throw together a beach snack cooler or whip a batch of butter to elevate a simple loaf of bread. By focusing on high-quality ingredients and straightforward techniques, you can create a viral-worthy spread that actually tastes as good as it looks.
Frequently Asked Questions
- How do I keep my food board from getting soggy? Always separate high-moisture items like sliced fruit or pickles into small bowls or silicone liners. If you are packing a board for travel, keep the dry items like crackers in a separate airtight container until the moment you serve.
- What are the best boards to use for food? Marble is great for keeping items like whipped butter or cheese cool, while wooden boards are classic and durable. Just ensure any wooden board you use is food-safe and seasoned with mineral oil.
- Can I make these boards ahead of time? Most components can be prepped in advance, but assembly should happen close to serving time. For example, you can prep the Shoneys pie the night before, but wait to add the whipped cream until you’re ready to eat!