

Level Up Your Party Game: Top 5 Viral Simple Food Boards to Try Today
There is something truly magical about the way a well-curated food board brings people together. I remember the first time I set out a massive spread for my best friend’s birthday; the room instantly transformed from a quiet gathering into a buzzing hive of laughter and shared stories. It wasn’t just about the food—it was about the experience of grazing, discovering new flavor combinations, and the tactile joy of picking up a perfectly crisp cracker or a juice-laden berry. Food boards have become a viral sensation for a reason: they are as beautiful to look at as they are delicious to eat.
In today’s fast-paced world, we’re all looking for ways to impress our guests without spending twelve hours in a hot kitchen. That is the beauty of the ‘viral board’ trend—it celebrates simplicity, fresh ingredients, and creative presentation. Whether you are prepping for a sunny day at the beach, a cozy night by the campfire, or a lively backyard summer bash, these ten ideas will elevate your hosting game to legendary status. Let’s dive into these crowd-pleasing favorites that promise to be the star of your next social media post and your next party!
How to make Shoneys strawberry pie?

Why we love this
This iconic dessert is the epitome of nostalgic summer bliss, offering a vibrant explosion of fresh strawberry flavor encased in a glossy, ruby-red glaze. We love it because it manages to be incredibly light and refreshing while still satisfying that deep craving for something sweet and decadent. The contrast between the buttery, flaky crust and the cool, silken texture of the strawberry gel creates a sensory experience that feels like a warm hug on a sunny afternoon. Every bite is a perfect balance of tart fruit and sugary glaze that lingers beautifully on the palate.
Ingredients
- 1 pre-baked 9-inch pie crust
- 1 quart fresh strawberries, hulled and cleaned
- 1 cup granulated sugar
- 3 tablespoons cornstarch
- 1 cup water
- 3 tablespoons strawberry-flavored gelatin powder
- Whipped cream for topping
How to make it
- Begin by selecting the finest, firmest strawberries; wash them thoroughly, pat them dry with a paper towel to ensure the glaze sticks, and remove the green hulls. Arrange the whole berries tip-side up in your pre-baked and cooled pie shell, packing them tightly so there are no large gaps.
- In a medium saucepan over medium heat, whisk together the granulated sugar and cornstarch until no lumps remain, then gradually pour in the water while stirring constantly.
- Bring the mixture to a gentle boil, stirring frequently to prevent sticking; you will notice the liquid transforming from cloudy to a thick, translucent consistency. This usually takes about 3 to 5 minutes once the boil starts.
- Remove the pan from the heat immediately and whisk in the strawberry gelatin powder until it is completely dissolved and the mixture is a brilliant, clear red.
- Allow the glaze to cool slightly for about 10 minutes (it should still be pourable but not scalding) before slowly pouring it over the strawberries in the pie shell, ensuring every berry is generously coated.
- Place the pie in the refrigerator for at least 3 to 4 hours, or until the glaze is completely firm and set. Slice into generous wedges and serve with a massive dollop of fresh whipped cream for that classic Shoney’s aesthetic.
How to make Rotel dip?

Why we love this
Rotel dip is the undisputed king of party appetizers, known for its velvety, molten texture and that signature kick of spice that keeps everyone coming back for ‘just one more’ scoop. It is the ultimate comfort food that bridges the gap between a casual snack and a hearty treat, filling the air with the savory aroma of melted cheese and browned sausage. We love how the acidity of the tomatoes and the heat of the green chiles cut through the richness of the cheese, creating a perfectly balanced bite that is as satisfying as it is addictive. It’s a nostalgic staple that never fails to draw a crowd.
Ingredients
- 1 pound ground breakfast sausage or lean ground beef
- 1 loaf (32 oz) Velveeta processed cheese, cubed
- 2 cans (10 oz each) Ro*Tel Diced Tomatoes and Green Chilies
- 1/2 teaspoon garlic powder
- Fresh cilantro for garnish
- Sturdy tortilla chips for serving
How to make it
- Place a large skillet or heavy-bottomed pot over medium-high heat and add your ground sausage or beef; use a wooden spoon to break the meat into small, uniform crumbles.
- Cook the meat until it is thoroughly browned and no pink remains, which typically takes 7-10 minutes. Once cooked, drain the excess grease carefully to ensure your dip isn’t oily.
- Lower the heat to medium-low and add the cubed Velveeta cheese to the pot; stir constantly as the cheese begins to melt to prevent it from scorching on the bottom.
- Once the cheese is about halfway melted, pour in both cans of Ro*Tel tomatoes (do not drain them, as the juices provide essential flavor and the right consistency).
- Add the garlic powder and continue to stir gently until the mixture is completely smooth, creamy, and bubbling softly.
- Transfer the dip to a slow cooker on the ‘warm’ setting to maintain that perfect dipping consistency throughout your party, and garnish with fresh cilantro right before serving with a pile of salty chips.
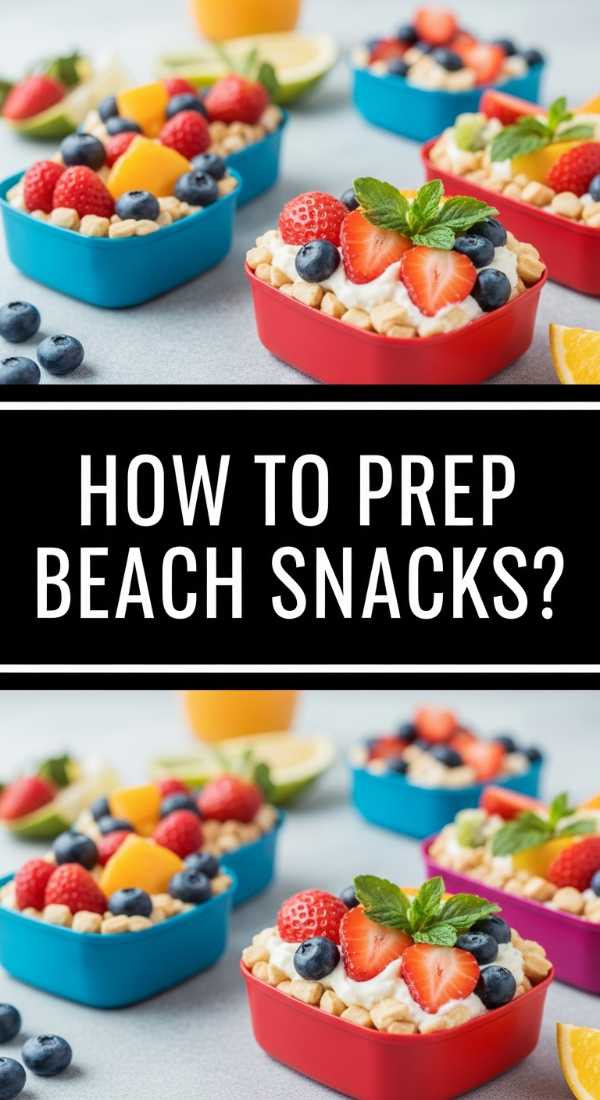
How to prep beach snacks?
Why we love this
Prepping beach snacks is all about capturing the carefree, sun-drenched essence of the coast while ensuring everything stays fresh, sand-free, and cooling. We love beach snacks that offer a symphony of textures—from the crisp snap of chilled cucumbers to the refreshing burst of frozen grapes—providing much-needed hydration and energy for a day in the surf. There is something uniquely satisfying about opening a cooler to find a vibrant assortment of finger foods that taste even better with a hint of salt air and the sound of crashing waves in the background. It’s portable joy in every bite.
Ingredients
- Frozen grapes and watermelon chunks
- Individual hummus cups
- Pre-cut bell pepper strips and cucumber slices
- Beef jerky or turkey sticks
- Pretzel twists or pita chips
- Bottled water and electrolyte drinks
- Reusable airtight containers and silicone bags
How to make it
- Start by washing all your fresh produce and cutting them into easy-to-grab sticks or slices; for watermelon, use a melon baller or cut into thick wedges that are easy to hold.
- Place your grapes in a single layer on a baking sheet and freeze them overnight; these act as edible ice packs in your cooler and provide a refreshing, slushy-like texture when eaten on the hot sand.
- Utilize airtight, stackable containers to keep sand out; portion snacks into individual servings to prevent cross-contamination and ensure everyone has their own dedicated ‘snack pack.’
- When packing the cooler, place the heaviest items and ice packs at the bottom, followed by the more delicate fruits and vegetables, and finally the dry snacks like pretzels in waterproof bags at the top.
- Pro tip: Freeze half-full bottles of water the night before and top them off with fresh water in the morning; this provides ice-cold hydration that lasts all day as the core slowly melts.
How to make creamy butter?

Why we love this
Homemade creamy butter is a revelation, offering a rich, multifaceted flavor profile that store-bought varieties simply cannot match. We love the process of watching heavy cream transform from a liquid into a fluffy, golden solid, releasing the freshest buttermilk imaginable along the way. The texture is incredibly silky and pliable, making it the perfect canvas for a ‘butter board’ adorned with flaky sea salt, fresh herbs, and edible flowers. There is a deep sense of artisanal pride in serving butter you’ve crafted yourself, and the aroma of fresh dairy is undeniably inviting.
Ingredients
- 2 cups high-quality heavy whipping cream (room temperature)
- 1/4 teaspoon fine sea salt (optional)
- Ice-cold water for rinsing
- Optional: Fresh herbs, honey, or minced garlic for flavoring
How to make it
- Pour the room-temperature heavy cream into a stand mixer fitted with the whisk attachment; starting with cream that isn’t cold helps the fat molecules separate more efficiently.
- Begin whisking on medium-low to avoid splashing, then gradually increase the speed to high; the cream will first turn into soft peaks, then stiff peaks (whipped cream).
- Continue whisking past the whipped cream stage until the mixture suddenly ‘breaks’—you will see solid yellow clumps of butter separating from a thin, milky liquid (the buttermilk). This usually happens within 5-10 minutes.
- Strain the mixture through a fine-mesh sieve or cheesecloth, reserving the buttermilk for baking if desired.
- Place the solid butter in a bowl of ice-cold water and use your hands or a spatula to ‘wash’ it, kneading the butter to squeeze out any remaining buttermilk; repeat this with fresh water until the water runs completely clear. This step is crucial to prevent the butter from spoiling quickly.
- Once clean, pat the butter dry, mix in your salt or flavorings, and whip it briefly once more for maximum creaminess before spreading it onto a board or shaping it into a log.
How to prep camping meals?

Why we love this
Camping meals are the ultimate tribute to rustic, outdoor living, where the smoky scent of a campfire infuses every ingredient with a rugged, earthy depth. We love the simplicity of prep-ahead meals that allow you to spend more time hiking and less time hovering over a portable stove, all while enjoying gourmet-level flavors under the stars. There is a primal satisfaction in eating a hearty, warm meal that has been carefully packed and then sizzled to perfection over an open flame. It turns the act of dining into a shared adventure, where even the simplest ingredients taste extraordinary in the fresh mountain air.
Ingredients
- Pre-marinated chicken or steak skewers
- Foil-wrapped potato and carrot packets with butter and herbs
- Pre-cracked eggs in a sealed mason jar
- Hard cheeses and cured meats (salami, prosciutto)
- Heavy-duty aluminum foil and cast-iron skillet
- Vacuum-sealed bags for organization
How to make it
- Do all your chopping and marinating at home 24 hours in advance; cut meat and vegetables into uniform sizes to ensure they cook evenly over the unpredictable heat of a campfire.
- For ‘foil packets,’ place thinly sliced potatoes, onions, and carrots on a large piece of heavy-duty foil, add a generous pat of butter, salt, and rosemary, then fold the edges tightly to create a steam-trapping seal.
- If you’re bringing eggs, crack them into a jar at home and whisk them slightly; this saves space, prevents broken shells in your cooler, and makes breakfast prep as simple as pouring and scrambling.
- Freeze your pre-marinated meats; they will act as additional cooling agents for your other perishables and will be perfectly thawed by the time you’re ready to grill them on the second night.
- When cooking at the site, wait for your fire to burn down to hot coals rather than leaping flames; place your cast iron skillet or foil packets directly on a grate over the coals for steady, even heat that sears the meat and softens the vegetables without burning them.
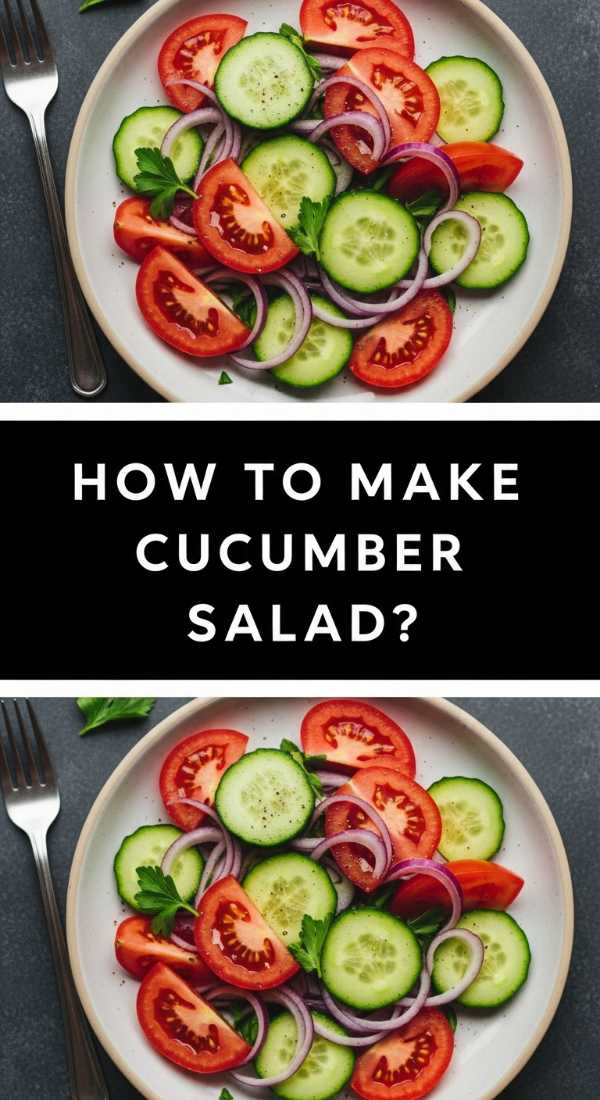
How to make cucumber salad?
Why we love this
Cucumber salad is the quintessential palate cleanser of the summer, offering a sharp, vinegary tang and a crunch that is incredibly revitalizing on a humid day. We love how the thin, translucent slices of cucumber soak up the dressing, becoming tender while retaining a core crispness that pops with every mouthful. The addition of red onions provides a subtle bite, while fresh dill adds an herbaceous, airy quality that makes the whole dish feel like a garden in a bowl. It is light, healthy, and provides the perfect acidic balance to grilled meats or heavy dips.
Ingredients
- 3 large English cucumbers, thinly sliced
- 1/2 small red onion, paper-thinly sliced
- 1/2 cup white vinegar or apple cider vinegar
- 2 tablespoons granulated sugar
- 1 teaspoon sea salt
- 1/4 cup fresh dill, chopped
- Black pepper to taste
How to make it
- Use a mandoline slicer to get the cucumbers and red onions paper-thin; this increased surface area allows the vegetables to absorb the brine much faster.
- In a large glass bowl, whisk together the vinegar, sugar, and salt until the sugar and salt have completely dissolved into a clear liquid.
- Add the cucumber and onion slices to the bowl and toss thoroughly with your hands or tongs to ensure every slice is coated in the dressing.
- Let the salad sit at room temperature for at least 30 minutes, or in the refrigerator for 2 hours; this ‘marinating’ time is essential as the salt draws out the cucumber’s water, mixing with the vinegar to create a flavorful brine.
- Right before serving, fold in the fresh chopped dill and a generous crack of black pepper. The dill should be added last to keep its bright green color and punchy aroma from wilting in the acidic vinegar.
How to grill summer veggies?

Why we love this
Grilling summer vegetables transforms humble garden produce into a sophisticated, smoky feast that celebrates the peak of the season’s bounty. We love the way the intense heat of the grill caramelizes the natural sugars in peppers, zucchini, and corn, creating charred edges that are sweet, savory, and deeply aromatic. The texture becomes tender-crisp, and when finished with a drizzle of balsamic or a sprinkle of feta, it feels like a high-end restaurant dish made in your own backyard. It’s a healthy, colorful way to add visual flair and robust flavor to any food board.
Ingredients
- Zucchini and yellow squash, sliced lengthwise
- Bell peppers, seeded and quartered
- Asparagus spears, woody ends trimmed
- Extra virgin olive oil
- Balsamic glaze or fresh lemon juice
- Kosher salt and cracked black pepper
- Dried oregano or Italian seasoning
How to make it
- Preheat your grill to medium-high (about 400°F); a hot grill is necessary to get those beautiful char marks without overcooking the inside of the veggies into mush.
- Toss your prepared vegetables in a large bowl with enough olive oil to coat them lightly but thoroughly; season aggressively with salt, pepper, and dried herbs.
- Place the sturdier vegetables like peppers and squash directly over the grates first, as they take longer to soften. Asparagus and thinner items should go on last.
- Grill the vegetables for 3-5 minutes per side; look for clear, dark grill marks as your visual cue to flip. Avoid moving them around too much so the char can properly develop.
- Remove the veggies once they are tender but still have a slight ‘snap’ when bitten. Arrange them on a platter and immediately drizzle with balsamic glaze or a squeeze of lemon to brighten the smoky flavors while they are still hot.
How to cook summer meals?

Why we love this
Summer cooking is all about embracing the ‘less is more’ philosophy, focusing on high-quality ingredients and minimal heat to keep things airy and effortless. We love this style of eating because it prioritizes vibrant colors, raw textures, and bright, citrusy finishes that reflect the energy of the season. Whether it’s a cold pasta salad, a quick sear on the grill, or a massive grazing board, summer meals are designed to be shared al fresco with a cold drink in hand. It’s a celebration of nature’s peak flavors, where a simple tomato can be the star of the show.
Ingredients
- Fresh seasonal produce (heirloom tomatoes, peaches, corn)
- Light proteins (shrimp, chicken breast, chickpeas)
- Fresh herbs (basil, mint, cilantro)
- High-quality olive oil and artisanal vinegars
- Grains like quinoa or orzo
How to make it
- Focus on ‘assembly’ rather than ‘cooking’; start by building a base of greens or grains that have been tossed in a light, citrus-based vinaigrette.
- Use quick-cooking techniques like sautéing or grilling for your proteins to minimize the time spent over a heat source; shrimp, for example, only needs 2 minutes per side to reach perfect opaque doneness.
- Incorporate raw elements into every dish—shaved radishes, torn basil, or sliced peaches add a layer of freshness that cooked food lacks.
- Season as you go, but do a ‘final check’ right before serving; summer flavors are delicate and often need an extra pinch of flaky salt or a squeeze of lime to really sing.
- Serve everything family-style on large boards or platters to encourage grazing and conversation, keeping the atmosphere relaxed and the focus on the company.
How to bake strawberry pie?

Why we love this
There is nothing quite like the aroma of a traditional baked strawberry pie wafting through the house, promising a warm, jammy interior and a golden, buttery crust. We love this baked version because the heat of the oven intensifies the strawberries, breaking them down into a thick, concentrated syrup that is rich and deeply satisfying. The lattice crust adds a delightful crunch and a professional aesthetic that makes this the perfect centerpiece for a dessert board. It’s a timeless classic that feels both rustic and elegant, especially when served warm with a melting scoop of vanilla bean ice cream.
Ingredients
- 2 disks of refrigerated or homemade pie dough
- 2 pounds fresh strawberries, sliced
- 3/4 cup granulated sugar
- 1/4 cup cornstarch (or tapioca starch)
- 1 tablespoon lemon juice
- 1 teaspoon vanilla extract
- 1 egg (for egg wash) and turbinado sugar
How to make it
- Preheat your oven to 400°F (200°C); a high initial temperature helps set the crust and prevents it from becoming soggy from the fruit juices.
- In a large bowl, gently toss the sliced strawberries with sugar, cornstarch, lemon juice, and vanilla; let this mixture sit for 15 minutes to allow the juices to start flowing and the starch to begin its thickening magic.
- Roll out the bottom crust and fit it into a 9-inch pie plate; pour the strawberry mixture in, making sure to include all those delicious juices at the bottom of the bowl.
- Roll out the second crust and cut into strips to create a lattice top, or place it whole over the pie and cut several large slits for steam to escape.
- Brush the top crust with a beaten egg wash and sprinkle generously with turbinado sugar for a professional, glittering crunch.
- Bake for 45-55 minutes; you are looking for the crust to be a deep golden brown and the strawberry filling to be bubbling thick, slow bubbles in the center. Let it cool completely (at least 4 hours) before slicing to ensure the filling sets properly.
How to cook cheesy dip?

Why we love this
A warm, bubbling cheesy dip is the ultimate crowd-pleaser, offering a gooey, stringy texture that is the definition of indulgence. We love how the golden-brown crust of baked cheese on top gives way to a molten, creamy center that can be customized with everything from jalapeños to bacon. It’s a sensory powerhouse—the sight of the ‘cheese pull,’ the savory smell of toasted cheddar, and the rich, salty flavor profile make it the perfect anchor for a savory snack board. It turns any assortment of bread and crackers into a gourmet experience.
Ingredients
- 8 oz cream cheese, softened
- 1 cup sour cream
- 2 cups shredded sharp cheddar cheese
- 1 cup shredded mozzarella (for that perfect pull)
- 1/2 teaspoon smoked paprika
- 1/4 cup chopped green onions
- Salt and pepper to taste
How to make it
- Preheat your oven to 375°F (190°C); a medium-high oven ensures the dip gets hot all the way through while the top browns beautifully.
- In a medium mixing bowl, beat the softened cream cheese and sour cream together until completely smooth and free of lumps.
- Fold in the cheddar, half of the mozzarella, the smoked paprika, and the green onions; seasoned with salt and pepper to your preference.
- Spread the mixture evenly into a small oven-safe skillet or baking dish; sprinkle the remaining mozzarella over the top in an even layer.
- Bake for 20-25 minutes; keep a close eye on the oven during the last 5 minutes. You want to see the edges bubbling vigorously and the top cheese layer starting to develop golden-brown spots.
- For an extra-charred top, turn on the broiler for 1-2 minutes at the very end. Serve immediately while the cheese is still at its most elastic and molten state.
Conclusion
Stepping up your party game doesn’t require a culinary degree—it just takes a little bit of creativity and the willingness to lean into the viral trends that everyone loves. These ten ideas, from the nostalgic Shoney’s pie to the smoky charred veggies, offer something for every guest and every occasion. By focusing on beautiful presentation and bold flavors, you’ll create more than just a meal; you’ll create a memory. So, grab your favorite board, prep your ingredients, and get ready to be the host everyone talks about for weeks to come!