
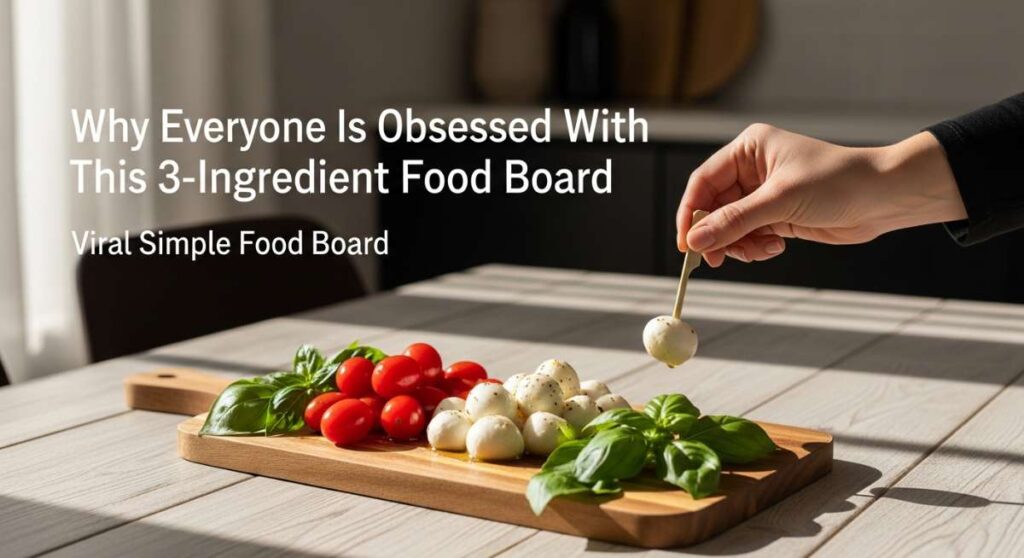
Why Everyone is Obsessed With This 3-Ingredient Food Board
There is something inherently magical about a gathering that centers around a beautifully laid-out board. I remember the first time I set one down on my coffee table during a rainy Tuesday; the atmosphere in the room shifted instantly from mundane to celebratory. It’s not just about the food; it’s about the permission to graze, the lack of formal plates, and the visual feast that greets your eyes before the first bite even reaches your lips.
Lately, the internet has been losing its collective mind over the ‘3-ingredient’ philosophy, and for good reason. We are all exhausted, yet we crave that aesthetic, ‘Pinterest-perfect’ lifestyle. This food board trend bridges the gap between our busy realities and our desire for beauty. By focusing on just three high-quality elements for each section, we strip away the stress of complex recipes and leave only the pure, unadulterated joy of flavor and texture combinations that sing.
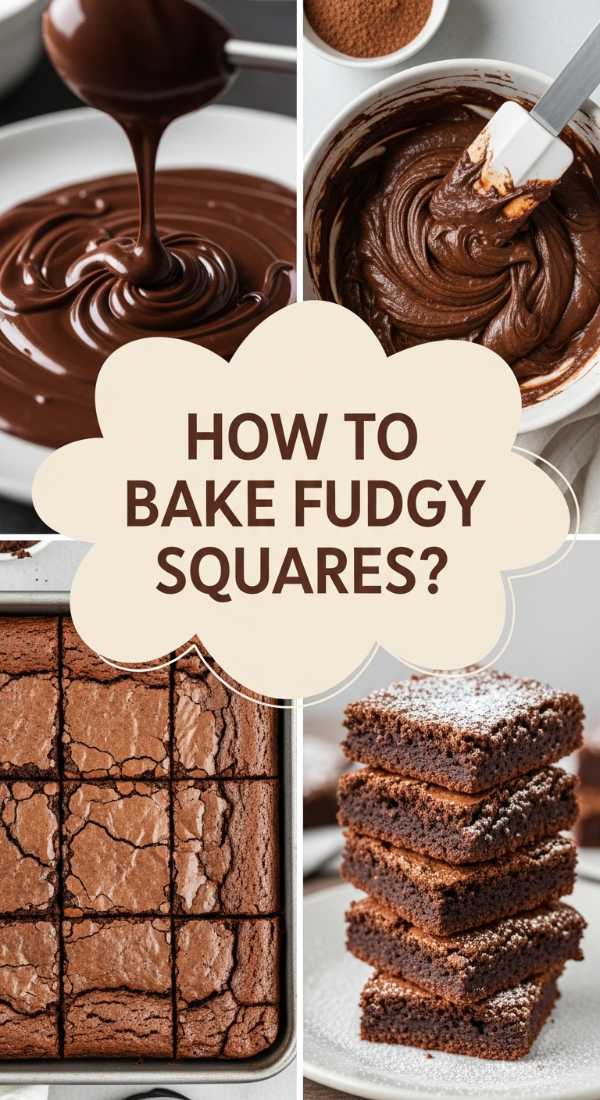
How to Bake Fudgy Chocolate Squares for a Crowd Pleasing Dessert
Why we love this
These squares are the ultimate indulgence, offering a deep, dark cocoa aroma that fills your entire home with a sense of cozy warmth. When you bite into one, the outer crust offers a delicate, paper-thin crackle that yields to a center so dense and fudgy it practically melts against your palate. The richness of the chocolate is perfectly balanced by a hint of salt, creating a sensory experience that feels both sophisticated and deeply nostalgic, like a warm hug in dessert form.
Essential Elements:
- High-quality dark chocolate chips or chunks
- Salted grass-fed butter
- Organic cane sugar
How to make it
- Begin by preheating your oven to 325°F (165°C); a lower temperature is the secret to achieving that ultra-fudgy texture without drying out the edges. Line an 8×8 inch pan with parchment paper, leaving an overhang for easy removal.
- In a double boiler over medium-low heat, gently melt the butter and chocolate together, stirring constantly with a silicone spatula to ensure the chocolate doesn’t seize or scorch. You are looking for a glossy, uniform liquid.
- Once melted, remove from heat and vigorously whisk in the sugar for at least two minutes; this mechanical action creates the sought-after crackly top by dissolving the sugar into the fats.
- Fold in your dry ingredients (flour/cocoa) just until no streaks remain, then pour into the pan and smooth the top. Bake for exactly 22-24 minutes; the center should still have a slight wobble when the pan is gently shaken, indicating the fudgy interior is preserved.
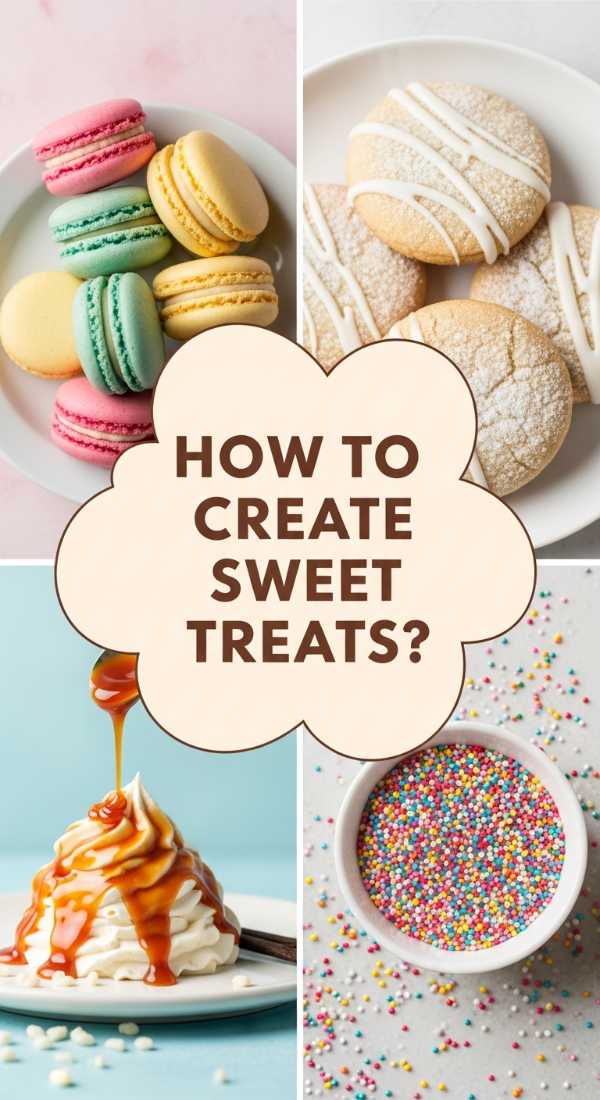
How to Create Sweet Confections for a Dreamy After Dinner Treat
Why we love this
There is a whimsical elegance to these confections that makes any evening feel like a special occasion. Imagine the scent of toasted sugar and vanilla bean wafting through the air as you arrange these delicate morsels on your board. The texture is a delightful journey—starting with a firm, snap-like exterior that gives way to a soft, pillowy center that feels light as air. They offer a refined sweetness that lingers gently, making them the perfect companion to a post-dinner espresso or a glass of dessert wine.
Essential Elements:
- Pure maple syrup or honey
- Whipped egg whites
- Crushed freeze-dried berries
How to make it
- Start by cleaning your mixing bowl with a touch of lemon juice to remove any trace of oil, which is the professional secret to achieving maximum volume with egg whites.
- Whisk the egg whites on medium-high speed until soft peaks form, then slowly drizzle in your liquid sweetener while continuing to whip until the mixture is stiff, glossy, and holds its shape perfectly.
- Gently fold in the crushed freeze-dried berries using a wide spatula to maintain the aeration, ensuring the color streaks beautifully through the white base for a marbled effect.
- Pipe small mounds onto a baking sheet lined with a silicone mat and dehydrate in a very low oven (200°F) for 90 minutes. They are done when they peel away easily from the mat and feel completely dry to the touch.
How to Mix Colorful Gooey Textures for Sensory Play Fun

Why we love this
This section of the board is all about the tactile joy of food, reminding us that eating should be an interactive, playful experience. The vibrant hues are a feast for the eyes, but the real star is the gooey, stretchy consistency that invites you to pull, dip, and play. It smells faintly of fruit and cream, and the texture is a marvelous contradiction—sticky yet smooth, yielding yet elastic. It brings out the inner child in everyone, turning a simple snack into a memorable moment of sensory exploration.
Essential Elements:
- Marshmallow fluff
- Natural food coloring (beet or turmeric)
- Cornstarch for dusting
How to make it
- Warm the marshmallow fluff in a microwave-safe bowl for 15 seconds just to loosen the consistency, making it easier to incorporate color without deflating the air bubbles.
- Divide the fluff into three small bowls and add a single drop of natural food coloring to each, folding gently with a spoon to create vibrant, saturated tones.
- Dust your hands and the workspace lightly with cornstarch to prevent sticking, then pull and stretch the colored fluff to aerate it further, creating a ‘cloud-like’ texture that is incredibly satisfying to touch.
- Arrange the different colors in small heaps on your board, ensuring they are slightly touching so guests can see the beautiful gradient of colors as they pick them up.
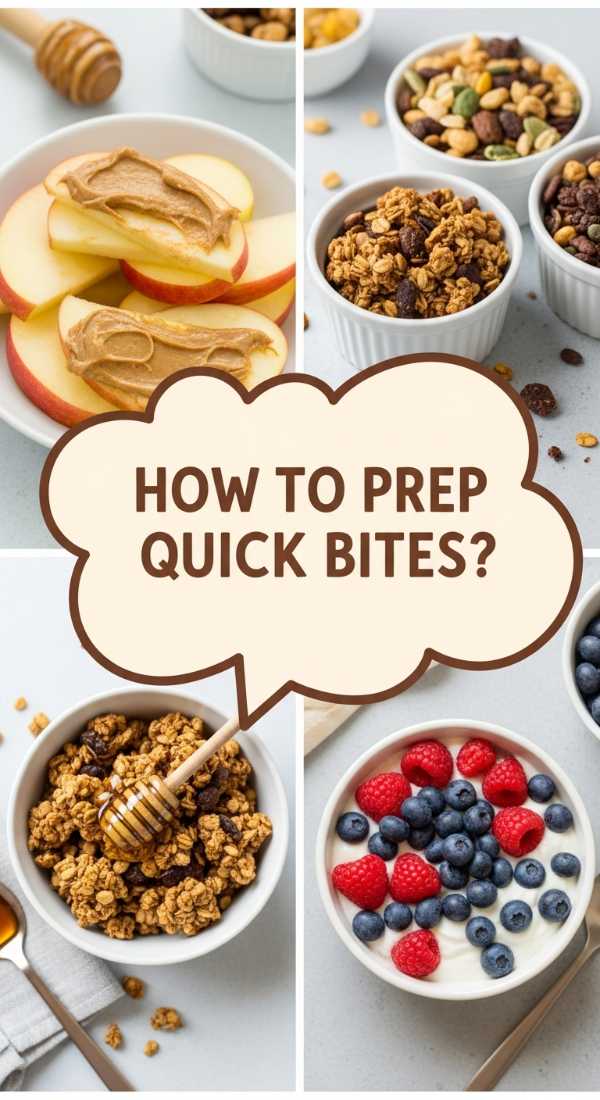
How to Prep Quick Bites for Busy Weekday Energy
Why we love this
When the weekday hustle hits, these quick bites are the ultimate savior, providing a burst of clean energy and a savory punch that wakes up the senses. They possess a satisfying crunch that echoes with every bite, followed by a savory, earthy undertone that feels grounded and nourishing. The aroma is fresh and herbaceous, evoking the feeling of a garden in mid-summer. It’s the kind of food that makes you feel productive and cared for, even when your schedule is packed to the brim.
Essential Elements:
- Crisp cucumber slices
- Smoked salmon ribbons
- Everything bagel seasoning
How to make it
- Slice English cucumbers into thick, sturdy rounds—aim for about half an inch thick so they can act as a stable base for the toppings without bending.
- Pat the cucumber slices dry with a paper towel; this is a critical step to ensure the seasoning adheres and the salmon doesn’t slide off during transport to the mouth.
- Gently fold a small ribbon of cold, smoked salmon on top of each round, creating a ‘nest’ shape that looks professional and adds height to your board display.
- Generously sprinkle the everything bagel seasoning from a height of about six inches to ensure an even distribution of sesame seeds, garlic, and salt across the entire platter.
How to Assemble Cheesy Noodle Casseroles for Ultimate Comfort Food
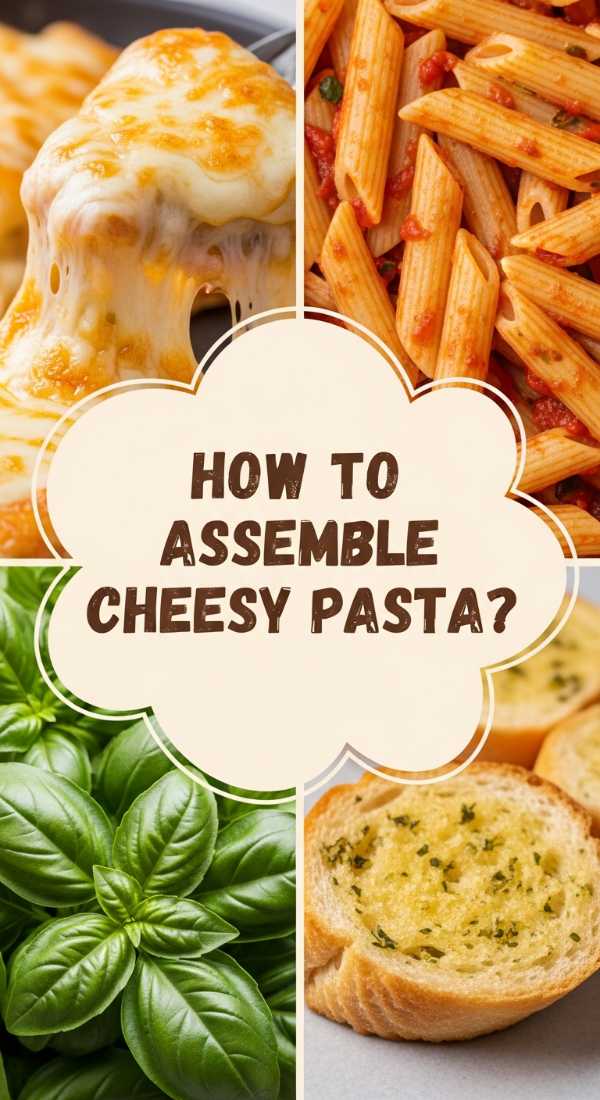
Why we love this
There is no scent quite as evocative as bubbling cheese and toasted pasta emerging from the oven. This casserole section of the board brings a rustic, heart-warming element that anchors the entire spread. The texture is a masterclass in contrast: a golden-brown, crispy top layer that shatters under the fork to reveal a world of silky, gooey cheese and tender noodles beneath. It feels like home, wrapping you in a blanket of savory warmth and making the world outside feel a little bit smaller and kinder.
Essential Elements:
- Wide egg noodles
- Sharp cheddar cheese block (freshly grated)
- Whole milk or heavy cream
- Breadcrumbs (optional garnish)
How to make it
- Boil the egg noodles in heavily salted water for two minutes less than the package instructions; they should be ‘al dente’ because they will continue to soften during the baking process.
- In a heavy-bottomed saucepan, heat the milk over medium heat until small bubbles form around the edges, then slowly whisk in the freshly grated cheese a handful at a time to create a smooth, emulsified sauce.
- Toss the noodles into the cheese sauce until every spiral is thoroughly coated, then transfer to a small cast-iron skillet or oven-safe dish that will fit neatly on your board.
- Bake at 400°F (200°C) for 15 minutes until the edges are bubbling vigorously and the top has achieved a deep, sunset-orange crust. Let it rest for 5 minutes before placing on the board to allow the sauce to set.
How to Slow Cook Tender Beef for a Hearty Family Feast
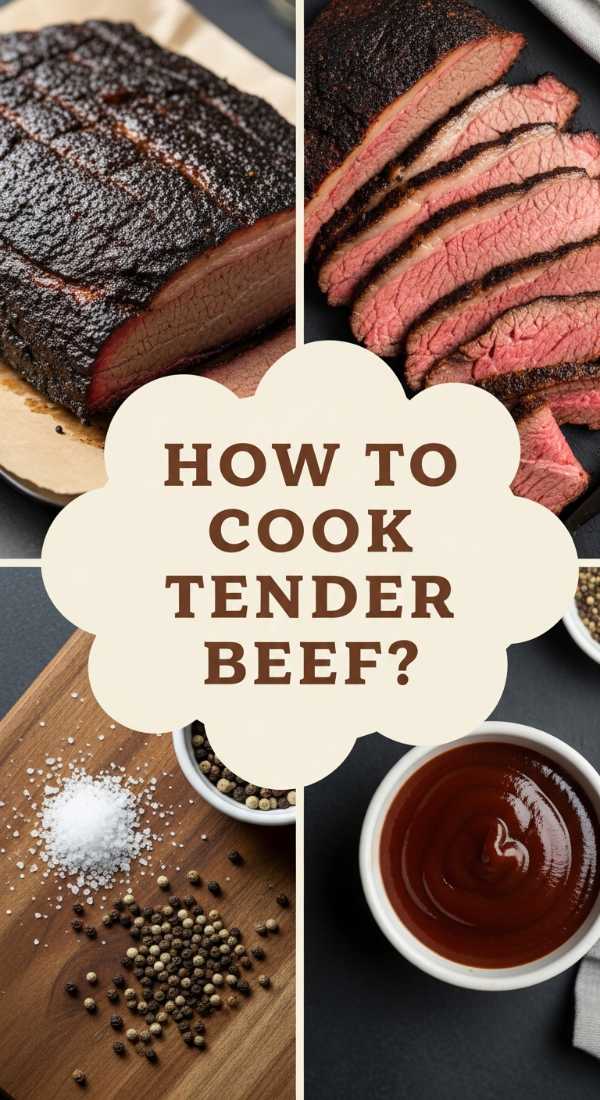
Why we love this
The aroma of beef slow-cooking in its own juices is enough to make anyone stop in their tracks; it’s deep, savory, and carries hints of caramelized onions and rich umami. The texture of the meat is unparalleled—it requires nothing more than a gentle press of a fork to fall apart into succulent, juice-laden strands. Enjoying this on a board feels like a modern take on a medieval feast, encouraging everyone to dig in and share in the hearty, soul-satisfying richness of a dish cooked with patience and care.
Essential Elements:
- Chuck roast or brisket
- Beef bone broth
- Aromatic root vegetables (carrots/onions)
How to make it
- Sear the beef in a hot pan with a splash of oil for 3-4 minutes per side until a dark, mahogany crust forms; this ‘Maillard reaction’ is essential for developing deep flavor profiles.
- Place the seared meat and roughly chopped aromatics into a slow cooker and pour the broth over until the meat is half-submerged, ensuring the top remains exposed to steam for a tender finish.
- Set the cooker to ‘Low’ and allow it to braise for 8 full hours. Resist the urge to open the lid, as the trapped steam is what breaks down the tough connective tissues into gelatinous perfection.
- Once finished, remove the meat and shred it coarsely with two forks, then drizzle with a bit of the reduced cooking liquid before piling it onto the center of your food board.
How to Garnish Vibrant Street Tacos for a Festive Dinner Night
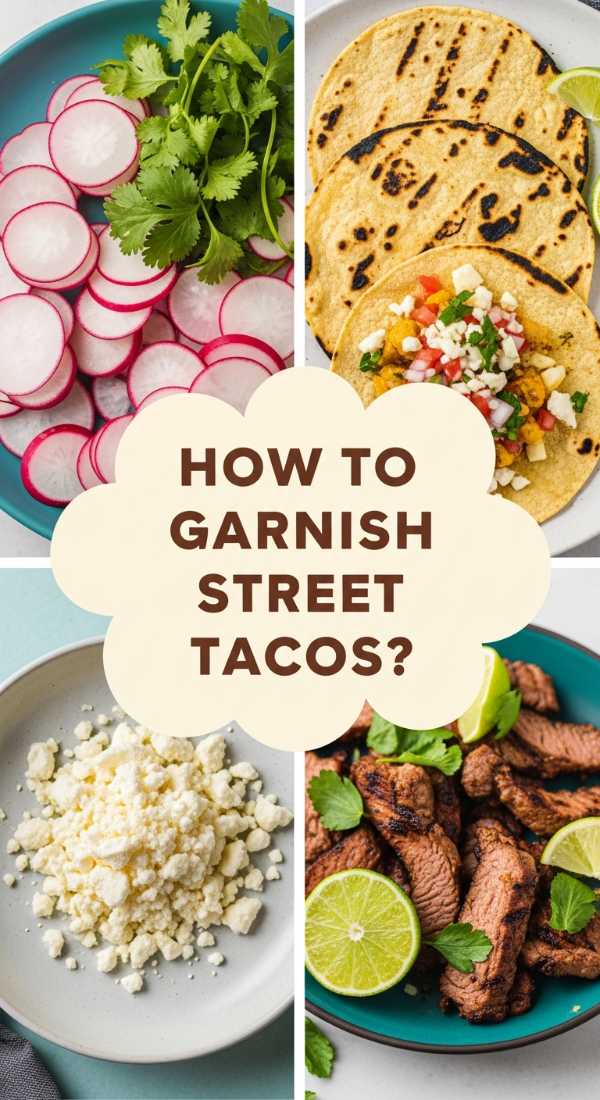
Why we love this
Street tacos bring a festive, high-energy vibe to the board with their explosion of colors and bright, zingy flavors. The smell of charred corn tortillas mixed with fresh lime and cilantro is instantly mouth-watering. Every bite is a symphony of textures: the soft chew of the tortilla, the tender protein, and the sharp, refreshing crunch of raw radish or onion. It’s a interactive way to eat that encourages customization and conversation, making it the heartbeat of any social gathering.
Essential Elements:
- Mini corn tortillas
- Pickled red onions
- Fresh cilantro and lime wedges
How to make it
- Toast the corn tortillas directly over a gas flame for 10 seconds per side using metal tongs; look for slight char marks and a softening of the texture which indicates the sugars in the corn are caramelizing.
- Keep the tortillas warm by wrapping them in a clean kitchen towel or a dedicated tortilla warmer while you prepare the garnishes to ensure they remain pliable.
- Slice the limes into thin wedges and finely chop the cilantro, removing the thicker stems to ensure the flavor is bright and herbal without any bitterness.
- Assemble the tacos with your choice of protein, then artfully drape the bright pink pickled onions over the top for a visual pop that contrasts beautifully with the green of the cilantro.
How to Master Rich Cocoa Bars for a Decadent Afternoon Pick Me Up
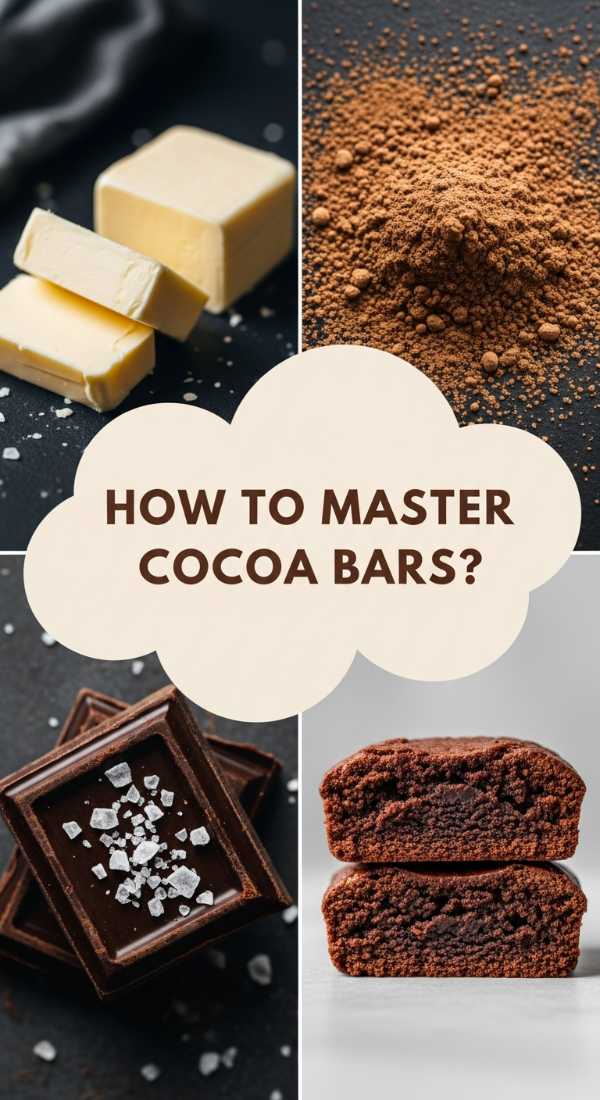
Why we love this
These cocoa bars are the sophisticated older sibling of the brownie, offering a more refined and intense chocolate experience. The aroma is dark and complex, reminiscent of a high-end chocolatier’s shop. When you snap a piece off, the texture is dense and almost truffle-like, coating the mouth in a silky layer of dark cocoa. It provides a much-needed moment of decadence in the middle of a busy afternoon, offering a concentrated dose of chocolate that satisfies the deepest cravings with just one or two bites.
Essential Elements:
- Unsweetened cocoa powder
- Coconut oil (refined for no coconut flavor)
- Raw honey or agave
How to make it
- Gently melt the coconut oil in a small saucepan over the lowest possible heat setting; coconut oil has a low smoke point and must be handled with care to maintain its structural integrity.
- Sift the cocoa powder into the melted oil to prevent any clumps, then whisk continuously until the mixture is perfectly smooth and looks like liquid obsidian.
- Stir in the honey slowly, noticing how the mixture thickens slightly as the sweetener emulsifies with the fats. Pour the liquid into a rectangular mold lined with parchment.
- Freeze for at least 45 minutes until solid. Before serving on the board, use a hot knife (dipped in boiling water and dried) to cut the bars into clean, sharp-edged rectangles for a professional look.
How to Whip Up Savory Kitchen Classics for a Truly Satisfying Meal

Why we love this
There is a quiet confidence in kitchen classics that never goes out of style. This section of the board focuses on those reliable, savory flavors that everyone recognizes and loves—think buttery garlic, toasted grains, and roasted vegetables. The aroma is savory and inviting, like a Sunday roast at grandma’s house. The textures are comforting and varied, offering a solid foundation to the more adventurous items on the board. It’s the culinary equivalent of a well-worn leather chair: familiar, reliable, and perfectly comfortable.
Essential Elements:
- Roasted garlic cloves
- Artisan sourdough baguette
- Salted whipped butter
How to make it
- Slice the top off a head of garlic, drizzle with olive oil, wrap in foil, and roast at 400°F (200°C) for 40 minutes until the cloves are soft enough to spread like jam.
- Whip the salted butter in a stand mixer for 5 minutes until it becomes pale and airy, increasing its volume and creating a cloud-like texture that spreads effortlessly.
- Slice the sourdough into thick diagonal wedges and toast them under a broiler for 60 seconds until the edges are charred and the center remains chewy.
- To serve, smear a generous amount of whipped butter on the warm bread and squeeze a roasted garlic clove over the top, using the back of a knife to incorporate the two into a savory paste.
How to Craft Sugary Delights for a Perfect Birthday Celebration

Why we love this
A birthday board isn’t complete without a section dedicated to pure, unadulterated sugary joy. These treats are bright, colorful, and unashamedly sweet, smelling of vanilla frosting and celebration. The texture is a party in itself—soft sponge, crunchy sprinkles, and creamy icing all working together in every mouthful. It captures the essence of a party, making even a small gathering feel like a major milestone. It’s the visual and literal ‘cherry on top’ of your 3-ingredient board creation.
Essential Elements:
- Vanilla sponge cake bites
- Rainbow sprinkles
- Powdered sugar glaze
How to make it
- Cut a pre-baked vanilla sponge cake into uniform 1-inch cubes; using a serrated knife is the best technique to ensure the delicate crumb doesn’t compress or tear.
- Create a simple glaze by whisking powdered sugar with a teaspoon of water or milk until it reaches the consistency of heavy cream; it should be thick enough to coat but thin enough to drip.
- Dip the top of each cake cube into the glaze, allowing the excess to run down the sides for an ‘iced’ look, then immediately dunk into a bowl of rainbow sprinkles before the glaze sets.
- Chill the bites in the refrigerator for 10 minutes to allow the glaze to harden into a sweet shell, then stack them in a festive pyramid on your board for maximum visual impact.
Why the 3-Ingredient Board is the Future of Hosting
As we move toward a world that values authenticity and ease over complicated perfection, the 3-ingredient food board stands as a testament to the beauty of simplicity. It proves that you don’t need a pantry full of exotic ingredients or a culinary degree to create something that brings people together and sparks joy. By focusing on quality, texture, and presentation, you can turn any ordinary evening into a viral-worthy event that nourishes both the body and the soul.