
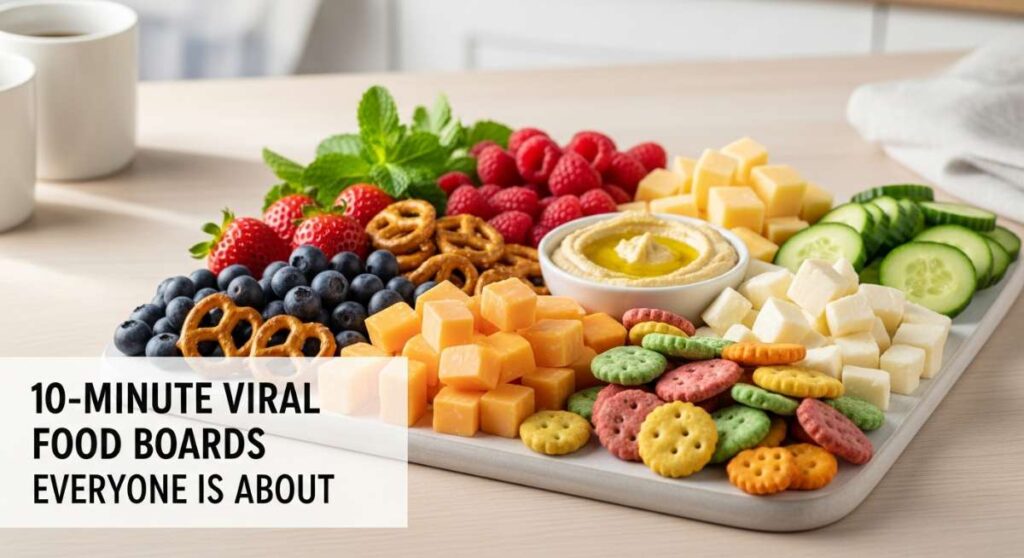
10-Minute Viral Food Boards Everyone is Talking About
There is something inherently magical about a shared meal that brings people together, but in our fast-paced world, finding the time to curate a complex spread can feel like a chore. That is why the rise of viral food boards has been such a breath of fresh air for home cooks and entertainers alike. They represent more than just a trend; they are an invitation to slow down, admire the colors of fresh ingredients, and enjoy the tactile pleasure of ‘grazing’ with the people we love most. Whether it is a rainy Tuesday or a celebratory Sunday, these boards transform simple ingredients into a visual and culinary feast.
I remember the first time I set out a themed board for a few friends—the way the room filled with laughter as everyone reached for their favorite bite, the clinking of glasses, and the effortless flow of conversation. It stripped away the formality of a sit-down dinner and replaced it with a warm, cozy atmosphere that lingered long after the last crumb was gone. Today, I am sharing my absolute favorite viral food board components, from pillowy scones to savory dumplings, that will help you create that same magic in your own home with minimal stress and maximum impact.
How to Bake Fluffy English Scones for a Dreamy Morning Tea

Why we love this
There is nothing quite like the aroma of freshly baked scones wafting through a sunlit kitchen on a quiet morning. These scones are the epitome of comfort, boasting a golden, slightly crisp exterior that gives way to a cloud-like, buttery interior that practically melts on your tongue. When split open, they release a delicate puff of steam, ready to be slathered with thick clotted cream and tart jam. The experience is sensory bliss—the crumbly texture, the subtle sweetness, and the warmth that radiates through your palms as you take that first, perfect bite.
Essential Elements:
- Self-rising flour (sifted for lightness)
- Cold unsalted butter (cubed)
- Caster sugar
- Whole milk
- A splash of vanilla extract
- Egg wash (for that golden sheen)
How to make it
- Begin by chilling your butter until it is ice-cold; this is the secret to a flaky lift. Combine your sifted flour and sugar in a large bowl.
- Using your fingertips, rub the cold butter into the flour mixture until it resembles coarse breadcrumbs. Work quickly to ensure the butter doesn’t melt from the heat of your hands.
- Create a well in the center and pour in the milk and vanilla. Use a flat-bladed knife to stir until a soft dough just begins to form. Overworking the dough will result in tough scones, so keep your touch light.
- Turn the dough onto a lightly floured surface and gently pat it down to a thickness of about 2.5cm. Do not use a rolling pin, as this can compress the air pockets.
- Use a round cutter to stamp out circles, pressing straight down without twisting. Arrange them closely on a lined baking tray so they help each other rise.
- Brush the tops with egg wash and bake at 220°C (425°F) for 10-12 minutes until they are tall and golden brown.
How to Whip Up Edible Cookie Dough for a Sweet Midnight Craving

Why we love this
We have all been there—standing in front of the fridge at midnight, craving the nostalgic, sugary comfort of raw cookie dough but knowing we shouldn’t eat it. This edible version is the ultimate indulgence, offering that gritty, sugary texture and rich vanilla-butter flavor we crave, without any of the risks. It’s dense, velvety, and studded with chocolate chips that provide a satisfying snap against the soft dough. Every spoonful is a trip back to childhood, capturing the essence of kitchen memories in a bowl that is entirely yours to enjoy.
Essential Elements:
- Heat-treated all-purpose flour
- Softened salted butter
- Brown sugar and granulated sugar
- Pure vanilla extract
- Milk or heavy cream
- Semi-sweet mini chocolate chips
How to make it
- First, you must heat-treat your flour to kill any bacteria. Spread it on a baking sheet and bake at 175°C (350°F) for about 5-7 minutes until it reaches 70°C (160°F). Let it cool completely before using.
- In a medium bowl, cream together the softened butter and both sugars using a hand mixer. You want the mixture to be pale and fluffy, which usually takes about 2-3 minutes of high-speed mixing.
- Add the vanilla extract and a tablespoon of milk, mixing until smooth. This provides the moisture needed to bind the dough without eggs.
- Gradually fold in the cooled, heat-treated flour. If the dough feels too dry or crumbly, add another tablespoon of milk until it reaches your desired ‘scoopable’ consistency.
- Finally, fold in the chocolate chips by hand. For the best experience, let the dough sit in the fridge for 20 minutes to allow the flavors to meld and the texture to firm up slightly.
How to Decorate Soft Sugar Cookies for an Elegant Garden Party
Why we love this
An elegant garden party demands treats that are as beautiful as the floral arrangements, and these decorated sugar cookies are the star of the show. The cookies themselves are soft and tender, with a hint of almond that lingers on the palate. But the real magic lies in the decoration—the smooth, royal icing creates a canvas for delicate pastel swirls and edible petals. Holding one feels like holding a small piece of art; the icing provides a gentle crunch that perfectly complements the buttery, give-away texture of the cookie underneath.
Essential Elements:
- Chilled sugar cookie dough
- Royal icing (stiff and flood consistencies)
- Gel food coloring (pastel shades)
- Fine-tipped piping bags
- Edible dried flowers or gold leaf
- Scribe tool or toothpick
How to make it
- Roll out your chilled dough to an even 1/4 inch thickness. Use floral or geometric cutters to create shapes, then bake until the edges are just barely set—do not let them brown, as we want a soft bite.
- Prepare your royal icing. Divide it into bowls and tint them with gel colors. You will need a ‘border’ consistency (like toothpaste) and a ‘flood’ consistency (like honey).
- Pipe a border around the edge of the cooled cookie with the stiff icing. Let it set for two minutes.
- Fill the center with the flood icing, using a scribe tool to push the icing into the corners and pop any tiny air bubbles for a glass-smooth finish.
- While the flood icing is still wet, you can drop small dots of a different color into it and drag a toothpick through them to create ‘marble’ or ‘heart’ patterns.
- Add your edible flowers or gold leaf accents while the icing is tacky, then let the cookies dry undisturbed for at least 6 hours to ensure a hard, stackable finish.
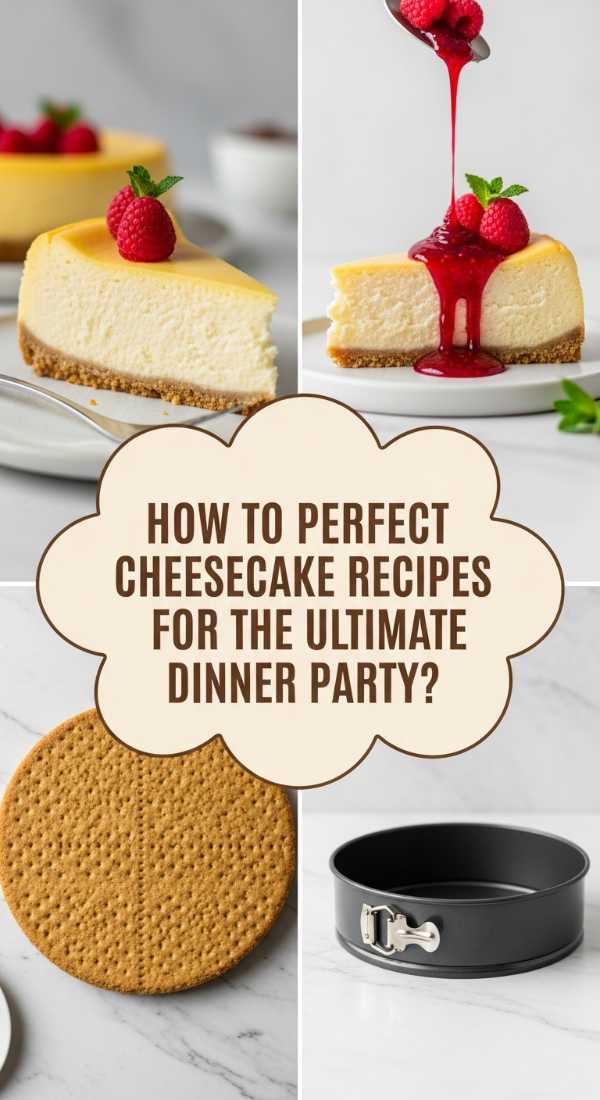
How to Perfect Creamy Cheesecake Recipes for the Ultimate Dinner Party
Why we love this
Cheesecake is the crown jewel of desserts, a sophisticated finale that leaves guests swooning. When done correctly, it is impossibly silky and dense, with a tanginess that cuts through the richness of the cream cheese. The contrast between the buttery, crunchy graham cracker crust and the ethereal, smooth filling is a masterclass in textures. As your fork glides through a slice, you can see the tight, creamy grain of the cake, promising a decadent experience that feels like a warm hug for your taste buds.
Essential Elements:
- Full-fat brick cream cheese (room temperature)
- Sour cream
- Granulated sugar
- Large eggs (room temperature)
- Graham cracker crumbs and melted butter
- Vanilla bean paste
How to make it
- Preheat your oven to 160°C (325°F). Mix the graham cracker crumbs with melted butter and press firmly into the bottom of a springform pan. Bake for 10 minutes to set the crust.
- In a large mixer, beat the room-temperature cream cheese and sugar on low speed. It is vital to use low speed to avoid incorporating too much air, which causes cracks.
- Add the sour cream and vanilla bean paste, scraping the sides of the bowl frequently to ensure there are no lumps.
- Add the eggs one at a time, mixing only until just combined. The mixture should look like thick, glossy ribbons.
- Wrap the outside of your pan in several layers of heavy-duty foil and place it in a large roasting pan. Fill the roasting pan with boiling water halfway up the sides of the cake pan (a bain-marie).
- Bake for 60-70 minutes until the edges are set but the center still has a slight jiggle. Turn off the oven and crack the door, letting the cheesecake cool inside for an hour to prevent sudden temperature drops.
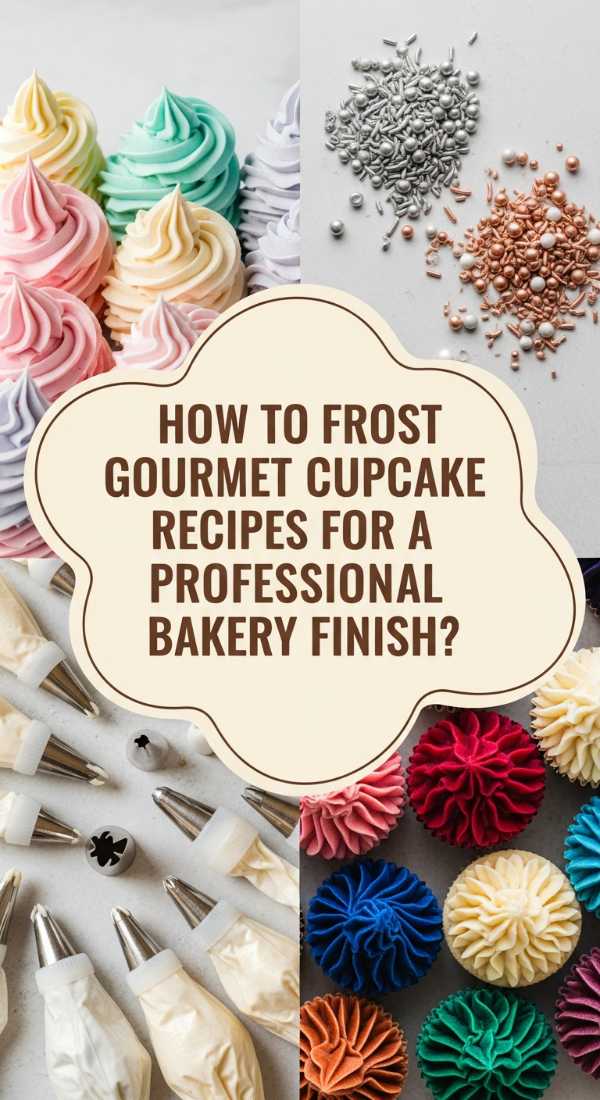
How to Frost Gourmet Cupcake Recipes for a Professional Bakery Finish

Why we love this
There is a specific joy in holding a perfectly frosted cupcake—it’s like a personal-sized celebration. The cake should be moist and springy, acting as the sturdy base for a towering swirl of velvety buttercream. When you take a bite, the frosting should be light and aerated, not overly greasy, dissolving instantly to coat your palate in sweetness. The visual appeal of a professional swirl, dusted with fine sprinkles or a drizzle of ganache, makes these feel like a high-end luxury rather than a simple home-baked treat.
Essential Elements:
- Freshly baked cupcakes (completely cooled)
- High-quality unsalted butter (slightly cool)
- Powdered sugar (double-sifted)
- Heavy cream
- Large star or round piping tips
- Sturdy piping bags
How to make it
- Whip your butter alone for at least 5 minutes using a paddle attachment until it is almost white and very voluminous. This aeration is what makes bakery frosting so light.
- Add sifted powdered sugar one cup at a time, mixing on low until incorporated, then high for a minute. Sifting is non-negotiable for a smooth finish.
- Add a splash of heavy cream and your flavorings. Beat on high until the frosting holds stiff peaks but feels like silk.
- Fit your piping bag with a large tip (like the Wilton 2D or 1M). Fill the bag, ensuring there are no air pockets by squeezing the frosting toward the tip.
- Hold the bag vertically over the center of the cupcake. Starting from the outside edge, pipe in a continuous circular motion, spiraling inward and upward.
- Release pressure as you reach the peak and pull away quickly to create a sharp point. Garnish immediately while the frosting is fresh.
How to Discover Unique Recipe Ideas for a Cozy Weekend In

Why we love this
A cozy weekend in is the perfect time to experiment with ‘slow food’—those recipes that require a bit more time but offer a massive emotional payoff. We love this approach because it turns cooking into an activity rather than a chore. Imagine the sound of a simmering pot of homemade jam or the rhythmic kneading of bread dough while music plays in the background. It’s about the earthy scents of herbs, the vibrant colors of seasonal produce, and the satisfaction of creating something entirely from scratch that fills your home with warmth and life.
Essential Elements:
- Seasonal fruits or vegetables
- Fresh herbs (rosemary, thyme, basil)
- High-quality pantry staples (flour, olive oil, spices)
- A reliable cast iron skillet or Dutch oven
- Patience and a creative mindset
How to make it
- Start by choosing a theme, such as ‘Rustic Mediterranean’ or ‘Autumn Harvest.’ This helps narrow down your ingredient list and creates a cohesive flavor profile.
- Focus on a ‘centerpiece’ dish that takes time, like a slow-roasted tomato galette or a braised short rib. Prep your ingredients meticulously, enjoying the process of chopping and measuring.
- Use ‘layering’ techniques to build flavor. For a savory dish, sear your proteins first to get a deep brown crust (the Maillard reaction), then deglaze the pan with wine or stock to capture all those savory bits.
- Incorporate fresh elements at the end—a squeeze of lemon, a handful of fresh herbs, or a drizzle of infused oil—to brighten the heavy, cooked flavors.
- Set the scene while the food cooks. Clear the clutter, light a candle, and prepare a beautiful board or platter to serve your creation on.
- Serve the dish ‘family style’ right in the middle of the table, encouraging everyone to dig in and share the experience.
How to Flip Golden Pancake Recipes for the Ultimate Sunday Brunch
Why we love this
Sunday brunch isn’t complete without a stack of golden, lacy-edged pancakes. There is a nostalgic comfort in the sound of batter hitting a hot griddle and the anticipation as tiny bubbles begin to surface. These pancakes are light as air, with a tender crumb that eagerly soaks up maple syrup. The smell of caramelizing sugar and butter filling the air is the universal signal to gather around the table. Each bite is a perfect balance of sweet and savory, a soft and fluffy cloud that makes the world feel a little bit brighter.
Essential Elements:
- Buttermilk (for tang and lift)
- Melted butter
- Whisked egg whites (the secret to fluffiness)
- All-purpose flour, baking powder, and soda
- A non-stick griddle or heavy skillet
How to make it
- Mix your dry ingredients in one bowl and your wet ingredients (buttermilk, yolks, melted butter) in another. The key is to keep them separate until the last second.
- In a clean bowl, whisk your egg whites until they form soft peaks. Folding these in at the end is what creates that ‘diner-style’ height.
- Combine the wet and dry ingredients, stirring with a spatula just until the flour streaks disappear. Lumps are your friend here—do not overmix, or you’ll develop gluten and make the pancakes tough.
- Gently fold in the whipped egg whites. Heat your griddle to medium-low. If it’s too hot, the outside will burn before the inside is cooked.
- Grease the pan lightly with butter. Pour 1/4 cup of batter per pancake. Wait for the bubbles on the surface to pop and stay open; this is the visual cue that it’s time to flip.
- Flip with a confident, quick motion. Cook for another 60-90 seconds until golden. Serve immediately on a pre-warmed plate to maintain that fluffy texture.
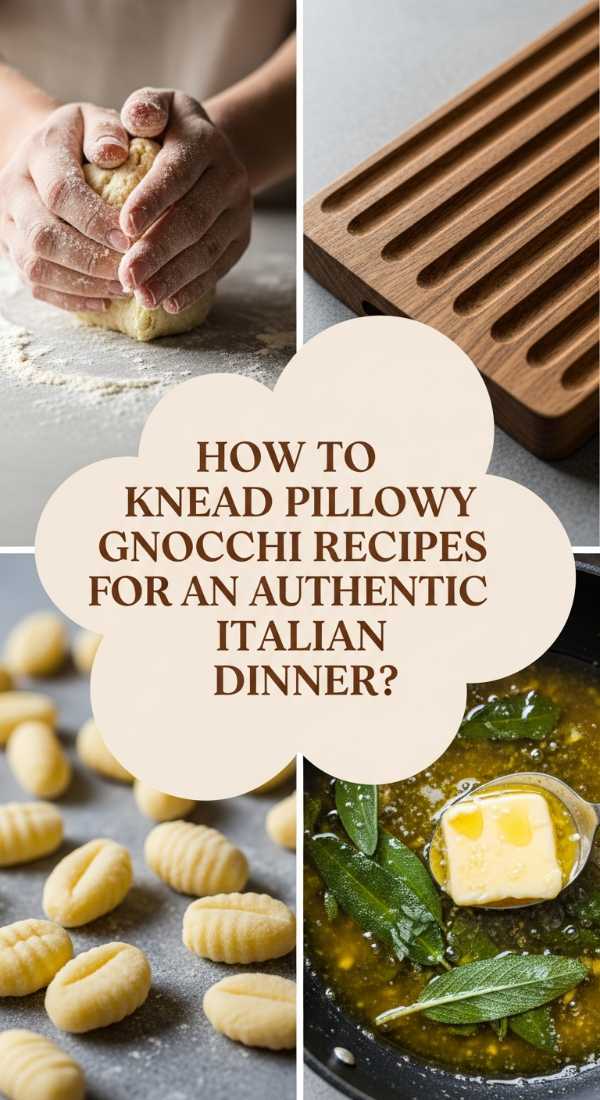
How to Knead Pillowy Gnocchi Recipes for an Authentic Italian Dinner
Why we love this
Making gnocchi by hand is a meditative practice that results in ‘little pillows’ of pure joy. Unlike store-bought versions which can be rubbery, homemade gnocchi are incredibly delicate, almost melting away as soon as they hit your tongue. They carry the subtle, earthy flavor of roasted potatoes and the richness of parmesan. There is a deep satisfaction in the tactile process of rolling the dough and seeing the characteristic ridges take shape—ridges designed perfectly to catch every drop of a sage butter or pomodoro sauce.
Essential Elements:
- Starchy potatoes (like Russets or Yukon Golds)
- ’00’ flour or all-purpose flour
- Egg yolk (for richness)
- Fine sea salt
- A ricer or food mill
How to make it
- Bake your potatoes on a bed of salt instead of boiling them. This keeps them dry, which is the most important factor for light gnocchi. Once tender, peel them while hot.
- Pass the hot potatoes through a ricer onto a clean work surface. Let the steam escape for a few minutes; excess moisture is the enemy.
- Drizzle the egg yolk over the potatoes and sprinkle with salt. Sift the flour over the top. Use a bench scraper to ‘chop’ the flour into the potatoes gently.
- Knead the dough very lightly—just enough to bring it together into a soft, non-sticky ball. If you over-knead, the gnocchi will become chewy.
- Cut the dough into sections and roll into long ropes about 1/2 inch thick. Cut the ropes into small nuggets.
- Roll each nugget over a gnocchi board or the back of a fork to create ridges. Boil in salted water; they are done the second they float to the surface.
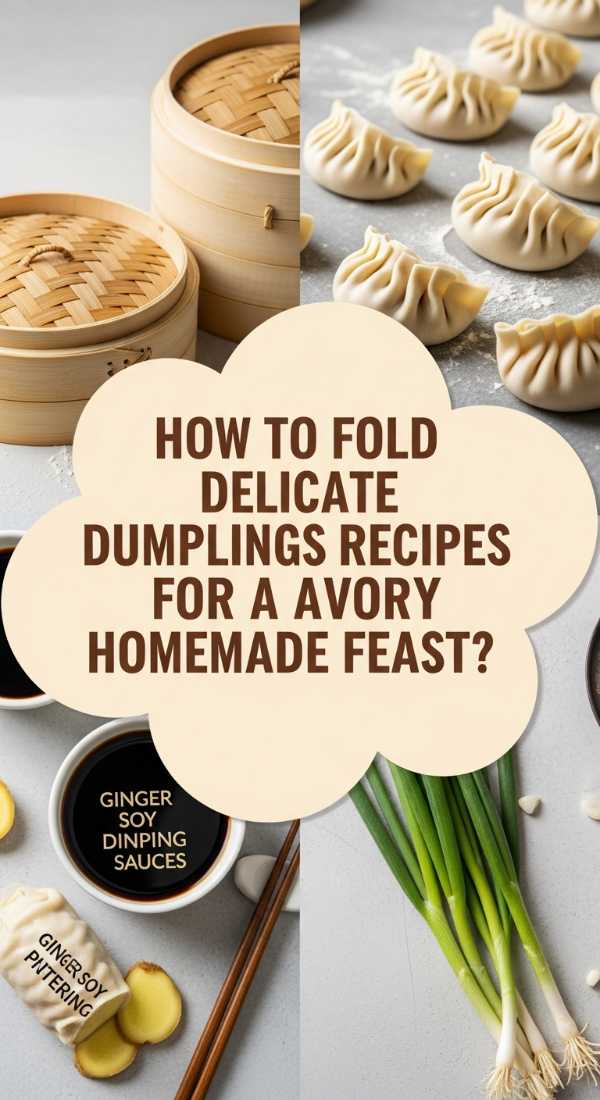
How to Fold Delicate Dumplings Recipes for a Savory Homemade Feast
Why we love this
Dumplings are little parcels of wonder, packing an explosion of savory juices and aromatic fillings into a thin, translucent wrapper. The contrast between the soft, steamed top and the crispy, golden-brown ‘potsticker’ bottom is addictive. As you bite into one, the ginger and garlic scents hit you first, followed by the rich savory filling. They are the ultimate communal food—best made in a group where everyone takes a turn folding, and even better when shared from a large bamboo steamer in the center of the table.
Essential Elements:
- Dumpling wrappers (round)
- Ground protein (pork, shrimp, or tofu)
- Finely minced cabbage (salted and squeezed dry)
- Aromatics: Ginger, garlic, and green onions
- Soy sauce and toasted sesame oil
- Cornstarch (for thickening and crispy bottoms)
How to make it
- Prepare the filling by mixing your protein, aromatics, and seasonings. Ensure the cabbage is bone-dry after salting to prevent a soggy filling. Mix in one direction until the meat becomes tacky and emulsified.
- Place a teaspoon of filling in the center of a wrapper. Moisten the edges with a finger dipped in water.
- Fold the wrapper in half and pinch at the top. Create 3-4 pleats on one side, pressing them firmly against the flat back side to create a crescent shape.
- Heat a tablespoon of oil in a non-stick skillet over medium-high heat. Arrange the dumplings in a circular pattern and fry for 2 minutes until the bottoms are deeply golden.
- Pour in about 1/4 cup of water and immediately cover with a tight-fitting lid. This steams the tops and cooks the filling through (about 5 minutes).
- Remove the lid and let the remaining water evaporate. The bottoms will re-crisp. Serve with a dipping sauce of black vinegar, soy sauce, and chili oil.
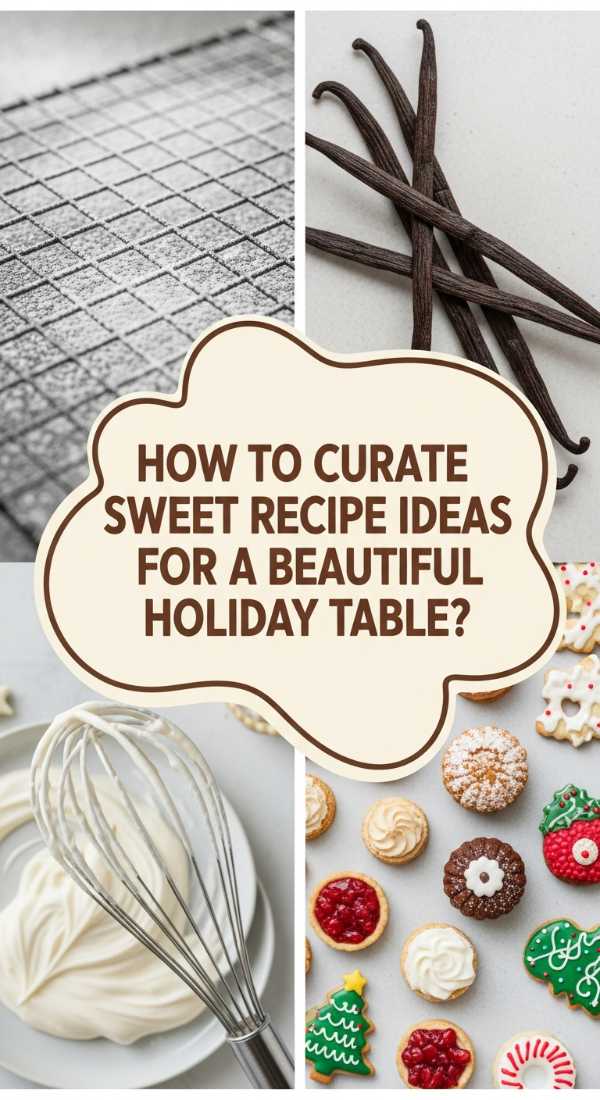
How to Curate Sweet Recipe Ideas for a Beautiful Holiday Table
[IMAGE_10]
Why we love this
The holiday table is where memories are made, and a curated board of sweets acts as the stunning centerpiece of the celebration. It’s an explosion of festive colors—deep reds, snowy whites, and glints of gold. We love this because it offers variety; instead of one heavy dessert, guests can sample a bit of everything, from peppermint bark to spiced truffles and glazed fruits. The textures range from the snap of tempered chocolate to the chew of gingerbread, creating a playful and indulgent end to a holiday feast that feels truly magical.
Essential Elements:
- Assorted homemade cookies (gingerbread, linzer)
- Chocolate truffles and fudge
- Fresh berries and sugared cranberries
- Candied nuts (pecans or walnuts)
- Festive garnishes: Rosemary sprigs, cinnamon sticks, and holly leaves
How to make it
- Start with your largest items first, like a bowl of chocolate mousse or a small cake, placing them off-center on a large wooden or marble board to create a focal point.
- Group your homemade cookies in ‘S’ shapes or fans across the board to create a sense of movement and flow.
- Fill small ramekins with ‘wet’ items like honey, chocolate ganache, or fruit preserves to prevent them from making the dry cookies soggy.
- Incorporate various heights. Use small pedestals or even upside-down bowls covered with napkins to elevate certain treats, making the board look more professional and abundant.
- Fill in every single gap. A viral board looks best when it is ‘tessellated’—use smaller items like candied nuts, berries, or chocolate chips to plug the holes between larger items.
- Add the finishing aromatic touches. Tucking in sprigs of fresh mint or rosemary not only adds a pop of green but also ensures the board smells as festive as it looks.
Creating Your Own Viral Food Board Legacy
Whether you are hosting a grand holiday event or just looking to elevate a quiet evening at home, these recipes provide the building blocks for unforgettable food boards. The beauty of the ‘board’ trend is that it celebrates imperfection and variety. It encourages us to play with our food again—to dip, to share, and to savor. So, grab your favorite platter, pick a few of these recipes, and start creating. Your kitchen is about to become the most popular ‘restaurant’ in town!
Frequently Asked Questions
How do I keep my food boards fresh if I prep them in advance?
The key is to keep components separate until serving. Store moist items like fruit or dips in airtight containers, and keep crispy items like crackers or cookies in a cool, dry place. Assemble the board no more than 30 minutes before guests arrive to maintain the best textures.
What is the best way to clean a wooden food board?
Always hand wash your wooden boards with mild soap and warm water. Never soak them or put them in the dishwasher, as this causes warping. Rub them with food-grade mineral oil once a month to keep the wood hydrated and food-safe.