
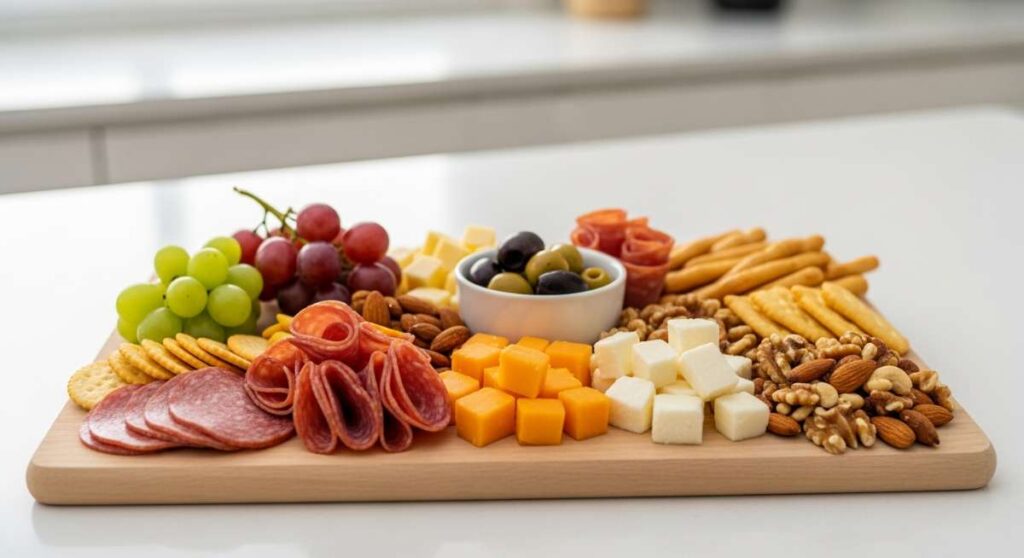
There is something magical about the way a simple board of food can turn an ordinary evening into an unforgettable gathering. In a world that often feels rushed and disconnected, the 10-minute food board has emerged as the ultimate hero of hospitality, proving that you don’t need hours in the kitchen to create a moment of genuine beauty and connection. It’s about more than just sustenance; it’s about the art of the assembly and the joy of seeing your favorite people reach across the table to share a bite of something crafted with love.
I remember the first time I set out a viral-inspired board for my friends—the immediate gasp of delight followed by a flurry of photos was enough to convince me that this trend is here to stay. Whether it’s a rainy Tuesday or a celebratory weekend brunch, these recipes are designed to be the stars of your spread. They are approachable, visually stunning, and packed with the kind of flavors that make you want to close your eyes and savor every single morsel.
How to make matcha latte?
Why we love this
A perfectly crafted matcha latte is a meditative experience in a cup, offering a vibrant, earthy depth that grounds your senses while providing a gentle, sustained energy boost. There is something deeply satisfying about watching the vivid green powder dissolve into a frothy, velvet-like liquid that smells of fresh grass and toasted nuts. The warmth of the mug against your palms and the creamy texture of the milk create a comforting ritual that feels like a warm hug for your soul, making it the ultimate centerpiece for a morning-themed food board.
Ingredients
- 1-2 tsp ceremonial grade matcha powder
- 2 oz hot water (about 175°F or 80°C)
- 1 cup oat milk or almond milk
- 1 tsp honey or maple syrup (optional)
- A pinch of cinnamon for dusting
How to make it
- Begin by sifting your matcha powder through a fine-mesh strainer into a wide-mouthed bowl or chawan; this is crucial for removing any clumps and ensuring a perfectly smooth, lump-free texture.
- Heat your water to exactly 175°F (avoid boiling water as it will scald the delicate tea and leave a bitter aftertaste), then pour it over the sifted powder.
- Using a traditional bamboo whisk or a handheld electric frother, whisk the mixture in a vigorous ‘W’ or ‘M’ motion for about 30-60 seconds until a thick, frothy layer of tiny bubbles forms on the surface.
- In a separate small saucepan or milk frother, heat your milk of choice until it is steaming but not boiling, then froth it until it reaches a micro-foam consistency.
- Pour the bright green matcha concentrate into your favorite mug, stir in your sweetener if using, and then slowly pour the frothed milk over the top, finishing with a dusting of cinnamon for a fragrant, beautiful finish.
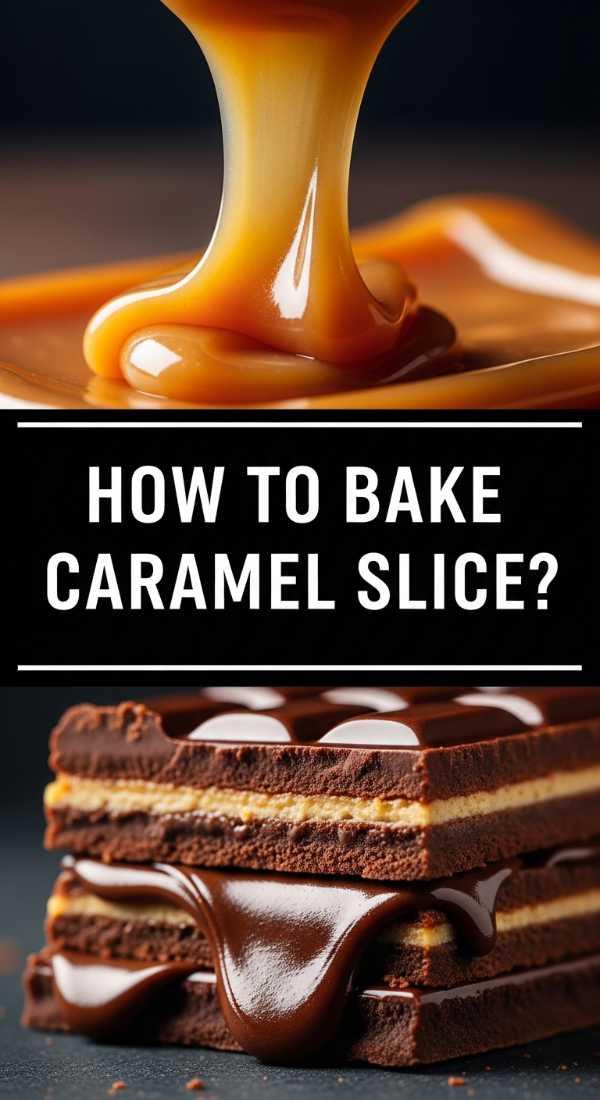
How to bake caramel slice?

Why we love this
The caramel slice is the triple threat of the dessert world, offering a symphony of textures that range from the buttery crunch of the shortbread base to the silky, molten gooeyness of the salted caramel center. Topped with a snap of dark chocolate that cracks satisfyingly under your teeth, every bite is a decadent exploration of sweetness balanced by a hint of salt. It’s the kind of treat that fills the kitchen with the aroma of toasted sugar and vanilla, evoking childhood memories of bake sales and cozy afternoons spent indulging in life’s simplest pleasures.
Ingredients
- 1 cup plain flour
- 1/2 cup desiccated coconut
- 1/2 cup brown sugar
- 125g melted butter
- 1 can sweetened condensed milk
- 2 tbsp golden syrup
- 60g butter (for caramel)
- 200g dark chocolate melts
- 1 tbsp coconut oil
How to make it
- Preheat your oven to 350°F (180°C) and line a square baking tin with parchment paper, ensuring there is some overhang for easy removal later.
- Combine the flour, coconut, brown sugar, and melted butter in a bowl, mixing until a sandy dough forms, then press it firmly and evenly into the base of the tin using the back of a spoon.
- Bake the base for 12-15 minutes or until it just begins to turn a pale golden brown around the edges, then remove from the oven and set aside to cool slightly.
- In a small saucepan over medium-low heat, combine the condensed milk, golden syrup, and 60g of butter, whisking constantly for 8-10 minutes until the mixture thickens and turns a deep, luscious amber color (be careful not to let the bottom burn!).
- Pour the caramel over the baked base and return to the oven for another 10 minutes to set, then let it cool completely in the fridge for at least an hour.
- Melt the chocolate and coconut oil together in the microwave in 30-second bursts, stir until glossy, pour over the chilled caramel layer, and refrigerate until the chocolate is firm before slicing with a hot knife.
How to make apple crumble?

Why we love this
Apple crumble is the epitome of rustic comfort food, a dish that transforms humble fruit into a bubbling, golden masterpiece of warmth and spice. The contrast between the softened, tart apples infused with cinnamon and the buttery, crumbly topping that shatters with every spoonful is truly unparalleled. As it bakes, the kitchen is perfumed with the intoxicating scent of caramelized fruit and toasted oats, creating an atmosphere of cozy contentment that draws everyone to the table for a shared experience of pure, unadulterated sweetness.
Ingredients
- 6 Granny Smith apples, peeled and sliced
- 1/2 cup granulated sugar
- 1 tbsp ground cinnamon
- 1 cup all-purpose flour
- 1/2 cup rolled oats
- 1/2 cup packed brown sugar
- 1/2 cup cold unsalted butter, cubed
- A pinch of nutmeg
How to make it
- Preheat your oven to 375°F (190°C) and grease a deep baking dish with butter to ensure the fruit juices don’t stick to the sides.
- Toss the sliced apples with the granulated sugar, cinnamon, and a pinch of nutmeg in a large bowl until every slice is evenly coated, then spread them in an even layer in the prepared dish.
- In a separate bowl, combine the flour, oats, and brown sugar; add the cold, cubed butter and use your fingertips or a pastry cutter to rub the butter into the dry ingredients until the mixture resembles coarse breadcrumbs with some pea-sized lumps.
- Sprinkle the crumble mixture generously over the apples, making sure to cover the fruit entirely so that the steam from the apples cooks the bottom of the topping.
- Bake for 35-45 minutes until the topping is a deep golden brown and the apple juices are bubbling up around the edges, indicating the fruit is tender and the sugars have caramelized perfectly.
How to roast pumpkin soup?

Why we love this
There is nothing quite like a bowl of roasted pumpkin soup to soothe the soul on a chilly evening, its velvety texture and vibrant orange hue promising instant warmth. The process of roasting the pumpkin brings out a natural, nutty sweetness that you simply cannot achieve by boiling alone, creating a depth of flavor that is both sophisticated and deeply comforting. Enhanced with aromatic garlic and herbs, each spoonful is a rich, creamy journey that feels decadent yet wholesome, making it the perfect dipping companion for crusty bread on a harvest food board.
Ingredients
- 1 medium pumpkin (Sugar or Butternut), peeled and cubed
- 1 large onion, quartered
- 4 cloves garlic, skin on
- 3 tbsp olive oil
- 3 cups vegetable broth
- 1/2 cup heavy cream or coconut milk
- Salt, pepper, and nutmeg to taste
How to make it
- Preheat your oven to 400°F (200°C) and toss the pumpkin cubes, onion quarters, and garlic cloves in olive oil, salt, and pepper on a large baking sheet.
- Roast the vegetables for 30-40 minutes, tossing halfway through, until the pumpkin is soft and caramelized on the edges and the garlic is tender.
- Squeeze the roasted garlic out of its skin and transfer it along with the pumpkin and onion into a high-speed blender or a large pot if using an immersion blender.
- Add the vegetable broth gradually while blending on high until the soup is completely smooth and reaches your desired consistency; you want a thick, silky pour.
- Pour the mixture back into a pot over medium heat, stir in the heavy cream and a pinch of nutmeg, and simmer for 5 minutes to allow the flavors to meld, adjusting the seasoning before serving hot with a swirl of cream.
How to make healthy snacks?
Why we love this
Healthy snacks on a board are all about variety and vibrancy, offering a kaleidoscope of colors and textures that keep your energy levels steady throughout the day. From the satisfying crunch of raw vegetables to the creamy richness of homemade hummus, these bites prove that nourishing your body can be an exciting sensory experience. We love the way a well-balanced snack board feels like a treasure hunt for the palate, blending salty, sweet, and savory elements in a way that feels indulgent without the sugar crash, providing the perfect fuel for a busy lifestyle.
Ingredients
- 1 can chickpeas (rinsed and dried)
- 2 tbsp olive oil
- 1 tsp smoked paprika
- Assorted raw veggies (carrots, cucumbers, bell peppers)
- 1/2 cup Greek yogurt
- 1 tsp dried dill and lemon juice
How to make it
- To make crispy roasted chickpeas, preheat your oven to 400°F (200°C) and ensure your rinsed chickpeas are completely dry by patting them with a paper towel.
- Toss the chickpeas with 1 tablespoon of olive oil and smoked paprika, then roast them on a tray for 20-25 minutes until they are crunchy and golden, shaking the pan occasionally for even cooking.
- While the chickpeas roast, prepare your dip by whisking together the Greek yogurt, lemon juice, dried dill, and a pinch of salt until smooth and aerated.
- Slice your raw vegetables into uniform sticks or batons, ensuring they are sturdy enough to act as vessels for the dip.
- Arrange the roasted chickpeas in a small bowl, place the yogurt dip in another, and fan the colorful vegetables around them on your board for a visually stunning and nutritionally dense snack spread.
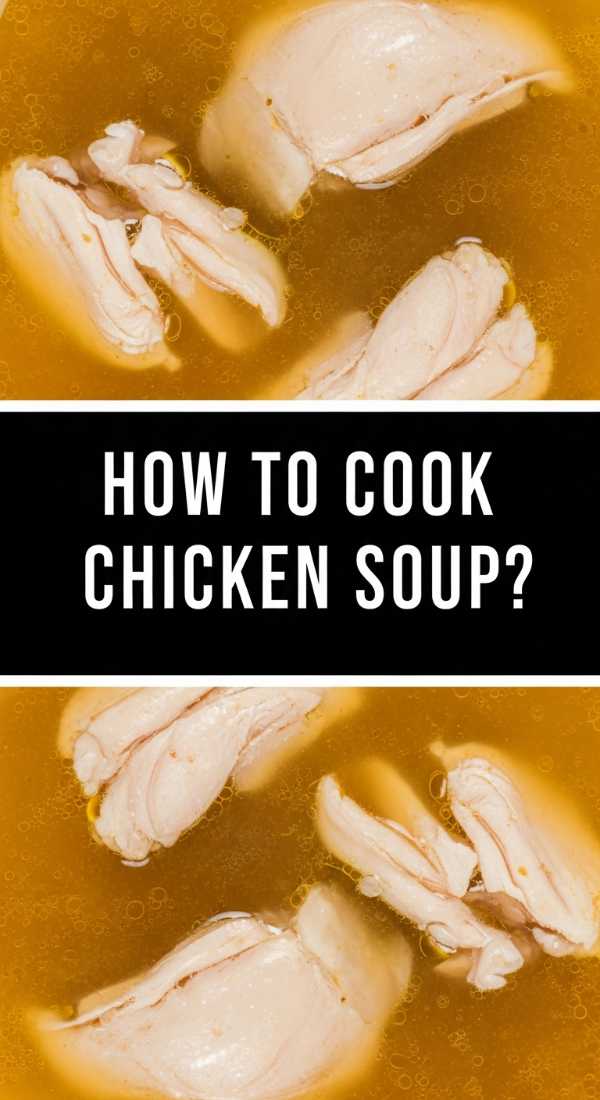
How to cook chicken soup?

Why we love this
Chicken soup is the ultimate culinary medicine, a timeless classic that carries the weight of tradition and the warmth of a thousand memories. The aroma of a simmering pot filled with tender chicken and aromatic vegetables is enough to make any house feel like a home, offering a sense of security and healing with every sip. The broth is clear and golden, packed with the essence of slow-cooked poultry and fresh herbs, making it a soothing, lightweight addition to a family-style food board that invites everyone to slow down and nourish themselves from the inside out.
Ingredients
- 1 whole chicken or 4 large chicken thighs
- 2 carrots, sliced
- 2 stalks celery, sliced
- 1 onion, diced
- 3 cloves garlic, smashed
- 8 cups water or chicken stock
- Fresh parsley and thyme
- Salt and peppercorns
How to make it
- In a large heavy-bottomed stockpot, sear the chicken skin-side down in a splash of oil over medium-high heat for 5 minutes until golden to develop a rich base flavor.
- Remove the chicken temporarily and add the diced onion, carrots, and celery (the mirepoix), sautéing for about 8 minutes until the vegetables have softened and the onions are translucent.
- Return the chicken to the pot, add the garlic, parsley, thyme, and peppercorns, then cover completely with water or stock.
- Bring the liquid to a gentle boil, then immediately reduce the heat to a low simmer; use a spoon to skim off any foam that rises to the top to keep the broth crystal clear.
- Simmer for 45-60 minutes until the chicken is falling off the bone, then remove the chicken to shred the meat, discard the bones, and return the meat to the pot for a final 5-minute simmer with a generous pinch of salt.
How to make beef tacos?
Why we love this
Beef tacos bring an explosion of festive energy to any table, characterized by the sizzle of spiced meat and the zesty brightness of fresh toppings. We love the communal nature of tacos, where the combination of savory, seasoned beef and the cooling crunch of cabbage creates a balanced bite that hits every taste bud. The smell of cumin and chili powder wafting through the air is an instant signal that the party has started, offering a customizable and interactive eating experience that makes them a quintessential star of any viral-worthy food board.
Ingredients
- 1 lb ground beef (80/20 for best flavor)
- 1 tbsp taco seasoning (cumin, chili powder, garlic powder)
- 1/2 cup tomato sauce
- Small corn or flour tortillas
- Toppings: Shredded lettuce, lime wedges, cilantro, pickled onions
How to make it
- Place a large skillet over medium-high heat and add the ground beef, using a wooden spoon to break it into small, uniform crumbles as it browns.
- Cook the beef until it is completely browned and no pink remains, then carefully drain the excess fat from the pan to ensure the tacos aren’t greasy.
- Add the taco seasoning and the tomato sauce to the pan, stirring well to coat the meat, then reduce the heat to low and simmer for 5-7 minutes until the sauce has thickened and the flavors are deeply infused.
- While the meat simmers, char your tortillas by placing them directly over a low gas flame for 10-15 seconds per side using tongs until they are soft and slightly blackened at the edges.
- Assemble by spooning the hot beef into the center of the warm tortillas and immediately topping with fresh cilantro, a squeeze of lime, and pickled onions for a hit of acidity that cuts through the richness of the beef.
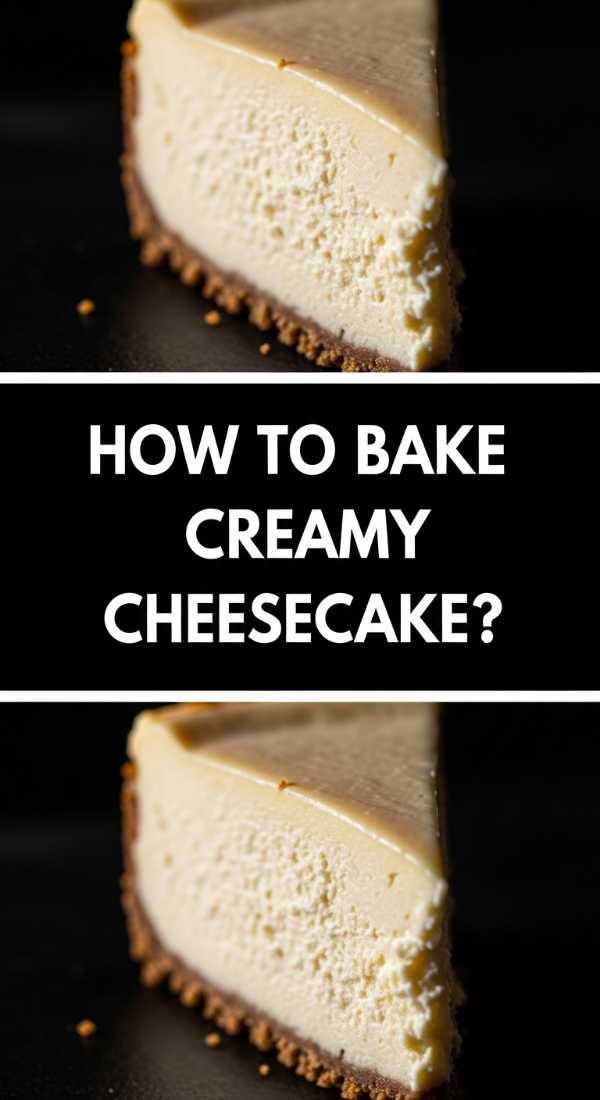
How to bake creamy cheesecake?

Why we love this
A truly creamy cheesecake is a triumph of balance—rich and indulgent yet light enough to melt on the tongue like a sweet cloud. Its appearance on a food board is always a showstopper, with its perfectly smooth, pale surface and thick, buttery graham cracker crust. We love the sophisticated tang of the cream cheese paired with a hint of vanilla, creating a flavor profile that is timeless and elegant. It is the kind of dessert that demands your full attention, encouraging slow, mindful bites that celebrate the luxury of high-quality ingredients and patient baking.
Ingredients
- 1.5 cups graham cracker crumbs
- 1/2 cup melted butter
- 24 oz cream cheese, room temperature
- 1 cup granulated sugar
- 1 cup sour cream
- 3 large eggs
- 1 tbsp vanilla extract
How to make it
- Preheat your oven to 325°F (160°C) and wrap the outside of a 9-inch springform pan in two layers of heavy-duty aluminum foil to prevent water from seeping in during the water bath.
- Mix the graham cracker crumbs and melted butter, press them firmly into the bottom of the pan, and bake for 10 minutes to set the crust before cooling.
- In a large bowl, beat the room-temperature cream cheese and sugar on medium speed until completely smooth and free of lumps; it is vital that the cheese is soft to avoid a grainy texture.
- Add the sour cream and vanilla, then incorporate the eggs one at a time on low speed, mixing just until combined to avoid whipping too much air into the batter, which causes cracking.
- Pour the batter over the crust, place the pan in a larger roasting tray filled with 1 inch of hot water, and bake for 60-70 minutes until the edges are set but the center still has a slight jiggle; turn off the oven and leave the door cracked for an hour to cool slowly before refrigerating overnight.
How to make fluffy pancakes?
Why we love this
Fluffy pancakes are the ultimate weekend luxury, standing tall in a stack that promises a soft, airy interior and perfectly golden, crisp edges. There is a specific joy in watching the batter bubble on the griddle, a visual cue that breakfast is almost ready. Drizzled with amber maple syrup and topped with a pat of melting butter, they provide a comforting, neutral base that pairs beautifully with everything from fresh berries to crispy bacon, making them a versatile and beloved anchor for any breakfast-style food board.
Ingredients
- 1.5 cups all-purpose flour
- 3.5 tsp baking powder
- 1 tbsp white sugar
- 1.25 cups milk
- 1 egg
- 3 tbsp melted butter
- 1 tsp vanilla extract
How to make it
- In a large bowl, whisk together the flour, baking powder, salt, and sugar until well combined, creating a well in the center of the dry ingredients.
- In a separate jug, whisk the egg, milk, melted butter, and vanilla, then pour the wet mixture into the well of the dry ingredients.
- Stir the mixture gently with a whisk or spatula just until the flour disappears; it is crucial to leave small lumps in the batter, as over-mixing will develop gluten and result in tough, flat pancakes rather than fluffy ones.
- Heat a non-stick skillet over medium heat and lightly grease with a tiny amount of butter or oil, then pour 1/4 cup of batter per pancake onto the hot surface.
- Wait until large bubbles form on the surface and the edges look dry and set (about 2-3 minutes), then flip carefully and cook for another 1-2 minutes until golden brown on both sides.
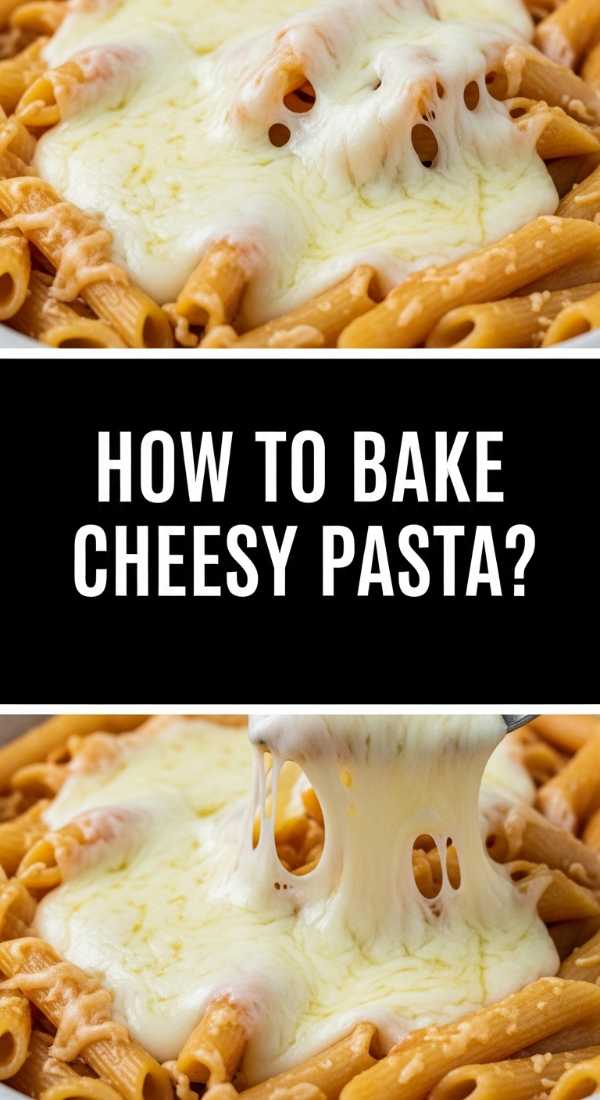
How to bake cheesy pasta?
[IMAGE_10]
Why we love this
Cheesy pasta is the ultimate crowd-pleaser, a dish that radiates warmth and indulgence with its strings of molten cheese and perfectly al dente noodles. There is something primal and satisfying about the combination of a rich, creamy sauce and a golden-brown, bubbly cheese crust that has been crisped to perfection in the oven. It’s the ultimate comfort food that brings a sense of abundance to your food board, inviting everyone to dig in and enjoy the gooey, savory goodness that feels like home in every single bite.
Ingredients
- 1 lb dried pasta (Rigatoni or Macaroni)
- 4 tbsp butter
- 1/4 cup all-purpose flour
- 3 cups whole milk
- 4 cups shredded sharp cheddar or Gruyere
- 1/2 cup grated Parmesan
- 1 tsp garlic powder and smoked paprika
How to make it
- Boil a large pot of heavily salted water and cook your pasta for 2 minutes less than the package directions for ‘al dente,’ as it will continue to cook and absorb sauce in the oven.
- In a large saucepan, melt the butter over medium heat, then whisk in the flour to create a roux, cooking for 2 minutes until it smells slightly nutty but hasn’t browned.
- Slowly whisk in the milk a little at a time, ensuring each addition is smooth before adding more, then simmer until the sauce is thick enough to coat the back of a spoon.
- Remove the sauce from the heat and stir in 3 cups of the shredded cheese, garlic powder, and paprika until melted and glossy; then fold in the cooked pasta until every tube is filled with cheese sauce.
- Transfer to a baking dish, top with the remaining cheese and Parmesan, and bake at 400°F (200°C) for 15-20 minutes until the top is bubbling and has developed a stunning, crispy golden crust.
The Art of the Final Board
Assembling these dishes into one cohesive food board is where the magic truly happens. Start by placing your larger bowls—like the pumpkin or chicken soup—as anchors, then fill in the gaps with the pancakes, tacos, and slices of cheesecake. Use the healthy snacks like veggie sticks and roasted chickpeas to add pops of color and fill the small crevices. The key is to create a sense of abundance; let things overlap, add some fresh herbs for garnish, and don’t be afraid to mix sweet and savory. Your guests will be drawn to the variety, and you’ll find that the best conversations happen when everyone is gathered around this beautiful, edible centerpiece.
Frequently Asked Questions
Can I make these dishes in advance? Yes! Many elements like the caramel slice, cheesecake, and soup can be prepared a day ahead. Just reheat the savory items and assemble the board right before serving.
How do I keep the hot items warm on the board? Use thick wooden boards which retain heat better than slate, or keep smaller portions of the hot dishes in pre-warmed ceramic bowls placed directly on the board.
What is the best way to clean a wooden food board? Always hand wash with mild soap and warm water. Never soak it or put it in the dishwasher, and occasionally rub it with food-grade mineral oil to keep the wood from cracking.