
Viral Food Board Hacks Every Host Needs to Know
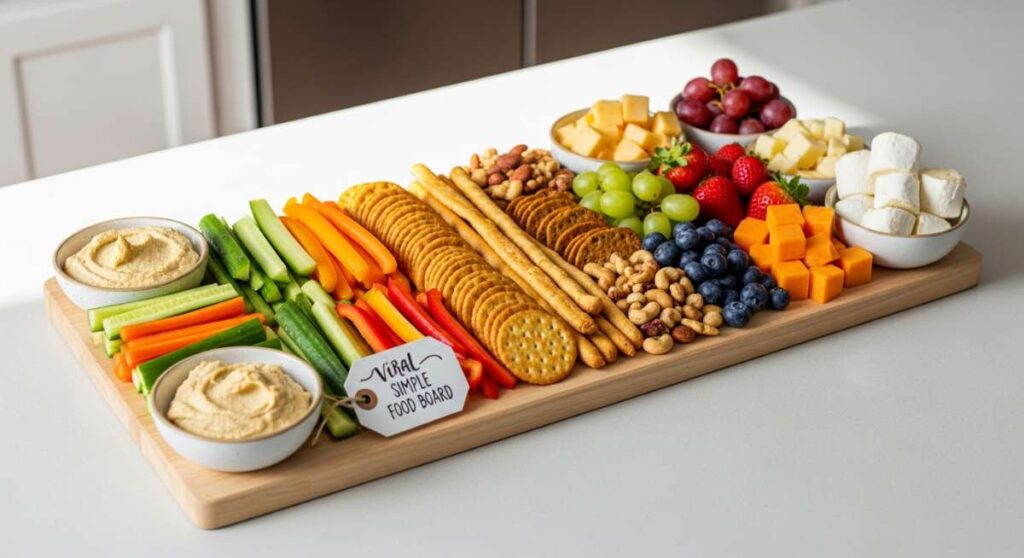
There is something undeniably magical about the moment your guests walk into the room and see a sprawling, colorful food board waiting for them. It’s more than just a snack; it’s a centerpiece that sparks conversation and invites everyone to lean in and share. I remember the first time I traded a traditional plated dessert for a ‘Viral Simple Food Board’—the atmosphere in the room shifted instantly from formal to festive, and I knew I’d never go back to the old way of hosting.
The secret to a viral-worthy board isn’t spending hours in the kitchen, but rather mastering these quick, high-impact treats that look like they came from a boutique bakery. Whether you’re hosting a cozy movie night or a big birthday bash, these hacks will help you assemble a dessert spread that is as beautiful as it is delicious. Let’s dive into the sweet treats that will make your next gathering the talk of the town!
How to make no bake chocolate bars?
Why we love this
These bars are the ultimate indulgence for when you want a professional-grade treat without ever touching the oven. Imagine the sound of a thick chocolate shell snapping under your teeth, giving way to a dense, velvety center that melts almost instantly on the tongue. The rich aroma of high-quality cocoa fills the air as you slice them, and the subtle hint of sea salt on top provides that perfect savory contrast. It feels like a luxury confection, yet the simplicity of the process makes it a stress-free staple for any busy host.
Ingredients
- 2 cups semi-sweet chocolate chips
- 1/2 cup creamy nut butter (almond or peanut)
- 1/4 cup maple syrup
- 1 teaspoon vanilla extract
- Pinch of flaky sea salt
- 1/2 cup crushed pretzels or graham crackers
How to make it
- Line an 8×8 inch baking pan with parchment paper, leaving a slight overhang on the sides to make removal easy later.
- In a medium glass bowl, combine the chocolate chips and nut butter. Set this over a pot of barely simmering water (double boiler method), ensuring the bottom of the bowl doesn’t touch the water.
- Stir the mixture constantly with a silicone spatula over low heat. You are looking for a glossy, perfectly smooth texture with no visible lumps.
- Once melted, remove from heat and fold in the maple syrup, vanilla extract, and your choice of crushed pretzels or graham crackers for that essential crunch.
- Pour the mixture into the prepared pan and smooth the top with an offset spatula until it is perfectly level.
- Sprinkle the flaky sea salt evenly across the surface while the chocolate is still wet so it adheres properly.
- Refrigerate for at least 2 hours, or until the center is firm to the touch. Lift the parchment paper to remove the block and slice into clean rectangles using a knife dipped in hot water and wiped dry between cuts.
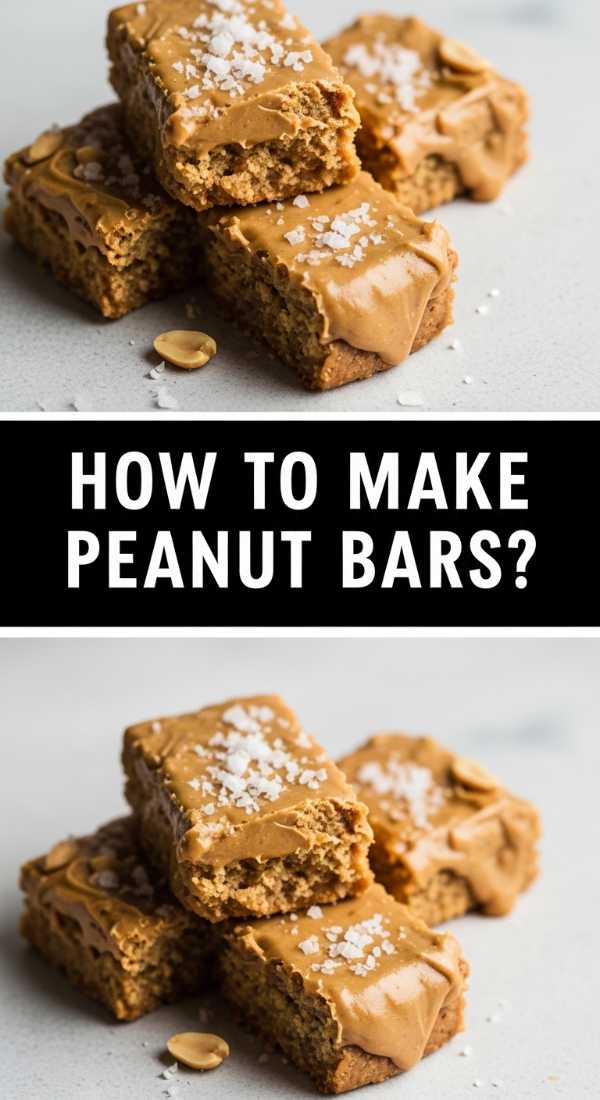
How to make viral peanut butter bites?
Why we love this
There is a nostalgic comfort in the combination of peanut butter and chocolate that never goes out of style. These bites are tiny powerhouses of flavor, offering a chewy, salty-sweet interior that feels incredibly satisfying after just one mouthful. When you set these on a board, they look like artisanal truffles, and the way they hold their shape at room temperature makes them perfect for grazing. The scent of roasted peanuts combined with the sweetness of the coating creates an irresistible invitation that guests simply cannot ignore.
Ingredients
- 1 cup creamy natural peanut butter
- 1/4 cup honey or agave nectar
- 1.5 cups oat flour
- 1/2 cup dark chocolate chips
- 1 teaspoon coconut oil
How to make it
- In a large mixing bowl, stir together the peanut butter and honey until the mixture is completely homogenous and smooth.
- Gradually add the oat flour half a cup at a time. Mix vigorously until a thick, pliable dough forms that no longer sticks to your fingers.
- Scoop out tablespoon-sized portions and roll them between your palms into perfectly round spheres about 1 inch in diameter.
- Place the balls on a tray lined with wax paper and chill in the freezer for 15 minutes to firm up.
- While they chill, melt the dark chocolate chips and coconut oil in the microwave in 30-second intervals, stirring each time until the chocolate is runny and sleek.
- Use a fork to dip each chilled peanut butter ball into the chocolate, tapping the fork against the edge of the bowl to let excess chocolate drip off.
- Place back on the tray and let them set in the fridge for 10 minutes until the chocolate shell is matte and hardened.
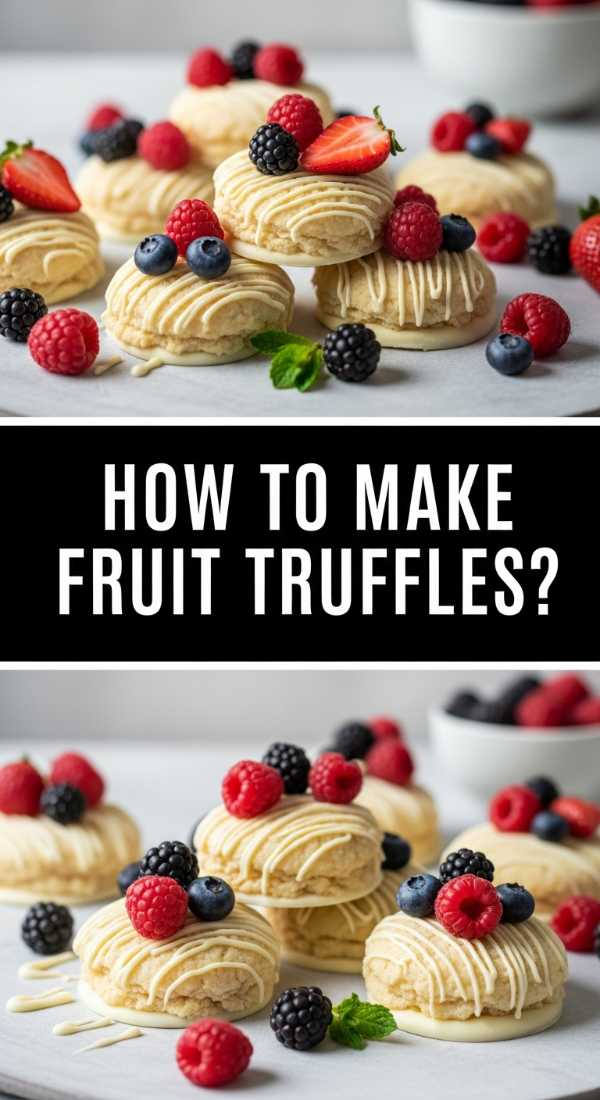
How to make easy fruit truffles?
Why we love this
These truffles bring a bright, vibrant pop of color and a refreshing zing to any food board that can sometimes be heavy on chocolates. The texture is a delightful surprise—soft and jammy on the inside with a delicate, crisp outer coating that shatters when bitten. They carry the essence of summer fruit, with a fragrance that is light, floral, and naturally sweet without being overwhelming. It’s the kind of treat that feels sophisticated and light, making it the perfect palate cleanser between richer items on your dessert spread.
Ingredients
- 1 cup freeze-dried strawberries or raspberries
- 1/2 cup softened cream cheese
- 2 cups white chocolate melting wafers
- 1 tablespoon lemon zest
- Optional: Extra fruit powder for dusting
How to make it
- Place the freeze-dried fruit into a food processor and pulse until it reaches a fine, powder-like consistency.
- In a bowl, beat the softened cream cheese and lemon zest together until light and fluffy using a hand mixer.
- Fold the fruit powder into the cream cheese mixture until the color is a vibrant, uniform pink or red.
- Scoop small teaspoons of the mixture and roll into tiny balls; if the mixture is too soft, chill it for 20 minutes before rolling.
- Place the balls on a parchment-lined sheet and freeze for 30 minutes. This is crucial so they don’t melt when dipped in warm chocolate.
- Melt the white chocolate wafers in a microwave-safe bowl on 50% power to prevent burning, stirring every 20 seconds.
- Dip the frozen fruit balls into the white chocolate, quickly rolling them to coat, and place them back on the parchment.
- Dust immediately with a little extra fruit powder before the chocolate sets for a beautiful, professional finish.
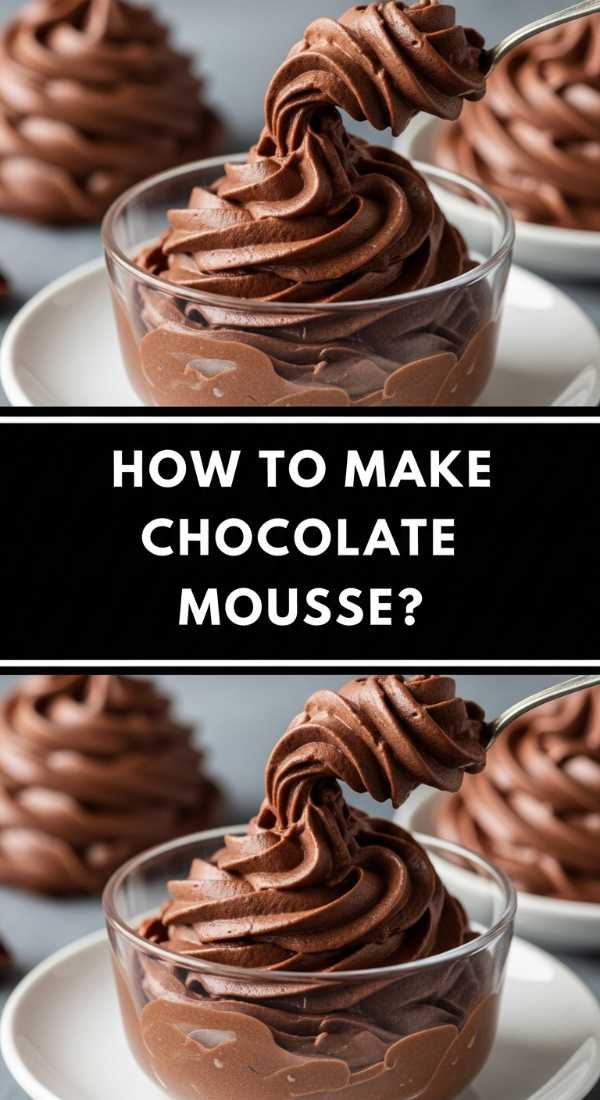
How to make creamy chocolate mousse?
Why we love this
Nothing says elegance quite like a perfectly aerated, cloud-like chocolate mousse served in delicate individual portions. The texture is the star here—it should feel like eating a chocolate-flavored breeze, dissolving instantly on the tongue and leaving behind a rich, lingering cocoa finish. The aroma is deep and sophisticated, reminiscent of a high-end Parisian patisserie. It provides a soft, creamy element to your board that contrasts beautifully with the crunchier, solid treats, making the whole experience feel curated and balanced.
Ingredients
- 1 cup heavy whipping cream (cold)
- 1/2 cup powdered sugar
- 1/3 cup high-quality cocoa powder
- 1 teaspoon vanilla bean paste
- Fresh berries for garnish
How to make it
- Place your mixing bowl and whisk attachment in the freezer for 10 minutes before starting; a cold bowl helps the cream reach maximum volume.
- Pour the cold heavy cream into the chilled bowl and begin whisking on medium-low speed to create small, stable bubbles.
- Once the cream starts to thicken slightly, sift in the powdered sugar and cocoa powder to ensure there are no lumps in your final mousse.
- Add the vanilla bean paste and increase the mixer speed to medium-high.
- Continue whisking until stiff peaks form. You’ll know it’s ready when the mixture holds its shape firmly on the whisk and doesn’t droop. Be careful not to over-beat, or it will turn into chocolate butter!
- Pipe the mousse into small shot glasses or decorative bowls using a star-tipped piping bag for a viral-ready aesthetic.
- Chill in the refrigerator for at least 1 hour to set the structure before serving.
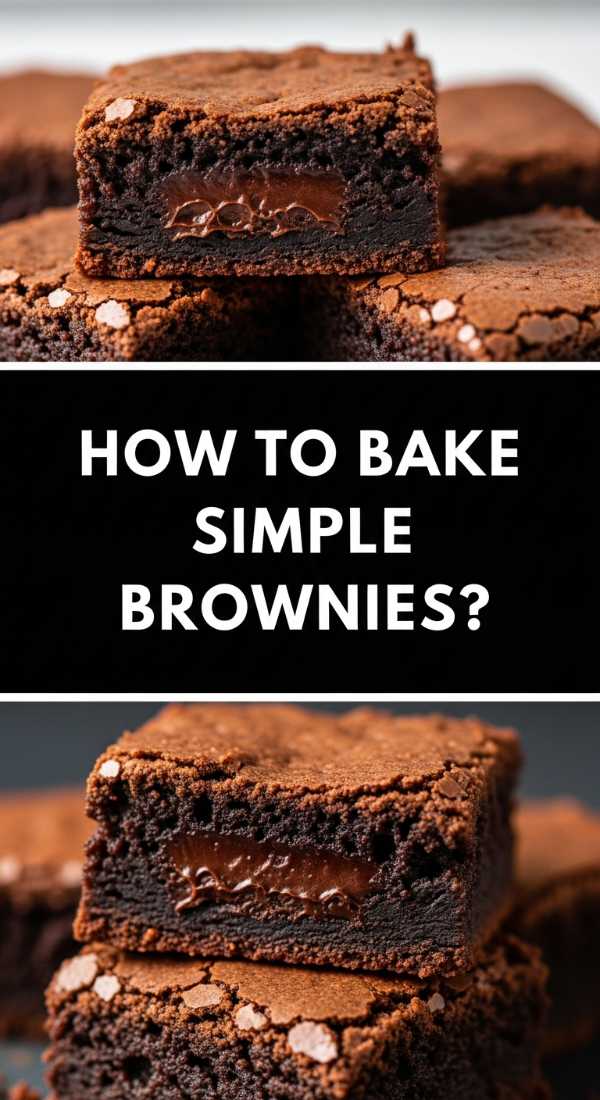
How to make simple brownie bites?
Why we love this
These brownie bites are the ultimate ‘fudgy’ experience, condensed into a single, manageable mouthful that packs a serious punch. They have that coveted crinkle top and a center so moist it almost sticks to the roof of your mouth in the best possible way. The smell of baking brownies is one of the most welcoming scents in the world, and these little squares bring that warm, home-baked feeling to your board. They are the perfect anchor for a dessert spread, providing a familiar and beloved flavor that everyone gravitates toward.
Ingredients
- 1/2 cup melted unsalted butter
- 1 cup granulated sugar
- 1 large egg + 1 egg yolk
- 1/2 cup all-purpose flour
- 1/3 cup cocoa powder
- 1/2 cup semi-sweet chocolate chunks
How to make it
- Preheat your oven to 350°F (175°C) and grease a mini-muffin tin thoroughly with butter or non-stick spray.
- In a large bowl, whisk the melted butter and sugar together for at least 2 minutes. This vigorous whisking creates the classic ‘shiny’ brownie top.
- Add the egg and egg yolk, whisking until the batter lightens in color and looks slightly frothy.
- Gently fold in the flour and cocoa powder using a spatula. Do not overmix; stop as soon as no dry streaks of flour remain to keep the texture fudgy rather than cakey.
- Fold in the chocolate chunks for extra pockets of melted goodness.
- Spoon the batter into the mini-muffin tin, filling each cavity about 3/4 full.
- Bake for 12-15 minutes. Check for doneness by inserting a toothpick; it should come out with a few moist crumbs attached, not clean and not wet.
- Let them cool completely in the tin before removing to ensure they don’t fall apart.
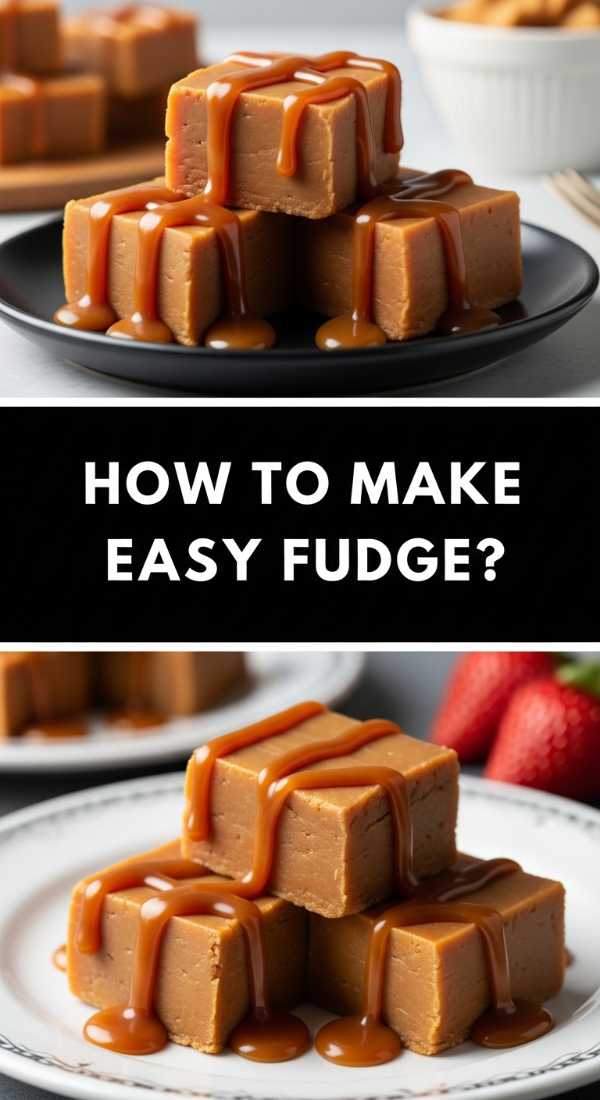
How to make viral fudge treats?
Why we love this
There is a specific kind of decadence found in fudge that is unmatched—a dense, buttery smoothness that feels incredibly heavy and rich. These viral treats are known for their mirror-like finish and the way they seem to slowly melt the moment they touch your tongue. The flavor is a deep, caramelized chocolate that pairs beautifully with the salty elements on a snack board. Watching someone take a bite and seeing their eyes light up at the richness is the ultimate reward for any host, and these treats deliver that reaction every single time.
Ingredients
- 1 can (14 oz) sweetened condensed milk
- 3 cups chocolate chips (milk or dark)
- 1/4 cup unsalted butter
- 1 teaspoon vanilla extract
- Optional: Walnuts or sea salt for topping
How to make it
- Prepare an 8-inch square pan by lining it with parchment paper, ensuring it covers all corners.
- In a heavy-bottomed saucepan over low heat, combine the sweetened condensed milk, chocolate chips, and butter.
- Stir the mixture constantly with a wooden spoon. It is vital to keep the heat low to prevent the milk from scorching or the chocolate from seizing.
- Continue stirring until the mixture is thick, glossy, and completely smooth. This usually takes about 5-7 minutes of patient stirring.
- Remove from heat and quickly stir in the vanilla extract. If you are adding nuts, fold them in now.
- Pour the fudge into the pan and spread it evenly. Work quickly as the fudge begins to set as it cools.
- If using sea salt, sprinkle it over the top now. Allow the fudge to sit at room temperature for an hour, then refrigerate for at least 4 hours.
- Slice into small 1-inch squares for the perfect bite-sized addition to your board.
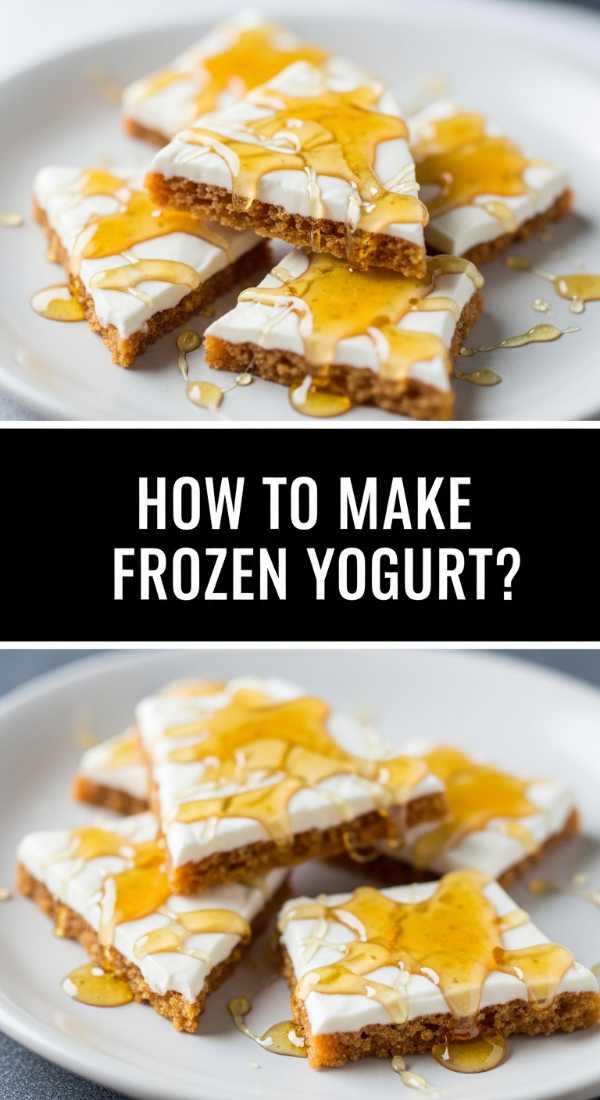
How to make healthy yogurt bark?
Why we love this
Yogurt bark is the refreshing, chilly hero of the dessert board, offering a bright contrast to the richer, room-temperature bakes. The texture is cold and snappy, like a frozen brittle, but it quickly transforms into a creamy, tangy delight as you eat it. It’s visually stunning, acting as a canvas for colorful berries, emerald-green pistachios, and golden honey drizzles. The scent is clean and lactic, providing a light finish that makes the entire board feel more balanced and accessible for those looking for a healthier treat.
Ingredients
- 2 cups Greek yogurt (full fat works best for creaminess)
- 3 tablespoons honey or maple syrup
- 1/2 cup fresh blueberries and sliced strawberries
- 1/4 cup granola
- 1 tablespoon chia seeds
How to make it
- In a bowl, whisk the Greek yogurt and honey together until the sweetener is fully incorporated and the yogurt is silky.
- Line a large rimmed baking sheet with parchment paper. This is essential for preventing the yogurt from sticking to the metal.
- Pour the yogurt onto the sheet and spread it out to about 1/4 inch thickness. You don’t want it too thin or it will shatter too easily.
- Scatter the berries, granola, and chia seeds over the top. Press down very lightly with your fingers to ensure the toppings are partially embedded in the yogurt.
- Place the sheet flat in the freezer and freeze for at least 3-4 hours, or until completely solid.
- Once frozen, use your hands to break the bark into large, rustic shards.
- Keep the bark in the freezer until the very moment you are ready to serve the board, as it will begin to soften within 10-15 minutes.
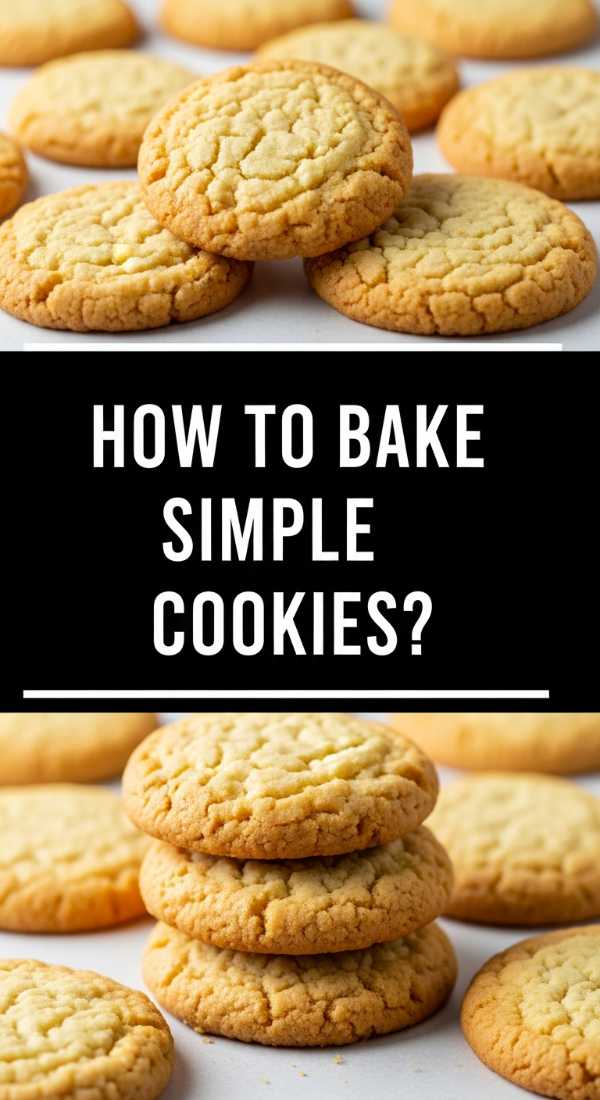
How to make simple vanilla cookies?
Why we love this
A classic vanilla cookie is the backbone of any good dessert spread, offering a buttery, crisp texture that everyone loves. The aroma of vanilla and toasted butter is the quintessential ‘bakery smell’ that makes a home feel warm and inviting the second guests arrive. These cookies have a delicate golden edge and a tender center, making them perfect for dipping into chocolate mousse or eating alongside fresh fruit. Their simplicity is their strength, providing a neutral but delicious base that complements every other flavor on the board.
Ingredients
- 1/2 cup softened butter
- 1/2 cup granulated sugar
- 1 large egg
- 1.5 cups all-purpose flour
- 2 teaspoons vanilla extract
- 1/2 teaspoon baking powder
How to make it
- Cream the softened butter and sugar together in a large bowl using a hand mixer on medium speed for about 3 minutes until the mixture is pale and fluffy.
- Beat in the egg and vanilla extract, ensuring the egg is fully incorporated before moving to the dry ingredients.
- In a separate small bowl, whisk the flour and baking powder together to remove any clumps.
- Gradually add the dry ingredients to the wet, mixing on low speed just until a soft dough forms.
- Wrap the dough in plastic wrap and chill in the fridge for 30 minutes. This prevents the cookies from spreading too much in the oven.
- Preheat your oven to 350°F (175°C). Roll the dough into small balls (about the size of a large marble) and place them on a parchment-lined baking sheet.
- Flatten each ball slightly with the bottom of a glass. Bake for 8-10 minutes, or until the edges are just barely starting to turn golden brown.
- Allow them to cool on the sheet for 5 minutes before transferring to a wire rack.
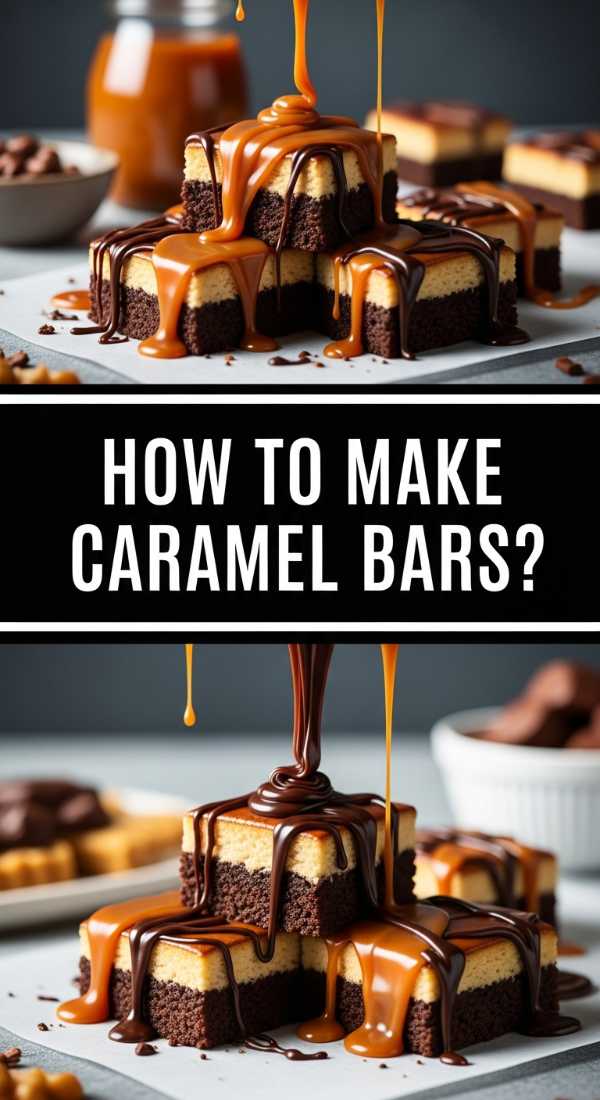
How to make viral caramel bars?
Why we love this
There is something hypnotic about a gooey caramel bar—the way the golden caramel stretches as you pull a piece away is pure food-porn magic. The texture is a triple threat: a buttery shortbread base, a soft and chewy caramel center, and a smooth chocolate top. The scent of toasted sugar and butter is intoxicating, drawing guests in from across the room. These bars feel substantial and decadent, providing a high-energy, high-flavor hit that makes them a consistent favorite on any viral food board.
Ingredients
- 1 cup crushed shortbread cookies
- 1/4 cup melted butter
- 1 cup soft caramels (unwrapped)
- 2 tablespoons heavy cream
- 1 cup milk chocolate chips
How to make it
- Mix the crushed shortbread cookies and melted butter together until it feels like wet sand. Press this firmly into the bottom of a parchment-lined loaf pan to create a solid base.
- Bake the base at 350°F (175°C) for 10 minutes to set it, then let it cool completely.
- In a microwave-safe bowl, combine the unwrapped caramels and heavy cream.
- Heat in 30-second bursts, stirring in between, until the caramel is completely melted and smooth. This requires patience; don’t rush it or the caramel might burn.
- Pour the hot caramel over the cooled shortbread base and spread it to the edges. Let this set in the fridge for 20 minutes.
- Melt the milk chocolate chips and pour them over the hardened caramel layer, smoothing it out into a sleek finish.
- Place the pan back in the fridge for at least 1 hour. Once set, use a warm knife to slice into thin, elegant bars.
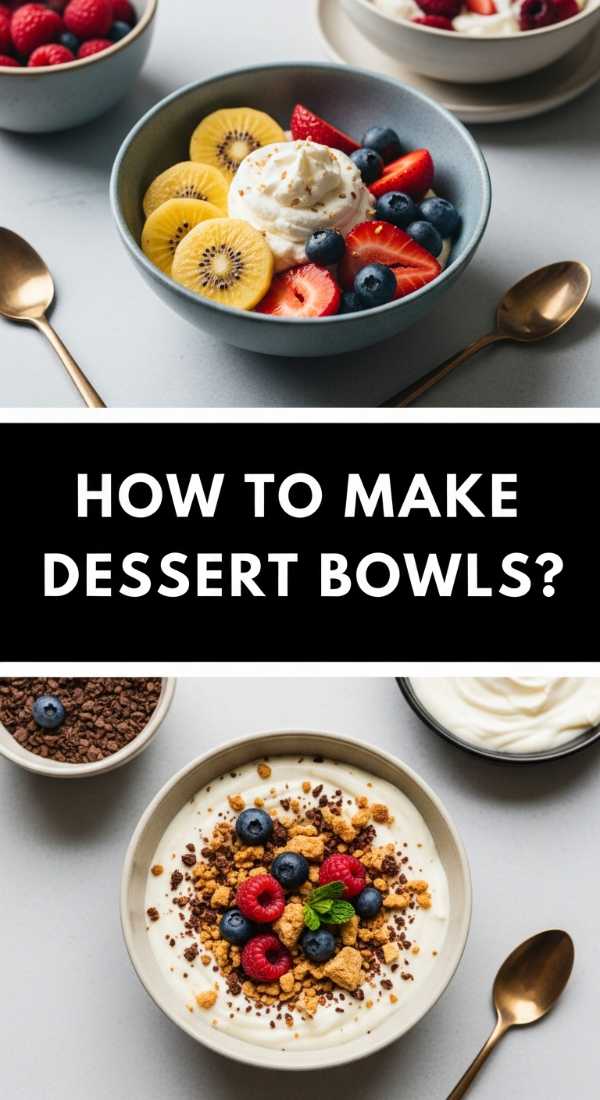
How to make easy dessert bowls?
[IMAGE_10]
Why we love this
Dessert bowls are the perfect way to add height and structure to your food board while offering a customizable experience for your guests. The concept of a ‘deconstructed’ dessert in a beautiful bowl allows people to dip, scoop, and mix flavors to their heart’s content. Whether filled with a light cream or a rich dip, the visual of a brimming bowl surrounded by cookies and fruit is incredibly photogenic. It encourages interaction and playfulness, making the act of eating feel like a fun, creative activity rather than just a meal.
Ingredients
- 1 cup heavy cream
- 2 tablespoons powdered sugar
- 1/2 cup lemon curd or chocolate ganache
- Assorted dippers (fruit, cookies, pretzels)
How to make it
- Start by selecting small, aesthetic bowls—clear glass or ceramic ramekins work beautifully for a viral look.
- Whip the heavy cream and powdered sugar together until you reach soft peaks; it should be airy but hold its shape.
- Place a generous dollop of the whipped cream into the bottom of each bowl.
- Top the cream with a swirl of lemon curd for a tart finish or a spoonful of chocolate ganache for something richer.
- Use a toothpick to gently swirl the two components together, creating a beautiful marble effect that looks professional.
- Garnish with a single mint leaf or a tiny sprinkle of zest to elevate the presentation.
- Arrange the bowls in the center of your board and surround them with a variety of textures: crunchy pretzels, soft berries, and crisp cookies to encourage dipping.
Conclusion
Creating a viral-worthy food board is all about the balance of textures, the pop of colors, and most importantly, the love you put into the individual components. By mastering these ten hacks, you’ve gone from a simple host to a culinary curator. Remember, there are no strict rules—feel free to swap fruits, use different chocolates, or arrange things in a way that feels most ‘you.’ Now, all that’s left is to pour a glass of something sparkling, invite your favorite people over, and watch their faces light up as they dive into your masterpiece.