
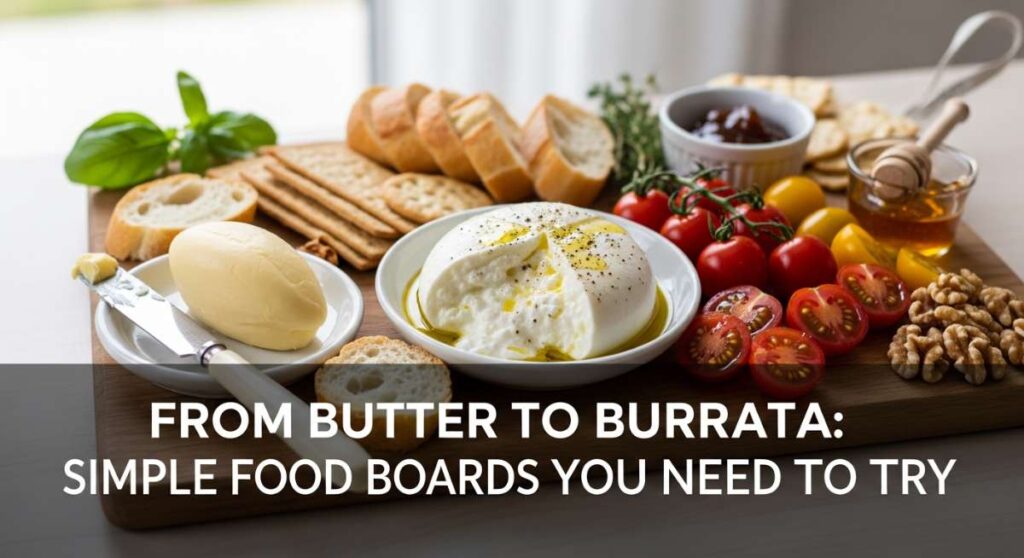
There is something inherently magical about the way food brings us together, isn’t there? I remember the first time I set a giant, overflowing board in the middle of my dining table; the room suddenly felt smaller, warmer, and filled with an energy that a plated meal just can’t replicate. It’s that shared experience—the reaching, the dipping, and the communal ‘oh, you have to try this’—that turns a simple dinner into a core memory. In our fast-paced lives, these boards are my way of hitting the pause button, inviting friends to linger just a little bit longer over a glass of wine and something delicious.
Lately, the trend has shifted from basic cheese and crackers to what I call the ‘Simple Food Board.’ We are taking comfort food classics—think silky pastas, crispy chicken, and glazed salmon—and presenting them with that same rustic, approachable elegance. It’s not about perfection; it’s about the texture of a perfectly seared steak or the golden hue of air-fried potatoes nestled against fresh herbs. These boards are a love letter to home cooking, proving that even the simplest ingredients can feel like a viral sensation when served with intention and heart.
How to cook creamy pasta?

Why we love this
There is a profound, almost spiritual comfort in a bowl of pasta that has been emulsified into a glossy, velvet-like masterpiece. The way the sauce clings to every ridge and curve of the noodle creates a sensory experience that is both rich and delicate, carrying the scent of aged parmesan and black pepper throughout your kitchen. When you twirl that first forkful, the texture should be supple and luxurious, never heavy, leaving a lingering warmth that feels like a culinary hug. It is the centerpiece of any board, inviting everyone to dive in while the steam still rises in fragrant clouds.
Ingredients
- 1 lb Rigatoni or Fettuccine
- 2 cups heavy cream
- 1 cup freshly grated Parmigiano-Reggiano
- 4 cloves garlic, minced
- 2 tbsp unsalted butter
- Salt and cracked black pepper
- Fresh parsley for garnish
How to make it
- Fill a large stockpot with at least 4 quarts of water and add a generous handful of sea salt; the water should taste like the ocean to properly season the pasta from the inside out.
- Bring the water to a rolling boil and add your pasta, stirring immediately to prevent sticking. Cook for exactly 2 minutes less than the package instructions for a true ‘al dente’ bite.
- While the pasta cooks, melt the butter in a wide skillet over medium-low heat. Add the minced garlic and sauté gently for about 3 minutes, or until the aroma is fragrant but the garlic hasn’t browned, which would make it bitter.
- Pour in the heavy cream and bring to a very gentle simmer. Do not let it boil vigorously; you want the fat molecules to remain stable. Let it reduce by about a third until it slightly coats the back of a spoon.
- Before draining the pasta, reserve 1 cup of the starchy pasta water—this is liquid gold for your sauce.
- Transfer the pasta directly into the skillet with the cream. Add the grated cheese and half of the reserved pasta water.
- Increase the heat to medium and toss vigorously with tongs. The agitation helps the starch and cheese emulsify into a smooth, glossy sauce. If it’s too thick, add more pasta water a tablespoon at a time until it reaches a silky consistency.
How to air fry chicken?

Why we love this
Imagine the most satisfying crunch you’ve ever heard, followed by an explosion of juicy, tender flavor—that is the magic of perfectly air-fried chicken. It’s the ultimate ‘cheat code’ for a food board, providing that deep-fried decadence without the heavy oil or the messy cleanup. The skin turns a beautiful, variegated amber brown while the meat stays incredibly moist, creating a contrast in textures that is absolutely addictive. Serving these golden morsels alongside a cool dipping sauce makes them the undisputed star of any casual gathering.
Ingredients
- 1 lb chicken thighs or wings
- 2 tbsp olive oil
- 1 tsp smoked paprika
- 1 tsp garlic powder
- 1/2 tsp onion powder
- Salt and lemon pepper to taste
- Cornstarch (optional for extra crunch)
How to make it
- Start by patting the chicken pieces completely dry with paper towels. Any surface moisture will create steam, preventing the skin from reaching maximum crispiness.
- In a large bowl, toss the chicken with olive oil and a light dusting of cornstarch if you want an extra-thick crust. This creates a barrier that crisps up beautifully in the hot air.
- Whisk your spices together and sprinkle them evenly over the chicken, rubbing the mixture into the skin and crevices to ensure every bite is seasoned.
- Preheat your air fryer to 400°F (200°C) for at least 5 minutes. A hot starting environment is crucial for searing the outside quickly.
- Arrange the chicken in the basket in a single layer, ensuring no pieces are overlapping. Airflow is the key to even browning; if the basket is crowded, the chicken will be soggy.
- Cook for 18-22 minutes, flipping the pieces halfway through the timer. You are looking for an internal temperature of 165°F (74°C) and a skin that sounds hollow when tapped with a fork.
- Let the chicken rest for 3 minutes before placing it on your board to allow the juices to redistribute back into the meat.
How to make fluffy pancakes?

Why we love this
There is nothing quite like the sight of a stack of pancakes that look like soft, golden clouds resting on a board, waiting to be drizzled with amber syrup. The aroma of vanilla and toasted butter wafting through the house is the universal signal for a slow, lazy morning where time doesn’t matter. Each bite should be airy and light, with a subtle sweetness that balances the savory elements of a brunch board. It’s the texture that wins you over—the way they spring back when touched and soak up toppings like a delicious, edible sponge.
Ingredients
- 1 1/2 cups all-purpose flour
- 3 1/2 tsp baking powder
- 1 tbsp white sugar
- 1 1/4 cups milk
- 1 egg
- 3 tbsp melted butter
- 1 tsp vanilla extract
How to make it
- In a large bowl, sift together the flour, baking powder, and sugar. Sifting is an essential step as it aerates the flour, contributing significantly to the final ‘fluff’ factor.
- In a separate jug, whisk the milk, egg, melted butter, and vanilla. Make sure the milk is at room temperature so it doesn’t solidify the melted butter upon contact.
- Create a well in the center of the dry ingredients and pour in the wet mixture. Use a spatula to fold the batter just until combined. Stop as soon as you see no more streaks of flour; lumps are your friend here! Over-mixing develops gluten, which makes pancakes tough instead of tender.
- Let the batter rest for 10 minutes. This allows the baking powder to activate and the flour to fully hydrate, creating tiny air bubbles.
- Heat a non-stick griddle over medium heat and lightly coat with a tiny bit of butter. Wipe away the excess butter with a paper towel—you want a thin film, not a puddle.
- Pour 1/4 cup of batter per pancake. Wait until you see bubbles forming on the surface and the edges look set and matte. This usually takes about 2-3 minutes.
- Flip gently and cook for another 1-2 minutes until golden brown. Keep them warm in a low oven (200°F) until you are ready to assemble your board.
How to make skillet steak?
Why we love this
A perfectly seared skillet steak is the epitome of rustic luxury, offering a deep, caramelized crust that gives way to a tender, ruby-red center. The sound of the meat hitting a scorching hot pan is a kitchen symphony, followed by the intoxicating scent of browning butter and woodsy rosemary. When sliced thin and fanned across a wooden board, it looks spectacular and encourages everyone to grab a piece and experience that rich, umami flavor. It turns a simple meal into an event, making even an ordinary Tuesday feel like a celebration of great food.
Ingredients
- 1.5 lb Ribeye or New York Strip
- 2 tbsp high-smoke point oil (avocado or grapeseed)
- 3 tbsp unsalted butter
- 3 cloves garlic, smashed
- 2 sprigs fresh rosemary or thyme
- Coarse kosher salt and flaky sea salt
How to make it
- Remove the steak from the refrigerator 45-60 minutes before cooking. Bringing the meat to room temperature ensures it cooks evenly from the edges to the center.
- Pat the steak extremely dry with paper towels. Any moisture on the surface will prevent the Maillard reaction (browning) from occurring. Season aggressively with kosher salt on all sides.
- Heat a cast-iron skillet over high heat until it is wispy with smoke. Add the oil and swirl to coat the bottom of the pan.
- Lay the steak into the skillet away from you to avoid oil splashes. Press down lightly to ensure total contact with the metal. Sear undisturbed for 3-4 minutes until a dark, mahogany crust forms.
- Flip the steak and immediately add the butter, smashed garlic, and herbs to the pan.
- Tilt the pan slightly so the melting butter pools at the bottom with the aromatics. Use a large spoon to continuously pour that flavored butter over the steak (basting). This adds incredible depth and finishes the cooking gently.
- Cook until the internal temperature reaches 130°F (54°C) for medium-rare. Remove the steak to a cutting board and let it rest for at least 10 minutes before slicing to keep the juices locked inside.
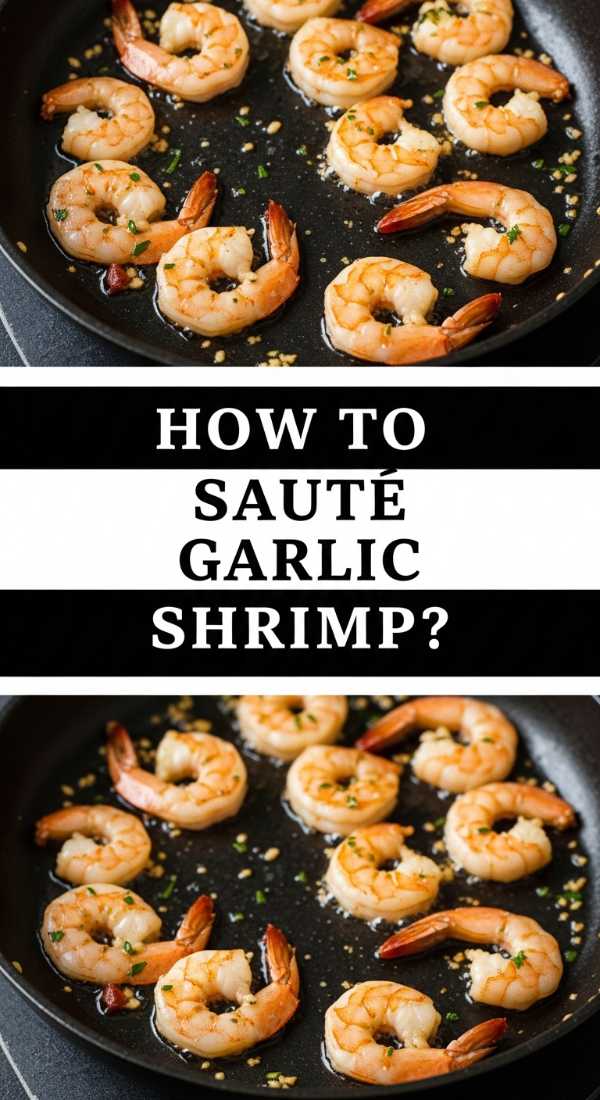
How to sauté garlic shrimp?
Why we love this
Garlic shrimp are the ultimate ‘pop-able’ snack for a board, offering a snappy texture and a bright, zesty flavor profile that cuts through richer dishes. The way the shrimp curl into tight pink ‘C’ shapes in a pool of golden, garlicky butter is visually stunning and incredibly appetizing. Each bite is a balance of sweet seafood, pungent garlic, and a hint of lemon acidity that wakes up the palate. They are fast, elegant, and always the first thing to disappear when the board hits the table.
Ingredients
- 1 lb large shrimp, peeled and deveined
- 4 tbsp unsalted butter
- 5 cloves garlic, thinly sliced
- 1/4 cup dry white wine (like Pinot Grigio)
- 1/2 tsp red pepper flakes
- Fresh parsley and lemon wedges
How to make it
- Ensure your shrimp are completely thawed and patted dry. If they are wet, they will boil in the pan instead of getting that beautiful sautéed sear.
- Place a large skillet over medium-high heat and melt 2 tablespoons of butter with a splash of olive oil to prevent the butter from burning.
- Add the shrimp in a single layer. Do not crowd the pan; cook in batches if necessary. Let them sear for about 1-2 minutes until the bottom side turns pink and opaque.
- Flip the shrimp and immediately add the sliced garlic and red pepper flakes. Slicing the garlic rather than mincing it allows it to toast and become sweet without burning too quickly.
- Once the garlic is fragrant (about 30 seconds), pour in the white wine. Let it bubble and reduce by half, which deglazes the pan and picks up all the flavor bits.
- Stir in the remaining 2 tablespoons of cold butter and remove from heat. Stirring in cold butter at the end creates a ‘monté au beurre’ sauce that is thick and creamy.
- Toss with fresh parsley and a squeeze of lemon juice right before serving on the board.
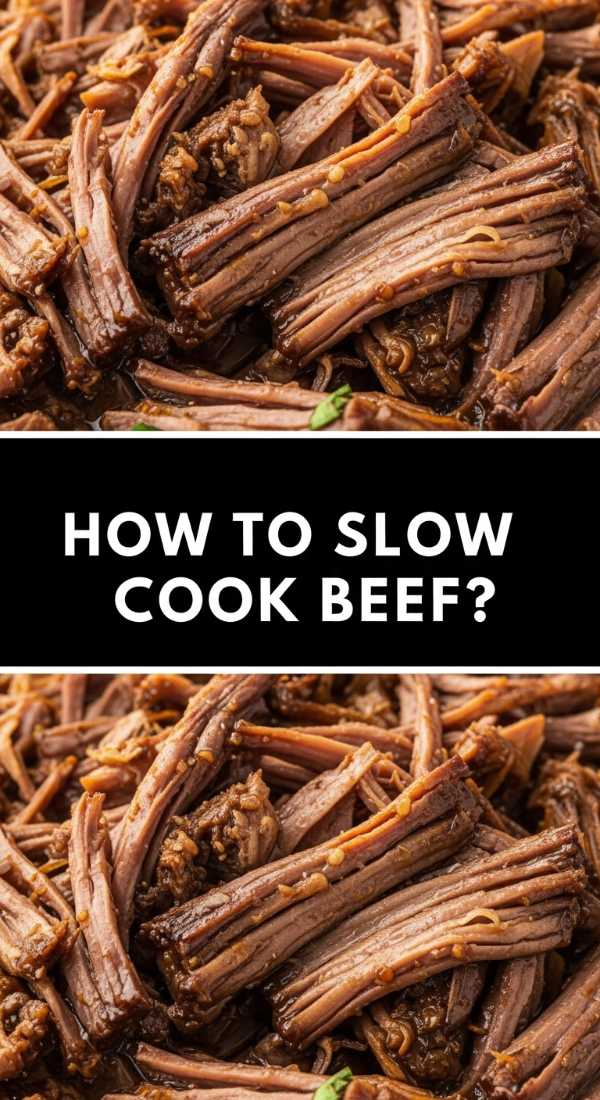
How to slow cook beef?
Why we love this
There is a unique soulfulness to beef that has spent hours slowly surrendering its toughness to become fork-tender and rich. The deep, dark mahogany sauce that develops in a slow cooker is packed with layers of flavor that only time can create, filling the entire home with an aroma that promises pure comfort. When placed on a board, this shredded or chunked beef becomes a versatile component that can be tucked into rolls or piled onto crusty bread. It’s the kind of food that encourages long conversations and second helpings.
Ingredients
- 3 lb Chuck roast, cut into large chunks
- 1 cup beef bone broth
- 1/2 cup red wine (optional)
- 2 tbsp tomato paste
- 1 large onion, chopped
- 3 carrots, cut into thick rounds
- 3 cloves garlic, smashed
- Bay leaf and thyme sprigs
How to make it
- Start by searing the beef chunks. Season the meat with salt and pepper and brown them in a hot skillet with oil. This step is non-negotiable as it creates the base of the flavor through caramelization.
- Transfer the browned meat to the slow cooker insert. In the same skillet, sauté the onions and carrots for 5 minutes, then stir in the tomato paste for 1 minute to cook out the raw metallic taste.
- Deglaze the skillet with the red wine or a splash of broth, scraping up all the browned bits from the bottom. Pour this liquid over the beef in the slow cooker.
- Add the remaining broth, garlic, bay leaf, and thyme. The liquid should cover about two-thirds of the meat; you don’t want to submerge it completely or you’ll end up with boiled beef.
- Set the slow cooker to ‘Low’ and cook for 7-8 hours. Avoid the ‘High’ setting if possible, as the gentle heat on low is what breaks down the tough connective tissues into gelatin, making the meat melt-in-the-mouth tender.
- Once finished, remove the meat and shred slightly. If the sauce is too thin, simmer it in a saucepan for 10 minutes to reduce and thicken before pouring it back over the beef.
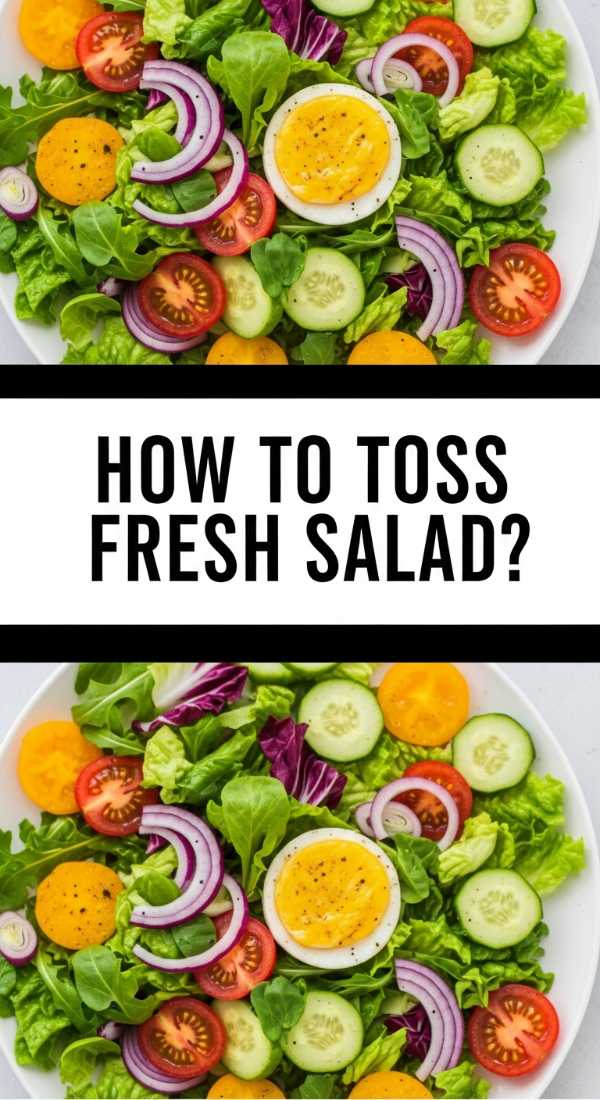
How to toss fresh salad?
Why we love this
A fresh salad is the vibrant, crunchy heartbeat of a food board, providing the necessary acidity and brightness to balance out heavier, cooked items. It’s a riot of colors and textures—the snap of radish, the softness of butter lettuce, and the creamy tang of a well-made vinaigrette. When tossed correctly, every leaf is kissed by dressing but remains impossibly crisp, offering a refreshing palate cleanser between bites of steak or pasta. It brings a sense of garden-fresh vitality to the table that makes the entire meal feel complete and wholesome.
Ingredients
- 5 oz mixed baby greens or arugula
- 1/2 cucumber, thinly sliced
- 1/4 red onion, shaved
- 1/2 cup cherry tomatoes, halved
- 3 tbsp extra virgin olive oil
- 1 tbsp fresh lemon juice or apple cider vinegar
- 1 tsp Dijon mustard
- 1/2 tsp honey
How to make it
- The most important rule for a great salad is dry greens. Use a salad spinner or pat the leaves with a clean kitchen towel until no moisture remains. Dressing will slide right off wet leaves, leaving a puddle at the bottom of the bowl.
- In a small jar, combine the olive oil, lemon juice, Dijon mustard, honey, salt, and pepper. Shake vigorously until the mixture is completely emulsified and looks opaque. The mustard acts as a bridge between the oil and acid.
- Place your greens in a bowl that is much larger than you think you need. This gives you ‘room to move’ so you don’t bruise the delicate leaves.
- Add the heavier ingredients like cucumbers, onions, and tomatoes to the bowl.
- Drizzle the dressing around the sides of the bowl rather than directly onto the greens. This allows for a more controlled distribution.
- Using clean hands or large tongs, lift and turn the salad gently from the bottom up. Do this just before the board is served to prevent the acid in the dressing from wilting the greens.
- Finish with a final crack of black pepper and a sprinkle of flaky salt to make the flavors pop.
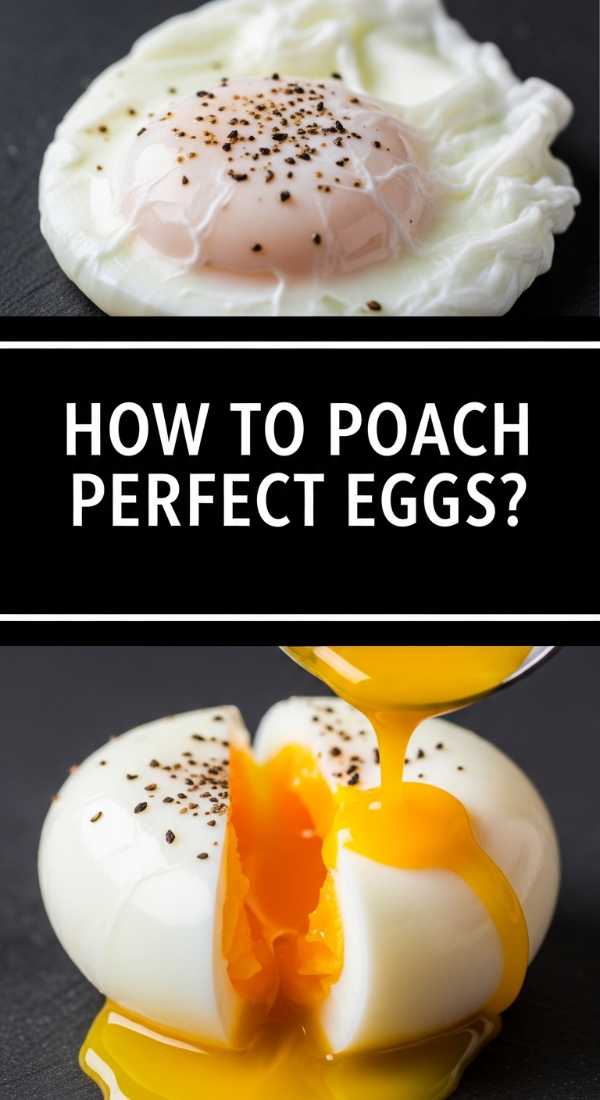
How to poach perfect eggs?

Why we love this
A poached egg is a little bundle of culinary suspense, waiting to be pierced so it can release its liquid gold center over the rest of the board. The whites should be opaque and delicate, holding the yolk in a gentle embrace like a soft silk pouch. There is something incredibly sophisticated yet simple about a poached egg; it elevates a piece of toast or a pile of sautéed greens into a gourmet experience. It provides a built-in sauce for everything it touches, adding a rich, fatty mouthfeel that is truly unparalleled.
Ingredients
- 2-4 large cold eggs (the fresher, the better)
- 1 tbsp white distilled vinegar
- A large pot of water
- Slotted spoon
- Paper towels
How to make it
- Freshness is the secret key. Older eggs have thinner whites that will wispy away in the water. Use eggs straight from the fridge as the cold temperature helps the proteins hold together.
- Fill a deep saucepan with water and bring it to a very light simmer. You want tiny bubbles like champagne, not a rolling boil. If the water is moving too much, it will tear the egg apart.
- Add the white vinegar to the water. The acid helps the egg whites coagulate faster, keeping them in a tight shape. Do not add salt to the water, as it can break down the whites.
- Crack one egg into a fine-mesh sieve over a bowl. Let the thin, watery part of the white drain away for about 30 seconds. This leaves only the thick white that will cling to the yolk.
- Carefully transfer the egg from the sieve into a small ramekin.
- Create a very gentle whirlpool in the water with a spoon. Drop the egg into the center of the vortex. The spinning motion helps wrap the white around the yolk.
- Cook for exactly 3 minutes for a runny yolk. Lift out with a slotted spoon and gently pat the bottom of the spoon on a paper towel to remove excess water before placing it on your board.
How to crisp air potatoes?
Why we love this
These potatoes are the ultimate crowd-pleaser—shattering crisp on the outside while remaining fluffy and light, like a baked potato, on the inside. They have that rustic, jagged-edge charm that looks beautiful scattered across a food board, catching the light with their golden-brown hues. The seasoning sticks to the crannies created by the hot air, ensuring that every single bite is a flavorful explosion. They are the perfect vessel for dipping and add a satisfying, earthy weight to your meal that keeps everyone coming back for ‘just one more.’
Ingredients
- 1.5 lb Yukon Gold or Russet potatoes
- 2 tbsp olive oil
- 1 tsp garlic powder
- 1 tsp dried rosemary or thyme
- 1/2 tsp sea salt
- 1/4 tsp smoked paprika
How to make it
- Wash and peel your potatoes (or leave the skin on for a more rustic look). Cut them into even 1-inch cubes. Uniformity is vital so they all finish cooking at the same time.
- Place the potato cubes in a bowl of cold water for 20 minutes. This draws out the excess surface starch, which is the secret to achieving a ‘glass-like’ crunch rather than a leathery exterior.
- Drain the potatoes and pat them extremely dry. Any water left on them will turn into steam in the air fryer, making them soft instead of crisp.
- In a clean bowl, toss the potatoes with olive oil and all the seasonings until every side is well-coated.
- Preheat the air fryer to 400°F (200°C). Arrange the potatoes in the basket. It is okay if they touch slightly, but do not stack them in multiple layers.
- Cook for 20-25 minutes. Every 7-8 minutes, remove the basket and give it a vigorous shake. This redistributes the oil and ensures all sides hit the heating element.
- They are done when they are a deep golden brown and feel light when you shake the basket. Sprinkle with a little extra flaky salt immediately after they come out.
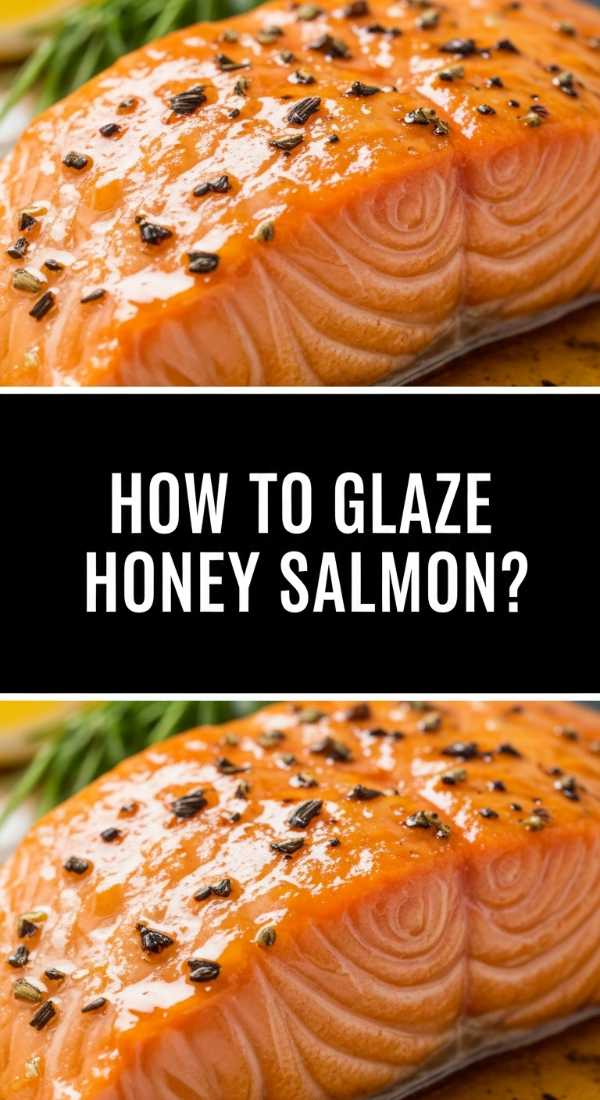
How to glaze honey salmon?
[IMAGE_10]
Why we love this
Honey glazed salmon is a masterclass in balance, offering a sticky-sweet exterior that caramelizes into a beautiful dark glaze over the succulent, flaky pink fish. As the honey hits the heat, it creates a slightly charred, candy-like crust that contrasts beautifully with the natural oils of the salmon. It’s visually striking on a board, especially when garnished with bright green onions or sesame seeds. The flavor profile—salty, sweet, and savory—is a universal favorite that feels elevated and thoughtful, yet takes only minutes to achieve.
Ingredients
- 2 large salmon fillets (about 6 oz each)
- 2 tbsp honey
- 1 tbsp soy sauce
- 1 tbsp fresh lemon juice
- 1 tsp grated fresh ginger
- 1 clove garlic, minced
- 1 tbsp olive oil
How to make it
- Whisk together the honey, soy sauce, lemon juice, ginger, and garlic in a small bowl. This is your glaze; set it aside while you prep the fish.
- Pat the salmon fillets dry with paper towels. Season the flesh side lightly with salt and pepper, keeping in mind that the soy sauce in the glaze is already salty.
- Heat the olive oil in a non-stick skillet over medium-high heat. When the oil is shimmering, place the salmon in the pan, skin-side up (flesh-side down).
- Sear the flesh for 3-4 minutes without moving it. This creates a firm surface that will hold the glaze. Flip the salmon so it is now skin-side down.
- Pour the honey mixture into the pan. As the liquid begins to bubble and thicken, use a spoon to continuously baste the top of the salmon with the glaze.
- Continue cooking for another 3-4 minutes. The skin will become crispy while the glaze reduces into a thick, mahogany syrup that coats the fish.
- The salmon is done when it flakes easily with a fork but remains slightly translucent in the very center. Transfer to your board and drizzle any remaining pan glaze over the top.
Bringing It All Together
Creating these boards is more than just a meal; it’s a way to express creativity and love through food. Whether you’re piling up fluffy pancakes for a Saturday brunch or fanning out a perfectly seared steak for a dinner party, the goal is always the same: to create a space where everyone feels welcome to dig in. I hope these simple techniques give you the confidence to turn your next gathering into a viral-worthy food board experience. Happy cooking!