

Turn Your Backyard Into a Paradise: Viral Garden DIYs You Can Actually Do
Is there anything more soul-soothing than watching the sunset from a space you built with your own two hands? My backyard used to be just a patch of grass and a few plastic chairs, but I realized that our outdoor spaces are truly the lungs of our homes. They are where we breathe deep, host the people we love, and reconnect with the simple rhythm of nature after a long, digital-heavy week.
Creating a sanctuary doesn’t require a professional landscaping crew or a five-figure budget; it just takes a bit of vision and a willingness to get your hands dirty. In this guide, we’re diving into the viral DIYs that are taking the internet by storm—from vertical gardens that smell like heaven to the ultimate floating deck for summer nights. Let’s turn that ‘one day’ project into today’s reality and create a home that feels like a permanent vacation.
How to Build a Custom Wood Trellis for Vertical Garden Bliss

Why we love this
Imagine the sweet, heady scent of jasmine or the vibrant reach of climbing roses weaving through a hand-built cedar frame. There’s a certain rustic elegance to vertical gardening; it draws the eye upward, making even the smallest patio feel like a sprawling estate. The rough-hewn texture of the wood contrasts beautifully with soft, emerald leaves, creating a living tapestry that changes with the seasons and offers a sense of secluded privacy that no fence can replicate.
Essential Elements:
- 8-foot Cedar 2×2 posts
- 1×2 Cedar slats for the grid
- Weather-resistant wood screws (2-inch)
- Waterproof wood glue
- Power drill and miter saw
- Level and measuring tape
- Exterior wood stain or sealant
How to make it
- Determine the height and width of your trellis based on your wall space. Cut two 2×2 posts for the vertical sides and two 2x2s for the top and bottom horizontal frame.
- Lay the frame pieces on a flat surface and apply wood glue to the corners. Use a square to ensure 90-degree angles before driving screws through the vertical posts into the horizontal crossbeams.
- Measure and cut your 1×2 slats to fit across the interior of the frame. For a classic grid, space them 6 inches apart horizontally, then layer a second set of slats vertically over them, also 6 inches apart.
- Apply a small dab of glue at every intersection point where the slats meet. Secure each joint with a single small wood screw, being careful not to split the thin wood.
- Once assembled, apply a high-quality exterior stain to protect the cedar from graying. Mount the trellis to your wall using 1-inch spacers so the plants have room to wrap around the slats.
How to Style Front Porch Flower Pots for Instant Curb Appeal

Why we love this
Walking up to a front door framed by lush, overflowing greenery feels like a warm hug before you even step inside. The secret is in the layering—the contrast between the velvety petals of petunias and the architectural spikes of Dracaena. You’ll catch the subtle fragrance of damp earth and sweet nectar every time you grab the mail, creating a sensory transition from the busy world to your personal haven.
Essential Elements:
- Large ceramic or resin planters (varied heights)
- High-quality potting mix with perlite
- A ‘Thriller’ plant (e.g., Grass, Canna Lily)
- ‘Filler’ plants (e.g., Geraniums, Begonias)
- ‘Spiller’ plants (e.g., Sweet Potato Vine, Creeping Jenny)
- Slow-release fertilizer
How to make it
- Choose three pots of varying heights but in a cohesive color palette to create visual interest. Ensure every pot has adequate drainage holes at the bottom.
- Fill the bottom third of the pots with empty plastic water bottles or lightweight filler to save on soil, then top with fresh potting mix up to 2 inches below the rim.
- Place your ‘Thriller’ in the center (or back if against a wall). This should be the tallest, most dramatic plant that defines the pot’s height.
- Surround the thriller with ‘Fillers.’ These should be mounding plants that hide the soil and provide a dense volume of color and texture.
- Plant the ‘Spillers’ along the edges. Angle them slightly outward so they naturally cascade over the sides of the pot as they grow.
- Water thoroughly until water drains from the bottom and apply a layer of mulch or decorative moss to the soil surface to retain moisture.
How to Refresh a Ranch Exterior for a Modern Home Aesthetic

Why we love this
There is something incredibly satisfying about taking a dated, 1970s ranch and stripping away the ‘tired’ to reveal a crisp, modern masterpiece. The visual impact of high-contrast colors—think charcoal siding against warm wood accents—instantly elevates the architecture. It feels substantial and clean, like a fresh canvas that highlights the surrounding greenery and makes the sunset glow reflect beautifully off the updated surfaces.
Essential Elements:
- Exterior paint in a modern matte finish (Charcoal or Navy)
- Natural wood cedar shutters or siding accents
- Black modern light fixtures
- New house numbers in a sans-serif font
- Power washer and high-quality rollers
- Painter’s tape and drop cloths
How to make it
- Start by power washing the entire exterior to remove decades of dirt, chalking paint, and mildew. Let the surface dry completely for 48 hours.
- Mask off all windows, doors, and trim with professional-grade painter’s tape and plastic sheeting to ensure sharp lines and no overspray.
- Apply a high-adhesion exterior primer if you are making a drastic color change. Use a paint sprayer for the main siding to get a smooth, factory-like finish, or use a thick-nap roller for textured brick.
- Apply two coats of your chosen modern hue. Matte finishes are currently very trendy for ranches as they hide imperfections in the old siding.
- Remove old, plastic shutters and replace them with custom-built cedar plank shutters. The warmth of the wood against the dark paint provides the ‘modern organic’ look.
- Swap out dated gold or brass light fixtures for sleek black lanterns to tie the entire modern aesthetic together.
How to Design a Relaxing Hot Tub Area for Ultimate Backyard Serenity

Why we love this
There is no better feeling than the steam rising into the cool night air as the gentle hum of bubbles lulls you into total relaxation. This isn’t just about the tub; it’s about the atmosphere—the soft glow of string lights reflecting off the water and the smooth feel of smooth river rocks underfoot. It transforms a utility item into a high-end spa experience where the scent of cedar and the warmth of the water wash away the day’s stress.
Essential Elements:
- Flat, level concrete pad or reinforced deck
- Privacy screening (slat wood or bamboo)
- Weatherproof outdoor rug
- String lights or solar path lights
- Side table for towels and drinks
- Potted palms or tall grasses for greenery
How to make it
- Ensure your foundation is perfectly level and rated for the weight of a filled tub (roughly 3,000–5,000 lbs). A reinforced concrete slab is the gold standard here.
- Place the tub in a location that offers both easy access from the house and a sense of enclosure. Position the ‘best view’ seat toward your garden’s most beautiful feature.
- Build or install a 6-foot tall privacy screen on at least two sides. Using horizontal wood slats allows for airflow while blocking the neighbors’ view.
- Lay an outdoor rug made of recycled plastic around the entry steps. This provides a soft, non-slip surface for wet feet and defines the ‘room.’
- Hang bistro string lights overhead, but ensure they are plugged into a GFCI outlet and high enough to be out of reach of splashing water.
- Add a weather-resistant storage bench nearby to keep dry towels, robes, and spa chemicals organized and out of sight.
How to Recreate a Nostalgic Teen Room for the Ultimate Vibe

Why we love this
Walking into a well-curated teen room is like stepping back into a world of pure self-expression and comfort. It’s all about the ‘vibe’—the soft, diffused glow of LED strips, the tactile comfort of faux-fur throws, and the visual rhythm of a perfectly curated gallery wall. It smells like vanilla candles and feels like a sanctuary where time slows down, making it the perfect place for late-night chats or getting lost in a favorite book.
Essential Elements:
- LED strip lights with remote
- Grid-style wire wall organizer
- Large floor cushions or bean bags
- Peel-and-stick wallpaper accent wall
- Sheer curtains for soft lighting
- Record player or high-quality Bluetooth speaker
How to make it
- Select a color palette that feels ‘moody’ yet cozy—think sage greens, sunset oranges, or classic monochrome with pops of neon.
- Install the LED strips along the perimeter of the ceiling or behind the bed frame. Hide the wires using plastic cord covers for a professional look.
- Create a ‘chill zone’ by layering a plush rug with oversized floor pillows in the corner. This separates the sleeping area from the lounging area.
- Apply a peel-and-stick mural or a geometric wallpaper to the wall behind the headboard to act as the room’s focal point.
- Use a wire grid or cork tiles to display photos, concert tickets, and art. This allows the inhabitant to constantly evolve the space without damaging the walls.
- Incorporate various light sources: a neon sign, a salt lamp, and the sheer curtains over the window to ensure the room can transition from bright study-mode to low-light relaxation.
How to Master Realistic Pantry Organization for a Stress Free Kitchen
Why we love this
The visual harmony of a perfectly organized pantry is a form of domestic art. There is something deeply satisfying about the click of an airtight lid and the sight of uniform glass jars filled with colorful grains, pastas, and spices. It removes the ‘visual noise’ of mismatched cardboard boxes, replacing it with a sense of calm and efficiency that makes the process of cooking feel intentional and creative rather than chaotic.
Essential Elements:
- Clear airtight glass or BPA-free plastic canisters
- Woven or wire baskets for bulk items
- A chalk marker or label maker
- Tiered shelving for canned goods
- Lazy Susans for oils and vinegars
- Over-the-door rack for small snacks
How to make it
- Empty the entire pantry. Discard expired items and group remaining items into categories: Baking, Grains, Snacks, Breakfast, and Canned Goods.
- Decant dry goods (flour, sugar, pasta, cereal) into clear uniform containers. This not only looks better but keeps food fresh significantly longer.
- Label every container immediately. Use a consistent font or handwriting style to maintain the visual flow of the shelves.
- Place frequently used items at eye level. Heavy bulk items or seasonal appliances should go on the bottom shelf, while backstock goes on the very top.
- Utilize Lazy Susans in corners or for ‘sticky’ items like honey and oils. This prevents bottles from getting lost in the back and makes everything accessible with a simple spin.
- Add a motion-sensor LED light strip under the shelves. Being able to see every corner of your pantry is the ultimate luxury for a home cook.
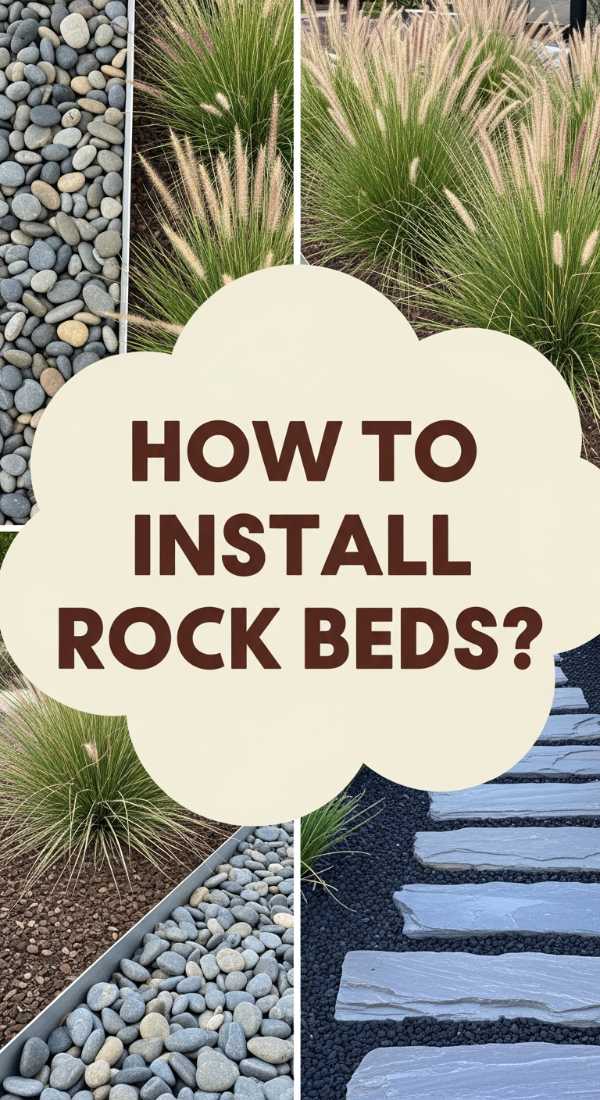
How to Install Rock Flower Beds for a Low Maintenance Front Yard

Why we love this
Rock beds offer a clean, sculptural aesthetic that looks manicured year-round with almost zero effort. The cool, grey tones of river rock or the warm beige of pea gravel provide a sophisticated backdrop for structural plants like succulents or ornamental grasses. You’ll love the crisp sound of rain filtering through the stones and the way the rocks retain the day’s heat, creating a micro-climate that helps hardy plants thrive while keeping pesky weeds at bay.
Essential Elements:
- Professional grade landscape fabric
- Galvanized steel or heavy-duty plastic edging
- River rocks, lava rocks, or pea gravel
- Landscaping staples
- A shovel and heavy-duty rake
- Drought-tolerant plants (Agave, Lavender, Sedum)
How to make it
- Dig out the area to a depth of 3–4 inches. Remove all grass and weeds, ensuring the soil is sloped slightly away from your home’s foundation for drainage.
- Install your edging along the perimeter. Steel edging provides the cleanest, most modern line and prevents the rocks from migrating into your lawn.
- Lay down heavy-duty landscape fabric. This is the most critical step; overlap the seams by at least 6 inches and secure with landscape staples every 12 inches.
- Cut ‘X’ shapes in the fabric where you want to place your plants. Dig a hole, plant your greenery, and tuck the fabric back around the base of the plant.
- Pour your chosen rock in 5-gallon bucket increments to avoid tearing the fabric. Use a rake to spread the rocks evenly to a depth of at least 2 inches.
- Hose down the rocks to remove the dust from the bag and reveal their true, vibrant color and texture.
How to Craft a Grill Station for Affordable Outdoor Cooking

Why we love this
The sizzle of a steak hitting a hot grate and the smoky aroma of charcoal are the universal signals of summer. A dedicated grill station elevates your BBQ from a lonely appliance to a social hub. The smooth, cool surface of a stone countertop paired with the warmth of a wooden base creates a professional-grade prep area where you can slice, season, and serve without ever having to run back inside to the kitchen.
Essential Elements:
- Pressure-treated 4×4 posts and 2×4 framing
- Concrete pavers or a stone slab for the countertop
- Exterior wood stain or paint
- Stainless steel hooks for tools
- Heavy-duty casters (optional, for mobility)
- Built-in bottle opener
How to make it
- Measure your grill’s height and width. Design your station to have a ‘cutout’ for the grill or build two separate side tables that flank the unit.
- Build the base frame using 4×4 posts for legs and 2x4s for the shelving support. Use pocket-hole joinery for a clean look that hides the screws.
- Clad the sides with cedar pickets or outdoor-rated plywood. Leave the front open or add doors to hide your propane tank or charcoal bags.
- Install the countertop. For a budget-friendly option, use large 12×12 smooth concrete pavers adhered with construction adhesive. For a splurge, get a remnant piece of granite.
- Sand the wood thoroughly and apply an exterior-grade polyurethane or stain to protect against grease spills and weather.
- Attach stainless steel hooks to the sides for your tongs and spatulas, and mount a magnetic strip for grill knives to keep everything within arm’s reach.
How to Construct a Floating Deck for a Perfect Summer Hangout

Why we love this
There is a unique architectural beauty to a deck that seems to hover just above the grass. It defines a space without the massive undertaking of a traditional raised deck. The wood feels soft and warm under bare feet, and because it sits low to the ground, it creates an intimate, grounded feeling that encourages hours of conversation. It’s the perfect stage for your outdoor furniture, turning an unused corner of the yard into a destination.
Essential Elements:
- TuffBlocks or concrete deck blocks
- Pressure-treated 2×6 joists
- Composite or cedar decking boards
- Deck screws (3-inch)
- Landscape fabric and gravel (for under the deck)
- Speed square and long level
How to make it
- Clear the area and lay down landscape fabric topped with a thin layer of gravel. This prevents weeds from growing up through your deck boards.
- Place your deck blocks in a grid pattern. For a standard 10×10 deck, you’ll need blocks spaced every 4–5 feet. Use a long level to ensure every block is perfectly even with its neighbor.
- Set your 2×6 outer frame joists into the blocks. Check for square by measuring the diagonals; they must be identical.
- Install the interior joists 16 inches apart (on center). Secure them to the frame using joist hangers and specialized connector screws.
- Lay your decking boards across the joists. Use a spacer (like a carpenter’s pencil) to keep a consistent 1/8-inch gap between boards for drainage.
- Screw the boards down, keeping your screw lines perfectly straight for a professional finish. Trim the overhanging edges with a circular saw for a crisp, flush perimeter.
How to Upgrade Patio Floors for a Budget Friendly Outdoor Makeover
[IMAGE_10]
Why we love this
Tired, cracked concrete is the ultimate buzzkill for a backyard paradise. Upgrading the floor with a stencil or interlocking deck tiles is like laying down a permanent outdoor rug. The transformation is instant—going from a ‘parking lot’ look to a high-end Mediterranean terrace or a chic Scandinavian balcony. It feels cleaner, looks brighter, and provides a polished foundation that makes your furniture and plants truly pop.
Essential Elements:
- Interlocking wood or composite deck tiles
- OR: Large-scale floor stencil and concrete paint
- Concrete cleaner and degreaser
- Painter’s tape
- Foam rollers (for stenciling)
- Outdoor sealant
How to make it
- Scrub the concrete patio with a heavy-duty degreaser and a stiff brush. Any leftover oil or dirt will prevent paint or tiles from adhering properly.
- If using tiles: Start at the most visible corner and simply snap the interlocking pieces together. Use a jigsaw to trim tiles to fit around posts or edges.
- If stenciling: Apply a base coat of high-quality exterior concrete paint (satin finish) and let dry for 24 hours.
- Position your stencil in the center of the patio. Secure with painter’s tape. Use a ‘dry brush’ technique with a foam roller—meaning very little paint—to prevent bleeding under the stencil.
- Repeat the pattern across the patio. If the stencil gets gummed up with paint, wash it mid-way through to keep your lines sharp.
- Once the paint is fully cured (usually 48-72 hours), apply two coats of clear anti-slip concrete sealer to protect your handiwork from UV rays and foot traffic.
Conclusion: Your Sanctuary Awaits
Transforming your home and garden is a journey, not a sprint. Each of these projects adds a layer of personality and comfort to your life, proving that you don’t need a massive budget to create a viral-worthy home. Whether you start with a single flower pot or commit to building a floating deck, the goal is the same: to create a space that reflects your soul and invites you to slow down. So, pick one project this weekend, gather your tools, and get ready to fall in love with your home all over again.