
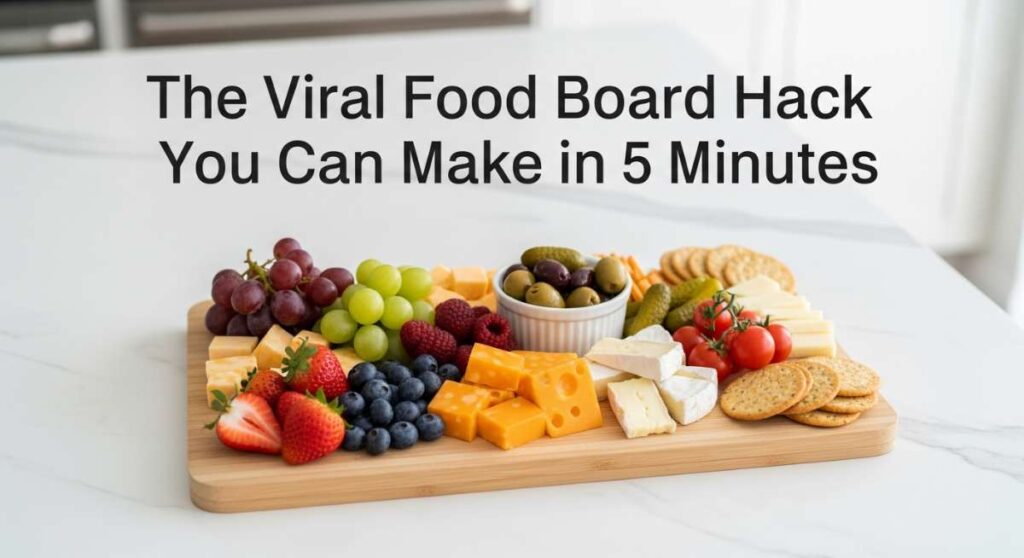
The Viral Food Board Hack You Can Make in 5 Minutes
We’ve all been there—the doorbell is about to ring, your friends are moments away, and you realize you haven’t even touched the appetizer situation. My kitchen used to be a place of pure hosting panic until I discovered the magic of the ‘everything’ board. It’s not just a platter; it’s a lifestyle shift that prioritizes connection over kitchen-exhaustion, turning simple ingredients into a visual masterpiece that looks like you spent hours curation each tiny detail.
The beauty of this viral hack is that it works for every single season, from the bright, tart beginnings of spring rhubarb to the celebratory heights of graduation season. It’s about creating a grazing experience that appeals to every sense, mixing textures and colors to keep your guests reaching for more. Grab your favorite wooden board, because we are about to elevate your hosting game with these ten essential additions that make any gathering feel like a five-star event.
How do you style the ultimate graduation cake board?
Why we love this
There is something so incredibly nostalgic and celebratory about a perfectly moist sponge cake sitting as the centerpiece of a party. We love the way the velvety buttercream catches the light, especially when paired with the sophisticated contrast of dark chocolate and gold leaf. As you slice into it, the aroma of Madagascar vanilla bean fills the air, promising a bite that is both airy and decadent. It is the ultimate crowd-pleaser that signals a major life milestone with every sweet, buttery forkful.
Ingredients
- 2 layers of prepared vanilla sponge cake
- 4 cups Swiss meringue buttercream
- Edible gold leaf
- Miniature graduation cap topper
- Fresh seasonal berries for garnish
How to make it
- Begin by chilling your cake layers in the freezer for 20 minutes; this makes them much easier to handle and prevents crumbs from tearing into your frosting.
- Place the bottom layer on a rotating cake stand and apply a generous 1/2-inch layer of buttercream, spreading it perfectly flat with an offset spatula to ensure structural integrity.
- Stack the second layer top-side down to create a perfectly flat surface, then apply a thin ‘crumb coat’ of frosting over the entire cake to trap any loose bits.
- Refrigerate for 15 minutes before applying the final thick layer of buttercream, using a bench scraper held at a 45-degree angle to achieve those sharp, professional edges.
- Gently press the gold leaf onto the sides using a clean, dry brush, and place the mortarboard topper directly in the center for that viral-worthy finish.
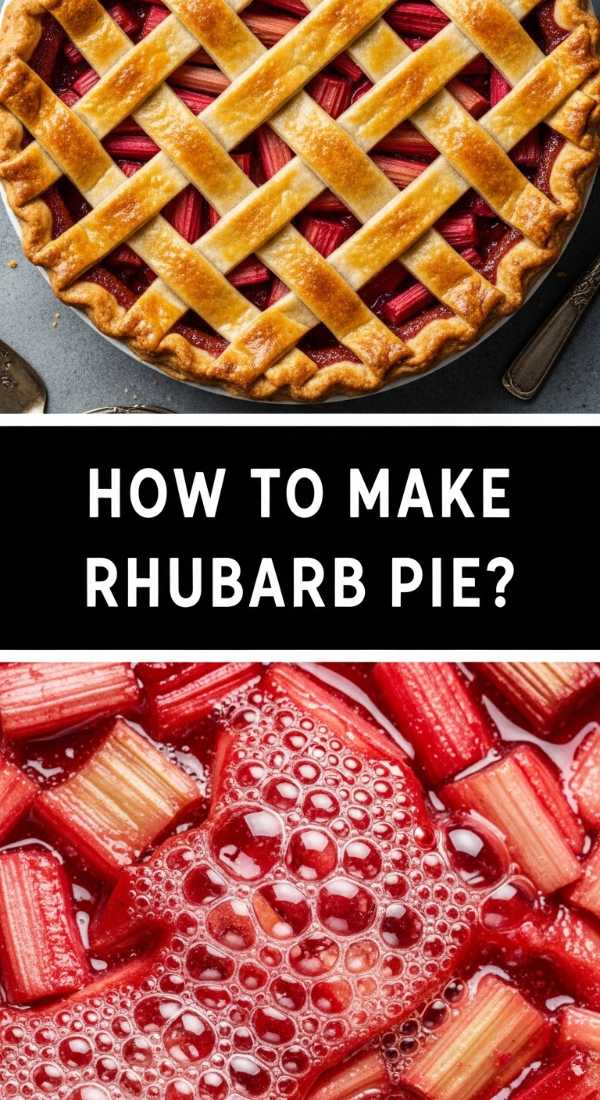
Can you master the perfect lattice rhubarb pie?
Why we love this
Rhubarb pie is the unsung hero of the baking world, offering a sophisticated tartness that cuts through the richness of a buttery, flaky crust. When it’s baking, the kitchen is transformed by the scent of caramelized sugar and earthiness, creating an atmosphere of pure comfort. Each bite offers a satisfying crunch from the lattice top followed by the jammy, ruby-red interior that feels like a warm hug. It is the perfect balance of sweet and sour that leaves your palate feeling refreshed rather than weighed down.
Ingredients
- Double pie crust pastry (chilled)
- 4 cups fresh rhubarb, chopped into 1-inch pieces
- 1.5 cups granulated sugar
- 3 tablespoons cornstarch
- 1 tablespoon lemon juice
- Egg wash and coarse sugar for topping
How to make it
- Preheat your oven to 400°F (200°C) and place a baking sheet on the bottom rack to catch any juices that might bubble over.
- Toss the rhubarb with sugar, cornstarch, and lemon juice in a large bowl, letting it macerate for 10 minutes so the juices begin to draw out.
- Roll out the bottom crust and fit it into a 9-inch pie plate, then pour in the rhubarb mixture, ensuring it is distributed evenly to avoid air pockets.
- Cut the second piece of dough into 1-inch strips and weave them over the filling in a classic lattice pattern, tucking the edges under the bottom crust to seal.
- Brush the dough with a beaten egg and sprinkle heavily with coarse sugar; bake for 45-50 minutes until the crust is deep golden brown and the filling is bubbling thick.
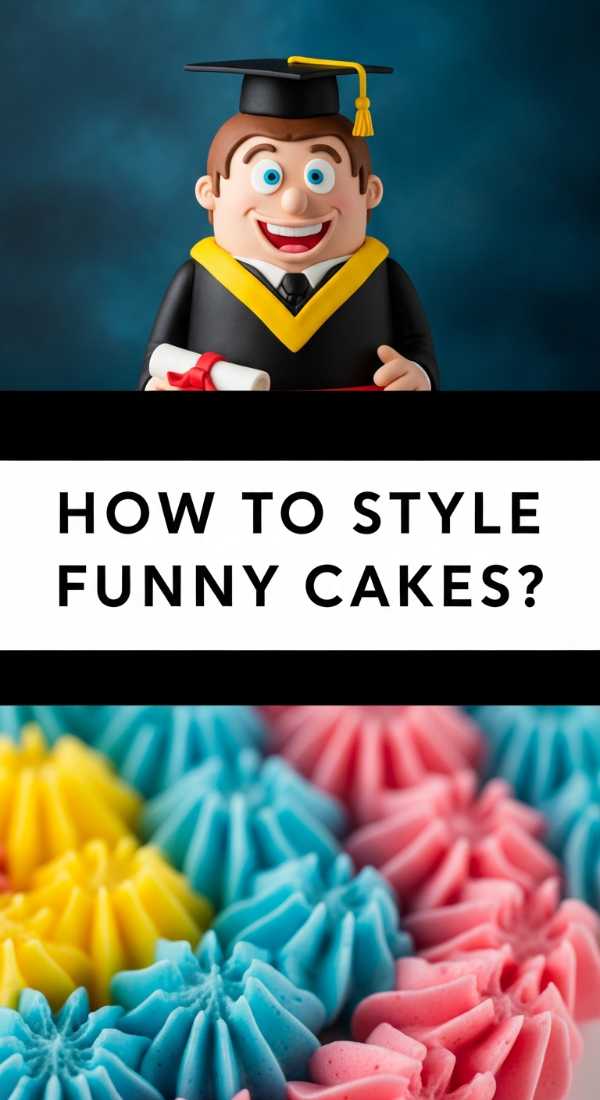
How to bake a graduation cake that actually makes them laugh?
Why we love this
Injecting a bit of humor into a formal occasion is the best way to break the ice and create lasting memories. We love the ‘funny grad cake’ because it combines high-quality baking with a witty, personal touch that shows you really know the graduate. The texture of the cake remains soft and indulgent, while the decorations serve as a playful nod to the long nights of studying and endless coffee. It’s a conversation starter that tastes just as good as it looks, making it the star of any graduation food board.
Ingredients
- 9×13 sheet cake (any flavor)
- Black fondant for ‘diploma’ and ‘cap’
- White royal icing for lettering
- Edible ink markers
- Food-safe wire for ‘bouncing’ graduation tassels
How to make it
- Frost your sheet cake with a smooth, flat layer of buttercream to create a ‘blank canvas’ for your jokes and puns.
- Roll out a small rectangle of white fondant, roll it up to look like a diploma, and secure it with a red fondant bow; place this in the corner of the cake.
- Using the royal icing, pipe a humorous phrase like “The Tassel Was Worth The Hassle” or “I’m 100% Done” in a modern, clean font style.
- To add a 3D element, create a mini graduation cap out of black fondant and use food-safe wire to make a tassel that ‘boops’ or shakes when the cake is moved.
- Add small details like fondant ‘books’ or ‘coffee cups’ around the base to complete the humorous scene of a tired but victorious student.
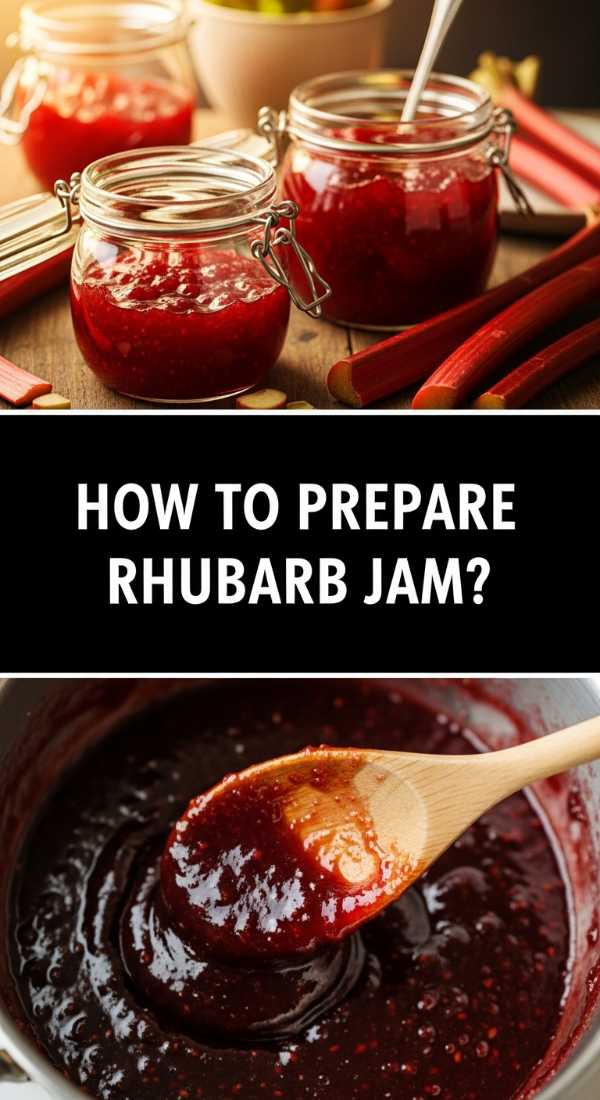
How to make small-batch rhubarb jam in a flash?
Why we love this
This jam is like liquid sunshine in a jar, boasting a vibrant pink hue and a zesty profile that wakes up your taste buds instantly. We love its versatility; it’s equally at home on a morning scone as it is paired with a sharp cheddar on your food board. The consistency is silky and thick, with small bits of tender rhubarb that provide a delightful textural contrast. The aroma is bright and floral, making it a sophisticated addition to any pantry or party spread.
Ingredients
- 1 pound fresh rhubarb, sliced thin
- 1 cup sugar
- 1 teaspoon lemon zest
- 1/2 teaspoon vanilla bean paste
- A pinch of salt
How to make it
- Combine the sliced rhubarb, sugar, and lemon zest in a heavy-bottomed saucepan over medium heat, stirring constantly as the sugar dissolves.
- Bring the mixture to a low boil, then reduce the heat to a simmer, allowing the rhubarb to break down into a thick, syrupy consistency for about 15-20 minutes.
- Use a potato masher or a fork to gently crush any large remaining pieces of rhubarb if you prefer a smoother jam texture.
- Stir in the vanilla bean paste and salt during the last 2 minutes of cooking to preserve the delicate floral notes of the vanilla.
- Perform the ‘plate test’ by putting a small spoonful on a cold plate; if it wrinkles when pushed with a finger, it is ready to be transferred to a sterilized jar.
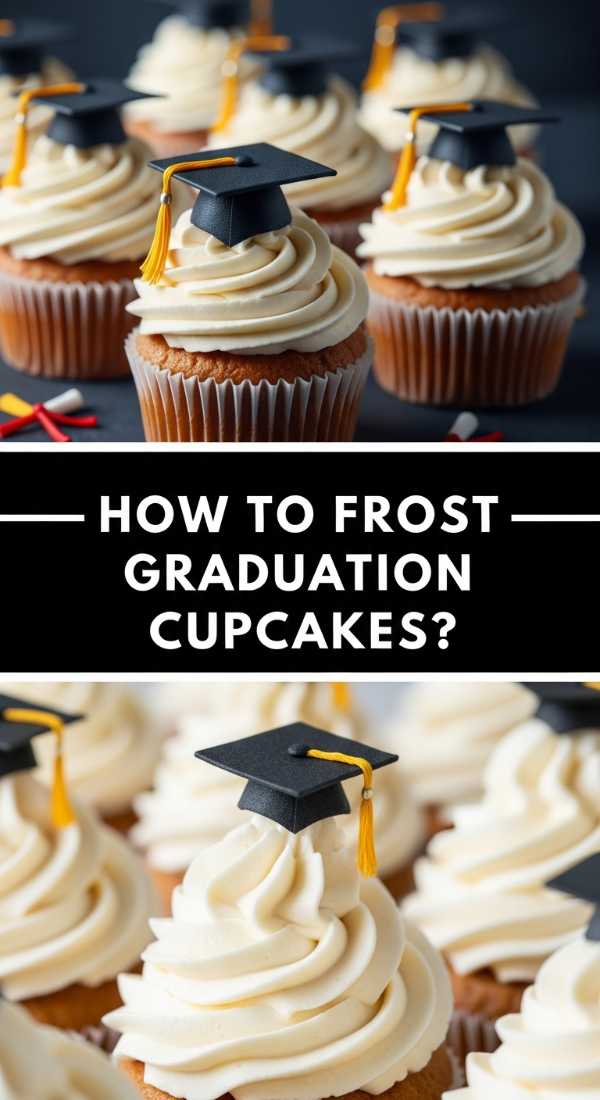
What’s the secret to bakery-style graduation cupcakes?
Why we love this
Cupcakes are the perfect grab-and-go treats for a busy party, and these graduation versions are as stylish as they are delicious. We love the airy, light-as-a-cloud crumb of the cake paired with a high-domed swirl of frosting that looks professionally piped. The individual portions make them ideal for a food board, allowing guests to sample different flavors without needing a plate. Each bite is a harmonious blend of sweet cake and creamy topping, finished with a celebratory topper that ties the whole theme together.
Ingredients
- 12 pre-baked chocolate cupcakes
- 2 cups chocolate ganache or stiff buttercream
- Square chocolate pieces (like Ghirardelli)
- Sour belt candies (cut into strips for tassels)
- M&Ms or small round candies
How to make it
- Fit a piping bag with a large open star tip and pipe a tall, three-tiered swirl of frosting onto each cooled cupcake, starting from the outside and moving in.
- To create the graduation cap, place a square chocolate piece on top of the frosting swirl, pressing down slightly so it sticks securely.
- Use a tiny dot of leftover frosting to attach a ‘tassel’ made from a thin strip of sour belt candy to the center of the chocolate square.
- Cover the attachment point of the tassel with a single M&M candy to mimic the button on top of a graduation cap.
- Chill the cupcakes for 10 minutes to set the structure before arranging them in a cascading pattern on your food board.
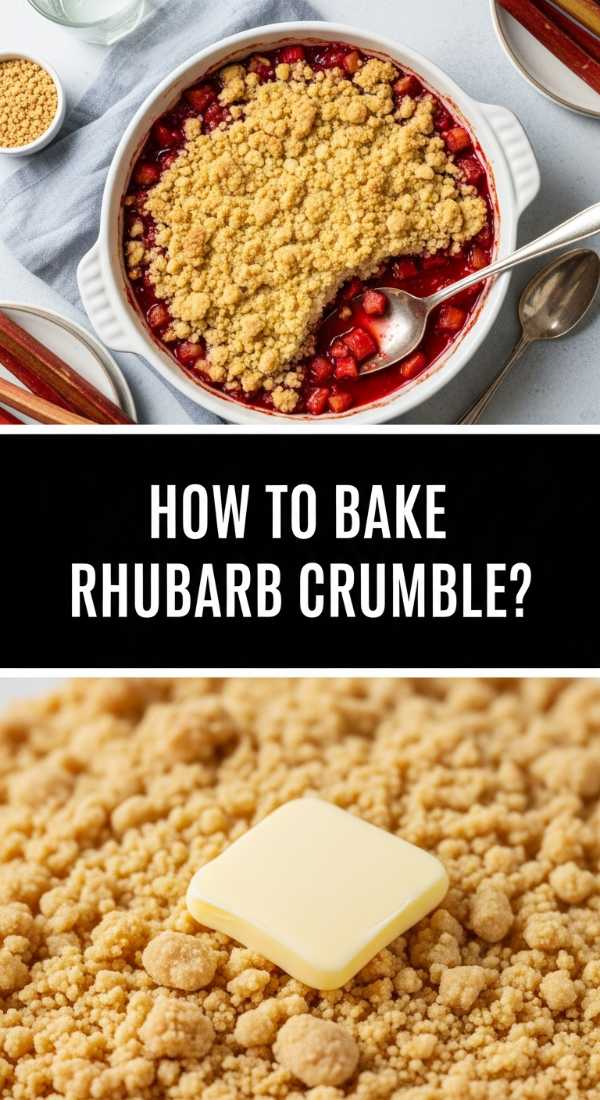
How to get the crunchiest topping on a rhubarb crumble?
Why we love this
A crumble is the ultimate rustic dessert, and the rhubarb version is a masterclass in texture. We love the way the buttery, oat-filled topping shatters under the spoon to reveal a bubbling, bright red fruit filling underneath. The scent of toasted oats and cinnamon is incredibly inviting, drawing everyone into the kitchen before the timer even goes off. It’s a dish that feels homey and unpretentious, yet the sharp flavor of the rhubarb makes it feel modern and exciting for any dinner party.
Ingredients
- 5 cups rhubarb, chopped
- 1/2 cup sugar
- 1 cup rolled oats
- 1 cup brown sugar
- 3/4 cup cold butter, cubed
- 1 teaspoon cinnamon
How to make it
- Preheat your oven to 375°F (190°C) and grease a 9-inch square baking dish with butter to prevent the fruit from sticking.
- Toss the rhubarb with the granulated sugar and a tablespoon of flour, then spread it into the bottom of the prepared dish.
- In a separate bowl, combine oats, brown sugar, cinnamon, and flour; use a pastry cutter or your fingers to rub in the cold butter until the mixture resembles coarse breadcrumbs.
- Squeeze small handfuls of the topping together to create larger ‘clumps’ before scattering them over the fruit; this is the secret to those big, crunchy pieces.
- Bake for 35-40 minutes until the topping is a deep golden brown and the rhubarb juices are thick and bubbling up around the edges.
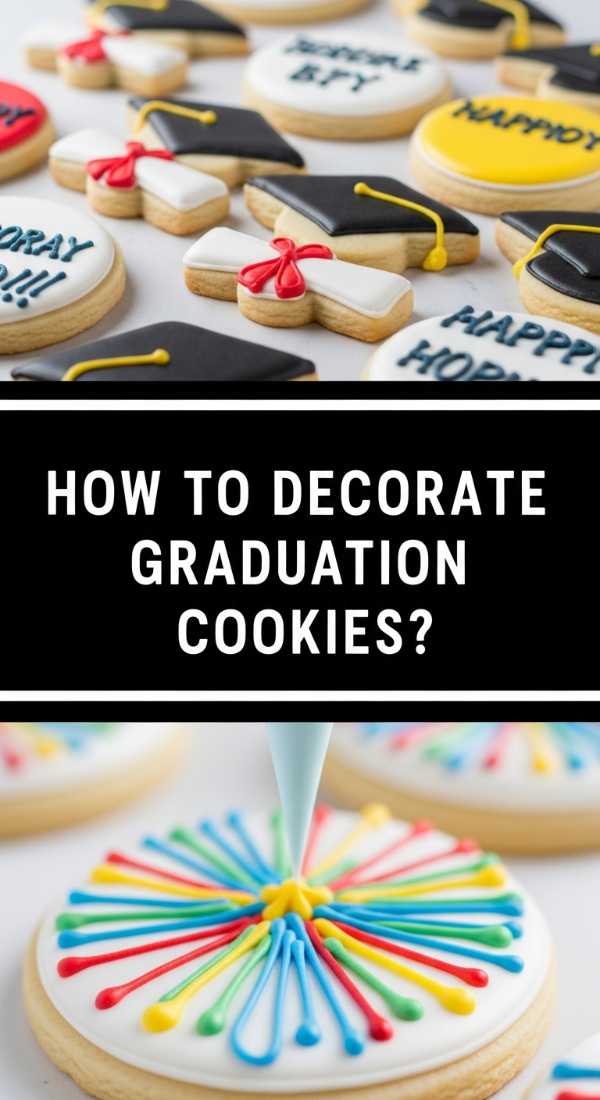
How to decorate graduation cookies like a pro?
Why we love this
Graduation cookies are essentially edible art, and we love the way they can be customized to match any school color or degree. The snap of a perfectly baked sugar cookie combined with the smooth, sweet finish of royal icing is a match made in heaven. There is something so satisfying about the clean lines and crisp designs that make these cookies stand out on a platter. They are the perfect way to add a personalized, handmade touch to your board that guests will actually want to take home as a souvenir.
Ingredients
- Standard sugar cookie dough (chilled)
- Royal icing in 3 consistencies (stiff, piping, and flood)
- Gel food coloring in school colors
- Fine-tip piping bags
- Edible silver or gold luster dust
How to make it
- Roll out your dough to a consistent 1/4-inch thickness and use a graduation-cap-shaped cutter; bake and let them cool completely before icing.
- Use the piping consistency icing to outline the shape of the cap, then immediately fill the center with the flood consistency icing using a toothpick to pop any bubbles.
- Let the base layer dry for at least 4 hours (or overnight) to ensure the next layers of detail don’t sink or bleed into the base.
- Pipe the tassel and the ‘button’ details using a contrasting color of stiff icing to provide a raised, textured effect.
- Once dry, mix a drop of vodka with luster dust and paint the tassel for a metallic sheen that catches the light beautifully on your food board.
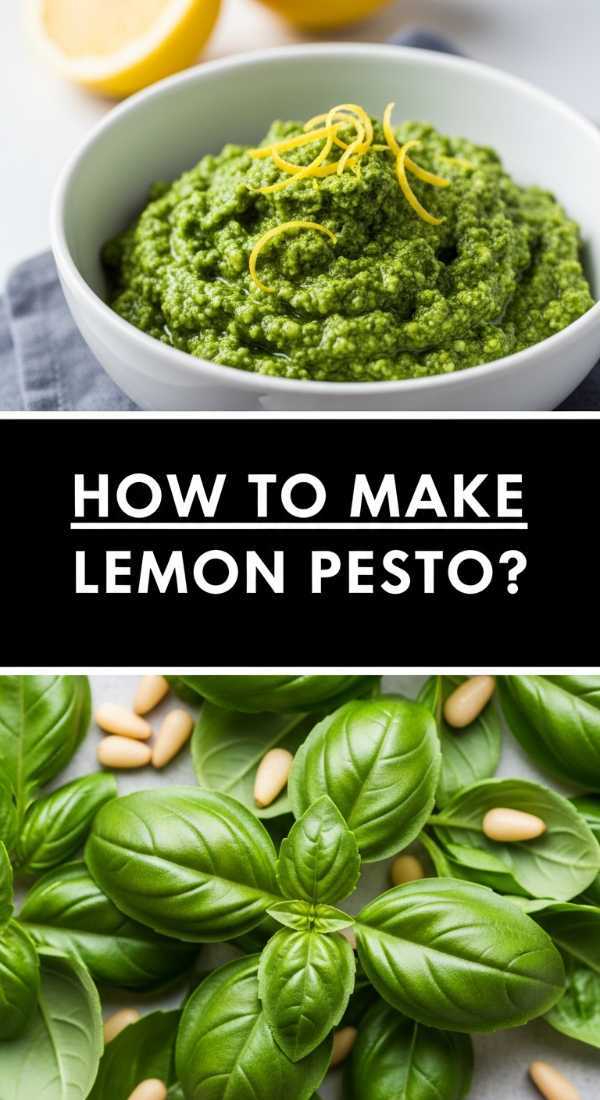
How to whip up zesty lemon pesto for your board?
Why we love this
This isn’t your average pesto; the addition of fresh lemon zest and juice transforms it into a bright, herbaceous spread that is addictive. We love how the vibrant green color pops against the neutral tones of crackers and cheeses on a food board. The aroma of fresh basil combined with the sharp tang of citrus is incredibly refreshing, making it the perfect palate cleanser between richer bites. It’s a sophisticated, zesty twist on a classic that adds a ‘chef’s touch’ to even the simplest platter.
Ingredients
- 2 cups fresh basil leaves, packed
- 1/2 cup toasted pine nuts
- 2 large cloves garlic
- 1/2 cup grated Parmesan cheese
- 1/2 cup extra virgin olive oil
- Zest and juice of 1 lemon
How to make it
- Pulse the basil, toasted pine nuts, and garlic in a food processor until coarsely chopped, being careful not to over-process and turn it into a paste too early.
- With the processor running on low, slowly drizzle in the olive oil in a steady stream to create a perfect emulsion.
- Add the Parmesan cheese and pulse just 2-3 times to incorporate; you want to keep some of the texture from the cheese.
- Stir in the lemon zest and juice by hand at the very end to ensure the citrus oils stay bright and don’t turn bitter from the heat of the processor blades.
- Transfer to a small ramekin and finish with a crack of black pepper and a drizzle of oil before placing it in the center of your food board.
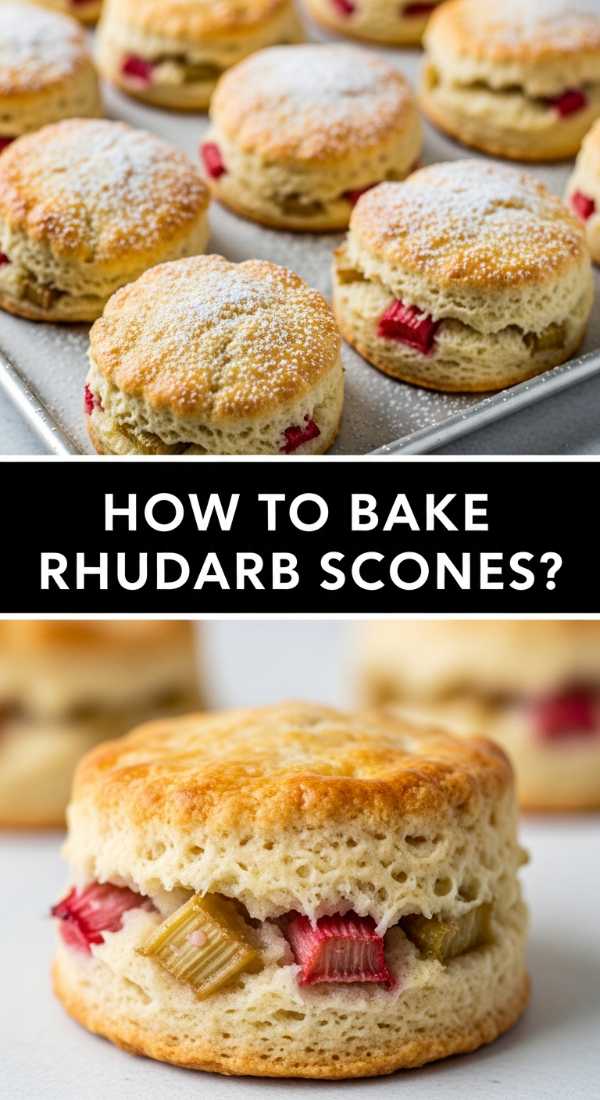
How to bake flaky rhubarb scones for brunch?

Why we love this
Scones are the ultimate brunch luxury, and when they are studded with tart rhubarb, they become truly irresistible. We love the interplay between the crumbly, buttery dough and the softened, jammy pockets of fruit that melt in your mouth. The texture is light and flaky, with a slightly crisp exterior that provides a satisfying crunch. Drizzled with a simple glaze, these scones offer a bakery-quality experience that feels incredibly special and artisanal, perfect for a morning celebration board.
Ingredients
- 2 cups all-purpose flour
- 1/4 cup sugar
- 1 tablespoon baking powder
- 1/2 cup cold salted butter, grated
- 3/4 cup heavy cream
- 1 cup finely diced rhubarb
How to make it
- Whisk the dry ingredients together, then use your fingers to toss the grated cold butter into the flour until it resembles coarse crumbs.
- Gently fold in the diced rhubarb, ensuring each piece is coated in flour to prevent them from sinking or clumping together.
- Make a well in the center and pour in the heavy cream, stirring with a fork just until a shaggy dough forms—do not overmix!
- Turn the dough out onto a floured surface, pat it into a 1-inch thick circle, and cut it into 8 wedges using a sharp knife or bench scraper.
- Brush the tops with extra cream and bake at 400°F (200°C) for 18-20 minutes until the edges are golden and the center is set; serve warm with the rhubarb jam from section 4.
How to craft viral coffee drinks for your guests?
[IMAGE_10]
Why we love this
A viral coffee drink is the perfect ‘wow’ factor to accompany your food board, offering a layered, aesthetic look that is pure Instagram gold. We love the rich, deep flavor of high-quality espresso paired with the velvety sweetness of cold foam. The aroma of roasted beans combined with hints of vanilla or hazelnut creates a coffeehouse vibe right in your dining room. It’s a sophisticated way to transition from savory snacks to sweet treats, providing a caffeinated boost that keeps the party energy high.
Ingredients
- 2 shots of chilled espresso
- 1 tablespoon vanilla syrup
- 1/2 cup milk of choice
- 1/4 cup heavy cream (for the cold foam)
- Ice cubes
How to make it
- Fill a tall glass with large ice cubes and pour in the vanilla syrup, followed by your chilled espresso shots.
- Add the milk, leaving about two inches of space at the top of the glass for your signature cold foam layer.
- In a separate small jar or frother, combine the heavy cream and a splash of syrup, then froth for 30 seconds until it reaches a thick, pourable consistency.
- Gently pour the cold foam over the back of a spoon onto the coffee to create a distinct, beautiful layer that won’t immediately mix.
- Garnish with a dusting of cocoa powder or cinnamon and serve with a reusable straw for that perfect viral aesthetic.
Conclusion
Whether you are celebrating a hard-earned graduation or simply enjoying the first harvest of the season, these tips and tricks ensure your food board is anything but ordinary. Remember, the secret to a viral board isn’t just the food—it’s the love and detail you put into every bite. Now, go forth and host with confidence!