
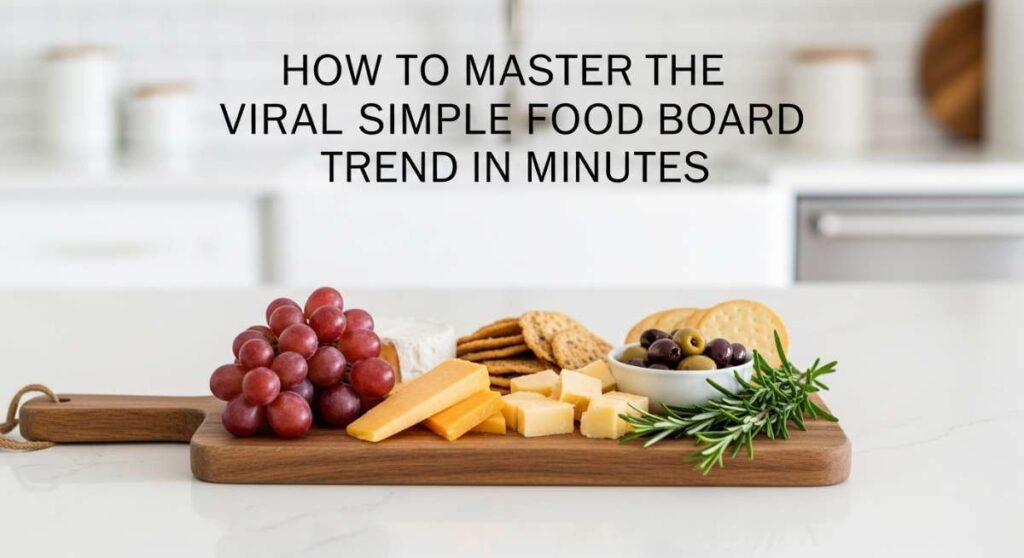
How to Master the Viral Simple Food Board Trend in Minutes
There is something inherently magical about a shared meal that brings people together, isn’t there? Lately, my social media feeds have been overflowing with these stunning food boards that seem to capture a moment in time—a celebration, a season, or just a lazy Sunday morning. These viral simple food boards are more than just a trend; they are a canvas for our culinary creativity and a way to show our loved ones that we care about the little details.
I remember the first time I set out a themed board for a graduation party; the gasps of delight from my guests were worth every second of prep. Whether you are celebrating a major milestone or just trying to make a weekday lunch a bit more special for your toddler, the secret lies in the variety of textures and colors. It’s about that perfect balance between sweet and tart, crunchy and soft, and the warmth that comes from homemade treats.
Today, I’m sharing my favorite components for the ultimate seasonal and celebratory boards. From the tart zing of fresh rhubarb to the whimsical joy of graduation treats, we are going to dive into ten ways you can elevate your hosting game. Let’s roll up our sleeves and turn your kitchen into a hub of viral-worthy deliciousness!
How to bake graduation cakes?
Why we love this
There is nothing quite like the aroma of a classic vanilla sponge wafting through the house to signal a momentous occasion. This graduation cake is designed to be the centerpiece of your food board, offering a tender, moist crumb that melts in your mouth with every bite. The sweetness is perfectly balanced, providing a comforting base for any frosting of your choice, while the golden-brown edges offer a slight, satisfying caramelization that contrasts beautifully with the soft interior. It’s a celebratory staple that feels like a warm hug for the graduate.
Ingredients
- 2 1/2 cups all-purpose flour
- 1 1/2 cups granulated sugar
- 1 cup unsalted butter, softened
- 4 large eggs
- 1 cup whole milk
- 1 tablespoon vanilla extract
- 2 1/2 teaspoons baking powder
- 1/2 teaspoon salt
How to make it
- Begin by preheating your oven to 350°F (175°C) and generously greasing two 8-inch round cake pans with butter or cooking spray, then lining the bottoms with parchment paper to ensure an easy release.
- In a large mixing bowl, cream together the softened butter and granulated sugar using a stand mixer or hand mixer on medium-high speed for about 3-5 minutes until the mixture is pale, light, and fluffy.
- Incorporate the eggs one at a time, beating well after each addition and scraping down the sides of the bowl to ensure a cohesive batter; add the vanilla extract during the last egg.
- In a separate medium bowl, whisk together the flour, baking powder, and salt to aerate the dry ingredients and remove any large lumps.
- Reduce the mixer speed to low and alternately add the dry ingredients and the milk to the butter mixture, starting and ending with the flour; mix only until just combined to avoid overworking the gluten, which can make the cake tough.
- Divide the batter evenly between the prepared pans, smoothing the tops with a spatula, and bake for 30-35 minutes or until a toothpick inserted into the center comes out clean or with just a few moist crumbs.
- Allow the cakes to cool in the pans for 10 minutes before carefully inverting them onto a wire rack to cool completely before you begin the decorating process.
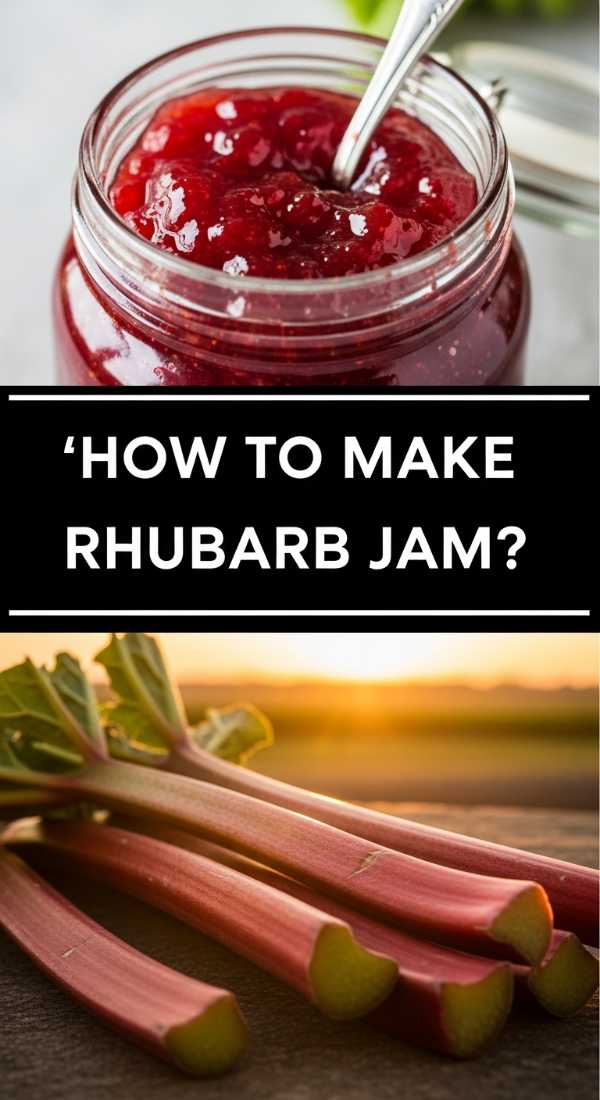
How to make rhubarb jam?

Why we love this
This vibrant ruby-red jam is the definition of springtime in a jar, offering a sophisticated balance of sharp tartness and deep sweetness. As it simmers on the stove, the rhubarb breaks down into a luscious, silky texture that spreads effortlessly over warm toast or flaky scones. The aroma is bright and floral, instantly waking up your senses and adding a sophisticated, artisanal touch to any breakfast spread or dessert board. It is a preserved bit of sunshine that brings a pop of color and flavor to every bite.
Ingredients
- 4 cups fresh rhubarb, chopped into 1/2 inch pieces
- 2 cups granulated sugar
- 1 tablespoon lemon juice
- 1 teaspoon lemon zest
- 1/2 teaspoon vanilla bean paste (optional)
How to make it
- Place the chopped rhubarb and sugar in a large, heavy-bottomed saucepan or Dutch oven and stir well to coat the fruit; let it sit for about 30 minutes at room temperature to allow the sugar to draw out the natural juices.
- Place the pan over medium heat and bring the mixture to a gentle boil, stirring frequently with a wooden spoon to prevent the sugar from scorching on the bottom.
- Once boiling, add the lemon juice and lemon zest, which provide the necessary acidity and pectin to help the jam set properly while adding a bright citrus note.
- Continue to simmer the mixture over medium-low heat for 15-20 minutes, stirring often; the rhubarb should completely break down into a thick, glossy syrup that coats the back of a spoon.
- If using, stir in the vanilla bean paste during the final 2 minutes of cooking for a layer of aromatic depth.
- To test for doneness, place a small spoonful of jam on a chilled plate; if it wrinkles when pushed with your finger after a minute, it is ready.
- Remove from heat and carefully ladle the hot jam into sterilized glass jars, leaving 1/4 inch of headspace, and allow them to cool completely before sealing and storing in the refrigerator.
How to decorate graduation cookies?

Why we love this
Decorating graduation cookies is an exercise in edible art that brings a whimsical and personalized touch to your food board. The contrast between the crisp, buttery shortbread base and the smooth, sweet royal icing creates a delightful texture that is as fun to eat as it is to look at. Seeing a tray filled with little mortarboards and diplomas evokes a sense of pride and accomplishment, making these the ultimate conversation starter at any grad party. The bright whites and bold colors of the icing make these cookies pop against the natural wood of a serving board.
Ingredients
- Batch of sugar cookies (shaped like caps and diplomas)
- 3 cups powdered sugar
- 2 tablespoons meringue powder
- 1/4 cup warm water
- Food coloring gels (school colors)
- Edible gold leaf or sprinkles
How to make it
- Ensure your sugar cookies are completely cooled to room temperature before you begin, otherwise the icing will melt and run off the edges.
- Prepare the royal icing by whisking together the powdered sugar, meringue powder, and warm water in a stand mixer on low speed until combined, then increase to medium-high for about 7 minutes until stiff peaks form.
- Divide the icing into separate bowls and add food coloring gels to match the graduate’s school colors, keeping a portion white for the diploma ribbons.
- Transfer the icing to piping bags fitted with small round tips; for the “flood” consistency, add a few drops of water to a portion of the icing until it reaches the consistency of honey.
- Outline the shapes with the stiffer icing first, creating a border, then “flood” the interior with the thinner icing, using a toothpick to pop any air bubbles and smooth the surface.
- Allow the base layer to dry for at least 2-4 hours before adding decorative details like tassels on the caps or “Class of 2024” lettering with the stiff icing.
- Finish with a touch of edible gold leaf or sprinkles while the final details are still tacky for a high-end, professional look.
How to bake rhubarb pie?

Why we love this
A rhubarb pie is a masterpiece of seasonal baking, featuring a buttery, flaky crust that shatters upon impact to reveal a bubbling, jammy interior. The natural acidity of the rhubarb is tempered by sugar, resulting in a complex flavor profile that is both refreshing and deeply satisfying. When served warm, the steam carries the scent of toasted flour and baked fruit, creating a sensory experience that feels rustic yet refined. It is the perfect anchor for a dessert board, especially when paired with a dollop of cold whipped cream.
Ingredients
- Pastry for a double-crust 9-inch pie
- 5 cups fresh rhubarb, sliced
- 1 1/4 cups granulated sugar
- 1/4 cup cornstarch
- 1/2 teaspoon ground cinnamon
- 1 tablespoon unsalted butter, cubed
- 1 egg (for egg wash)
How to make it
- Preheat your oven to 400°F (200°C) and roll out half of your pie dough on a floured surface to fit a 9-inch pie plate, gently pressing it into the bottom and sides.
- In a large bowl, toss the sliced rhubarb with the sugar, cornstarch, and cinnamon until every piece is evenly coated; the cornstarch is vital here to thicken the juices and prevent a soggy bottom.
- Pour the rhubarb mixture into the prepared crust, mounding it slightly in the center, and dot the top with the small cubes of butter to add richness to the filling.
- Roll out the second half of the dough and either place it over the top as a full crust (with slits for steam) or cut it into strips to create a beautiful lattice pattern.
- Crimp the edges of the pie tightly to seal the juices inside, then brush the top of the crust with a simple egg wash (one egg beaten with a splash of water) for a golden, shiny finish.
- Place the pie on a baking sheet to catch any drips and bake for 45-50 minutes, or until the crust is a deep golden brown and the filling is bubbling thick through the vents.
- Crucially, allow the pie to cool on a wire rack for at least 2-3 hours before slicing; this allows the filling to set properly so you get clean, beautiful slices.
How to design funny cakes?
Why we love this
Funny cakes are all about breaking the rules of traditional baking to bring a sense of humor and personality to the table. Whether it’s a cake that looks like a giant cheeseburger or one with a sarcastic message piped in bright colors, these designs are meant to make people laugh before they take a bite. The joy comes from the unexpected—seeing something familiar transformed into a sweet treat. They add a lighthearted energy to your food board, reminding everyone that food is meant to be fun, creative, and a little bit silly.
Ingredients
- Multi-layer round cake
- 4 cups vanilla buttercream
- Assorted food colorings
- Fondant or modeling chocolate
- Funny cake toppers or edible ink pens
- Crushed cookies or sprinkles for “dirt” or texture
How to make it
- Start with a sturdy, chilled cake that has been crumb-coated; a cold cake is much easier to carve or decorate without crumbs getting into your final design.
- Decide on your “funny” theme—if you’re doing a “gravity-defying” cake, use a hidden dowel or straw to support candy pouring out of a bag onto the cake.
- Tint your buttercream in vibrant, non-traditional colors using gel pastes to ensure the colors are bold and don’t water down the frosting consistency.
- Use a piping bag with a grass tip to create “hair” or a petal tip to create ruffled, silly textures around the sides of the cake.
- Sculpt small details out of fondant, like a “spilled” drink or a tiny person face-planting into the frosting, and place them strategically to tell a visual joke.
- Use an edible ink pen or a very fine piping tip to write a witty or self-deprecating message across the top in a contrasting color.
- Finish the design by adding oversized sprinkles or “mistake” elements like a faux crack in the icing to lean into the humorous, imperfect aesthetic.
How to frost graduation cupcakes?
Why we love this
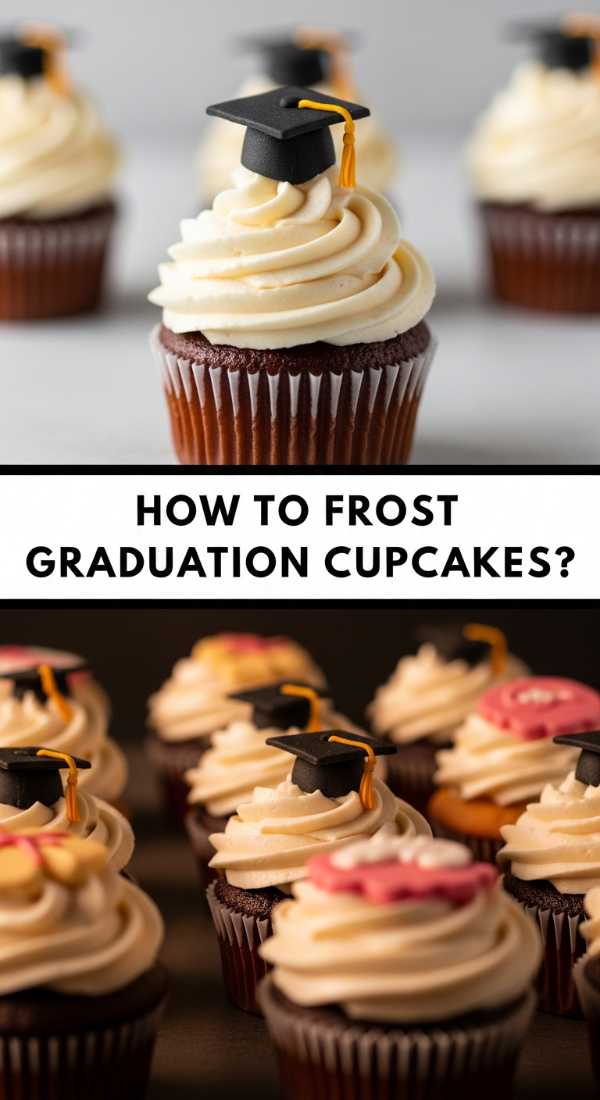
Graduation cupcakes are the ultimate grab-and-go treat for a busy party, offering individual portions of decadence that are easy to display. The magic lies in the high swirl of frosting, which provides a creamy, airy contrast to the dense cake base. When frosted with precision, they look like miniature sculptures, each one topped with a symbol of success. The sight of a dozen perfectly frosted cupcakes in school colors adds a professional and cohesive look to your board, making the celebration feel truly curated and special.
Ingredients
- 12 baked and cooled cupcakes
- 2 cups unsalted butter, softened
- 4 cups powdered sugar, sifted
- 2 teaspoons vanilla extract
- 2 tablespoons heavy cream
- Small square chocolates (for caps) and sour belts (for tassels)
How to make it
- Prepare your buttercream by beating the softened butter for 5 minutes until it is nearly white and very fluffy, then gradually add the sifted powdered sugar on low speed.
- Once the sugar is incorporated, add the vanilla and heavy cream, then whip on high for another 2 minutes until the frosting is smooth and holds its shape perfectly.
- Fit a large piping bag with a star tip (like a 1M or 2D) and fill it with the buttercream, ensuring there are no large air pockets trapped inside.
- Hold the bag vertically over the center of the cupcake, about half an inch above the surface, and pipe a spiral starting from the outside edge and moving inward and upward.
- As you reach the center, release the pressure and pull the bag away quickly to create a neat peak.
- To create the graduation cap topper, place a small square of dark chocolate on top of the frosting swirl and use a tiny dot of frosting to attach a thin strip of sour belt or a piece of licorice as a tassel.
- For a final touch, add a small edible pearl or a gold sprinkle to the center of the “cap” to represent the button, completing the graduation look.
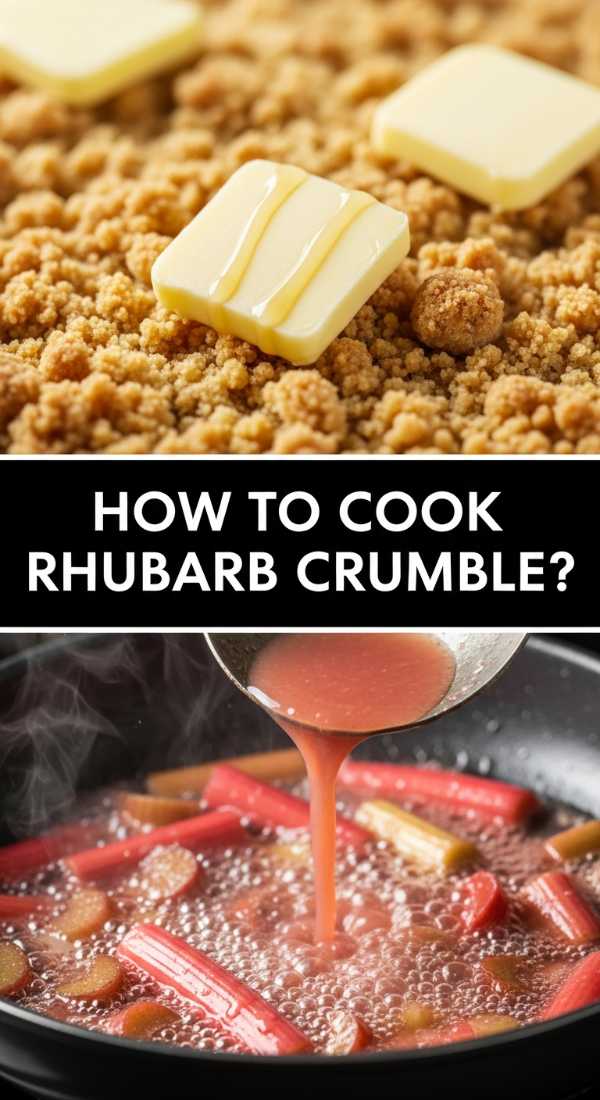
How to cook rhubarb crumble?
Why we love this
Rhubarb crumble is the ultimate comfort food, striking a perfect chord between the crunchy, buttery oat topping and the soft, tart fruit underneath. The sound of the spoon breaking through the golden crust is incredibly satisfying, revealing the bright pink, steaming fruit filling. It’s a rustic dish that doesn’t require perfection, making it feel homey and approachable. The warmth of the cinnamon and the richness of the butter create an inviting aroma that fills the kitchen, promising a dessert that is both simple and sophisticated.
Ingredients
- 6 cups rhubarb, cut into 1-inch pieces
- 3/4 cup granulated sugar
- 1 tablespoon cornstarch
- 1 cup all-purpose flour
- 1 cup rolled oats
- 1 cup brown sugar, packed
- 1/2 cup unsalted butter, chilled and cubed
- 1 teaspoon cinnamon
How to make it
- Preheat your oven to 375°F (190°C) and lightly grease a 9×9 inch baking dish or a deep pie plate with butter.
- In a large bowl, toss the rhubarb pieces with the granulated sugar and cornstarch until the fruit is well coated, then spread it evenly into the bottom of the baking dish.
- In a separate bowl, combine the flour, rolled oats, brown sugar, and cinnamon; whisk these together to ensure the spices are evenly distributed.
- Add the chilled, cubed butter to the dry mixture and use a pastry cutter or your fingertips to rub the butter into the flour and oats until the mixture resembles coarse crumbs with some pea-sized lumps.
- Sprinkle the crumble mixture evenly over the top of the rhubarb, making sure to cover the fruit completely to prevent it from drying out in the oven.
- Bake for 35-45 minutes, or until the rhubarb juices are bubbling up around the edges and the topping is a deep, golden brown and feels firm to the touch.
- Allow the crumble to rest for at least 15 minutes before serving; this gives the juices time to thicken into a delicious syrup that coats the fruit.
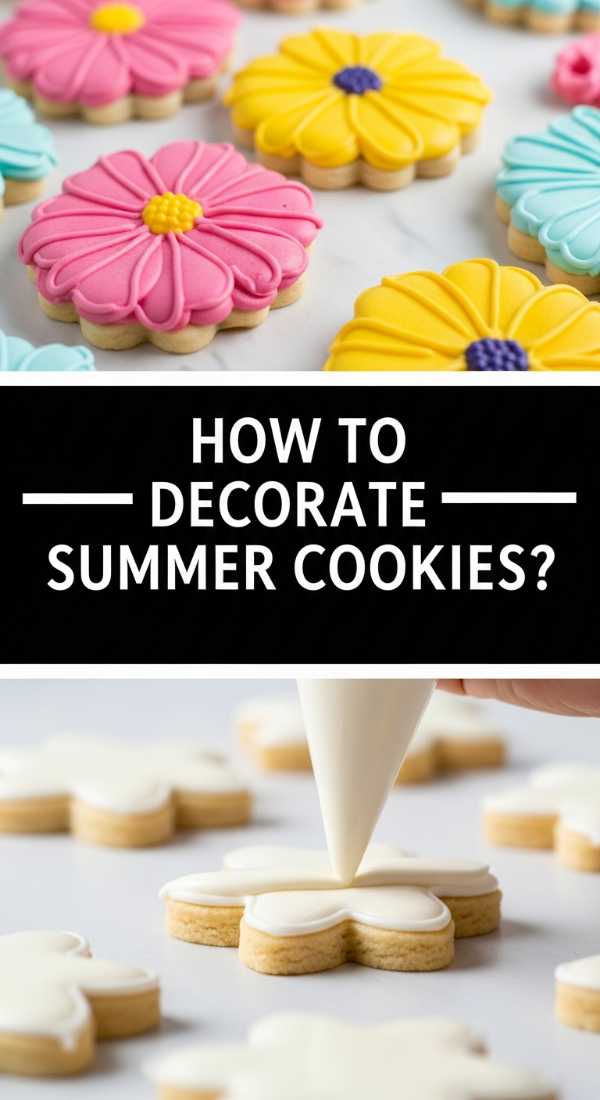
How to decorate summer cookies?
Why we love this
Summer cookies bring the brightness of the season to your food board with their sunny colors and refreshing citrus-infused flavors. These treats are all about celebrating the outdoors, with designs featuring lemons, sunflowers, or beach balls that evoke a sense of vacation and relaxation. The crisp snap of the cookie paired with a light, zesty icing creates a refreshing snack that isn’t too heavy for a warm day. They are like little edible postcards of summer, adding a cheerful and energetic vibe to any gathering.
Ingredients
- Lemon-zest sugar cookies
- Royal icing in yellow, white, and green
- Fine sanding sugar (for a “sandy” beach effect)
- Lemon extract (to flavor the icing)
- Small piping bags and tips
How to make it
- Start with cookies that have been flavored with fresh lemon zest and juice to ensure the summer theme is carried through to the taste.
- Prepare your royal icing to a “15-second consistency,” which is thin enough to smooth itself out but thick enough not to run off the sides of the cookie.
- To create a lemon slice design, pipe a yellow circle around the edge of the cookie and fill it in; while wet, use white icing to pipe a small circle in the center and thin lines radiating out like spokes.
- For a sunflower design, use a leaf tip and stiff yellow icing to pipe petals around the outer edge, then fill the center with brown icing or chocolate sprinkles to represent the seeds.
- If you’re making “beach” cookies, frost half the cookie in blue icing for water and the other half in tan icing, then immediately dip the tan side into light brown sanding sugar for a realistic sand texture.
- Use a toothpick to drag through wet icing colors to create “marbled” waves or tie-dye patterns that look like summer sunsets.
- Let the cookies dry in a single layer for at least 12 hours to ensure the icing is hard enough to stack or place on a board without smudging the intricate designs.
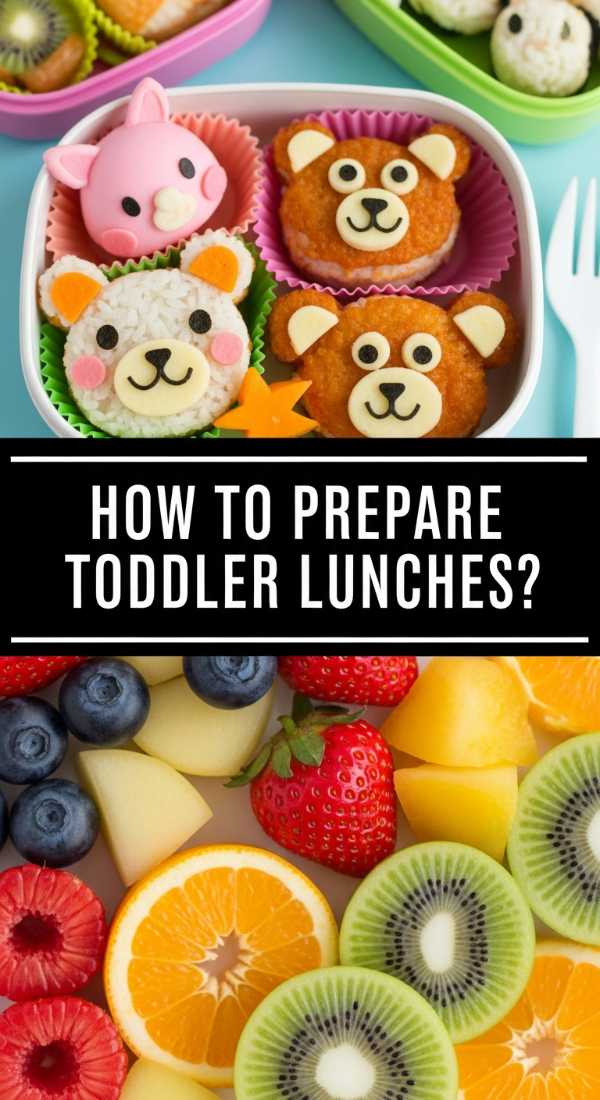
How to prepare toddler lunches?

Why we love this
Toddler lunches on a board are a game-changer for picky eaters, turning a meal into a fun, interactive exploration of tastes and textures. By presenting small, colorful portions of different foods, you take the pressure off and encourage them to try new things. The visual appeal of bite-sized star-shaped sandwiches and rainbow-colored fruit slices makes the meal feel like a treat rather than a chore. It’s a wonderful way to provide a balanced diet—protein, fats, and fiber—all in a format that is easy for little hands to manage and enjoy.
Ingredients
- Whole grain bread and turkey or cheese slices
- Cucumber and bell pepper strips
- Berries and melon balls
- Greek yogurt or hummus for dipping
- Small crackers or pretzels
How to make it
- Use fun-shaped sandwich cutters (like stars, dinosaurs, or hearts) to cut the bread, cheese, and deli meats into engaging shapes that are easy for toddlers to hold.
- Slice vegetables like cucumbers and peppers into long, thin matchsticks that are perfect for dipping and provide a satisfying crunch without being a choking hazard.
- Arrange the fruit in a rainbow pattern across the board; the variety of colors provides different vitamins and makes the board look irresistible.
- Place a small, spill-proof container of hummus or yogurt in the center of the board to act as an anchor and encourage the toddler to interact with their food.
- Include a small handful of crunchy elements like pretzels or whole-grain crackers to provide a different texture and satisfy their love for salty snacks.
- Roll up slices of turkey or ham into tight cylinders, which makes them easier to pick up and prevents the meat from getting soggy against the fruit.
- Present the board at a child-height table and let them choose what to eat first, giving them a sense of autonomy and making mealtime a positive, stress-free experience for everyone.
How to mix coffee drinks?
[IMAGE_10]
Why we love this
Crafting the perfect coffee drink is a morning ritual that transitions beautifully into a social experience when added to a brunch board. The deep, earthy aroma of freshly brewed espresso combined with the velvety smoothness of frothed milk creates a luxurious mouthfeel that is both comforting and energizing. Whether it’s a cold brew with a swirl of caramel or a hot latte with a dusting of cinnamon, these drinks provide the perfect caffeinated kick. They offer a sophisticated element to your food board, inviting guests to linger longer and savor the moment.
Ingredients
- 2 shots of strong espresso or 1 cup cold brew concentrate
- 1 cup milk (whole, oat, or almond)
- 1-2 tablespoons flavored syrup (vanilla, caramel, or lavender)
- Ice cubes (for cold versions)
- Cinnamon or cocoa powder for garnish
How to make it
- For a hot latte, start by brewing two shots of high-quality espresso into a large mug; if you don’t have an espresso machine, use a very strong moka pot brew.
- Steam or froth your milk until it reaches about 150°F (65°C), ensuring you create a thick, micro-foam on top that looks like wet paint.
- Pour the frothed milk slowly over the espresso, holding back the foam with a spoon initially, then dolloping the foam on top at the very end for a professional finish.
- For an iced version, fill a tall glass with large ice cubes (which melt slower) and pour in your flavored syrup of choice first.
- Add the cold brew concentrate or chilled espresso over the ice, then pour in the cold milk, watching the beautiful “marbling” effect as the white milk swirls into the dark coffee.
- Stir gently with a long spoon to incorporate the syrup from the bottom, ensuring every sip is perfectly sweetened.
- Garnish the top with a light dusting of cinnamon or cocoa powder through a stencil to create a beautiful design that adds a final touch of cafe-style elegance to your board.
Mastering the Board Lifestyle
Creating these boards is all about the joy of the process. Whether you’re carefully piping icing onto a graduation cookie or watching jam thicken on the stove, you’re creating something that people will remember. The viral food board trend isn’t just about the photos; it’s about the connection we feel when we share a beautiful, handmade meal. I hope these recipes inspire you to get creative in your kitchen and bring a little extra magic to your next gathering. Happy hosting!