
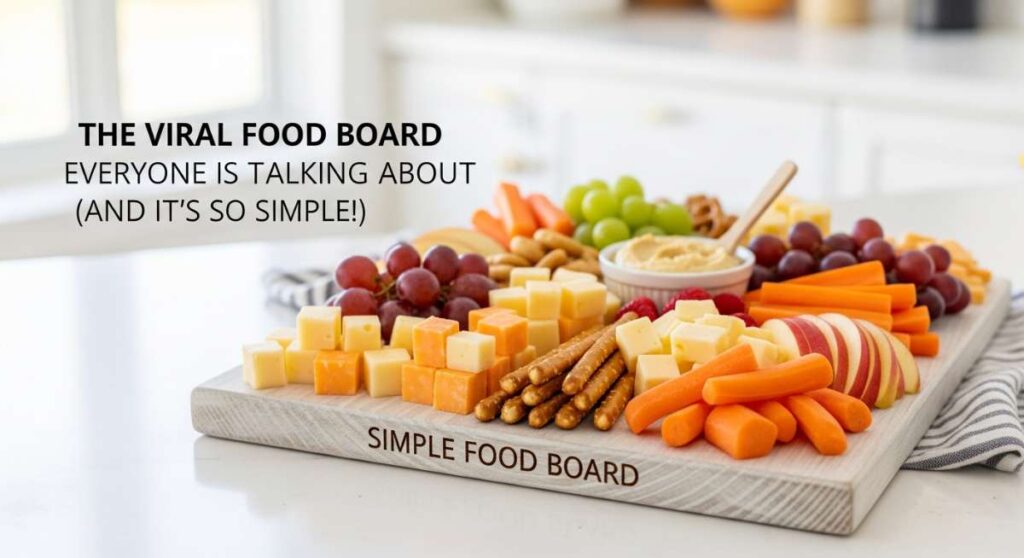
The Viral Food Board Everyone is Talking About (And It’s So Simple!)
There is something magical about the way food brings us together, especially when the sun starts to linger a little longer in the evening and the air feels charged with the excitement of new beginnings. I remember the first time I set out a massive, sprawling food board for my friends; the room immediately filled with laughter, the clinking of glasses, and that cozy, collective sigh of relief that happens when everyone realizes they can just graze and be happy. It wasn’t about being fancy; it was about the stories shared over a slice of tart rhubarb or a decadent piece of cake.
Lately, my social media feed has been exploding with this concept of the ‘Viral Simple Food Board.’ It’s a curation of comfort, a mix of sweet and savory that looks like a masterpiece but feels like home. This board is more than just cheese and crackers—it’s a celebration of seasonal flavors and the little victories, like a perfectly frosted cupcake or a zesty pesto. Today, I’m pulling back the curtain and sharing the ten essential recipes that make this board the talk of the town, ensuring your next gathering is as delicious as it is unforgettable.
How to bake graduation cakes?
Why we love this
Graduation cakes are the ultimate symbol of transition and triumph, filling the kitchen with the warm, nostalgic scent of vanilla bean and toasted sugar. We love this recipe because it produces a crumb so tender it practically melts on the tongue, balanced by a sturdy structure that can hold up to any celebratory decorations. There is something deeply satisfying about pulling a golden-brown layer out of the oven, knowing it will soon be the centerpiece of a core memory for someone you love. The aroma alone is enough to make the whole house feel like a party is about to begin.
Ingredients
- 2 1/2 cups all-purpose flour
- 1 1/2 cups granulated sugar
- 1 tablespoon baking powder
- 1/2 teaspoon salt
- 3/4 cup unsalted butter, softened
- 1 cup whole milk, room temperature
- 4 large eggs
- 2 teaspoons pure vanilla extract
How to make it
- Begin by preheating your oven to 350°F (175°C) and meticulously greasing two 8-inch round cake pans. Line the bottoms with parchment paper to ensure an effortless release later; this is a professional step you don’t want to skip.
- In a large mixing bowl, sift together the flour, baking powder, and salt. Sifting is crucial here as it aerates the flour, contributing to that light, viral-worthy texture we are aiming for.
- Using a stand mixer fitted with the paddle attachment, cream the softened butter and sugar together on medium-high speed. Continue for at least 3-5 minutes until the mixture is pale, fluffy, and looks like whipped clouds.
- Add the eggs one at a time, beating well after each addition. Scrape down the sides of the bowl frequently to ensure every bit of egg is fully emulsified into the butter mixture.
- Incorporate the vanilla extract into the milk. Gradually add the dry ingredients to the butter mixture in three parts, alternating with the milk in two parts. Start and end with the flour mixture, mixing only until just combined to avoid overworking the gluten.
- Divide the batter evenly between the prepared pans. Bake for 30-35 minutes. You’ll know they are done when a wooden skewer inserted into the center comes out clean or with just a few moist crumbs, and the tops spring back when lightly pressed.
- Cool in the pans for 10 minutes before inverting onto a wire rack to cool completely. Never frost a warm cake, or your beautiful designs will slide right off!
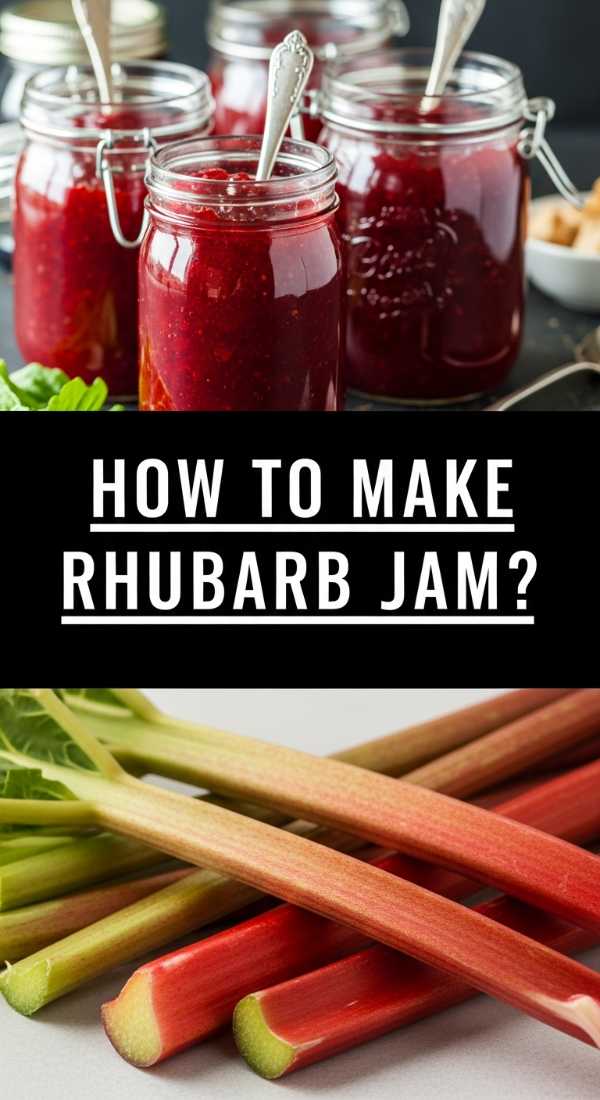
How to make rhubarb jam?

Why we love this
Rhubarb jam is like capturing springtime in a glass jar, offering a vibrant, ruby-red hue that looks stunning on any food board. The flavor profile is a sophisticated dance between sharp tartness and mellow sweetness, creating a spread that is as refreshing as it is comforting. When it’s bubbling on the stove, the kitchen is filled with a bright, fruity fragrance that feels incredibly artisanal and wholesome. It’s the perfect companion for crusty bread or a sharp cheddar, adding a zingy brightness that cuts through richer flavors beautifully.
Ingredients
- 4 cups fresh rhubarb, chopped into 1/2 inch pieces
- 1 1/2 cups granulated sugar
- 1 tablespoon lemon juice
- 1 teaspoon lemon zest
- 1/4 teaspoon ground ginger (optional)
How to make it
- Start by cleaning your rhubarb stalks thoroughly and slicing them into uniform 1/2 inch pieces. Consistency in size ensures that the pieces break down at the same rate during the cooking process.
- Place the chopped rhubarb and sugar in a heavy-bottomed saucepan. Stir well to coat the fruit and let it sit for about 30 minutes at room temperature; this process, called maceration, draws out the natural juices and helps the sugar dissolve.
- Add the lemon juice, zest, and ginger to the pan. Place over medium heat and stir constantly until the sugar has completely melted and the mixture begins to simmer.
- Increase the heat slightly to bring the jam to a rolling boil. Continue to cook for 15-20 minutes, stirring frequently to prevent the sugar from scorching on the bottom of the pan.
- You are looking for the ‘sheeting’ stage. Dip a cold metal spoon into the jam and lift it; if the jam falls off in a single wide sheet rather than individual drops, it has reached the proper set point. Alternatively, use a candy thermometer to reach 220°F (104°C).
- Remove from heat and skim off any foam that has risen to the top. Let it cool slightly before transferring into sterilized glass jars. The jam will continue to thicken as it cools completely in the refrigerator.
How to design funny cakes?
Why we love this
Funny cakes are the ultimate conversation starters, injecting a sense of playfulness and joy into any gathering. Whether it’s a cake shaped like a giant taco or one decorated with a goofy caricature, these bakes prove that food doesn’t always have to be serious to be impressive. We love the creative freedom they provide—the way you can use bright colors, exaggerated shapes, and unexpected textures to bring a smile to everyone’s face. The joy of seeing a guest laugh at a cake is just as rewarding as the first bite of the moist sponge underneath the whimsy.
Ingredients
- 2 baked 9-inch round cakes (chilled)
- 4 cups stiff buttercream frosting
- Gel food coloring (various colors)
- Assorted candies (marshmallows, licorice, sprinkles)
- Edible ink markers
- Fondant for sculpting small details
How to make it
- Begin with chilled cakes; a cold cake is much easier to carve and shape without crumbling. Decide on your ‘funny’ theme—for a classic ‘spilled cereal’ cake, you’ll need a vertical support like a straw or dowel.
- Carve your cake into the desired base shape using a serrated knife. Use small, sawing motions and take off little bits at a time. For a ‘face’ cake, you might round the edges or create a slight indentation for the mouth.
- Apply a thin ‘crumb coat’ of frosting over the entire cake. This seals in the crumbs so your final layer of ‘funny’ decoration looks clean and professional. Chill the cake for 30 minutes until the crumb coat is firm to the touch.
- Divide your remaining buttercream and tint it with gel food colors. Use high-quality gel rather than liquid to keep the frosting stiff enough for piping details.
- Pipe on the exaggerated features. Use a large round tip for ‘eyes’ and a grass tip for ‘hair.’ If you’re making a character, focus on making the features slightly oversized to enhance the humorous effect.
- Use fondant to sculpt 3D elements like ears, hats, or tongues. Apply these last so they don’t lose their shape. Finally, use edible markers to add fine details like eyelashes or ‘stitch’ marks to complete the look.
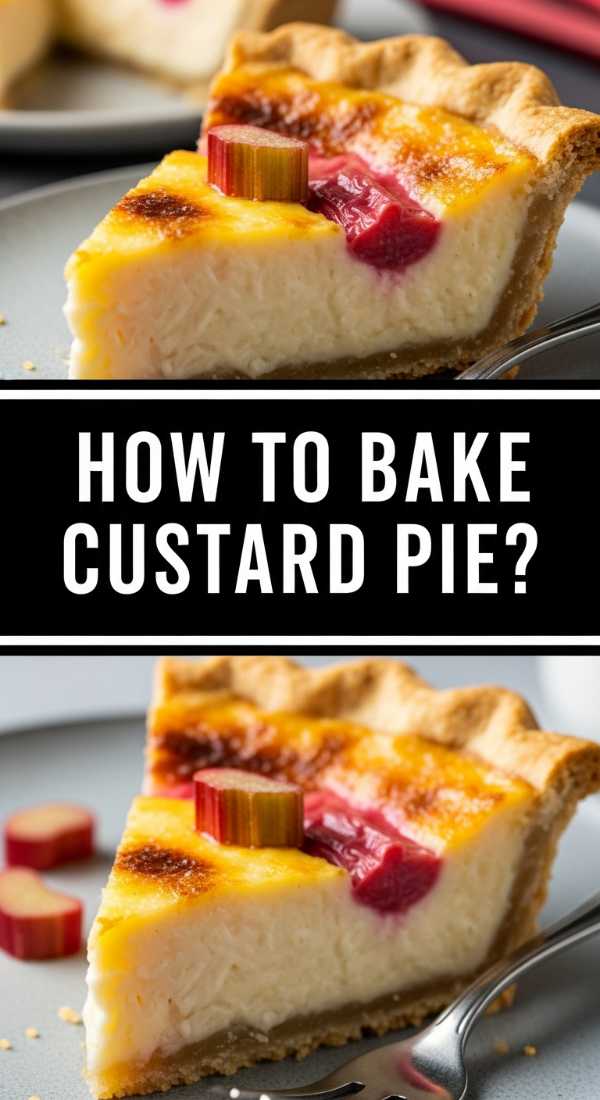
How to bake custard pie?

Why we love this
There is an elegant simplicity to a custard pie that makes it a timeless favorite on any dessert spread. It’s all about the contrast of textures: the shattering crispness of a perfectly par-baked butter crust against the silky, trembling softness of the vanilla-flecked custard. Each bite is a delicate balance of creamy richness and a subtle hint of nutmeg that lingers on the palate. It feels like a hug in dessert form—sophisticated enough for a dinner party, yet humble enough to remind you of Sunday afternoons at grandma’s house.
Ingredients
- 1 pre-chilled 9-inch pie crust
- 4 large eggs
- 3/4 cup granulated sugar
- 2 1/2 cups whole milk (scalded)
- 1 teaspoon pure vanilla extract
- 1/2 teaspoon ground nutmeg
- 1/4 teaspoon salt
How to make it
- Preheat your oven to 400°F (200°C). Roll out your pie crust and fit it into a deep-dish pie plate. Crimp the edges and prick the bottom with a fork. Line with parchment paper and fill with pie weights or dried beans.
- Blind bake the crust for 12-15 minutes. Remove the weights and parchment, then bake for another 5 minutes until the bottom is dry and pale gold. Lower the oven temperature to 325°F (165°C).
- In a medium saucepan, heat the milk over medium-low heat until it just begins to simmer and small bubbles form around the edges (scalding). Do not let it reach a full boil.
- In a large bowl, whisk the eggs and sugar together gently. You want to combine them without creating too many air bubbles, which can cause the custard to puff and then collapse.
- Slowly temper the eggs by pouring a very thin stream of the hot milk into the egg mixture while whisking constantly. This prevents the eggs from scrambling. Stir in the vanilla and salt.
- Place the pie plate on a baking sheet on the oven rack. Pour the custard mixture through a fine-mesh sieve into the crust to ensure a perfectly smooth texture. Sprinkle the top generously with nutmeg.
- Bake for 35-45 minutes. The pie is done when the edges are set but the center still has a slight, jello-like jiggle when moved. Let it cool completely on a wire rack for at least 4 hours to allow the custard to set fully before slicing.
How to decorate grad cupcakes?

Why we love this
Graduation cupcakes are the perfect bite-sized way to honor a big achievement, making them an essential addition to any celebratory food board. We love the way they can be personalized with school colors and tiny, edible symbols of success. The sight of a dozen cupcakes topped with miniature caps and diplomas is instantly festive and incredibly photogenic. The combination of a moist cupcake base with a mountain of smooth frosting and cute toppers creates a sense of whimsy that guests of all ages find irresistible.
Ingredients
- 12 baked and cooled cupcakes
- 2 cups vanilla frosting
- Square chocolate pieces (like Ghirardelli)
- Miniature peanut butter cups or rolled chocolate caramels
- Sour straw candy or fruit leather (for tassels)
- M&Ms or small round candies
- White fondant (for diplomas)
How to make it
- Ensure your cupcakes are completely cool. If they are even slightly warm, the ‘caps’ will melt and slide off. Pipe a flat swirl of frosting on each cupcake to act as the glue for your decorations.
- To create the graduation caps, invert a miniature peanut butter cup and place it in the center of the frosting. This forms the base of the cap.
- Place a tiny dot of melted chocolate or frosting on top of the peanut butter cup and press a square chocolate piece onto it. Hold for a few seconds to ensure it sticks and sits level.
- Cut a thin strip of sour straw or fruit leather to about 1 inch in length. Fray one end slightly with a knife to mimic a tassel. Attach the other end to the center of the chocolate square with a tiny dab of frosting.
- Place a small M&M or candy on top of the tassel attachment point to act as the button.
- For ‘diplomas,’ roll out a small piece of white fondant into a thin rectangle, roll it up tightly, and tie a tiny piece of red string or a thin strip of fruit leather around the middle. Place this next to the cap on the cupcake.
How to brew fun coffee?
Why we love this
In a world of standard black coffee, ‘fun’ coffee brings a sense of cafe-culture luxury right into your kitchen. It’s about the art of layering flavors and textures—the way a velvety foam sits atop a rich, dark brew, or how a swirl of caramel catches the light. We love it because it transforms a morning routine into a mindful ritual. The aroma of freshly ground beans mixed with hints of cinnamon or lavender is enough to brighten even the gloomiest morning, making your food board feel curated and complete.
Ingredients
- 1 cup freshly brewed strong coffee or 2 shots of espresso
- 1/2 cup whole milk or oat milk
- 1 tablespoon flavored syrup (vanilla, lavender, or salted caramel)
- A pinch of cinnamon or cocoa powder
- Whipped cream (optional)
- Ice cubes (if making a cold version)
How to make it
- Start with high-quality beans. Grind them just before brewing to ensure the oils are fresh and the flavor is at its peak. Use a French press or an espresso machine for a concentrated, robust base.
- While the coffee is brewing, heat your milk in a small saucepan over medium heat until steaming but not boiling. If you have a milk frother, use it to create a thick, micro-foam. If not, whisk the milk vigorously by hand or shake it in a sealed jar until it doubles in volume.
- Add your chosen flavored syrup to the bottom of a glass or mug. If making an iced version, fill the glass with large ice cubes first so the drink doesn’t dilute too quickly.
- Pour the hot coffee or espresso over the syrup. Stir gently to combine.
- Slowly pour the frothed milk over the coffee. If you do this over the back of a spoon, you can create beautiful layers.
- Top with a dollop of whipped cream if you’re feeling indulgent. Finish with a dusting of cinnamon or cocoa powder. For a viral look, use a stencil to create a shape in the foam or add a sprig of fresh mint or lavender on the side.
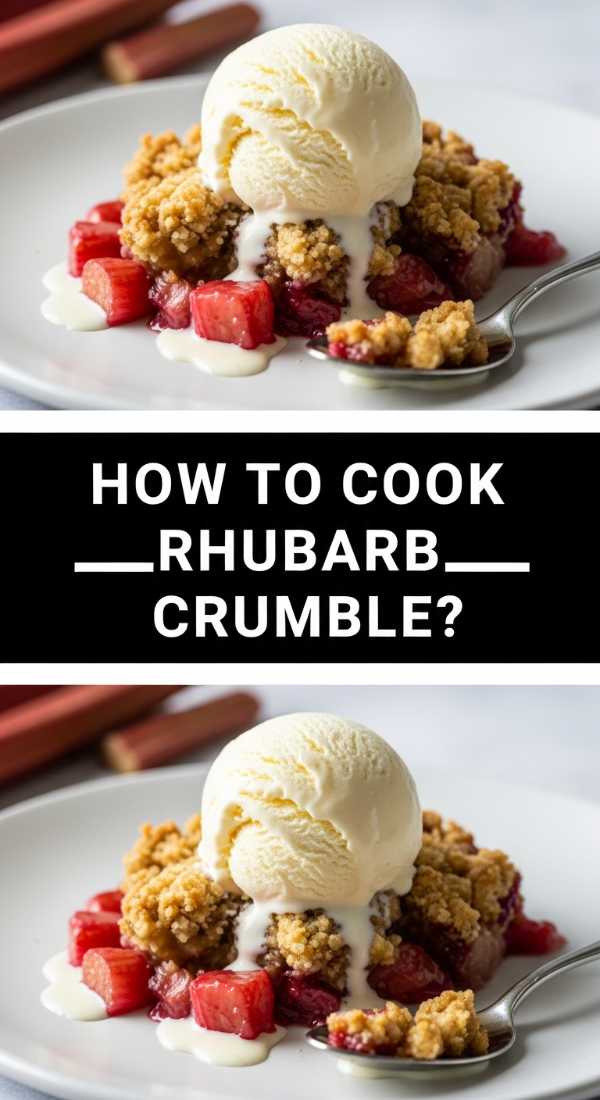
How to cook rhubarb crumble?

Why we love this
Rhubarb crumble is the epitome of rustic comfort, offering a sensory experience that is both crunchy and gooey. We love the sound of the spoon breaking through the golden, buttery crust to reveal the bubbling, tart fruit underneath. The way the juices from the rhubarb mingle with the brown sugar to create a natural syrup is pure culinary magic. Served warm with a scoop of cold vanilla bean ice cream, it creates a hot-and-cold sensation that is absolutely addictive and perfectly balances the sharp acidity of the stalks.
Ingredients
- 5 cups rhubarb, cut into 1-inch pieces
- 3/4 cup granulated sugar
- 1 tablespoon cornstarch
- 1 cup all-purpose flour
- 1 cup rolled oats
- 1 cup packed brown sugar
- 1/2 cup cold unsalted butter, cubed
- 1 teaspoon cinnamon
How to make it
- Preheat your oven to 375°F (190°C). In a large bowl, toss the chopped rhubarb with the granulated sugar and cornstarch. The cornstarch is essential as it thickens the juices as they bake, preventing a watery crumble.
- Transfer the fruit mixture into a 9×9 inch baking dish, spreading it out evenly.
- In a separate bowl, combine the flour, rolled oats, brown sugar, and cinnamon. Mix them together until well distributed.
- Add the cold, cubed butter to the dry ingredients. Use your fingers or a pastry cutter to work the butter in until the mixture resembles coarse crumbs with some pea-sized pieces of butter remaining. This cold butter is the secret to a flaky, crisp topping.
- Sprinkle the crumble topping evenly over the rhubarb. Don’t press it down; you want it to remain light and airy so the heat can circulate.
- Bake for 35-45 minutes. You are looking for the fruit juices to be bubbling vigorously around the edges and the topping to be a deep, golden brown.
- Let the crumble stand for at least 15 minutes before serving. This resting period allows the filling to set so it’s not too runny when you scoop it out.
How to host summer dinners?
Why we love this
Hosting summer dinners is about embracing the effortless beauty of the season. We love the relaxed atmosphere where the golden hour light stretches across the table and the menu is dictated by what’s freshest at the farmer’s market. It’s an opportunity to slow down, to enjoy long conversations over chilled wine, and to let the food speak for itself. There’s a specific kind of magic in a table filled with shared platters and the sound of cicadas in the background, creating a soul-nourishing experience that stays with you long after the dishes are cleared.
Ingredients
- A curated playlist of acoustic or chill tracks
- Seasonal produce (heirloom tomatoes, corn, peaches)
- High-quality olive oil and sea salt
- Fresh herbs for garnishing
- String lights or unscented candles
- A large wooden board or platters for family-style serving
How to make it
- Plan a menu that requires minimal ‘active’ cooking once guests arrive. Think of dishes that can be served at room temperature or prepped in advance, like the Viral Simple Food Board elements we’ve discussed.
- Set the scene about an hour before arrival. Clean your outdoor space, light your candles, and start your playlist. The ambiance is just as important as the food for a viral-worthy dinner.
- Focus on high-quality, simple ingredients. A plate of sliced heirloom tomatoes with just sea salt, basil, and a drizzle of olive oil can be more impressive than a complex dish if the produce is at its peak.
- Create a ‘self-serve’ station for drinks. Fill a galvanized bucket with ice, wine, and sparkling water so guests can help themselves, which keeps the vibe informal and relaxed.
- Arrange your food on large platters or boards in the center of the table. This encourages sharing and interaction among your guests.
- Keep the lighting low and warm. As the sun sets, the glow of candles or string lights will make the food look even more appetizing and the environment more intimate.
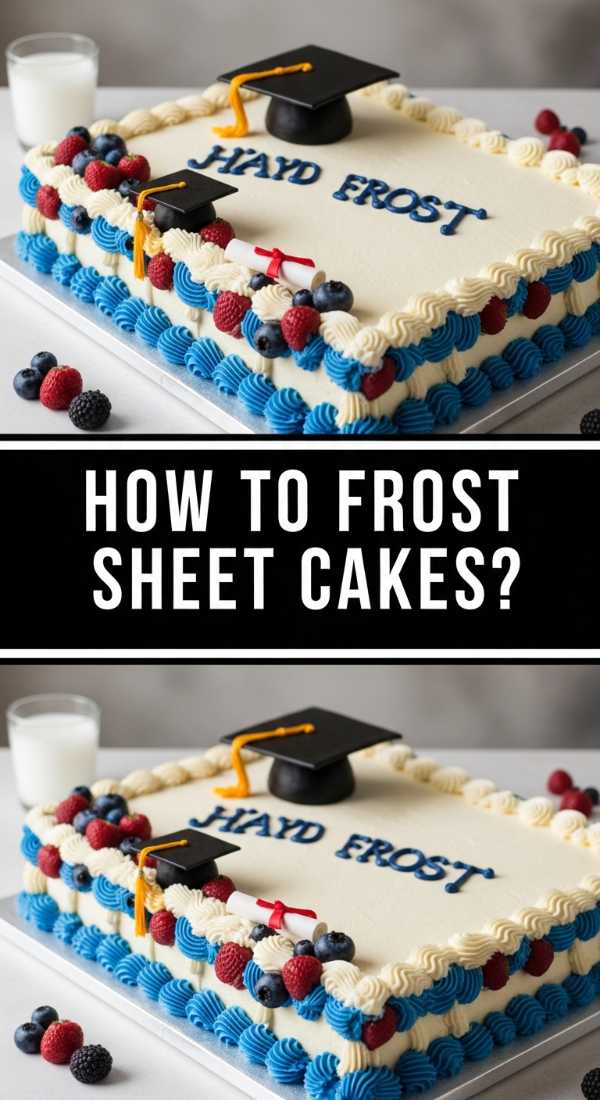
How to frost sheet cakes?
Why we love this
Frosting a sheet cake is surprisingly therapeutic, turning a simple flat surface into a luscious landscape of swirls and peaks. We love the generous ratio of frosting to cake that a sheet pan allows, ensuring every single bite is perfectly balanced. There is something so inviting about a giant, beautifully frosted cake—it signals abundance and communal joy. Whether you go for a smooth, glass-like finish or a rustic, textured look, the act of spreading that creamy topping is the ultimate finishing touch that makes a cake look professional and crave-worthy.
Ingredients
- 1 cooled 9×13 inch sheet cake
- 3 cups of your favorite buttercream or cream cheese frosting
- Offset spatula
- Bench scraper (for smooth edges)
- Piping bag and tips (optional)
- Sprinkles or edible flowers for garnish
How to make it
- Ensure the cake is completely level. If the center has domed significantly, use a long serrated knife to gently shave off the top so you have a flat canvas to work on.
- Place a large dollop of frosting (about 1 cup) in the center of the cake. Use your offset spatula to spread it toward the edges in a thin layer. This is your ‘crumb coat’ which prevents little cake bits from ruining your final look. Chill for 20 minutes.
- Apply the remaining frosting generously over the chilled crumb coat. For a ‘swoopy’ viral look, use the tip of your spatula to create ‘S’ and ‘C’ motions across the surface, lifting the spatula at the end of each stroke to create little peaks.
- If you want a perfectly smooth finish, use a bench scraper. Hold it at a 45-degree angle to the cake and pull it across the surface in one steady motion. Wipe the scraper clean after each pass.
- Clean the edges of the pan with a damp paper towel for a neat presentation.
- If using a piping bag, add a decorative border around the edge using a star tip. This hides any imperfections where the cake meets the pan.
- Add your garnishes immediately while the frosting is still ‘tacky’ so they stay in place.
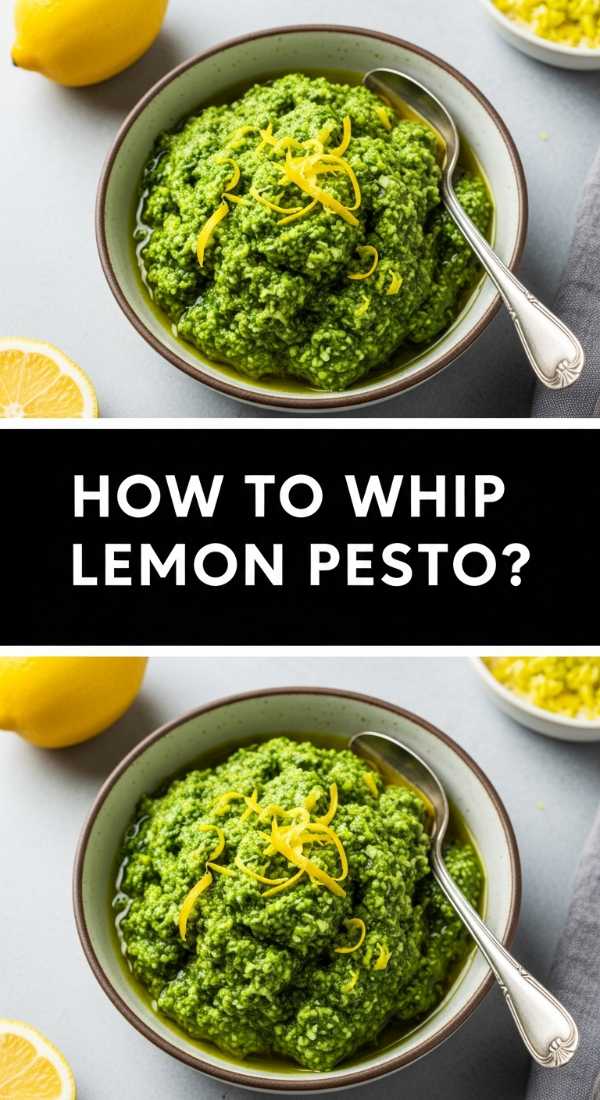
How to whip lemon pesto?
[IMAGE_10]
Why we love this
Lemon pesto is a bright, zesty evolution of the classic basil sauce, offering an explosion of Mediterranean sunshine in every spoonful. We love how the acidity of the lemon zest cuts through the richness of the pine nuts and parmesan, creating a sauce that feels incredibly light and refreshing. It’s vibrant green, smells like a summer garden, and has a punchy, herbaceous flavor that elevates everything it touches—from pasta to grilled chicken or even as a dip on your food board. It’s the secret weapon for any host looking to add a ‘wow’ factor with minimal effort.
Ingredients
- 2 cups fresh basil leaves, packed
- 1/2 cup freshly grated Parmesan cheese
- 1/3 cup pine nuts (toasted)
- 2 cloves garlic, peeled
- 1/2 cup high-quality extra virgin olive oil
- Zest of 2 large lemons
- 2 tablespoons fresh lemon juice
- Salt and black pepper to taste
How to make it
- Start by toasting your pine nuts in a dry skillet over medium-low heat for 3-5 minutes. Stir them constantly until they are golden and fragrant. This step is vital as it releases the natural oils and deepens the flavor of the pesto.
- In a food processor, pulse the garlic cloves and toasted pine nuts until they are coarsely chopped.
- Add the fresh basil leaves, lemon zest, and Parmesan cheese to the processor. Pulse several times until the mixture is finely minced but not yet a paste.
- With the processor running on low, slowly drizzle in the olive oil in a steady stream. This ’emulsifies’ the sauce, making it creamy and ensuring the oil doesn’t separate.
- Add the lemon juice and pulse one or two more times to incorporate. The acid in the lemon juice can dull the green of the basil over time, so adding it last helps keep the color vibrant.
- Taste and season with salt and pepper. Remember that the Parmesan is already salty, so go easy on the added salt.
- Transfer to a bowl and cover the surface directly with plastic wrap to prevent oxidation before serving on your viral food board.
Bringing it All Together
Creating the viral food board isn’t just about the recipes; it’s about the harmony of flavors and the joy of sharing. From the tart pop of rhubarb jam to the silky finish of a custard pie, each element we’ve explored adds a layer of texture and taste that makes the board a complete sensory experience. When you set this out for your friends or family, you’re offering more than just a meal—you’re offering an invitation to connect, celebrate, and enjoy the simple pleasures of good food. So, grab your largest board, start baking, and watch as your table becomes the heart of the home.