
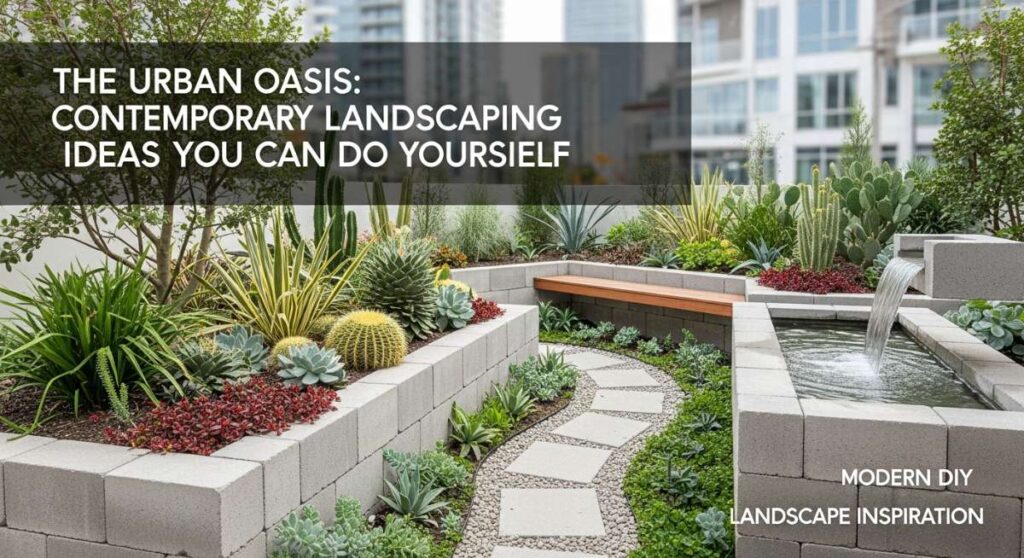
The Urban Oasis: Contemporary Landscaping Ideas You Can Do Yourself
There is a specific kind of magic that happens when you step out of your back door and feel the weight of the world simply slide off your shoulders. We spend so much of our lives rushing through concrete jungles and staring at screens that our outdoor spaces shouldn’t just be ‘yards’—they should be sanctuaries. I remember the first time I traded my patchy, overgrown grass for a structured seating area; suddenly, my morning coffee tasted like a vacation and the sunset felt like a private event just for me.
Creating an urban oasis isn’t about having a massive budget or a degree in horticulture. It’s about intentionality, texture, and the willingness to get a little dirt under your fingernails. Whether you have a sprawling suburban lot or a tiny city balcony, these DIY projects are designed to elevate your lifestyle, bringing that high-end boutique hotel vibe right to your doorstep. Let’s dive into how you can transform your outdoor living space into the retreat you’ve always dreamed of.
How to Curate Mud Kitchen Accessories for Endless Backyard Play
Why we love this
There is nothing quite like the earthy, grounding aroma of damp soil mixed with the fresh scent of crushed mint leaves from the garden. A mud kitchen invites a sensory explosion that modern plastic toys simply cannot replicate, offering a tactile experience where the cool squelch of mud between fingers meets the rough texture of weathered wooden spoons. It’s a beautiful, messy tribute to childhood imagination, where the backyard transforms into a five-star rustic bistro and every ‘mud pie’ is a masterpiece of textures, topped with the delicate crunch of dried pine needles and the velvet softness of flower petals.
Essential Elements:
- Weatherproof wooden potting bench or reclaimed pallets
- Stainless steel mixing bowls and colanders
- Old muffin tins and cake pans
- Wooden spoons, whisks, and spatulas
- Chalkboard for the ‘Daily Menu’
- Natural ‘ingredients’: pebbles, acorns, dried lavender, and sand
- A dedicated water source (like a small pump or beverage dispenser)
How to make it
- Select a sturdy, weather-resistant base like an old cedar potting bench or construct one from heat-treated pallets to ensure it can withstand the elements and heavy play.
- Sand all wooden surfaces thoroughly with 120-grit sandpaper to prevent splinters, finishing with a non-toxic outdoor sealant or food-grade mineral oil.
- Install a drop-in stainless steel sink by tracing the bowl’s diameter onto the countertop and carefully cutting out the circle with a jigsaw.
- Mount a series of rust-proof hooks along the backboard to hang your whisks and spoons, keeping the ‘workspace’ organized and inviting.
- Create a ‘pantry’ section using weather-resistant baskets or jars filled with sensory items like smooth river stones, pinecones, and dried corn kernels.
- Set up a nearby water station using a large glass or plastic beverage dispenser so children can independently control the flow of water for their ‘recipes.’
- Add a final touch with a chalkboard painted onto the back panel, allowing little chefs to write out their daily specials and practice their handwriting while they play.
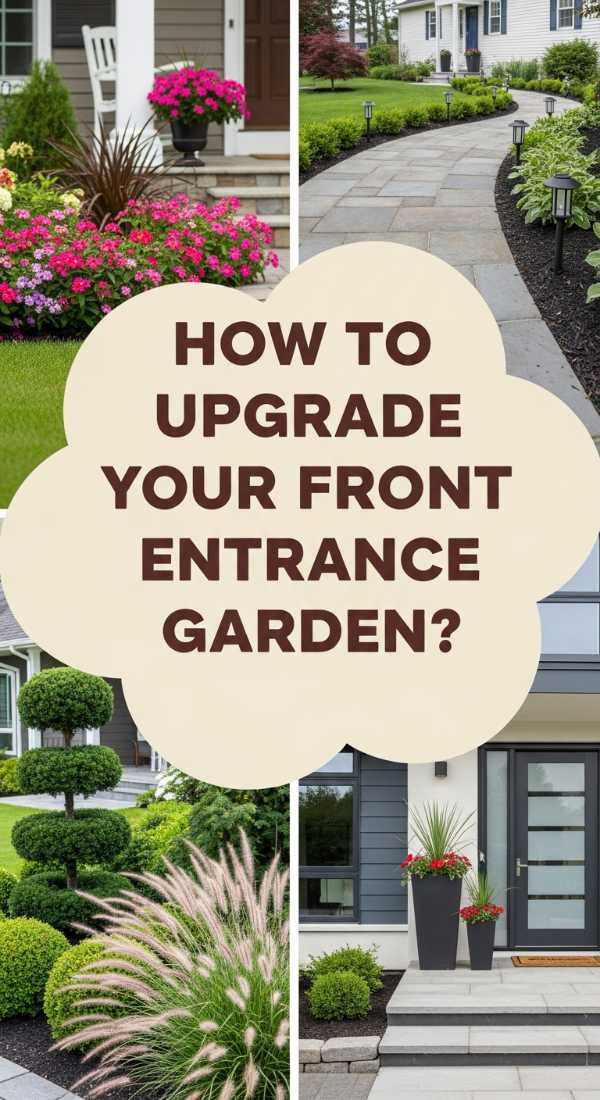
How to Plan Front Yard Landscaping for Maximum Curb Appeal

Why we love this
Your front yard is the handshake of your home—it’s the first impression that greets you after a long day and the visual gift you give to your neighborhood. When planned correctly, it creates a rhythmic flow of colors and heights that lead the eye directly to your front door, making the architecture of your house pop against a lush, green backdrop. Imagine the sweet, heady fragrance of blooming hydrangeas wafting toward the sidewalk and the soft rustle of ornamental grasses swaying in the breeze, creating a sense of movement and life that feels both sophisticated and deeply welcoming.
Essential Elements:
- Structural ‘anchor’ plants (evergreens or small trees)
- Layered perennials for year-round color
- Hardscape edging (stone, brick, or metal)
- Low-voltage LED path lighting
- Decorative mulch or ground cover
- A focal point (like a large planter or birdbath)
How to make it
- Begin by sketching your yard to scale, identifying ‘zones’ based on sun exposure—aim for a tiered look with the tallest plants near the house and shorter ones near the sidewalk.
- Define your garden beds with clean, crisp edges using a spade or professional metal edging to create a high-end, manicured appearance that separates the lawn from the foliage.
- Plant your ‘anchor’ pieces first, such as a Japanese Maple or Boxwood shrubs, ensuring they are spaced far enough from the foundation to allow for mature growth.
- Incorporate ‘fillers’ like hostas or lavender in the middle layer, choosing varieties with contrasting textures (e.g., broad leaves next to needle-like foliage) for visual depth.
- Install low-voltage path lights at 6-foot intervals along the walkway, angling them slightly downward to illuminate the path without creating glare, which provides safety and a luxury evening glow.
- Apply a 3-inch layer of dark bark mulch or cocoa hulls to the beds; this not only suppresses weeds but creates a dark, uniform background that makes the greens and florals of your plants truly stand out.
- Complete the look by placing a statement pot near the entryway filled with seasonal ‘thrillers, spillers, and fillers’ to draw the eye toward the front door.
How to Design a Hot Tub Area for the Ultimate Home Spa Experience
Why we love this
Transforming a standard hot tub into a spa retreat is all about the transition from ‘utility’ to ‘atmosphere.’ There is a profound sense of luxury in the contrast between the crisp night air and the rising steam that smells faintly of eucalyptus and cedar wood. It’s about creating a secluded cocoon where the bubbling water muffles the sounds of the outside world, surrounded by the soft glow of flickering lanterns and the plush comfort of oversized towels. This is where stress dissolves, and the backyard becomes a destination for physical and mental restoration.
Essential Elements:
- Privacy screening (slatted wood or tall greenery)
- Level concrete pad or reinforced decking
- Weatherproof outdoor rug
- Subtle mood lighting (string lights or lanterns)
- Towel rack or ‘spa station’
- Potted palms or bamboo for a tropical feel
How to make it
- Ensure your foundation is perfectly level and capable of supporting the weight of a full tub (roughly 100 lbs per square foot) by pouring a 4-inch reinforced concrete slab.
- Construct a horizontal slat privacy wall using cedar or pressure-treated pine, spacing the slats 1/2 inch apart to allow for airflow while blocking the view from neighbors.
- Position the hot tub so the control panel is easily accessible but the ‘view’ from the seats is focused on your most beautiful garden elements.
- Lay down a high-quality polypropylene outdoor rug around the base of the tub to provide a soft, slip-resistant surface for bare feet that dries quickly.
- Install a dedicated towel valet—a simple wooden ladder or a wall-mounted rack—stocked with thick, white cotton towels to mimic the feeling of a high-end resort.
- Drape warm-white globe string lights overhead, but keep them on a dimmer switch so you can adjust the intensity to match the mood of your soak.
- Place large planters filled with tall bamboo or Horsetail Reed around the perimeter to soften the hard edges of the tub and provide additional natural screening.
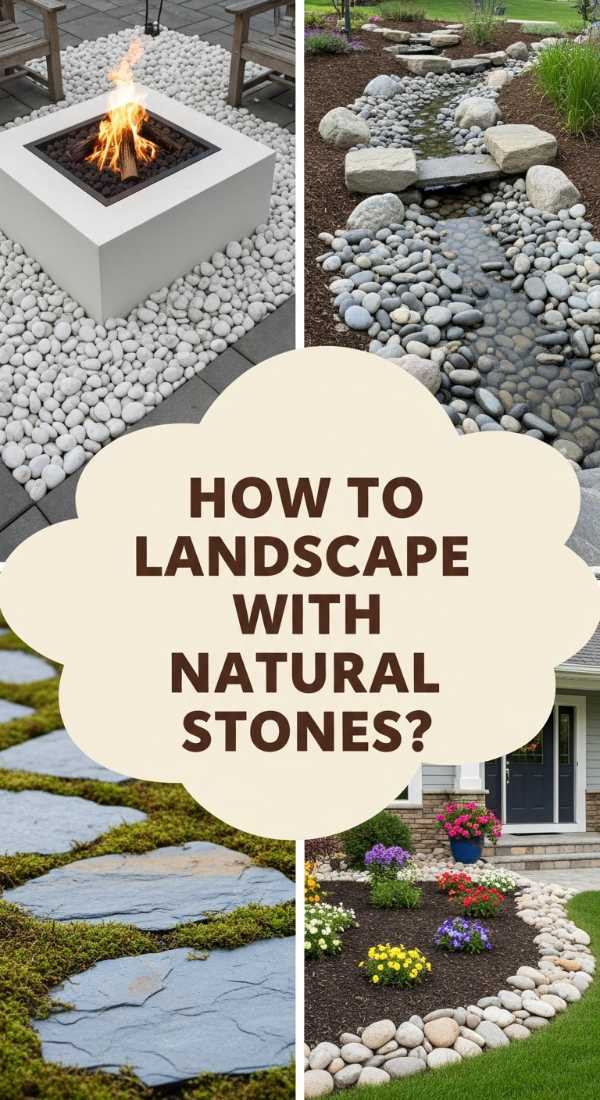
How to Use Rock Landscaping Ideas for a Low Maintenance Dream Yard
Why we love this
Rock landscaping is the unsung hero of modern design, offering a clean, sculptural aesthetic that looks pristine in every season without the need for constant watering or mowing. We love the way sun-bleached river stones shimmer after a rainstorm, highlighting the rich greys, tans, and ochres of the earth. There’s a satisfying permanence to stone; it provides a rugged, textured contrast to the delicate softness of succulents and ornamental grasses, creating a balanced landscape that feels both ancient and contemporary while freeing you from the weekend chores of traditional lawn care.
Essential Elements:
- Various sizes of river rocks, pea gravel, or lava rocks
- Heavy-duty landscape fabric (weed barrier)
- Large ‘statement’ boulders
- Drought-tolerant plants (agave, sedum, blue fescue)
- Steel or plastic heavy-duty edging
How to make it
- Clear the area of all grass and weeds, then excavate the soil to a depth of 2-3 inches to allow the rocks to sit flush with the surrounding terrain.
- Lay down a high-grade, woven landscape fabric, overlapping the seams by at least 6 inches and securing it with galvanized garden staples to prevent any weed breakthrough.
- Position your largest ‘statement’ boulders first, burying the bottom third of each rock into the ground so they look like natural outcroppings rather than objects just sitting on top.
- Install your steel edging along the perimeter, ensuring it is driven deep enough to stay secure and create a crisp border between the rock and other yard elements.
- Cut ‘X’ shapes into the landscape fabric to plant your drought-tolerant species, ensuring they are spaced to account for their full grown width.
- Pour your chosen rock (pea gravel for walking paths, larger river stones for garden beds) over the fabric, spreading it evenly with a heavy rake until it reaches a depth of 2 inches.
- Rinse the stones with a hose to remove the ‘rock dust’ and reveal their true colors and textures, instantly brightening the entire landscape.
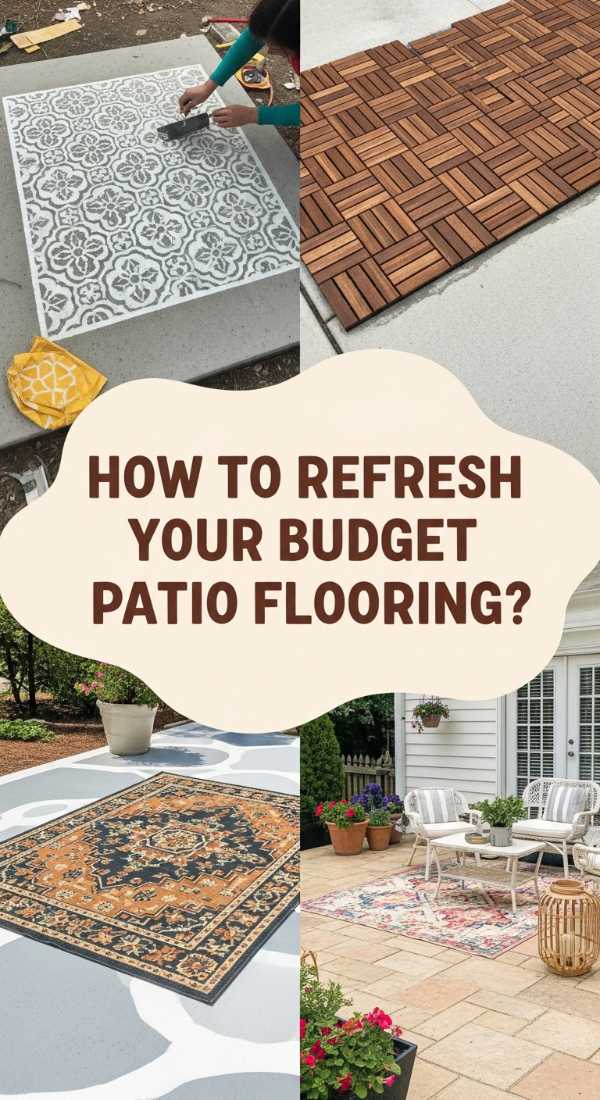
How to Update Cheap Patio Floor Ideas for a High End Look
Why we love this
A tired, grey concrete slab can often feel like a cold industrial footprint in the middle of your garden, but with the right DIY approach, it can become a sophisticated canvas. We love this transformation because it proves that style isn’t about the price tag of the materials, but the creativity of the execution. There is something immensely satisfying about seeing a dull floor come to life with the geometric precision of a stencil or the warm, interlocking texture of wood-look deck tiles, making the entire patio feel like an extension of your indoor living room.
Essential Elements:
- Concrete cleaner and degreaser
- Concrete-safe paint or stain
- Large-scale floor stencils
- Interlocking wood or composite deck tiles
- High-quality outdoor sealant
How to make it
- Thoroughly scrub the existing concrete with a heavy-duty degreaser and a stiff brush, then power wash it to ensure the surface is completely free of dirt, oil, and old paint.
- For a stenciled look: apply a base coat of porch and patio paint in a neutral tone like ‘greige’ and let it cure for at least 24 hours.
- Secure your stencil with painter’s tape and use a high-density foam roller with a minimal amount of contrasting paint—this ‘dry brush’ technique prevents bleeding under the stencil.
- Work in small sections, moving the stencil across the floor and allowing each section to dry slightly before overlapping the pattern for perfect alignment.
- If using deck tiles: start in the most visible corner and simply snap the tiles together, using a jigsaw to trim the edge pieces for a custom, wall-to-wall fit.
- Seal the entire surface with a clear, UV-resistant outdoor topcoat to protect your hard work from fading and foot traffic.
- Add a final layer of comfort with a stylish outdoor rug and some low-profile furniture to complete the high-end boutique aesthetic.
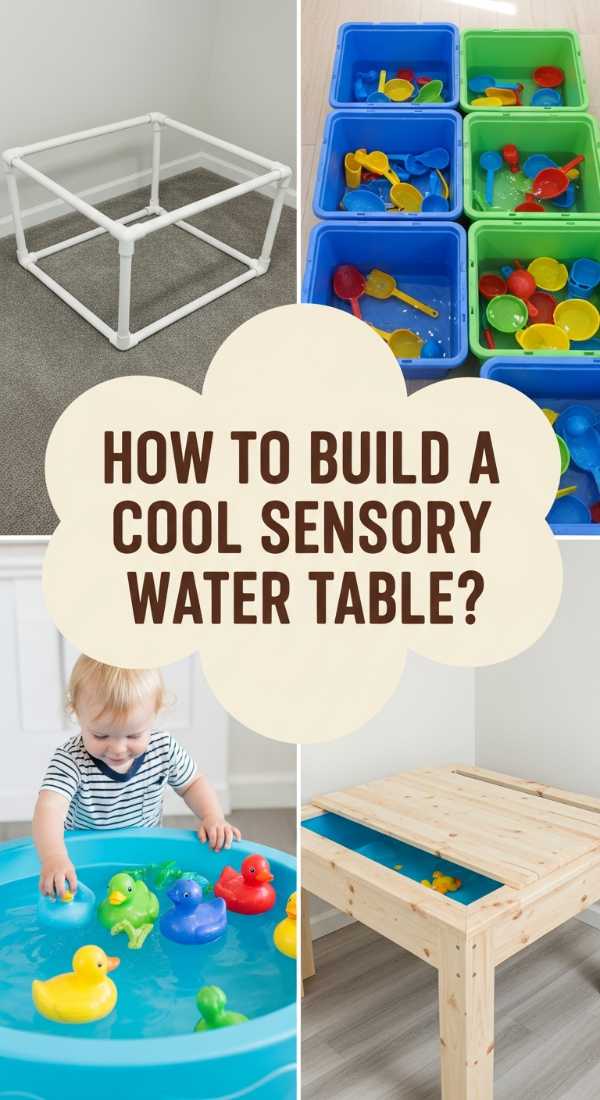
How to Construct a DIY Water Table for Hours of Sensory Fun
Why we love this
Water play is the ultimate summer cooling ritual, and a custom-built water table brings a level of sophistication and durability that plastic store-bought versions lack. We love the way the sunlight dances off the surface of the water, creating rippling shadows on the wood, and the rhythmic sound of a small splash that provides an instant calming effect. It’s a sensory hub where children can explore physics, volume, and temperature through the silky feel of water and the satisfying clink of metal measuring cups, all while staying cool in the shade of a backyard tree.
Essential Elements:
- Cedar or pressure-treated 2x4s and 4x4s
- Deep plastic storage bins with lids
- Stainless steel hardware (screws and bolts)
- Small battery-operated water pump (optional)
- Plastic tubing and funnels
- Floating toys, scoops, and sponges
How to make it
- Build a rectangular frame using 2×4 cedar boards, sized specifically to fit the lip of your chosen plastic storage bins so they can hang securely inside.
- Attach 4×4 posts as legs, ensuring the height is ergonomic for your children (usually between 18 and 24 inches) and securing them with heavy-duty lag bolts.
- Add a lower shelf using 1×4 slats, which provides stability to the structure and offers a storage spot for water toys when they aren’t in use.
- Sand every inch of the wood with progressively finer sandpaper (up to 220 grit) to ensure there are no rough spots, then apply a water-repellent sealer.
- Drop the bins into the frame; if you want a flowing water feature, use a small drill bit to create holes in one bin and set up a recirculating pump with plastic tubing.
- Install a small drain plug at the bottom of the bins by using a step-drill bit and a standard bulkhead fitting, making it easy to refresh the water.
- Fill with clean water and add a drop of blue food coloring or some floating lavender sprigs to enhance the sensory experience and visual appeal.
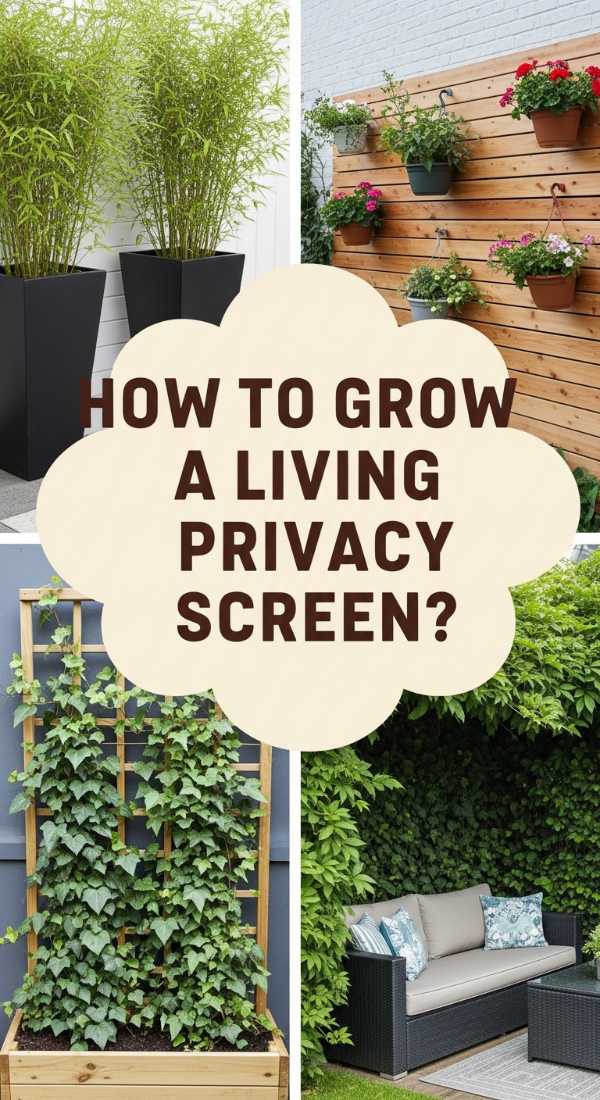
How to Install a Planter Privacy Wall for a Secluded Garden Retreat
Why we love this
There is nothing quite as cozy as a ‘living wall’ that wraps you in a lush, green embrace while shielding you from the prying eyes of the street. Unlike a cold fence, a planter privacy wall is a breathing, evolving structure that smells of damp earth and fresh foliage. We love the way the vibrant green leaves of climbing jasmine or the architectural stems of bamboo create a soft, swaying barrier that filters the wind and softens the harsh afternoon light, turning a small patio into a secret garden where you can truly disappear into a book or a conversation.
Essential Elements:
- Large rectangular wooden or composite planters
- Trellis panels or horizontal wood slats
- High-quality potting soil with perlite
- Fast-growing screening plants (Star Jasmine, Bamboo, or Clematis)
- Drip irrigation kit (optional but recommended)
How to make it
- Line up your large planters to form the base of your wall, ensuring they are heavy enough (or weighted with gravel at the bottom) to withstand high winds.
- Secure a tall trellis or custom-built slatted frame to the back of the planters using galvanized brackets and long screws, ensuring the structure is perfectly plumb.
- Fill the bottom 2 inches of the planters with river rock for drainage, then top with a premium potting mix enriched with organic compost.
- Space your plants approximately 12-18 inches apart; for climbers like Jasmine, gently weave the existing vines into the lower part of the trellis to encourage upward growth.
- Install a simple battery-operated drip irrigation system with emitters for each planter, ensuring consistent moisture which is crucial for plants in containers.
- Apply a layer of mulch to the top of the soil to retain moisture and give the planters a finished, professional look.
- As the plants grow, periodically tuck stray vines back into the trellis and prune the tops to encourage the plant to fill out horizontally for a denser privacy screen.
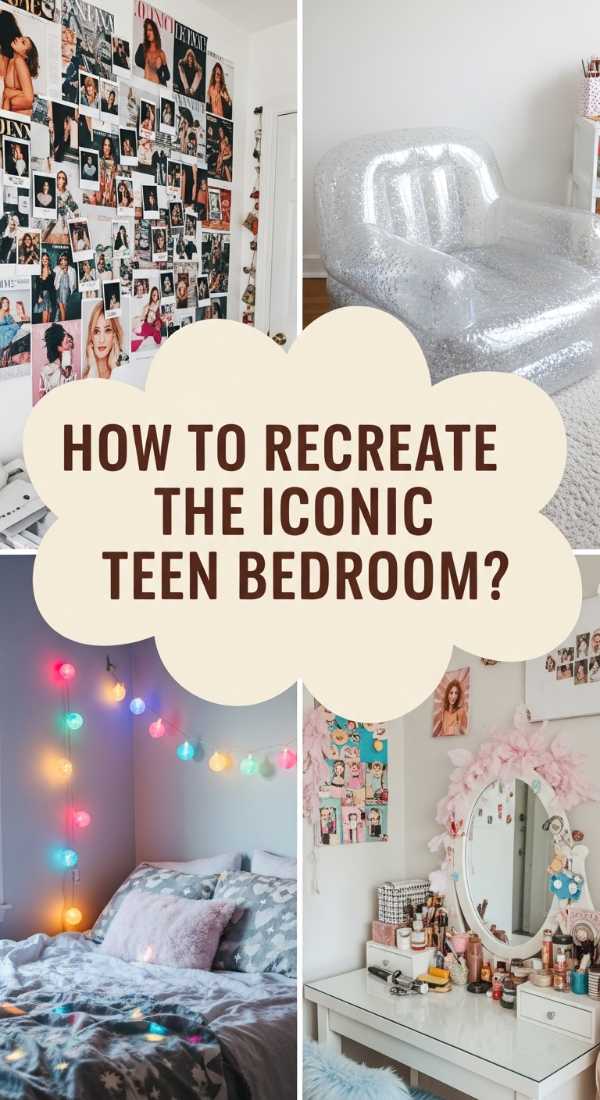
How to Style a Teen Room for the Perfect Nostalgic Vibe

Why we love this
A teen room should feel like a time capsule of personality—a blend of modern tech and the comforting, tactile nostalgia of decades past. We love the way this style mixes the warm, neon glow of ’80s-inspired lighting with the fuzzy texture of a shag rug and the smooth, cool surface of a vinyl record. It’s a space that prioritizes ‘vibes’—where the scent of a vanilla candle mingles with the sight of polaroid photos pinned to the wall, creating a cocoon of self-expression that feels safe, creative, and undeniably cool.
Essential Elements:
- LED neon signs or color-changing strip lights
- Bean bag chairs or floor cushions
- Gallery wall of vinyl records or vintage posters
- Macrame wall hangs or sheer curtains
- Compact record player or retro-style Bluetooth speaker
- Storage for ‘analog’ hobbies (film cameras, sketchbooks)
How to make it
- Start with a neutral wall color like soft charcoal or off-white to allow the colorful ‘nostalgia’ elements to take center stage without overwhelming the room.
- Install LED light strips along the ceiling perimeter or under the bed frame, using a remote to set the ‘mood’ (sunset oranges and deep purples work best for the nostalgic feel).
- Create a focal point by mounting a ‘record ledge’—thin wooden strips that allow vinyl covers to be displayed like art pieces and swapped out easily.
- Incorporate various textures by layering a chunky knit throw over a velvet duvet cover, and adding a plush faux-fur rug to create a dedicated ‘hangout’ zone on the floor.
- Dedicate a corner to a ‘memory wall’ using a wire grid or corkboard where they can clip instant-film photos and ticket stubs using mini clothespins.
- Choose furniture with ‘retro’ silhouettes, like a desk with tapered mid-century modern legs or a round, papasan chair that invites hours of lounging.
- Finish the space with a few low-maintenance indoor plants like a Pothos or Snake Plant to add a touch of life and improve the air quality of the ‘den.’
How to Master Beach Hacks for Stress Free Family Days
Why we love this
The beach should be a place of pure relaxation, where the salt air clears your head and the rhythm of the waves sets the pace for the day. However, we all know the struggle of sand getting into everything and the logistical nightmare of hauling gear. Mastering these hacks is about reclaiming that peace. We love the feeling of a perfectly organized cooler, the relief of a sand-free car, and the simple joy of an umbrella that actually stays put, allowing you to focus on the sun on your skin and the cold drink in your hand.
Essential Elements:
- Cornstarch or baby powder (the ultimate sand remover)
- Fitted sheet (to create a sand-free zone)
- Mesh bags for toys
- Frozen water bottles (double as ice packs)
- Sand anchors for umbrellas
- Ziploc bags for electronics
How to make it
- Create a ‘dry zone’ on the sand by laying down a large fitted sheet and placing heavy bags in the four corners to pull the sides up, creating a shallow ‘tub’ that keeps sand out.
- Pack your cooler by placing frozen water bottles at the bottom; they will keep your food cold all day and provide ice-cold drinking water as they melt.
- Use a large mesh laundry bag for all sand toys—at the end of the day, give the bag a vigorous shake, and the sand will fall through the holes before you ever reach the car.
- Before getting into the vehicle, apply a generous amount of cornstarch to sandy legs and feet; the powder absorbs the moisture, allowing the sand to simply slide off with a quick wipe.
- Store your phone and car keys in a clear, sealed Ziploc bag; you can still use the touchscreen through the plastic, and your tech stays protected from salt spray and grit.
- Dig a hole about 12 inches deep for your umbrella before inserting the pole, then fill it back in and pack the sand down firmly with your feet for a gust-proof setup.
- Bring a spray bottle filled with fresh water to mist your face and hands, providing instant relief from the salt-crust and heat during the drive home.
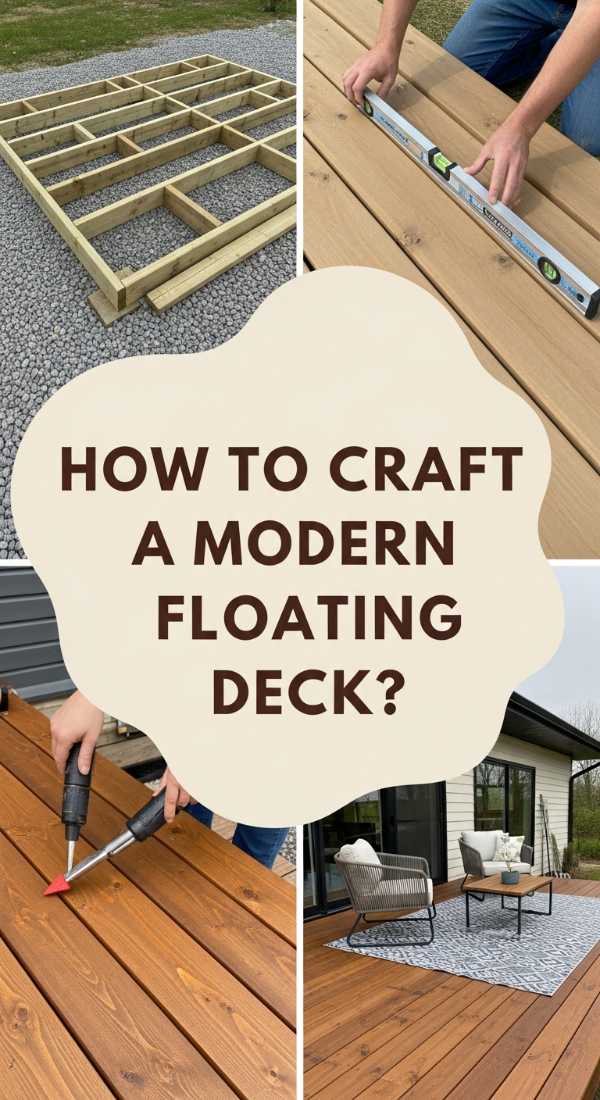
How to Build a Floating Deck for a Professional Backyard Makeover
[IMAGE_10]
Why we love this
A floating deck is the ultimate ‘level up’ for any backyard, providing a defined, elevated stage for your outdoor furniture that feels significantly more intentional than just placing chairs on the grass. We love the structural beauty of the parallel boards and the way the natural wood grain provides a warm, organic contrast to the green of the lawn. It’s a project that offers instant gratification; one day you have an empty corner, and the next, you have a professional-grade platform that smells of fresh cedar and looks like it was designed by an architect.
Essential Elements:
- Pressure-treated 2×6 boards for the frame
- Cedar or composite decking boards
- Pre-cast concrete deck blocks
- Galvanized deck screws and joist hangers
- Landscaping fabric and gravel
- Spirit level and speed square
How to make it
- Mark the footprint of your deck with stakes and string, then remove the sod and lay down landscape fabric topped with a thin layer of gravel to prevent weeds and rot.
- Position your concrete deck blocks at the corners and at 4-foot intervals along the perimeter, ensuring each block is perfectly level with the others using a long straight-edge and a level.
- Construct the outer frame using 2×6 pressure-treated lumber, checking for squareness by measuring the diagonals—they should be identical.
- Install the interior ‘joists’ every 16 inches on center, securing them to the frame with galvanized joist hangers for maximum structural integrity.
- Lay your first decking board perfectly flush with the edge of the frame, then use a 1/8-inch spacer (or a large nail) to maintain consistent gaps between all subsequent boards.
- Drive two deck screws into each joist through the decking boards, ensuring the heads are slightly countersunk for a smooth, professional finish.
- Trim any overhanging board ends with a circular saw for a perfectly straight edge, then sand the perimeter and apply a high-quality UV-rated wood stain to protect your investment.
Conclusion
Your outdoor space is more than just an area to maintain—it is a canvas for your life. By taking on these DIY projects, you aren’t just increasing your property value; you’re creating the backdrop for summer barbecues, quiet morning reflections, and childhood memories that last a lifetime. Whether you start small with a mud kitchen or go big with a floating deck, the key is to begin. Happy building, and enjoy your new urban oasis!