
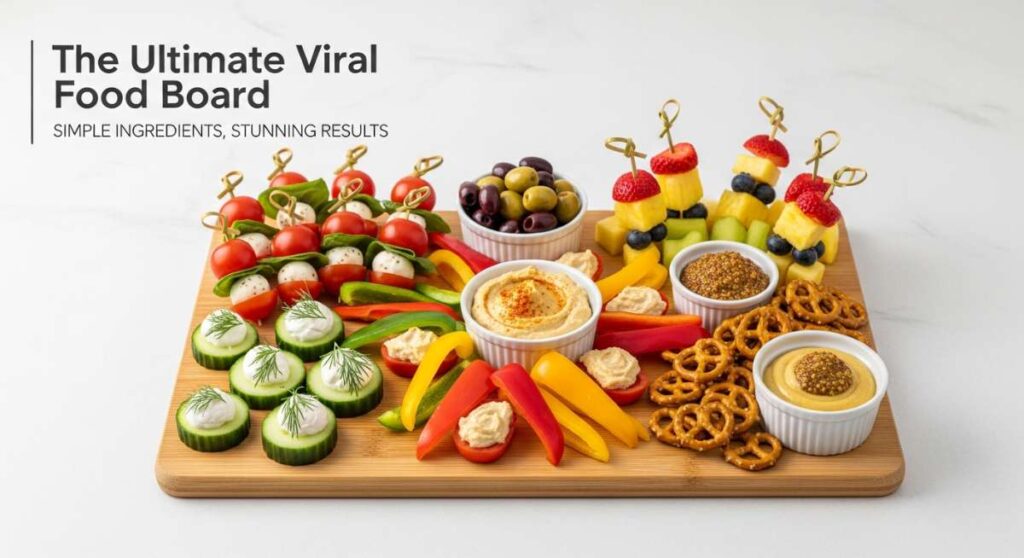
There is something truly magical about the way food brings us together, especially during those milestone seasons like graduation. As the weather warms up and the scent of blooming flowers fills the air, my kitchen becomes a sanctuary of flour, sugar, and the bright, tart tang of fresh rhubarb. Creating a viral-worthy food board isn’t just about the aesthetic; it’s about the memories baked into every crumb and the shared laughter over a perfectly brewed cup of coffee.
I remember my own graduation party—the chaos of the kitchen, the pride in my parents’ eyes, and that one centerpiece cake that everyone couldn’t stop talking about. Today, I want to help you recreate that same feeling of wonder. Whether you’re celebrating a hard-earned diploma or simply hosting a weekend brunch for friends, these recipes and styling tips are designed to turn simple ingredients into a stunning, edible landscape that will have everyone reaching for their cameras before they reach for a fork.
How to bake graduation cakes?
Why we love this
A graduation cake is more than just a dessert; it is a grand finale to years of hard work and late-night study sessions. We love the way a tall, towering sponge cake looks when it’s sliced open to reveal moist, airy layers that contrast beautifully with a silky-smooth buttercream. The aroma of vanilla bean and toasted sugar wafting through the house creates an atmosphere of pure celebration, while the sight of a perfectly leveled, pristine white cake provides the ultimate canvas for personal touches that honor the graduate’s unique journey.
Ingredients
- 3 cups all-purpose flour
- 2 cups granulated sugar
- 1 tbsp baking powder
- 1/2 tsp salt
- 1 cup unsalted butter, softened
- 4 large eggs, room temperature
- 1 cup whole milk
- 2 tsp vanilla bean paste
How to make it
- Preheat your oven to 350°F (175°C) and grease three 8-inch round cake pans, lining the bottoms with parchment paper for an easy release.
- In a large bowl, sift together the flour, baking powder, and salt. Sifting is crucial for that viral ‘cloud-like’ texture.
- Cream the butter and sugar in a stand mixer on medium-high speed for at least 5 minutes until the mixture looks pale and fluffy.
- Add eggs one at a time, beating well after each addition to ensure the emulsion doesn’t break.
- Gradually add the dry ingredients alternating with the milk, starting and ending with the dry. Mix until just combined; over-mixing will result in a tough cake.
- Divide the batter evenly among the pans and bake for 25-30 minutes. Use a toothpick to check for doneness—it should come out with just a few moist crumbs.
- Let the cakes cool in the pans for 10 minutes before transferring to a wire rack. Professional tip: wrap the warm cakes in plastic wrap and freeze for 30 minutes before frosting to lock in moisture and make leveling easier.
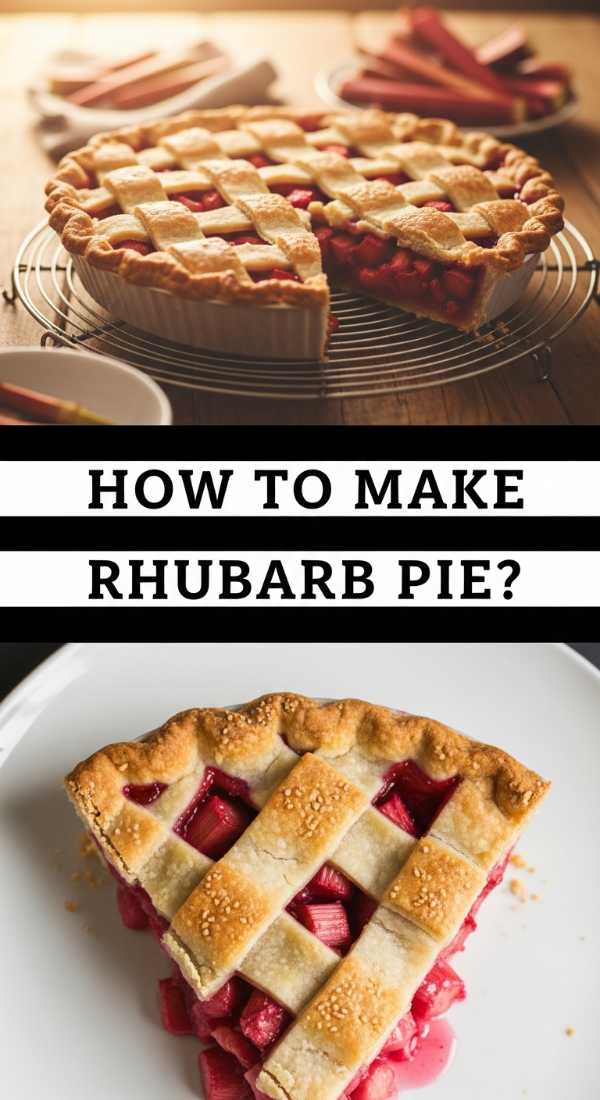
How to make rhubarb pie?

Why we love this
Rhubarb pie is the quintessential taste of spring, offering a sophisticated balance between assertive tartness and mellow sweetness. There is something incredibly satisfying about the way the ruby-red stalks break down into a jammy, luscious filling that contrasts with a flaky, buttery crust that shatters upon impact. The scent of cinnamon and nutmeg mingling with the earthy aroma of cooked rhubarb is nostalgic and comforting, making it a show-stopping addition to any seasonal food board that craves a pop of vibrant color.
Ingredients
- 4 cups fresh rhubarb, chopped into 1/2 inch pieces
- 1 1/4 cups granulated sugar
- 1/4 cup cornstarch
- 1 tsp cinnamon
- Double pie crust (homemade or store-bought)
- 1 egg (for egg wash)
- Coarse sanding sugar for topping
How to make it
- Roll out your bottom pie crust and fit it into a 9-inch pie plate. Chill in the refrigerator while you prepare the filling.
- In a large mixing bowl, toss the chopped rhubarb with sugar, cornstarch, and cinnamon. Let it sit for about 15 minutes to allow the juices to macerate.
- Pour the rhubarb mixture into the chilled pie shell, ensuring the fruit is evenly distributed.
- Roll out the second crust and cut into strips to create a lattice top. Weave the strips over the filling for that classic bakery look.
- Crimp the edges tightly to seal in the juices. Brush the lattice with a beaten egg wash and sprinkle generously with sanding sugar for a professional, sparkling finish.
- Bake at 400°F (200°C) for 20 minutes, then reduce heat to 375°F (190°C) and bake for another 35-40 minutes until the crust is golden brown and the filling is bubbling thick juices.
- Crucial step: allow the pie to cool completely (at least 4 hours) before slicing to ensure the filling sets properly.
How to decorate graduation cupcakes?
Why we love this
Cupcakes are the perfect grab-and-go treat for a busy graduation party, and decorating them allows for endless creativity. We love the transformation from a simple muffin into a miniature work of art using fondant, chocolate, and vibrant frosting. The tactile experience of piping perfect swirls and the visual joy of seeing a sea of tiny graduation caps is what makes these so viral-worthy. They provide a personalized touch that makes every guest feel like they are part of the celebration, all while smelling like sweet buttercream and cocoa.
Ingredients
- Batch of baked cupcakes (vanilla or chocolate)
- Stiff buttercream frosting
- Ghirardelli chocolate squares
- Mini Reese’s cups (unwrapped)
- Sour belt candy or fruit leather (for tassels)
- M&Ms or small round candies
How to make it
- Frost each cupcake with a flat, even layer of buttercream to create a stable base for your decorations.
- To create the ‘mortarboard’ hat, flip a mini Reese’s cup upside down and place it in the center of the cupcake.
- Apply a small dot of melted chocolate or frosting to the top of the Reese’s cup and press a Ghirardelli chocolate square onto it, ensuring it sits level.
- Cut a thin strip of sour belt candy or fruit leather to act as the tassel. Attach one end to the center of the chocolate square with a tiny dot of frosting.
- Place a small candy (like an M&M) on top of the tassel’s attachment point to mimic the button on a graduation cap.
- Use a fine-tip piping bag to write the graduation year on the chocolate square for a custom touch.
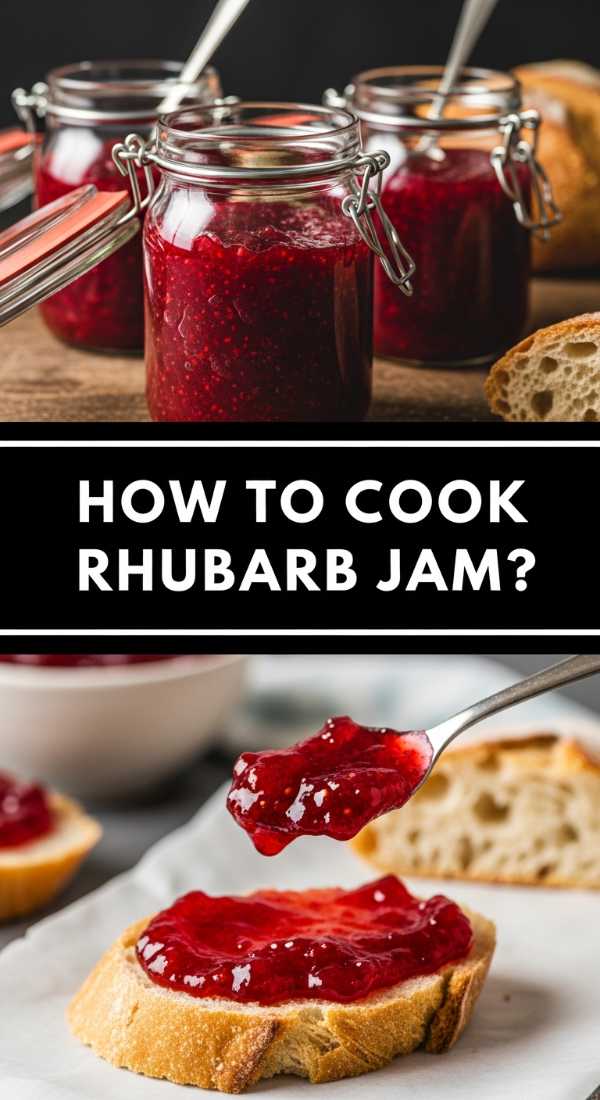
How to cook rhubarb jam?
Why we love this
Making your own rhubarb jam is like capturing sunshine in a jar. We love the slow, rhythmic process of the fruit breaking down on the stove, releasing its vibrant pink hue and a sharp, refreshing aroma that fills the entire house. This jam isn’t just a topping; it’s a versatile condiment that brings a bright acidity to the richness of a food board. The texture is thick and spreadable, with just enough fruit integrity to remind you of the fresh stalks it came from, making it an essential element for pairing with cheeses or warm scones.
Ingredients
- 6 cups chopped rhubarb
- 4 cups granulated sugar
- 2 tbsp lemon juice
- 1 tsp vanilla extract (optional)
- 1 tsp lemon zest
How to make it
- Combine the chopped rhubarb, sugar, lemon juice, and zest in a large, heavy-bottomed pot. Stir well and let it macerate for at least 2 hours (or overnight) to draw out the natural juices.
- Place the pot over medium-high heat and bring the mixture to a full rolling boil, stirring frequently to prevent scorching on the bottom.
- Maintain a steady boil for about 15-20 minutes. You are looking for the ‘gel point.’ Pro tip: place a small plate in the freezer. Drop a spoonful of jam onto the cold plate; if it wrinkles when pushed with your finger, it’s done.
- Remove from heat and stir in the vanilla extract if using. Skim off any foam that has risen to the surface with a metal spoon.
- Ladle the hot jam into sterilized jars, leaving 1/4 inch of headspace. Wipe the rims clean and screw on the lids.
- Process in a boiling water bath for 10 minutes for long-term storage, or let cool and store in the refrigerator for up to 3 weeks.
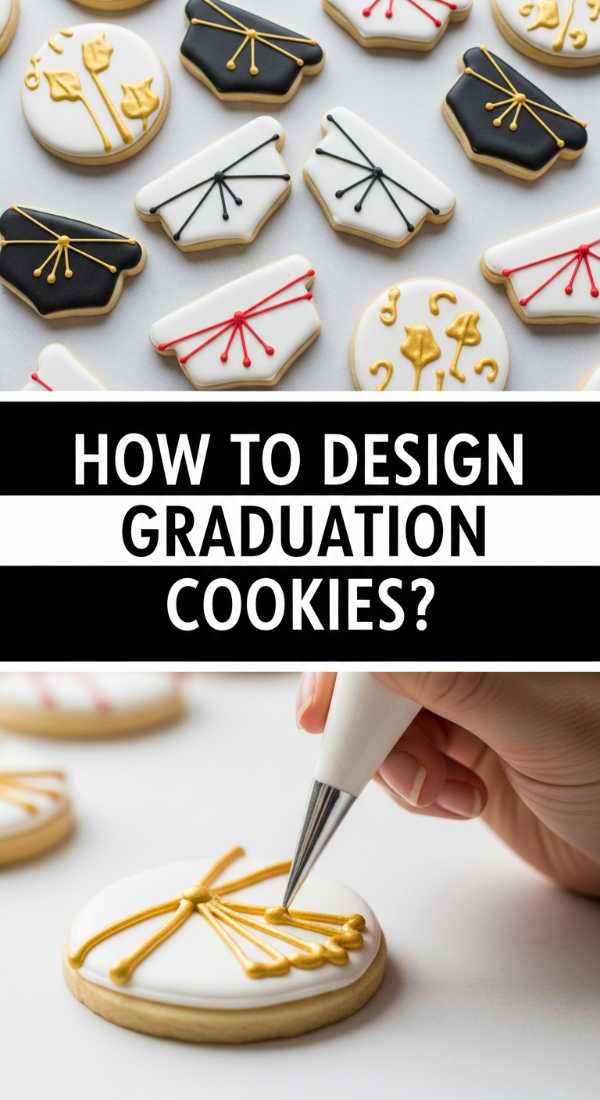
How to design graduation cookies?
Why we love this
Graduation cookies are the ultimate canvas for school spirit and personalized storytelling. We love the crisp snap of a well-baked sugar cookie paired with the smooth, royal icing finish that feels like porcelain. The process of designing these is incredibly therapeutic, from mixing custom school colors to the precision of piping delicate diplomas and stars. They look stunning arranged in clusters on a board, offering a sweet, buttery crunch that complements the softer elements of the spread while celebrating the graduate’s achievements in every bite.
Ingredients
- Batch of chilled sugar cookie dough
- Royal icing (stiff and flood consistencies)
- Gel food coloring (school colors)
- Edible gold luster dust
- Piping bags and fine tips
How to make it
- Roll out your cookie dough to a consistent 1/4-inch thickness and cut into shapes like diplomas, caps, and the graduation year. Bake and cool completely.
- Outline the edge of the cookie with ‘stiff’ consistency icing. This acts as a dam to hold the thinner icing in place.
- Use ‘flood’ consistency icing (about the texture of honey) to fill in the center of the outlined area. Use a toothpick or scribe tool to pop any air bubbles and pull the icing into the corners.
- Let the base layer dry for at least 4-6 hours until it is hard to the touch. This prevents the colors from bleeding into each other.
- Add details like diploma ribbons or cap tassels using the stiff icing. For a viral ‘glam’ look, mix gold luster dust with a drop of vodka and paint over the details once they are dry.
- Allow the cookies to dry completely overnight before stacking or packaging to ensure the icing doesn’t smudge.
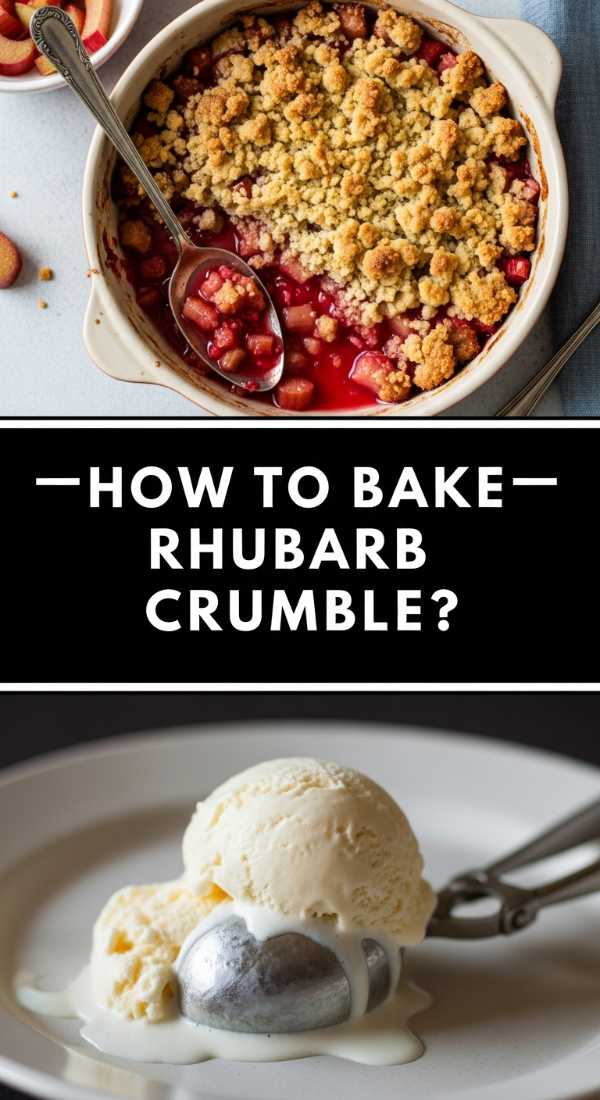
How to bake rhubarb crumble?
Why we love this
Rhubarb crumble is the rustic, effortless cousin of the pie, and we love it for its contrast of textures—the soft, bubbling fruit base topped with a crunchy, buttery oat crust. The aroma of toasted oats and brown sugar is heart-warming, while the zingy rhubarb underneath keeps the dish from being overly sweet. It’s the ultimate comfort food that looks incredibly appetizing when served warm in a large dish, allowing guests to scoop out large, messy portions that reveal the steaming, ruby-colored center.
Ingredients
- 6 cups sliced rhubarb
- 3/4 cup sugar
- 2 tbsp cornstarch
- 1 cup rolled oats
- 1 cup brown sugar
- 1 cup all-purpose flour
- 1/2 cup cold unsalted butter, cubed
How to make it
- Preheat your oven to 375°F (190°C) and butter a 9×13 inch baking dish.
- Toss the rhubarb with the white sugar and cornstarch until the pieces are evenly coated. Spread this into the bottom of the prepared dish.
- In a separate bowl, combine the oats, brown sugar, and flour. Use a pastry cutter or your fingers to rub the cold butter into the mixture until it forms pea-sized crumbs. Pro tip: don’t over-work the butter; you want those distinct chunks for maximum crunch.
- Sprinkle the crumble topping evenly over the rhubarb. Do not press it down; keep it light and airy.
- Bake for 35-45 minutes. You are looking for the fruit juices to bubble vigorously at the edges and the top to be a deep, golden brown.
- Serve warm, ideally with a scoop of melting vanilla bean ice cream to balance the heat and acidity.
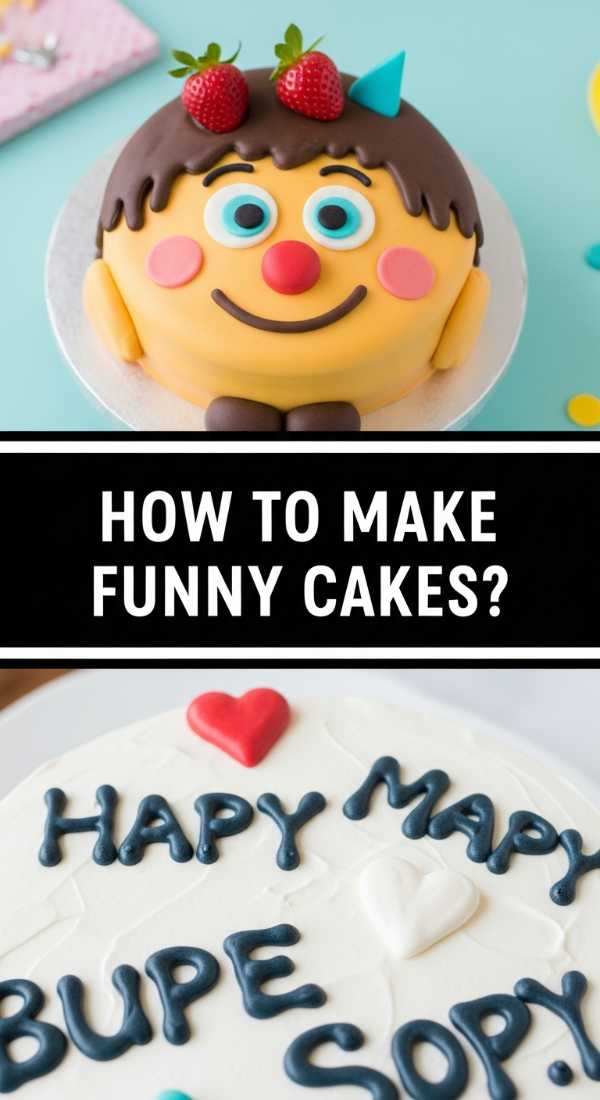
How to make funny cakes?

Why we love this
Funny cakes bring a much-needed sense of levity and humor to any celebration. Whether it’s a cake that looks like a giant pile of laundry for a new graduate or a ‘failing’ cake with intentionally wonky layers, we love the way these bakes break the ice and spark conversation. The joy of a funny cake lies in the clever use of everyday objects recreated in sugar, providing a tactile and visual surprise that proves baking doesn’t always have to be serious—it just has to be delicious and full of personality.
Ingredients
- Dense pound cake layers (for structural stability)
- Ganache or firm buttercream
- Modeling chocolate or fondant
- Edible markers
- Puffed rice treats (for sculpting large shapes)
How to make it
- Choose a theme that is relatable to the graduate, such as ‘The Student Debt’ or ‘The Late Night Ramen.’
- Use puffed rice treats to sculpt any non-cake shapes (like a coffee mug or a stack of books) as they are lighter and easier to shape than cake.
- Stack your cake layers with a firm ganache. For funny cakes, ‘carving’ is often necessary to get the right proportions. Freeze the stacked cake for 1 hour before carving to minimize crumbs.
- Cover the carved cake in a thin crumb coat and then a final layer of fondant. Smooth it out, but don’t worry about perfection if the ‘joke’ requires a messy look.
- Use edible markers to add ‘handwritten’ notes, like fake exam scores or funny quotes the graduate says often.
- Use modeling chocolate for small details like ‘spilled’ coffee (made from brown corn syrup) to add a hyper-realistic, hilarious touch.
How to style graduation boards?
Why we love this
Styling a graduation board is where all the individual elements come together to tell a story. We love the abundance of a well-curated board—the way the textures of the cookies, the vibrant jars of jam, and the heights of the cupcakes create a visual feast. It’s an interactive experience that encourages guests to graze and explore. The combination of savory elements like cheeses and nuts with the sweetness of the graduation treats ensures there is something for everyone, making the board the social hub of the party.
Ingredients
- Large wooden board or marble slab
- Small bowls for jam and pesto
- Variety of graduation cookies and cupcakes
- Fresh fruits (grapes, berries, sliced lemon)
- Cheeses and crackers (for balance)
- Greenery or edible flowers for garnish
How to make it
- Start by placing your largest items first, like the graduation cake or the bowls of rhubarb jam and lemon pesto. These act as the anchors for your design.
- Create ‘movement’ on the board by arranging crackers or cookies in winding curves rather than straight lines.
- Group your items by color or theme—place the graduation-specific sweets in one area and the fresh, fruity elements in another, but ensure they overlap slightly for a natural look.
- Fill in the small gaps with ‘filler’ items like nuts, berries, or small sprigs of mint. Pro tip: no part of the board should be visible; abundance is key to the viral aesthetic.
- Add height by using small cake stands or even upturned bowls hidden under a cloth to elevate certain sections of the board.
- Finish with a sprinkle of edible flowers or gold leaf to give the entire arrangement a cohesive, celebratory glow.
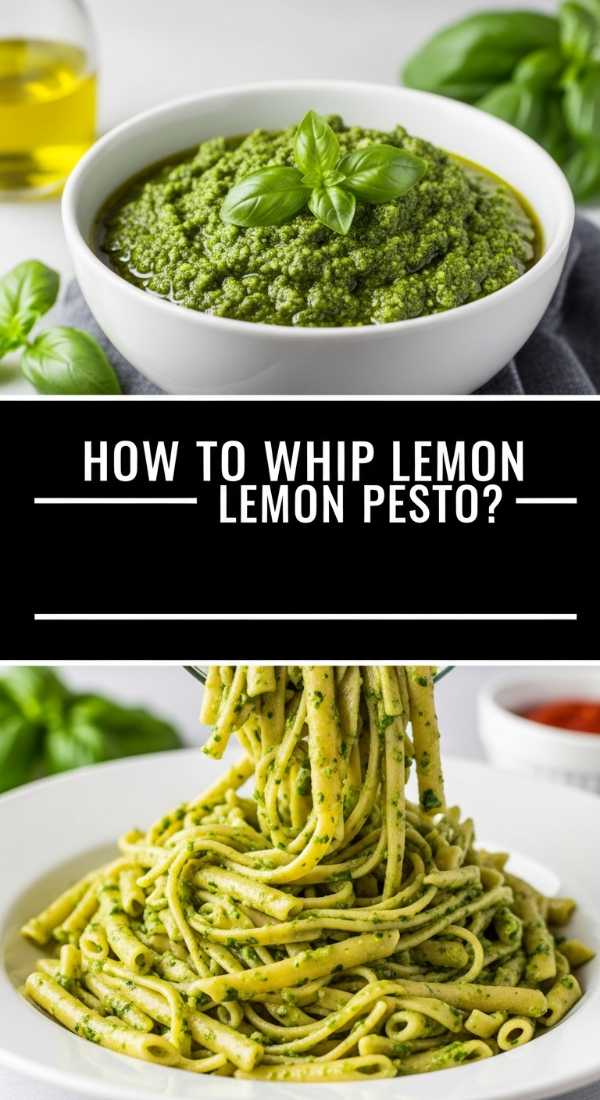
How to whip lemon pesto?

Why we love this
Whipped lemon pesto is a game-changer for any food board, providing a zesty, herbaceous punch that cuts through the sugar of the desserts. We love the airy, mousse-like texture that comes from whipping the ingredients together, making it incredibly light and spreadable. The bright aroma of fresh basil and lemon zest is invigorating, and the vibrant green color adds a stunning visual pop. It’s a sophisticated addition that elevates simple crackers or bread into a gourmet experience that guests won’t expect but will absolutely adore.
Ingredients
- 2 cups fresh basil leaves
- 1/2 cup grated Parmesan cheese
- 1/3 cup pine nuts (toasted)
- 2 cloves garlic
- 1/2 cup extra virgin olive oil
- Zest and juice of 1 large lemon
- 1/2 cup cold heavy cream or mascarpone (for whipping)
How to make it
- In a food processor, pulse the basil, Parmesan, toasted pine nuts, and garlic until coarsely chopped.
- With the motor running, slowly drizzle in the olive oil until a smooth paste forms. Add the lemon juice and zest, then pulse once more to combine.
- Transfer the pesto to a medium bowl. If using heavy cream, whip it in a separate bowl until stiff peaks form. If using mascarpone, soften it slightly.
- Gently fold the pesto into the whipped cream or mascarpone. Use a folding motion with a spatula to keep the air in the mixture.
- Whip the entire mixture with a hand mixer on medium speed for 30 seconds to ensure it is light and fluffy.
- Chill for at least 30 minutes before serving. This allows the flavors to meld and the texture to firm up slightly for the perfect spread.
How to brew fun coffee?
[IMAGE_10]
Why we love this
No food board is complete without a ‘fun’ coffee to wash it all down. We love the way a specialized brew—like a dalgona-style whipped coffee or a lavender-infused latte—adds an element of luxury to the occasion. The smell of freshly ground beans mixed with sweet syrups and creamy foams is the ultimate sensory experience. A beautiful coffee, topped with foam art or a sprinkle of cinnamon, provides a cozy, comforting end to the feast, ensuring that the conversation continues long after the food is gone.
Ingredients
- 2 tbsp instant coffee or espresso powder
- 2 tbsp granulated sugar
- 2 tbsp hot water
- 1 cup milk (dairy or oat)
- Ice cubes (for iced version)
- Flavoring syrup (vanilla, lavender, or caramel)
How to make it
- In a small bowl, combine the instant coffee, sugar, and hot water.
- Using a hand frother or a whisk, beat the mixture vigorously for about 3-5 minutes. You are looking for it to transform from a dark liquid into a thick, caramel-colored foam that holds its shape.
- Fill a glass with ice and your choice of milk. Stir in 1-2 teaspoons of your favorite flavoring syrup.
- Spoon the whipped coffee foam over the top of the milk. It should sit beautifully on the surface.
- For a hot version, steam your milk until frothy, pour into a mug, and top with the whipped coffee.
- Garnish with a dusting of cocoa powder or a piece of zest from your lemon pesto prep for a viral, cafe-quality presentation.
Conclusion: Celebrating Milestones with Every Bite
Creating a viral food board is about more than just the ingredients; it’s about the intention and the love you pour into the preparation. From the tart zest of the rhubarb to the personalized touch of a graduation cookie, every element we’ve explored today is designed to make your celebration unforgettable. I hope these recipes inspire you to get into the kitchen, get creative, and share something beautiful with the people you love. Congratulations to all the graduates, and happy hosting!