

There is something truly magical about gathering around a table overflowing with color, texture, and the sweet scent of home-baked treats. In a world that moves so fast, the viral ‘Food Board’ trend has become my favorite way to slow down and celebrate life’s biggest milestones with the people who matter most. It’s not just about the food; it’s about the gasps of delight when guests walk in and see a curated spread that looks almost too good to eat.
Today, I’m showing you how to build the ultimate celebration board—a mix of seasonal rhubarb delights, elegant graduation treats, and classic comfort bakes. Whether you are hosting a backyard graduation party or a cozy Sunday brunch, these elements are designed to be the showstoppers of your social media feed and the soul of your gathering. Let’s dive into the art of creating something beautiful, delicious, and undeniably viral.
How to design graduation cakes?

Why we love this
A graduation cake is more than just dessert; it is a centerpiece that symbolizes years of hard work and the bright future ahead. We love the way a well-designed cake draws the eye with its architectural height and smooth, satin-like buttercream finish that reflects the light in every photo. Imagine the aroma of Madagascar vanilla bean wafting through the air as you slice into a moist, tiered masterpiece that perfectly balances elegance with a personal touch of school spirit. The contrast between metallic gold accents and a deep, velvet-like frosting creates a sophisticated aesthetic that feels both celebratory and timelessly chic.
Ingredients
- Three 8-inch round sponge cakes
- 4 cups vanilla swiss meringue buttercream
- Edible gold leaf or gold luster dust
- Black fondant for mortarboard toppers
- Silk or ribbon tassels in school colors
- Wooden dowels for structural support
How to make it
- Level your cakes using a serrated knife to ensure they are perfectly flat; this prevents leaning and ensures a professional, sturdy silhouette.
- Apply a thin ‘crumb coat’ of buttercream to trap any loose bits of cake, then refrigerate for at least 30 minutes until the frosting is firm to the touch.
- Apply a generous second layer of buttercream, using a bench scraper held at a 45-degree angle against the rotating turntable to achieve a flawlessly smooth, sharp-edged finish.
- Roll out your black fondant to a 1/4 inch thickness, cut a square and a small circle to assemble a mini mortarboard, and let it dry overnight so it maintains its shape when placed on the cake.
- Carefully apply edible gold leaf using a dry, soft-bristled brush to create an organic, ‘deconstructed’ shimmer effect around the base or top edge of the cake.
- Insert your fondant topper and a matching tassel just before serving, ensuring the placement is off-center for a modern, artistic look that pops in photographs.
How to make rhubarb jam?

Why we love this
Rhubarb jam is the essence of spring captured in a jar, offering a vibrant, ruby-red hue that looks absolutely stunning on a breakfast board. The texture is a delightful mix of soft, jammy fruit and a slight floral tang that wakes up the palate and cuts through the richness of buttered toast. As it simmers on the stove, the kitchen fills with a bright, nostalgic aroma that reminds us of country gardens and sun-drenched mornings. It is the perfect balance of tart and sweet, providing a sophisticated alternative to standard berry preserves that your guests will be asking to take home.
Ingredients
- 2 lbs fresh rhubarb, chopped into 1-inch pieces
- 3 cups granulated sugar
- 1/4 cup fresh lemon juice
- 1 teaspoon lemon zest
- 1/2 teaspoon pure vanilla bean paste
How to make it
- In a large, heavy-bottomed pot, toss the chopped rhubarb with sugar and let it macerate for at least 2 hours; this draws out the natural juices and creates a better syrup consistency.
- Place the pot over medium heat and stir constantly until the sugar has completely dissolved and the mixture begins to reach a gentle boil.
- Increase the heat slightly and simmer the jam for 15-20 minutes, skimming off any foam that rises to the surface with a metal spoon to ensure a clear, jewel-toned finish.
- Use a candy thermometer to check for the setting point at 220°F (104°C), or perform the ‘plate test’ by dropping a small amount on a frozen saucer; if it wrinkles when pushed with a finger, it is ready.
- Stir in the lemon juice, zest, and vanilla paste at the very end to preserve the bright, aromatic notes and prevent the citrus from becoming bitter.
- Ladle the hot jam into sterilized jars, leaving a 1/4 inch headspace, and seal immediately to create a vacuum that preserves the freshness and vibrant color.
How to bake graduation cupcakes?
Why we love this
Graduation cupcakes are the ultimate crowd-pleaser because they offer individual portions of joy wrapped in a stylish, celebratory package. We love the versatility of these bite-sized treats—the way the cake remains incredibly moist under a cloud of silky frosting, topped with clever, edible decorations that tell a story. There’s a certain satisfaction in seeing a perfectly piped swirl that holds its shape, looking like a miniature work of art on a tiered stand. They bring a playful energy to the board, making it easy for guests to grab a treat while they mingle and celebrate the new grad.
Ingredients
- 24 chocolate or vanilla cupcakes (pre-baked and cooled)
- 3 cups stiff piping buttercream
- Chocolate squares (like Ghirardelli)
- Mini peanut butter cups or rolled chocolate wafers
- Sour belt candies or fruit leather (for tassels)
- M&Ms or small chocolate drops
How to make it
- Prepare your cupcakes using a high-quality liner that won’t peel away; ensure they are completely cool to the touch before you even think about frosting them.
- Fit a piping bag with a large open-star tip (like a 1M) and pipe a tall, stable swirl starting from the outside edge and moving toward the center in a continuous motion.
- To create the mortarboard caps, place a mini peanut butter cup upside down on the frosting swirl to act as the base of the hat.
- Apply a small dot of melted chocolate to the top of the peanut butter cup and press a flat chocolate square firmly onto it, holding for 5 seconds until it sets.
- Thinly slice your sour belt candy into fringe-like strips to mimic a tassel and use a tiny dab of frosting to adhere it to the center of the chocolate square.
- Place a single M&M on top of the tassel’s origin point to cover the seam, giving the cupcake a polished, professional ‘cap and gown’ aesthetic.
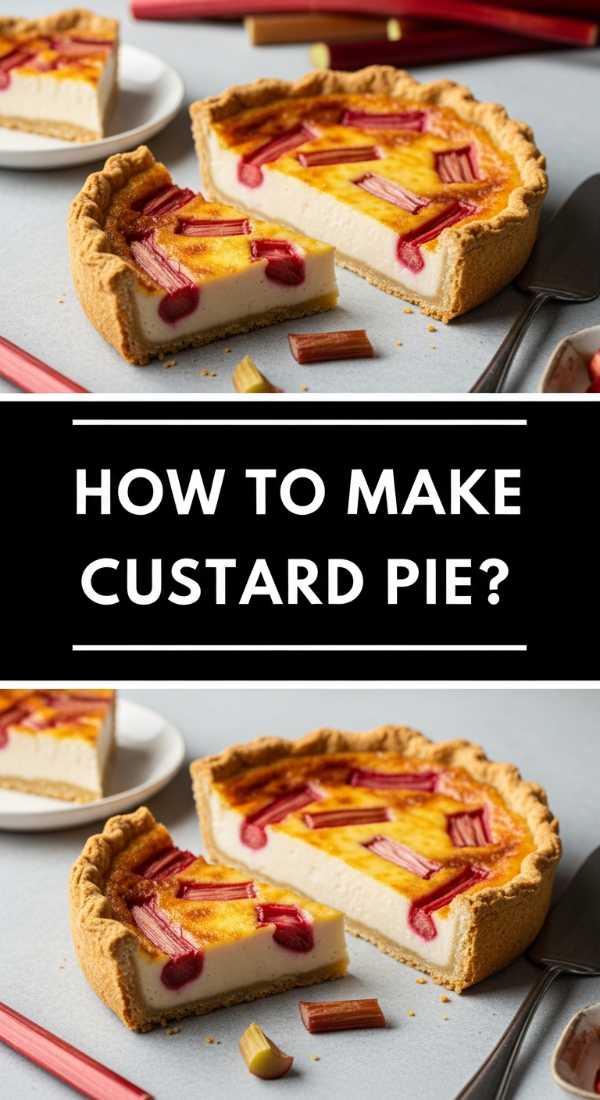
How to make custard pie?

Why we love this
A classic custard pie is the definition of understated elegance, boasting a silky-smooth, pale gold filling that contrasts beautifully against a crisp, buttery crust. We love the gentle ‘wobble’ of a perfectly baked custard—it’s a sign of a delicate, melt-in-the-mouth texture that feels incredibly luxurious on the tongue. The scent of freshly grated nutmeg and warm vanilla creates an inviting, cozy atmosphere that draws everyone to the table. It’s a nostalgic dessert that feels sophisticated enough for a formal food board yet remains deeply comforting, like a warm hug in pastry form.
Ingredients
- 1 pre-baked 9-inch deep-dish pie crust
- 4 large eggs, room temperature
- 3/4 cup granulated sugar
- 2 1/2 cups whole milk or half-and-half
- 1 teaspoon vanilla extract
- 1/2 teaspoon freshly grated nutmeg
How to make it
- Preheat your oven to 350°F (175°C) and ensure your pre-baked crust is cool and free of any cracks to prevent the liquid custard from leaking out.
- In a large bowl, whisk the eggs and sugar together gently; you want to combine them thoroughly without creating too many air bubbles, which can cause an unsightly foam on the surface.
- Scald the milk in a saucepan over medium heat just until tiny bubbles form around the edges; do not let it boil, as this can curdle the eggs during the tempering process.
- Slowly drizzle the warm milk into the egg mixture in a thin stream while whisking constantly; this ‘tempers’ the eggs, raising their temperature slowly so they stay smooth.
- Strain the entire mixture through a fine-mesh sieve into the pie crust to remove any stray bits of egg, ensuring a perfectly homogenous, glassy texture.
- Generously grate fresh nutmeg over the top and bake for 35-40 minutes until the edges are set but the center still has a slight, gelatinous jiggle when nudged.
How to decorate graduation cookies?
Why we love this
Decorated graduation cookies are like edible greeting cards, offering a crisp, buttery snap followed by the sweet, smooth crunch of royal icing. We love the way they allow for complete customization—from the year of the class to the specific colors of the university—making them a deeply personal addition to any viral food board. The precision of the icing lines and the vibrant, saturated colors make these cookies a visual highlight that guests will immediately want to photograph. They add a whimsical yet polished element that balances out the heavier cakes and pies on your spread.
Ingredients
- Batch of firm sugar cookies (diploma and cap shapes)
- Royal icing (flooding and piping consistencies)
- Gel food coloring (school colors)
- Fine-tipped piping bags or squeeze bottles
- Edible ink markers for fine details
- Gold sanding sugar
How to make it
- Outline your cooled cookies using a ‘piping consistency’ icing (thick like toothpaste) to create a border that will act as a dam for the thinner icing.
- Fill in the center of the outline using ‘flooding consistency’ icing (thinner like maple syrup), using a toothpick to pop any air bubbles and push the icing into the corners.
- Allow the base layer of icing to dry completely—usually 6 to 12 hours in a cool, dry place—before adding secondary layers or details to prevent color bleeding.
- Use a fine-tipped piping bag to write the graduation year or the student’s name, maintaining steady pressure and a consistent height from the cookie surface for clean lines.
- To create a diploma ‘ribbon,’ pipe a small line across a rectangular cookie and immediately sprinkle with gold sanding sugar while the icing is still wet.
- Once fully dry, use edible ink markers to add tiny details like ‘stitching’ on the graduation caps or fine text, giving the cookies an intricate, artisanal finish.
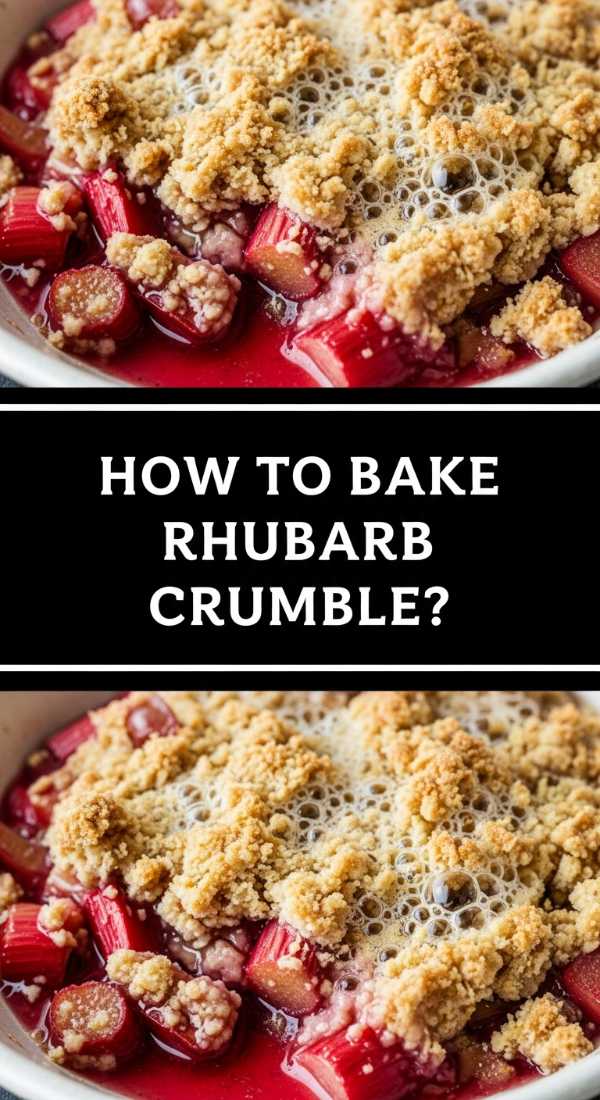
How to bake rhubarb crumble?
Why we love this
There is nothing quite like the rustic charm of a rhubarb crumble, where the juices of the fruit bubble up through a golden, buttery blanket of oats and nuts. We love the textural interplay between the soft, tart collapse of the rhubarb and the crunch of the cinnamon-spiced topping. As it bakes, the kitchen is filled with a mouthwatering aroma of toasted butter and caramelized sugar that is impossible to resist. It’s a dish that looks stunning served in a large ceramic dish on a food board, offering a warm, ‘help-yourself’ vibe that encourages guests to dig in and get messy.
Ingredients
- 4 cups fresh rhubarb, sliced
- 1/2 cup granulated sugar (for the fruit)
- 1 cup all-purpose flour
- 1 cup rolled oats
- 3/4 cup brown sugar, packed
- 1/2 cup cold unsalted butter, cubed
- 1 teaspoon ground cinnamon
How to make it
- Preheat your oven to 375°F (190°C) and lightly grease a shallow baking dish; toss the rhubarb with the granulated sugar and a tablespoon of flour to thicken the juices as they cook.
- In a separate bowl, combine the flour, oats, brown sugar, and cinnamon, stirring well to ensure the spices are evenly distributed throughout the dry ingredients.
- Add the cold, cubed butter to the dry mix and use a pastry cutter or your fingertips to work it in until the mixture resembles coarse, pea-sized crumbs.
- Spread the rhubarb evenly in the baking dish and then cover it completely with the crumble topping, pressing down very lightly to ensure it adheres to the fruit.
- Bake for 35-45 minutes; look for the fruit juices to be thick and bubbling vigorously around the edges, and the topping to be a deep, golden brown.
- Let the crumble rest for at least 15 minutes before serving; this allows the juices to set slightly, creating a luscious sauce that clings to every bite of the fruit and topping.
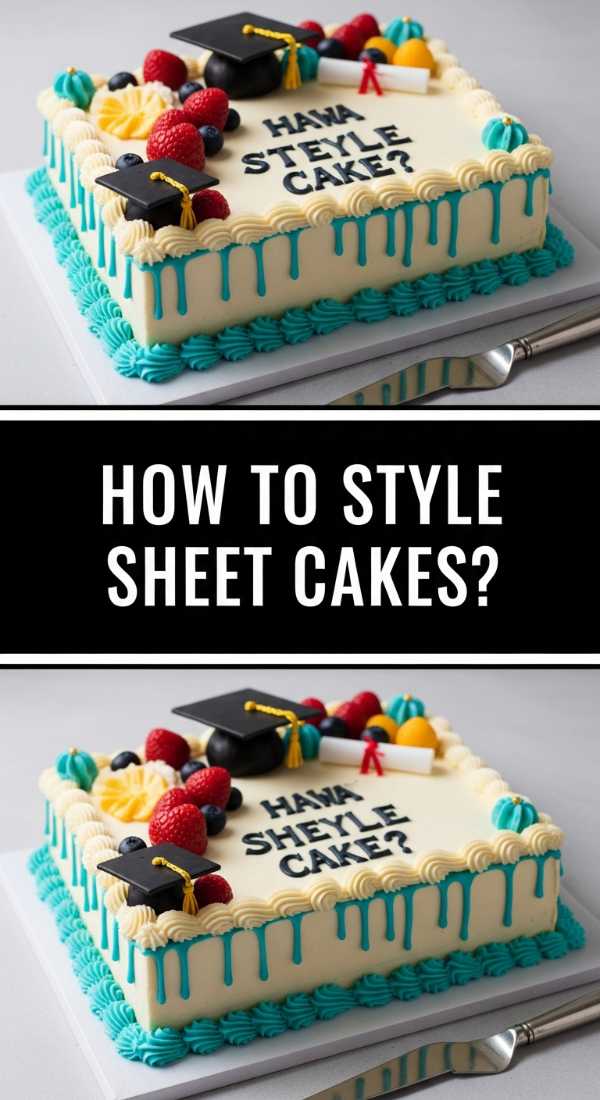
How to style sheet cakes?
Why we love this
Sheet cakes are the unsung heroes of the party world, and styling them correctly turns a humble dessert into a viral sensation. We love how a flat canvas allows for modern, minimalist designs or lush, garden-like arrangements of edible flowers and fresh berries. The beauty lies in the clean lines and the consistent height, making it easy to slice into perfect squares that look uniform and professional on a serving platter. A well-styled sheet cake feels approachable yet incredibly chic, proving that you don’t need multiple tiers to make a massive impact at a celebration.
Ingredients
- 1 rectangular sheet cake (9×13 or larger)
- 3 cups whipped cream frosting or smooth buttercream
- Fresh berries (strawberries, blueberries, raspberries)
- Edible pansies or marigolds
- Fresh mint leaves
- Gold leaf or decorative sprinkles
How to make it
- Bake your cake in a high-quality pan with sharp corners to ensure the final product looks like a clean, intentional rectangle rather than a rounded home-style bake.
- Apply your frosting using an offset spatula, creating a ‘stucco’ texture with soft swirls or a perfectly flat, mirror-like surface depending on your desired aesthetic.
- Visualize the cake in a grid; plan your decoration so that every individual square slice will have at least one decorative element like a berry or a flower.
- Arrange your fruit in an ‘S’ curve or a corner-heavy cluster to create a sense of movement and organic flow across the flat surface of the cake.
- Incorporate varying heights by standing some berries upright and halving others to show off their internal textures and vibrant colors.
- Finish with a light dusting of gold leaf or a few sprigs of fresh mint to add a pop of contrasting color that makes the fruit look even fresher and more vibrant.
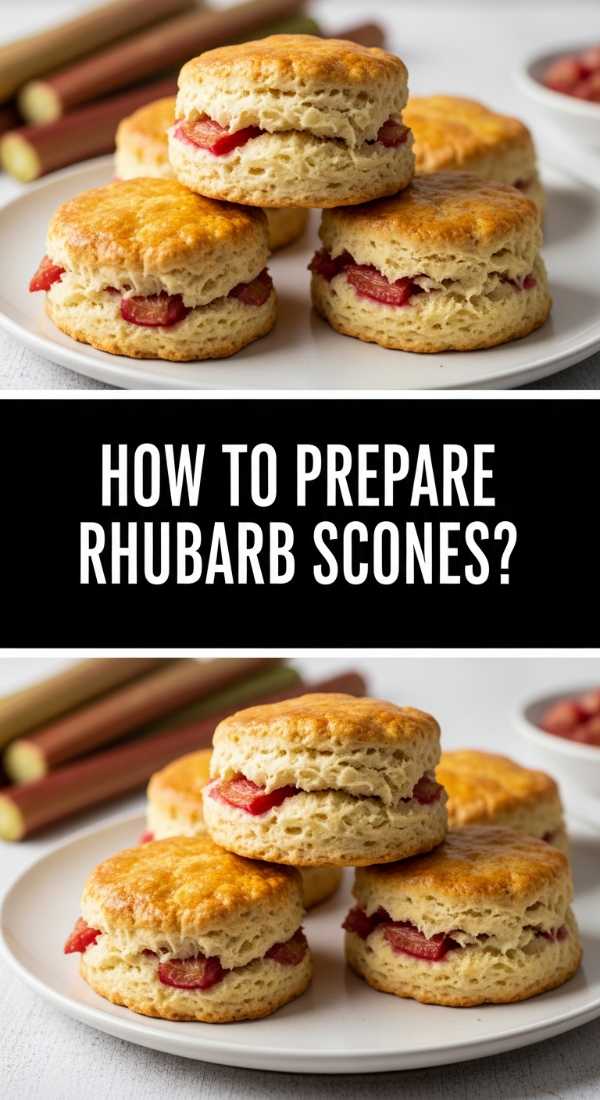
How to prepare rhubarb scones?
Why we love this
Rhubarb scones are a masterclass in texture, featuring a crumbly, tender interior and a crisp, sugar-dusted exterior that sparkles on your food board. We love the way the tart pockets of roasted rhubarb melt into the creamy, buttery dough, creating little bursts of flavor that surprise the palate. There’s something so sophisticated about a scone—it suggests a leisurely afternoon tea or a high-end brunch. Served warm with a dollop of clotted cream or your homemade rhubarb jam, these scones provide a rustic yet refined element that anchors the sweeter items on your display.
Ingredients
- 2 cups all-purpose flour
- 1/3 cup sugar
- 1 tablespoon baking powder
- 1/2 cup cold unsalted butter, grated
- 1/2 cup heavy cream (plus more for brushing)
- 1 cup finely diced rhubarb
- Coarse sparkling sugar for topping
How to make it
- Whisk your dry ingredients together and then fold in the grated butter; using a grater ensures the butter stays cold and distributes evenly for maximum flakiness.
- Toss the diced rhubarb in a teaspoon of flour before adding it to the mix; this prevents the fruit from sinking and helps it bond with the dough.
- Pour in the heavy cream and mix with a fork just until a shaggy dough forms; overmixing at this stage will develop gluten and result in a tough, bread-like scone.
- Turn the dough out onto a floured surface and gently pat it into a 1-inch thick circle, then cut it into 8 equal wedges using a sharp knife or bench scraper.
- Arrange the wedges on a parchment-lined baking sheet and freeze them for 15 minutes before baking; this ‘cold shock’ helps the scones rise vertically and prevents spreading.
- Brush the tops with heavy cream, sprinkle generously with sparkling sugar, and bake at 400°F (200°C) for 18-22 minutes until the bottoms are golden and the tops are slightly browned.
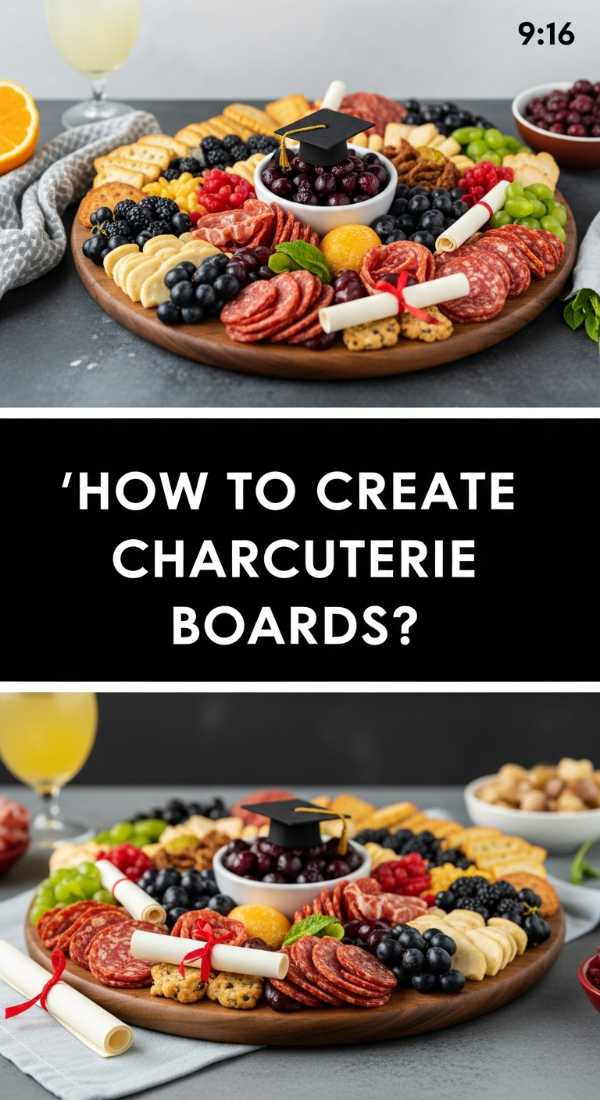
How to create charcuterie boards?
Why we love this
The charcuterie board is the ultimate expression of hospitality, offering a curated landscape of flavors that guests can explore at their own pace. We love the visual abundance of a board filled with folded meats, artisanal cheeses, and clusters of glistening fruit that create an irresistible ‘grazing’ experience. It’s a sensory journey where the saltiness of prosciutto meets the creamy tang of brie, all tied together by the crunch of a cracker and the sweetness of a grape. Designing a board is like painting a picture; it allows for endless creativity and ensures there is something for everyone to enjoy.
Ingredients
- 3 types of cheese (soft, semi-hard, hard)
- 3 types of cured meats (prosciutto, salami, capicola)
- Fresh fruits (grapes, figs, berries)
- Nuts and olives for texture
- Crackers and sliced baguette
- Honey or fig jam for drizzling
How to make it
- Start by placing your ‘anchors’—the small bowls for honey, olives, or jam—randomly across the board to create focal points for the eye.
- Position your cheeses next; leave soft cheeses like Brie whole but slice hard cheeses like Manchego into triangles or cubes to make them easier for guests to grab.
- ‘Ribbon’ your meats by folding thin slices of salami or prosciutto into fans or loose ‘roses’ and tucking them into the gaps between the cheeses and bowls.
- Fill larger remaining spaces with clusters of grapes or sliced figs, ensuring you distribute colors evenly so the board looks balanced from every angle.
- Tuck crackers and baguette slices into the curves of the meats and cheeses, creating a sense of flow and connection between the different elements.
- Finalize the board by filling the tiny remaining ‘negative spaces’ with handfuls of Marcona almonds or sprigs of rosemary to give the board a lush, overflowing appearance.
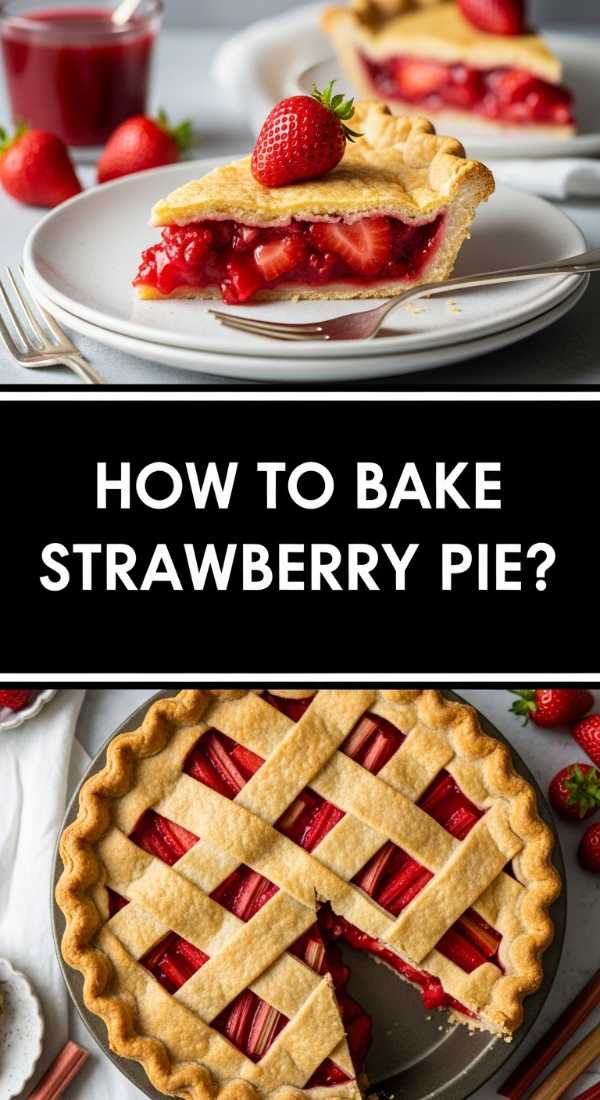
How to bake strawberry pie?
[IMAGE_10]
Why we love this
Strawberry pie is a celebration of summer’s bounty, featuring a bright, glossy filling of sun-ripened berries nestled in a flaky, golden-brown crust. We love the way the deep red filling contrasts with the pale pastry, especially when styled with a lattice top that reveals the bubbling fruit beneath. The aroma of baked strawberries is intoxicating—sweet, floral, and intensely nostalgic. Each slice offers a perfect harmony of tart fruit and buttery pastry, making it a timeless addition to any viral food board that craves a pop of classic Americana and vibrant color.
Ingredients
- 2 deep-dish pie crusts (top and bottom)
- 6 cups fresh strawberries, hulled and halved
- 3/4 cup granulated sugar
- 1/4 cup cornstarch
- 1 tablespoon lemon juice
- 1 egg (for egg wash)
How to make it
- In a large bowl, gently toss the strawberries with sugar, cornstarch, and lemon juice; let them sit for 15 minutes so the cornstarch can begin to absorb the excess moisture.
- Roll out your bottom crust and fit it into the pie plate, trimming the edges so there is a 1-inch overhang for crimping later.
- Pour the strawberry mixture into the crust, mounding the fruit slightly in the center to account for the natural shrinkage that happens during the baking process.
- Cut your second crust into 1-inch wide strips and weave them over the fruit to create a classic lattice pattern, which allows steam to escape and prevents a soggy bottom.
- Seal the edges by folding the bottom overhang over the lattice strips and crimping them with your thumb and forefinger to create a decorative, scalloped border.
- Brush the lattice with a beaten egg and bake at 425°F (220°C) for 15 minutes, then reduce to 375°F (190°C) and bake for another 40 minutes until the crust is mahogany-gold and the filling is thick and bubbling.
Bringing It All Together
Building a viral food board is about more than just placing items on a tray; it’s about the intention, the color story, and the joy of sharing. By mixing the tart freshness of rhubarb with the celebratory elegance of graduation treats and the savory depth of a charcuterie spread, you create a multi-dimensional experience that your guests will never forget. Don’t be afraid to let things overlap, to use fresh herbs as garnish, and to let your personality shine through in every swirl of frosting. Now, grab your biggest board, start baking, and watch the magic happen!