
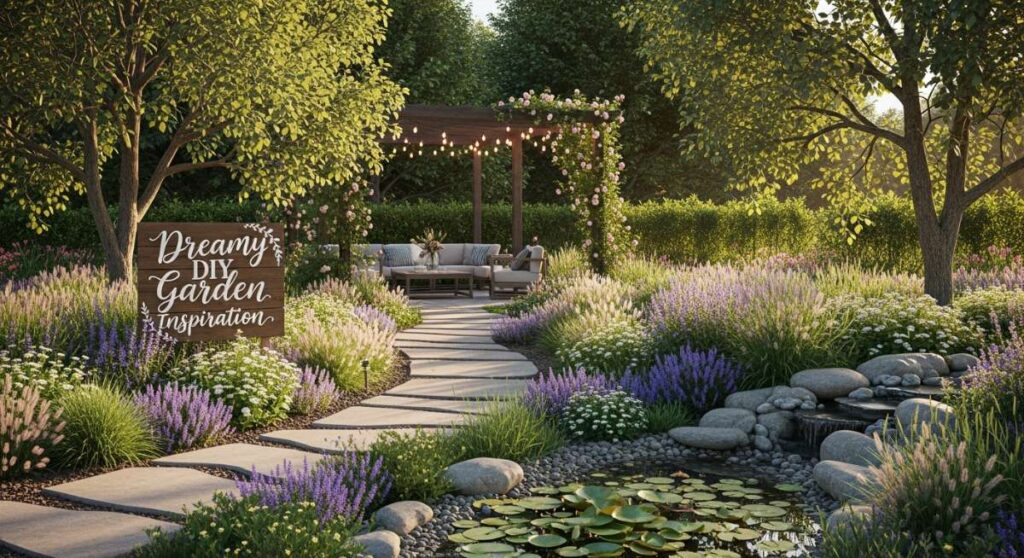
The Ultimate Guide to Crafting a Dreamy Outdoor Sanctuary on Your Own
There is something truly transformative about stepping out of your back door and into a space that feels like a warm hug for your soul. In the hustle of our daily lives, our outdoor spaces often become afterthoughts—neglected corners where the weeds grow taller than our ambitions. But imagine, for a moment, a sanctuary that smells of blooming jasmine and damp earth, where the light hits the leaves just right at golden hour, and the only sound is the gentle rustle of the wind. That dream isn’t reserved for luxury estates; it’s waiting right there in your own backyard, just waiting for a little bit of love and a DIY spirit.
Crafting your own garden oasis is more than just a home improvement project; it’s an act of self-care. It’s about creating a physical boundary between the chaos of the world and the peace of your home. Whether you have a sprawling lawn or a tiny concrete balcony, you have the power to curate a botanical retreat that reflects your personality. In this guide, I’m sharing my favorite ways to breathe life back into your exterior spaces, from whimsical forest-inspired decor to the sleek lines of modern minimalism. Let’s roll up our sleeves and turn those outdoor dreams into a reality together.
How to Create a Rustic Garden Oasis for Ultimate Backyard Bliss
Why we love this
A rustic garden oasis feels like a timeless escape, grounding you in the raw, unrefined beauty of nature. We love this look because it prioritizes comfort and heritage over perfection, using weathered woods, rough-hewn stones, and a palette of earthy browns and sage greens. Walking through a rustic space feels like a sensory journey—the rough texture of cedar under your fingertips, the scent of pine needles warming in the sun, and the visual delight of wildflowers spilling over stone borders. It’s a space that invites you to kick off your shoes, breathe deeply, and reconnect with the simpler rhythms of life.
Essential Elements:
- Weathered cedar or reclaimed wood furniture
- Natural fieldstone or river rock pathways
- Native wildflower seed mixes (Coneflower, Black-eyed Susans)
- Heavy-duty burlap accents
- Galvanized metal watering cans and planters
- Soft, amber-toned outdoor string lighting
How to make it
- Begin by clearing your designated ‘oasis’ zone, stripping away dead grass and leveling the ground with a garden rake to ensure a stable foundation for your features.
- Lay down a heavy-duty landscape fabric to prevent weed growth, securing it with U-shaped garden staples every 12 inches along the perimeter for a professional, taut finish.
- Design your primary pathway using flat fieldstones; place them roughly a stride’s length apart, then fill the gaps with pea gravel or creeping thyme to create that aged, ‘always-been-there’ aesthetic.
- Construct a simple rustic bench or table using reclaimed 4×4 cedar posts, ensuring you sand the edges just enough to prevent splinters while maintaining the wood’s natural grain and character.
- Install your lighting by draping Edison-style bulbs across the space at varying heights—aim for a ‘sag’ of about 6 inches between anchors to keep the look casual and inviting rather than rigid.
- Finalize the space by planting your wildflowers in clusters rather than rows, providing deep watering for the first two weeks until the roots are established and the colors begin to pop against the rustic wood.
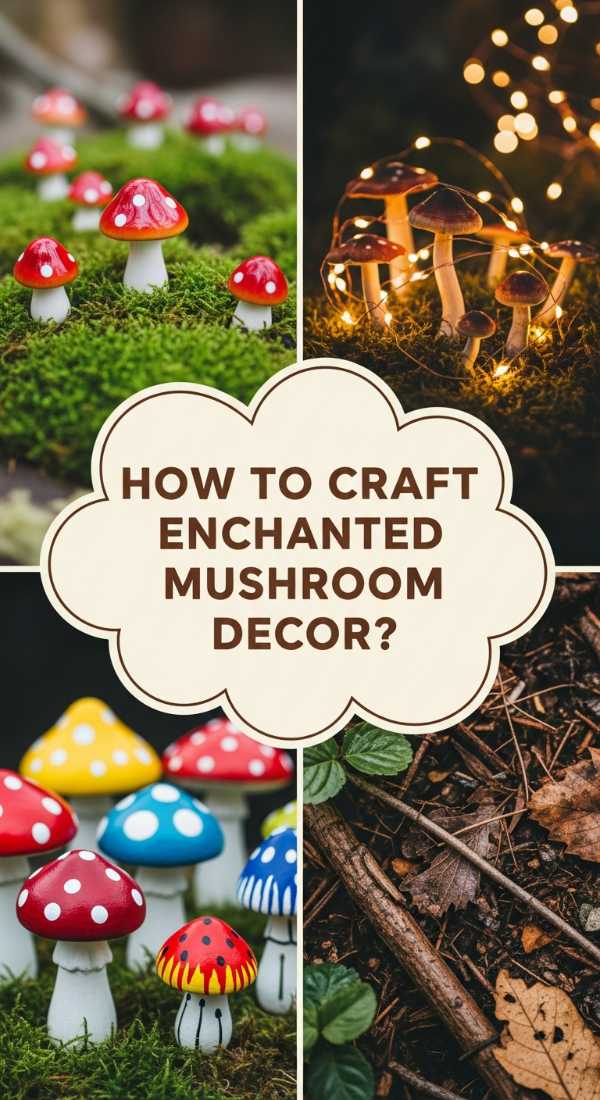
How to Craft Enchanted Mushroom Garden Decor for a Whimsical Outdoor Space
Why we love this
There is something inherently magical about a garden that feels like a secret fairy kingdom, and these enchanted mushrooms are the key to unlocking that whimsy. We love this project because it allows for total creative freedom, blending vibrant pops of crimson and cream against the deep greens of your shrubbery. The sight of these hand-painted treasures peeking out from under a hosta leaf creates a sense of wonder for guests of all ages. They catch the dappled sunlight beautifully, offering a glossy, organic texture that contrasts perfectly with the soft, velvety moss of a shaded garden corner.
Essential Elements:
- Terracotta pots and saucers of various sizes
- Exterior-grade acrylic paints (Red, White, Forest Green)
- Weather-resistant clear gloss sealant
- Strong construction adhesive or waterproof silicone
- Small decorative pebbles or dried moss
How to make it
- Clean your terracotta pots and saucers thoroughly with a damp cloth to remove any dust or factory residue, as this ensures the paint adheres perfectly to the porous surface.
- Invert the terracotta pot to serve as the mushroom stem; paint it a creamy off-white or light tan, applying two thin coats and allowing 30 minutes of drying time between each to prevent streaks.
- Flip the saucer upside down to serve as the mushroom cap; apply a bold base coat of crimson red, using a sponge brush for an even, saturated finish without visible brushstrokes.
- Once the red base is completely dry to the touch, use a round stencil or a small brush to add white ‘polka dots’ of varying sizes, concentrating them toward the center of the cap for a natural look.
- Apply a generous bead of waterproof construction adhesive to the bottom rim of the inverted pot, then firmly press the inverted saucer on top, centering it carefully and holding for 60 seconds.
- Apply two coats of clear gloss UV-resistant sealant over the entire piece to protect against rain and sun fading, letting it cure for a full 24 hours before placing it in your garden.
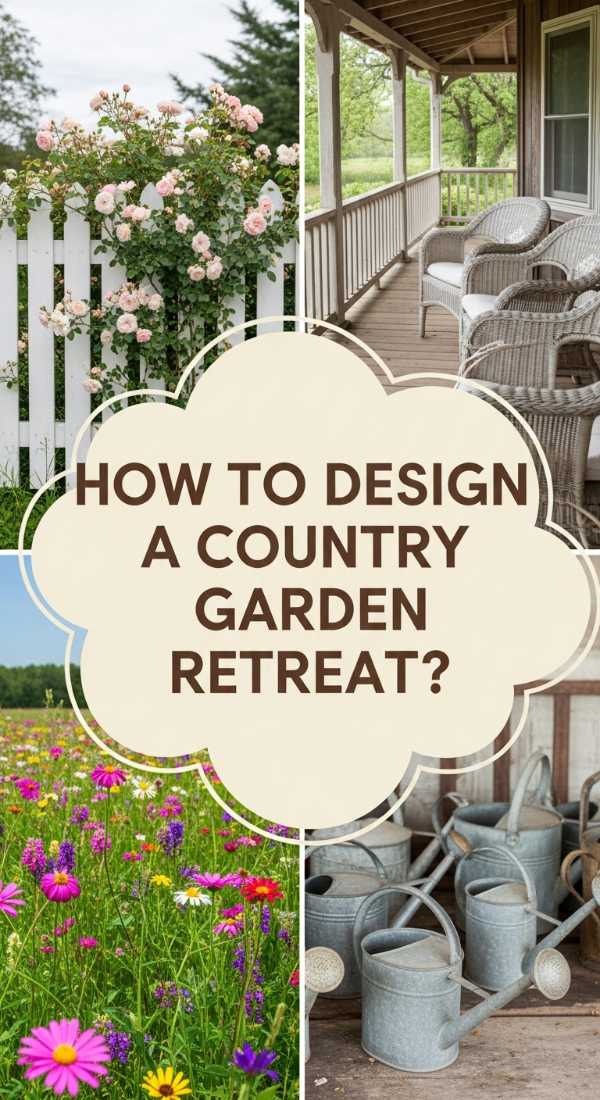
How to Design a Country Garden Retreat for Peaceful Morning Coffee

Why we love this
The country garden retreat is all about that slow, intentional start to the day where the world feels quiet and the steam from your mug rises into the cool morning air. We love this design because it balances the structured elegance of climbing roses with the casual charm of wicker and ironwork. The atmosphere is light and airy, filled with the sweet, heady aroma of lavender and the soft humming of early-rising bees. It’s a tactile experience—the cool metal of a bistro chair, the soft petals of a peony, and the sight of a perfectly manicured lawn framed by a white picket fence.
Essential Elements:
- Classic wrought iron bistro set or white wicker chairs
- Climbing roses or Clematis vines
- Wooden trellises or arched arbors
- Lavender and Rosemary bushes for fragrance
- Floral patterned outdoor cushions
How to make it
- Identify the sunniest spot in your yard that receives early morning light, as this will be the optimal ‘warmth zone’ for your coffee sessions.
- Install a wooden arbor or trellis against a wall or as a standalone gateway, anchoring the posts at least 12 inches deep in the soil to withstand wind and the weight of growing vines.
- Plant climbing roses at the base of your structure, gently weaving the primary canes through the lattice and securing them with soft garden twine to encourage upward growth patterns.
- Surround your seating area with a thick border of lavender; space the plants 18 inches apart to allow for air circulation, which prevents root rot and maximizes their soothing scent.
- Arrange your furniture on a flat surface—ideally a brick patio or a leveled gravel bed—positioning the chairs to face the most beautiful view of your blooming flowers.
- Layer your seating with high-density foam cushions covered in weather-proof floral fabric, ensuring the colors harmonize with your garden’s natural palette for a cohesive, designer look.
How to Build Sustainable Garden Decor Projects for a Greener Lifestyle
Why we love this
Sustainability is more than a trend; it’s a commitment to the earth, and these garden projects prove that being eco-friendly can be incredibly stylish. We love this approach because it challenges you to look at ‘waste’ with new eyes, turning old pallets, wine bottles, and scrap wood into functional art. The aesthetic is wonderfully eclectic and soulful, telling a story of resourcefulness and care. There is a deep satisfaction in knowing that your beautiful garden sanctuary isn’t just a place for you to rest, but a space that respects and protects the local ecosystem through upcycled materials.
Essential Elements:
- Untreated heat-treated (HT) wooden pallets
- Old glass bottles or mason jars
- Organic hemp rope or natural twine
- Compostable peat pots or coconut coir liners
- Solar-powered lighting components
How to make it
- Source pallets that are marked with the ‘HT’ stamp, indicating they were heat-treated rather than chemically preserved, which is crucial for a non-toxic garden environment.
- Dismantle the pallets using a pry bar, then sand the wood with 80-grit sandpaper followed by 120-grit to create a smooth surface ready for assembly or staining.
- Construct a vertical planter by reattaching the slats to create small troughs; line these with coconut coir to hold the soil while allowing for excellent drainage and breathability.
- Create ‘bottle torches’ by cleaning old wine bottles, filling them with citronella oil, and inserting a cotton wick through a copper coupling for a beautiful, sustainable pest-control solution.
- Use natural hemp rope to hang herb-filled mason jars along a sun-drenched fence, ensuring you drill a small drainage hole in the bottom of each jar using a glass-specific diamond drill bit.
- Finish by applying a homemade non-toxic wood sealer—a blend of beeswax and linseed oil—to protect your structures from moisture while keeping the garden 100% organic.
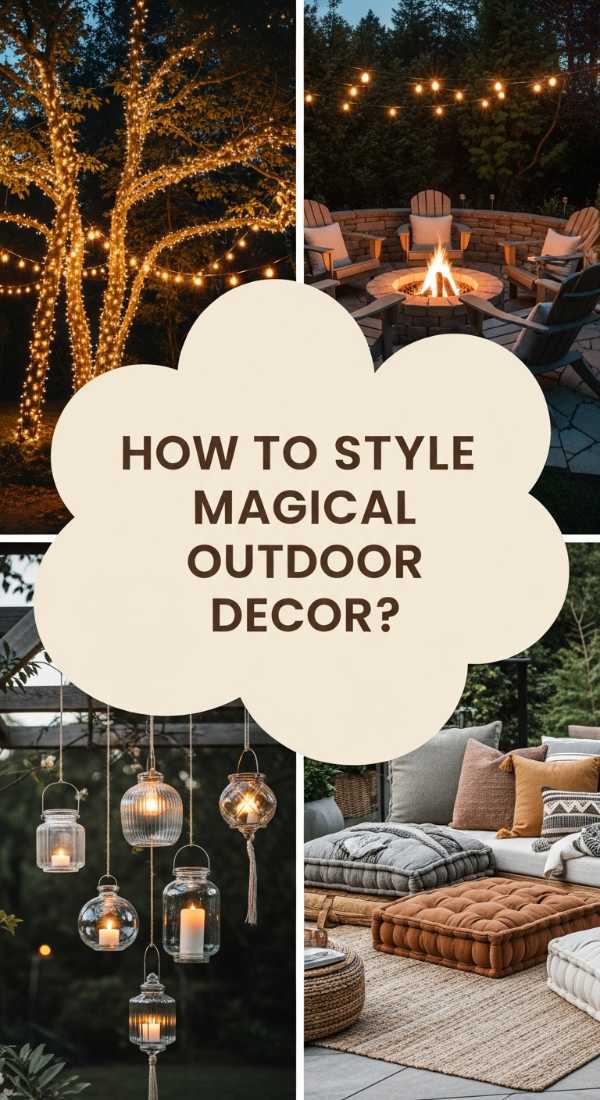
How to Style Outdoor Garden Decor for Magical Evening Gatherings

Why we love this
When the sun dips below the horizon, a well-styled garden transforms into a cinematic backdrop for laughter and connection. We love styling for evening gatherings because it’s all about the interplay of light and shadow, creating pockets of intimacy and warmth. The glow of lanterns reflected in wine glasses, the softness of plush outdoor rugs, and the gentle flicker of a fire pit create a magnetic atmosphere that guests never want to leave. It’s an immersive experience that heightens the senses, making every conversation feel a little more meaningful under the canopy of the stars.
Essential Elements:
- Multiple layers of lighting (String lights, lanterns, candles)
- Large outdoor area rugs with bold textures
- Low-profile lounge seating or floor cushions
- A central fire pit or tabletop fire bowl
- Textured throw blankets for chilly evenings
How to make it
- Define your ‘gathering zone’ by laying down a large, weather-resistant outdoor rug; this anchors the space and provides a soft, warm surface for feet as the evening air cools.
- Layer your lighting by stringing warm-white LEDs overhead at a height of at least 8 feet, then add ‘eye-level’ light using oversized lanterns placed on the ground and tables.
- Position your seating in a circular or semi-circular arrangement around a focal point, such as a fire pit, to encourage eye contact and flow in conversation.
- Prepare for temperature drops by neatly rolling up thick, textured throw blankets and placing them in a woven basket within easy reach of the seating area.
- Create an ‘evening scent’ by placing pots of night-blooming jasmine or evening primrose around the perimeter; these plants release their fragrance specifically after dusk.
- Set the table with unbreakable melamine plates and heavy acrylic glassware that mimics the look of crystal, ensuring your ‘magical’ vibe isn’t ruined by the fear of broken glass in the grass.
How to Achieve Zen Garden Decoration Ideas for Total Mental Clarity
Why we love this
The Zen garden is the ultimate antidote to the digital noise of modern life, offering a minimalist aesthetic that prioritizes space and stillness. We love this style because it requires you to slow down; the act of raking sand or watching water trickle over stone becomes a form of moving meditation. The palette is intentionally restrained—cool greys, deep blacks, and the vibrant green of moss or bamboo. It’s a clean, crisp environment where the mind can finally rest, free from the visual clutter that usually demands our attention.
Essential Elements:
- Fine white sand or very small light-colored gravel
- Large, weathered ‘feature’ rocks or boulders
- A wooden rake for creating ripple patterns
- Bamboo water features (Shishi-odoshi)
- Dwarf maples or cloud-pruned evergreens
How to make it
- Excavate a shallow area (about 3-4 inches deep) in a quiet corner of your yard, ensuring the base is perfectly level and firmly compacted to prevent the gravel from sinking.
- Install a sturdy timber or stone border around the edge of your Zen zone to keep the gravel contained and create a sharp, intentional boundary from the rest of the garden.
- Fill the area with white granite gravel or fine sand, spreading it evenly with a flat rake until it is about 2 inches deep across the entire surface.
- Place an odd number of large, weathered rocks (usually 3 or 5) in ‘islands’ within the sand; bury the bottom third of each rock so they look as though they are emerging naturally from the earth.
- Use a wide-toothed wooden rake to draw concentric circles around the rocks and long, flowing lines in the open spaces, symbolizing the movement of water and ripples in a pond.
- Position a simple bamboo water spout nearby, ensuring the sound of the water is a gentle trickle rather than a splash, to enhance the auditory sense of tranquility without being distracting.
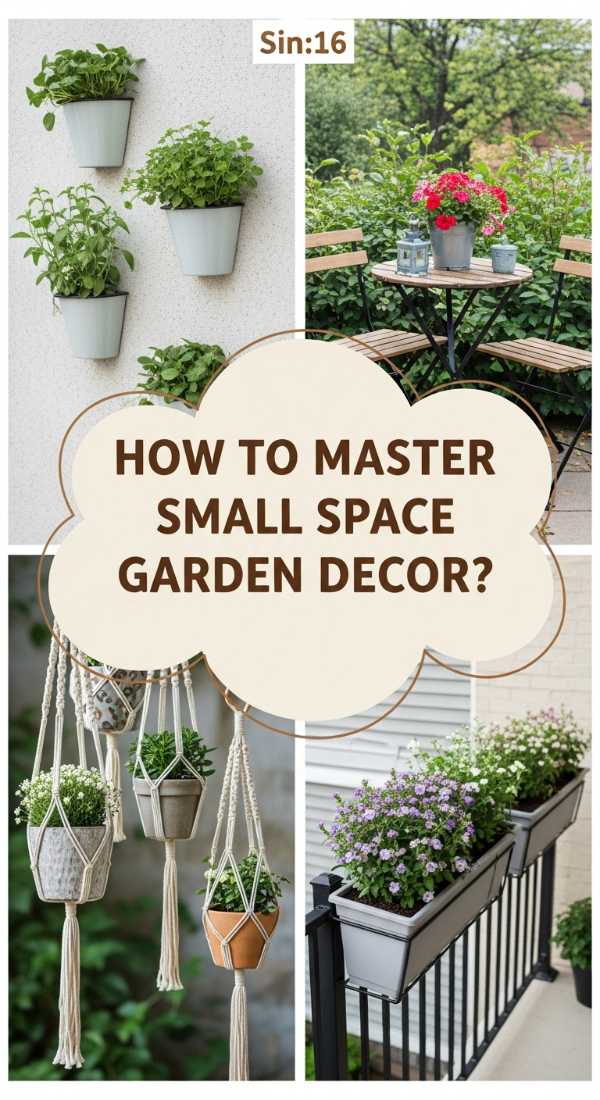
How to Master DIY Garden Decor for Small Balcony Spaces
Why we love this
Small balcony spaces prove that you don’t need an acre to create a paradise; in fact, the constraints of a small space often lead to the most brilliant DIY solutions. We love this subtopic because it’s about maximizing every square inch of vertical and floor real estate. A well-designed balcony feels like a private nest in the sky—a lush, green sanctuary that provides a breath of fresh air amidst an urban landscape. The feeling of being surrounded by plants on all sides, even in a high-rise, is incredibly grounding and life-affirming.
Essential Elements:
- Vertical wall planters or hanging pocket gardens
- Folding wooden bistro furniture
- S-hooks and railing-mounted planters
- Outdoor-rated mirrors to create the illusion of depth
- Lightweight, tiered plant stands
How to make it
- Measure your balcony’s dimensions and weight capacity before starting, as many apartment buildings have specific limits for heavy pots and furniture.
- Utilize vertical space by installing a trellis or a grid of wire mesh onto the most prominent wall; use S-hooks to hang lightweight terracotta or plastic pots at varying heights.
- Select multi-functional furniture, such as a bench with built-in storage or a table that folds flat against the railing when not in use, to keep the floor area feeling open.
- Hang a large, weather-proof mirror on one wall; position it so that it reflects your greenery, which instantly doubles the perceived size of your ‘garden’ and increases light levels.
- Choose a ‘thriller, filler, spiller’ planting strategy for your railing boxes to create a lush, overflowing look: one tall plant, several mounded plants, and one that hangs down over the edge.
- Install battery-operated or solar clip-on lights to the railing or umbrella ribs, providing an ambient glow that doesn’t require messy extension cords across your walkway.
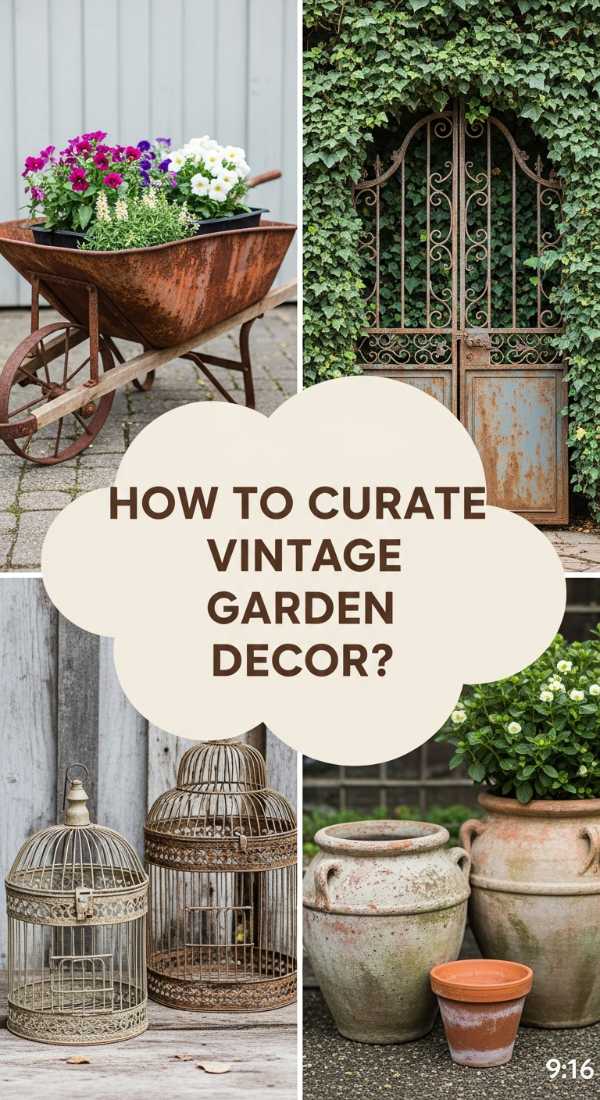
How to Curate Vintage Rustic Garden Decor for Timeless Charm

Why we love this
Vintage rustic decor is for the soul that loves a story, where every piece of iron and every weathered chair has a past life. We love this look because it’s effortlessly charming and perfectly imperfect; it celebrates the beauty of patina, rust, and worn paint. This garden style feels curated over decades rather than bought in a single weekend. The aroma of old roses and the sight of an antique birdbath creates a nostalgic atmosphere that feels both romantic and deeply comfortable, as if you’ve stepped into a scene from a classic novel.
Essential Elements:
- Antique iron gates or window frames used as art
- Chipped-paint wooden shutters
- Vintage metal birdcages used as planters
- Enamelware basins and old milk crates
- Weathered stone statuary with moss growth
How to make it
- Scour flea markets and estate sales for ‘found objects’ with a heavy patina; look for ironwork that has a slight orange rust, as this adds authentic vintage character.
- Prop an old, chippy-paint ladder against a fence or tree trunk, using the rungs as shelves for a collection of mismatched small potted succulents or herbs.
- Transform a vintage birdcage into a hanging planter by lining the bottom with moss and planting trailing ivy or string-of-pearls that will grow through the bars over time.
- Mount an old window frame or an ornate iron gate directly onto a garden wall or fence to serve as a ‘portal’ or architectural focal point that adds depth to the space.
- Encourage the growth of moss on stone statues or pots by spraying them with a mixture of buttermilk and blended moss, keeping them in a shaded, damp area until the green ‘velvet’ takes hold.
- Cluster your vintage finds in odd numbers (groups of three or five) to create vignettes that feel like intentional art installations rather than random clutter.
How to Implement Modern Garden Decor Ideas for a Sleek Exterior
Why we love this
Modern garden decor is all about high-contrast drama and the beauty of geometric precision. We love this style because it feels sophisticated, organized, and incredibly low-maintenance, making it perfect for the busy urbanite. The aesthetic relies on clean lines, smooth textures like polished concrete and dark metal, and a very specific plant palette—usually architectural foliage like snake plants or ornamental grasses. It’s a bold look that turns your garden into a living gallery, where every element is placed with purpose and precision.
Essential Elements:
- Geometric concrete or fiberstone planters
- Black powder-coated metal accents
- Sleek, built-in wooden bench seating
- Monochromatic plant selections (all white flowers or all green foliage)
- Integrated LED strip lighting
How to make it
- Start with a neutral base by using large-format porcelain pavers or dark grey gravel to create a clean, uniform floor that emphasizes the geometric layout.
- Select oversized planters in cubes or cylinders, placing them in symmetrical pairs or a strict linear row to create a sense of rhythm and architectural order.
- Choose ‘architectural’ plants like Horsetail Reed or Boxwood spheres; these plants maintain their shape with minimal pruning and provide the sharp silhouettes essential to modern design.
- Install black metal privacy screens or laser-cut panels to create distinct ‘rooms’ or zones within your garden, providing privacy while acting as a contemporary backdrop for your plants.
- Hide LED strip lighting under the lip of benches or stairs to create a ‘floating’ effect at night, which emphasizes the structural lines of your DIY build.
- Maintain the sleek look by using a hidden irrigation system (drip lines) buried under the mulch or gravel, ensuring your plants stay lush without the visual clutter of hoses or sprinklers.
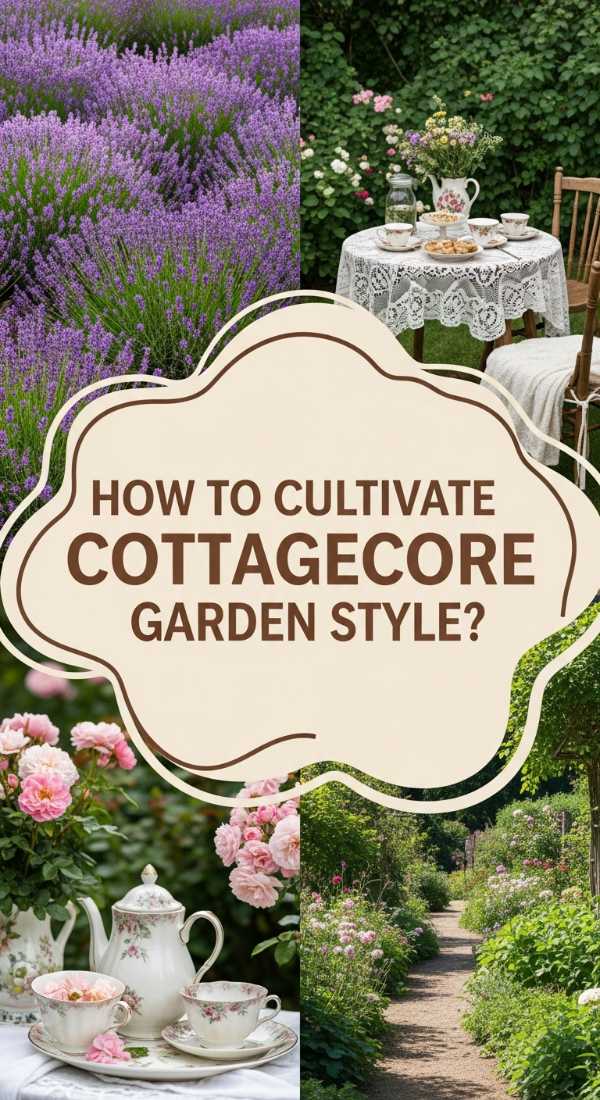
How to Cultivate a Cottagecore Garden Space for Romantic Afternoon Tea
[IMAGE_10]
Why we love this
Cottagecore is the ultimate romantic fantasy, a space where the flowers are overgrown in the best possible way and every afternoon feels like a celebration of slow living. We love this style because it is soft, feminine, and unapologetically pretty. It’s about the sensory overload of a thousand petals—the smell of sweet peas, the pastel haze of foxgloves, and the delicate clinking of china. In a cottagecore garden, time seems to stand still, offering a sanctuary of lace, wildflowers, and warmth that feels like a permanent summer afternoon.
Essential Elements:
- Densely packed flower beds with varying heights
- Quaint wooden garden gates
- Pastel-colored garden furniture (soft pink, mint, or butter yellow)
- Lace or crochet tablecloths and textiles
- Flowing, wild plants like Sweet Peas, Foxgloves, and Hydrangeas
How to make it
- Prepare your soil with high-quality organic compost to ensure a nutrient-rich environment that can support the high density of flowers required for this look.
- Plan your ‘layered’ beds by placing tall spikes like Delphiniums and Foxgloves at the back, mounding Hydrangeas in the middle, and low-growing Pansies or Sweet Alyssum at the front edge.
- Install a simple white picket or low wooden gate, even if it’s just as a decorative element between two garden beds, to provide that quintessential ‘cottage’ entrance.
- Paint an old wooden table and chairs in a soft, matte pastel shade; once dry, lightly sand the edges to give it a ‘shabby-chic’ worn look that fits the aesthetic.
- Sow Sweet Pea seeds at the base of a simple twine wigwam; as they grow, their fragrant blossoms will create a vertical pillar of color and scent perfect for a tea-time backdrop.
- Set the scene for your afternoon tea by layering a vintage lace cloth over your table, adding a vase of freshly cut flowers from your garden, and using mismatched floral china for an authentic, lived-in feel.
Conclusion: Your Sanctuary Awaits
Building your dream outdoor sanctuary is a journey of a thousand small, beautiful steps. Whether you chose the sleek lines of modernism or the wild, overgrown charm of a cottagecore retreat, remember that your garden is a living thing—it will grow, change, and evolve just as you do. Don’t be afraid to experiment, to move a pot, or to plant something new on a whim. The most important element of any sanctuary isn’t the furniture or the flowers; it’s the feeling of peace you get when you step inside it. Happy gardening, and may your outdoor space be a constant source of joy and renewal!