

You know that feeling when the golden hour hits just right, the patio is humming with laughter, and you realize you haven’t spent your entire afternoon stuck in the kitchen? For years, I thought hosting meant expensive charcuterie boards with thirty-dollar cheeses and imported meats that I couldn’t even pronounce. But then I discovered the magic of the ‘Simple Food Board’—a viral, budget-friendly approach to hosting that focuses on freshness, flavor, and the joy of shared plates without the financial stress.
The secret isn’t in how much you spend, but in how you curate. It’s about taking those everyday pantry staples and seasonal finds and arranging them with a little bit of love and a lot of style. Today, I’m sharing my ultimate guide to creating a viral-worthy food spread that feels like a million bucks but costs less than a takeout order. Let’s dive into the steps that will make your next gathering the talk of the town.
7 Healthy Ways to Prep Summer Meals (Step-by-Step Guide)

Why we love this
There is something inherently restorative about a meal that celebrates the peak of summer harvest. We love this approach because it focuses on vibrant colors—think deep greens, ruby reds, and sun-drenched yellows—that naturally signal high nutrient density. When you bite into a crisp, cold cucumber or a perfectly ripe heirloom tomato, the snap of the skin and the rush of sweet juice provide a sensory experience that processed foods simply can’t mimic. It’s light enough to keep you energized for sunset walks yet satisfying enough to feel like a true celebration of the season.
Ingredients
- 2 cups Quinoa or farro
- 1 bunch Organic kale or spinach
- 2 cups Heirloom cherry tomatoes
- 1 large English cucumber
- 1 bunch Fresh mint and parsley
- 3 tbsp Extra virgin olive oil
- 1 Lemon (juiced)
- Sea salt and cracked black pepper
How to make it
- Rinse your grains thoroughly in a fine-mesh sieve until the water runs clear to remove any bitter saponins.
- In a medium saucepan, combine the grains with water (2:1 ratio for quinoa). Bring to a rolling boil over high heat, then immediately reduce to a low simmer and cover tightly.
- Cook for 12-15 minutes until the water is fully absorbed and the grains look translucent. Remove from heat and let sit, covered, for 5 minutes to allow the steam to finish the fluffing process.
- While the grains cool, finely chiffonade your greens. The key to great summer prep is small, uniform bites; use a sharp chef’s knife to slice the kale into thin ribbons that catch the dressing.
- Whisk your olive oil, lemon juice, salt, and pepper in a small bowl until emulsified. The mixture should look slightly opaque and thickened.
- Toss the cooled grains with the greens and dressing, then gently fold in halved tomatoes and sliced cucumbers to maintain their structure.
- Store in airtight glass containers in the fridge for up to 4 days, adding fresh herbs only right before serving to prevent wilting.
5 Easy Ways to Make Rotel Dip (Step-by-Step Guide)
Why we love this
Rotel dip is the ultimate nostalgic comfort food, transformed into a viral board staple through the power of presentation. We love it for its velvety, molten texture and that signature kick of green chilies that cuts through the rich, salty cheese. There is a communal joy in dipping a warm, salty tortilla chip into a bowl of bubbling cheese; it’s the sound of the crunch and the sight of the steam rising that makes everyone gravitate toward the center of the table. It’s effortless, indulgent, and the absolute king of budget-friendly appetizers.
Ingredients
- 16 oz Processed cheese block (cubed)
- 1 can (10 oz) Rotel Original Diced Tomatoes and Green Chilies
- 1 lb Ground breakfast sausage or lean beef
- 1/2 cup Pickled jalapeños (optional)
- 1 tsp Smoked paprika
- Fresh cilantro for garnish
How to make it
- Place a heavy-bottomed skillet over medium-high heat. Add the ground meat, breaking it into very small crumbles with a wooden spoon or a meat masher.
- Sauté the meat until it is deeply browned and no pink remains. This browning process (the Maillard reaction) is crucial for a deep, savory flavor. Drain the excess fat thoroughly using a colander.
- Reduce the heat to low. In the same skillet or a slow cooker, add the cubed cheese. Cutting the cheese into uniform 1-inch cubes ensures even melting without scorching.
- Pour the can of Rotel (do not drain!) directly over the cheese. The liquid from the can provides the necessary acidity and moisture to keep the dip smooth.
- Stir constantly with a heat-resistant spatula as the cheese melts. If using a skillet, ensure the heat stays low; if the cheese bubbles too aggressively, it can break and become oily.
- Once the mixture is silky and completely smooth, stir in the browned meat and smoked paprika.
- Transfer to a serving bowl and top with fresh cilantro and jalapeños. Serve immediately while the cheese is at its peak fluidity.
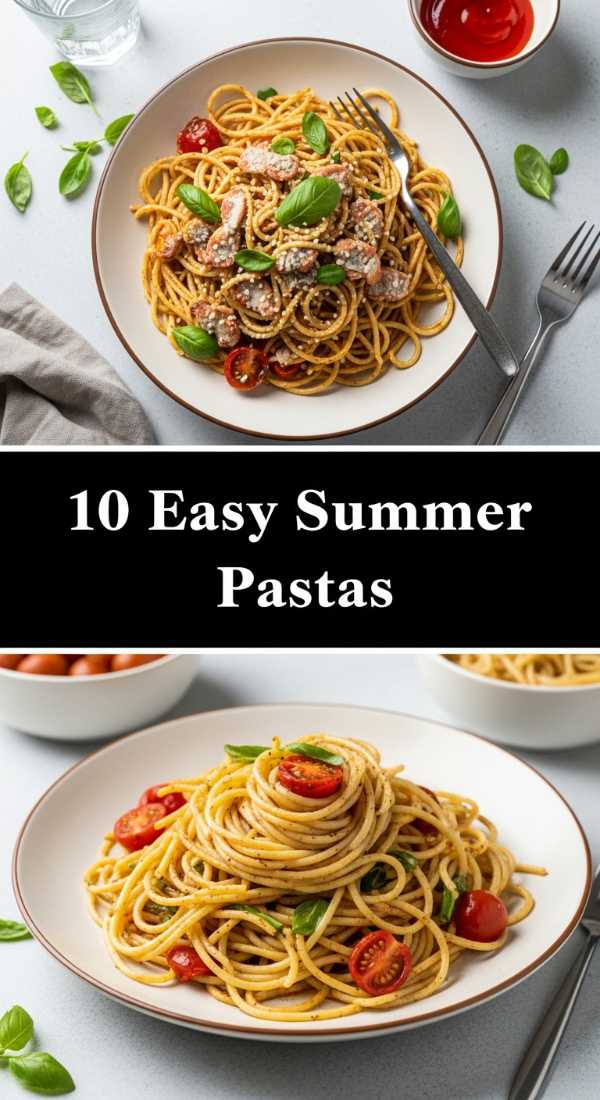
10 Simple Ways to Cook Summer Pasta (Step-by-Step Guide)
Why we love this
Summer pasta is all about ‘al dente’ perfection and the fragrance of fresh aromatics filling your kitchen. We love this because it shifts the focus from heavy, simmering sauces to bright, oil-based emulsions that highlight the quality of the noodles. Imagine the scent of garlic lightly golden-browning in olive oil, mingling with the sharp citrus of lemon zest and the peppery bite of fresh basil. It’s a dish that feels elegant and high-end, yet it relies on inexpensive pantry staples and a few fresh herbs from the garden.
Ingredients
- 1 lb Linguine or Spaghetti
- 1/2 cup High-quality extra virgin olive oil
- 6 cloves Garlic (thinly sliced)
- 1 tsp Red pepper flakes
- Zest and juice of 2 lemons
- 1 cup Freshly grated Parmesan cheese
- 1 bunch Fresh basil
How to make it
- Bring a large pot of water to a violent boil. Add a generous handful of salt; the water should taste like the sea to properly season the pasta from the inside out.
- Add the pasta and cook for exactly 2 minutes less than the package instructions. This ensures the pasta finishes cooking in the sauce, absorbing flavor.
- While the pasta boils, add olive oil to a cold, wide skillet. Add the sliced garlic and red pepper flakes. Turn the heat to medium-low.
- Slowly toast the garlic until it is translucent and just barely turning golden around the edges. If the garlic turns dark brown, it will be bitter; remove from heat if it cooks too fast.
- Before draining the pasta, reserve 2 cups of the starchy pasta water. This is the ‘liquid gold’ that creates a creamy sauce without heavy cream.
- Transfer the pasta directly into the garlic oil using tongs. Add 1 cup of the reserved pasta water and the lemon juice.
- Toss vigorously over medium heat. The agitation helps the oil and water emulsify into a glossy sauce that coats every strand. Add more water if it looks dry.
- Remove from heat, fold in the Parmesan and fresh basil, and serve immediately with a final drizzle of raw olive oil.
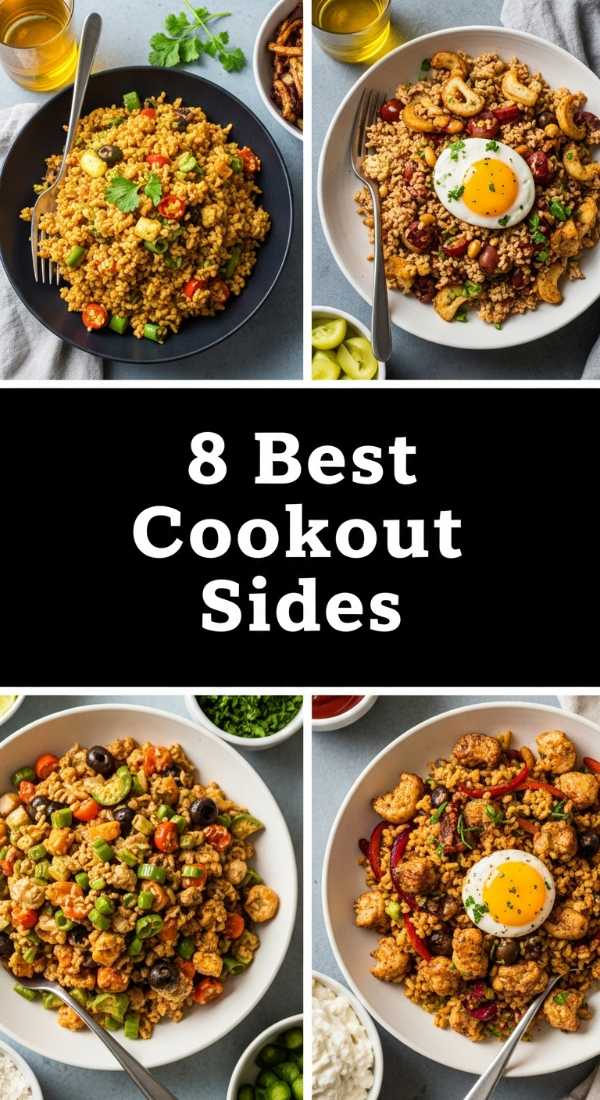
8 Fresh Ways to Serve Cookout Sides (Step-by-Step Guide)

Why we love this
Cookout sides are often the unsung heroes of the food board, providing the necessary crunch and acidity to balance out grilled meats. We love this because it elevates humble vegetables like corn and cabbage into star attractions through charred textures and zesty dressings. There is something incredibly satisfying about the contrast between a smoky, grilled ear of corn and a cold, vinegar-based slaw. These sides bring the ‘wow’ factor to your budget board by using seasonal produce when it’s at its most affordable and flavorful.
Ingredients
- 4 ears Fresh sweet corn
- 1 small head Red cabbage (shredded)
- 1/2 cup Mayo or Greek yogurt
- 2 tbsp Apple cider vinegar
- 1 tbsp Honey
- 1 tsp Celery seed
- Lime wedges
How to make it
- Preheat your grill to high heat (about 400°F). Shuck the corn and remove all the silk threads.
- Lightly brush the corn with oil and place directly on the grates. Rotate every 2-3 minutes until you see beautiful black char marks on all sides. This should take about 10 minutes total.
- Remove the corn and immediately squeeze fresh lime juice over it. The steam will help the lime flavor penetrate the kernels.
- For the slaw, whisk together the mayo, vinegar, honey, and celery seed in a large bowl until smooth and creamy.
- Add the shredded cabbage to the dressing. Using your hands or large spoons, massage the dressing into the cabbage. This slightly breaks down the fibers, making it tender yet crunchy.
- Let the slaw sit in the refrigerator for at least 30 minutes before serving. This ‘marinating’ time is essential for the flavors to meld.
- Serve the grilled corn and chilled slaw side-by-side on your board to create a beautiful temperature and texture contrast.
6 Great Ways to Grill Summer Kabobs (Step-by-Step Guide)

Why we love this
Kabobs are the ultimate budget hack because they make a small amount of protein go a long way by bulking them up with hearty vegetables. We love the charred, caramelized edges of the bell peppers and the way the onion petals become sweet and tender over the flame. The aroma of searing meat and wood smoke is the quintessential scent of summer. Arranging these colorful skewers on a board creates an instant visual feast that looks curated and professional without requiring expensive platters.
Ingredients
- 1 lb Chicken breast or Sirloin steak (cubed)
- 2 Bell peppers (various colors)
- 1 Red onion
- 1 cup Whole mushrooms
- 1/4 cup Soy sauce
- 2 tbsp Balsamic vinegar
- 2 cloves Minced garlic
- Wooden or metal skewers
How to make it
- If using wooden skewers, soak them in water for at least 30 minutes to prevent them from catching fire on the grill.
- Cut your protein and vegetables into uniform 1.5-inch pieces. Consistency is key; if the pieces vary in size, the small ones will burn before the large ones cook through.
- Whisk together the soy sauce, balsamic vinegar, and garlic. Marinate the protein in this mixture for at least 1 hour in the fridge, but no more than 4 hours for chicken (to avoid a rubbery texture).
- Thread the skewers, alternating between protein and vegetables. Don’t crowd them too tightly; leaving a tiny bit of space allows the heat to circulate and brown all sides.
- Preheat the grill to medium-high. Lightly oil the grates using a rolled-up paper towel dipped in oil held by tongs.
- Place skewers on the grill and cook for 10-12 minutes, turning a quarter turn every 3 minutes.
- Look for the meat to release easily from the grates; if it sticks, it’s not ready to be flipped. The internal temperature of chicken should reach 165°F.
12 Tasty Ways to Make Summer Desserts (Step-by-Step Guide)

Why we love this
Summer desserts should feel like a cool breeze on a humid night—refreshing, sweet, and effortless. We love using macerated berries and whipped creams because they rely on the natural sugar of the fruit, making them light on the palate and the wallet. The texture of a fluffy sponge cake soaking up ruby-red strawberry juice, topped with a cloud of vanilla cream, is pure bliss. It’s a low-stress way to end a meal that looks incredibly viral when styled with fresh mint leaves and edible flowers.
Ingredients
- 2 lbs Fresh strawberries or blueberries
- 1/4 cup Granulated sugar
- 1 loaf Angel food cake or Pound cake
- 2 cups Heavy whipping cream
- 1 tsp Vanilla extract
- Fresh mint for garnish
How to make it
- Wash and hull your berries. Slice them into thin rounds or halves. Place them in a bowl and sprinkle with the granulated sugar.
- Let the berries sit at room temperature for 30-60 minutes. This process is called ‘macerating,’ where the sugar draws out the fruit’s natural juices to create a syrup.
- In a chilled metal bowl, combine the heavy cream and vanilla extract. Using a hand mixer or whisk, beat until stiff peaks form. Stiff peaks mean the cream stands straight up when the whisk is lifted.
- Slice the cake into thick, uniform slabs or cubes. If you want a slightly toasted flavor, you can briefly sear the cake slices in a dry pan for 30 seconds per side.
- To assemble for the board, place the cake slices in a row, the bowl of macerated berries in the center, and the whipped cream in a separate bowl.
- Garnish the entire board with fresh mint leaves to add a pop of green and a refreshing aroma.
- Encourage guests to build their own shortcakes, ensuring the cake gets a generous spoonful of that strawberry syrup.
9 Perfect Ways to Pack Picnic Sides (Step-by-Step Guide)

Why we love this
Picnic sides are all about durability and the thrill of outdoor dining. We love these because they are designed to travel well without losing their integrity or becoming soggy. Think of a crisp pasta salad with a tangy vinaigrette or a crunchy nut and fruit mix that provides a burst of energy. The feeling of unpacking a well-curated picnic in the grass, surrounded by nature, makes even the simplest ingredients taste like a gourmet feast. It’s about the portable joy of a meal that stays fresh from the kitchen to the park.
Ingredients
- 1 box Tri-color rotini pasta
- 1/2 cup Italian dressing
- 1 cup Black olives
- 1 cup Cubed feta cheese
- 1/2 cup Salami (diced)
- Airtight mason jars or containers
How to make it
- Cook the pasta in salted water until just past al dente. For cold salads, cooking the pasta slightly longer helps it stay tender once it’s chilled.
- Drain and immediately rinse the pasta under cold running water to stop the cooking process and remove excess starch.
- In a large bowl, toss the pasta with half of the Italian dressing while it is still slightly damp. This allows the pasta to absorb the flavor as it cools.
- Add the olives, feta, and salami. Fold gently to combine.
- The secret to ‘viral’ picnic sides is the jar method: Pour a little extra dressing at the bottom of a mason jar, then layer the heavier ingredients (olives, salami), and put the pasta on top.
- Seal tightly and keep in an insulated cooler bag with ice packs. The temperature must stay below 40°F for food safety.
- Right before eating, shake the jar vigorously to distribute the dressing from the bottom across all the layers.
5 Quick Ways to Mix Summer Drinks (Step-by-Step Guide)

Why we love this
Nothing says ‘summer host’ like a signature drink that looks as good as it tastes. We love simple mixers because they allow the natural flavors of citrus and herbs to shine through without the need for expensive syrups or complicated equipment. Imagine a glass filled to the brim with crushed ice, the fizz of sparkling water, and the bright, zesty aroma of muddled lime and mint. It’s an instant mood-lifter that keeps everyone hydrated and happy throughout the heat of the day.
Ingredients
- 1 liter Sparkling water or Club soda
- 2 cups Fresh lemonade
- 1 bunch Fresh mint
- 2 Limes
- 1 cup Frozen berries (act as ice cubes)
- Optional: Honey or Agave for sweetness
How to make it
- Start by ‘slapping’ your mint leaves. Place a few leaves in your palm and clap your hands together once. This bruises the leaves just enough to release the essential oils without making them bitter.
- Place the mint and a slice of lime at the bottom of each glass. Use the back of a spoon to gently press them (muddle) to release the juices.
- Fill the glasses 3/4 of the way with ice. Using crushed ice creates a more professional, ‘viral’ look and cools the drink faster.
- Pour in the lemonade until the glass is half full, then top with the sparkling water. The carbonation adds a refreshing bite.
- Add a handful of frozen berries to each glass. These keep the drink cold without diluting the flavor as they melt, and they look like jewels in the water.
- Stir gently with a long spoon to pull the mint and lime flavors up through the drink.
- Garnish with a final sprig of fresh mint and a paper straw for a sustainable, stylish finish.
7 Light Ways to Enjoy Summer Soups (Step-by-Step Guide)

Why we love this
Chilled summer soups are a revelation for those who think soup is only for winter. We love the silken texture of a cold gazpacho or a cucumber-yogurt soup because it is incredibly cooling and packed with raw, enzyme-rich nutrients. The flavor is sharp, clean, and herbaceous—a total departure from the heavy, simmered stews of December. It’s an unexpected addition to a food board that adds a touch of sophistication and a beautiful pop of color in small appetizer shooters.
Ingredients
- 4 large Ripe tomatoes
- 1 Red bell pepper
- 1 Cucumber (peeled)
- 1/2 Red onion
- 2 tbsp Sherry vinegar or Red wine vinegar
- 1/4 cup Extra virgin olive oil
- Salt and cumin to taste
How to make it
- Roughly chop the tomatoes, bell pepper, cucumber, and onion. Don’t worry about perfect shapes; they are going into the blender.
- Place the vegetables in a high-speed blender. Add the vinegar, salt, and a pinch of cumin.
- Blend on high until the mixture is completely liquified. If you prefer a very smooth soup, you can pass the mixture through a fine-mesh strainer afterward.
- While the blender is running on low, slowly drizzle in the olive oil. This ’emulsifies’ the soup, giving it a creamy, rich mouthfeel without any dairy.
- Pour the soup into a glass container and chill in the refrigerator for at least 4 hours. Gazpacho is best when it is ice-cold and the flavors have had time to develop.
- Taste again before serving; cold temperatures can dull saltiness, so you might need an extra pinch.
- Serve in small glass votives or shooters on your food board, garnished with a tiny drop of olive oil and a single microgreen.
15 Festive Ways to Host July Parties (Step-by-Step Guide)
[IMAGE_10]
Why we love this
Hosting in July is all about embracing the energy of freedom and the peak of the outdoor season. We love this because it’s the time when communities come together, and the ‘Simple Food Board’ truly shines as a centerpiece for connection. The atmosphere is casual—flip-flops, string lights, and the sound of a playlist humming in the background. It’s the feeling of total relaxation, where the food is plentiful, the costs are low, and the memories are rich. It’s about creating a space where everyone feels welcome to grab a plate and stay a while.
Ingredients
- Outdoor string lights or lanterns
- Reusable bamboo plates
- A large wooden board or butcher paper
- Fresh flowers from the yard
- A curated ‘Summer Vibes’ playlist
- Assorted budget-friendly finger foods
How to make it
- Set the stage by cleaning your outdoor space and hanging string lights. Lighting is the most important element for setting a ‘viral’ mood; warm, low-level light makes everything look better.
- Cover your main table with brown butcher paper. This is a budget-friendly way to create a massive ‘board’ surface and makes cleanup a breeze.
- Place your larger bowls (like the Rotel dip and summer pasta) on the table first to act as anchors for your design.
- Fill in the gaps with the kabobs, corn, and fruit. Use the ‘rule of threes’—place similar colors in a triangular pattern to guide the eye across the spread.
- Scatter fresh herbs and flowers directly onto the butcher paper between the food items to give it an abundant, professional look.
- Set up a self-serve drink station with the summer mixers, plenty of ice, and pre-cut garnishes so you don’t have to play bartender all night.
- Light a few citronella candles nearby to keep the bugs away, turn up the music, and open the doors. The best parties are the ones where the host is actually present and enjoying the food along with the guests!
Conclusion
Creating a viral-worthy food board doesn’t require a massive budget; it requires a bit of strategy and a focus on the senses. By mixing high-texture items like charred corn with silky dips and bright, fresh pastas, you create an experience that feels curated and intentional. Remember, the goal of a simple food board is to bring people together. So, grab a board, pick a few of these summer guides, and start hosting your most memorable (and affordable) season yet!