

There is something almost magical about the way a well-curated food board brings people together. You know that feeling when you walk into a room and see a sprawling, colorful display of treats just waiting to be enjoyed? It instantly lowers the temperature of the room, turning a formal gathering into a cozy, communal experience where everyone feels welcome to grab a plate and dig in. I’ve always believed that hosting shouldn’t feel like a chore, but rather a celebration of the people we love, and that’s exactly why I fell head over heels for the viral food board trend.
This trend is all about stripping away the fuss of individual plating and embracing a more tactile, sensory way of eating. Whether you’re hosting a sun-drenched backyard barbecue or an intimate sunset dinner on the patio, these boards allow you to showcase the best of summer’s bounty in a way that feels both effortless and incredibly chic. Today, I’m sharing my favorite ways to level up your hosting game using the food board concept across every category imaginable—from slow-cooked favorites to refreshing drinks. Let’s dive into the ultimate guide to simple, viral hosting!
10 Best Summer Crockpot Recipes You’ll Love

Why we love this
We absolutely adore this approach because it takes the heat out of the kitchen while still delivering deep, complex flavors that taste like they’ve been simmering for days. Imagine walking into a home filled with the aroma of smoky BBQ and sweet brown sugar, only to find a stunning Pulled Pork Slider Board waiting for you. The meat is so tender it literally melts on your tongue, contrasting perfectly with the crunch of a tangy vinegar slaw and the soft, pillowy texture of toasted brioche buns. It’s the ultimate low-effort, high-reward meal that keeps your house cool and your guests incredibly happy.
Ingredients
- 4 lbs pork shoulder (butt)
- 2 cups favorite BBQ sauce
- 1/4 cup apple cider vinegar
- 1 tablespoon smoked paprika
- 2 teaspoons garlic powder
- 1 teaspoon onion powder
- Kosher salt and cracked black pepper
- Mini brioche buns
- Bread and butter pickles
How to make it
- Begin by patting the pork shoulder dry with paper towels to ensure the seasoning sticks. In a small bowl, whisk together the smoked paprika, garlic powder, onion powder, salt, and pepper. Rub this spice blend generously over all sides of the meat, pressing it into the crevices for maximum flavor.
- Place the seasoned pork into your slow cooker. Pour the apple cider vinegar around the base of the meat (not over the top, so you don’t wash off the spices). Cover and cook on the low setting for 8 to 10 hours. You want the meat to be so tender that it falls apart when touched with a fork; don’t rush this process by using the high setting if you can avoid it.
- Once fully cooked, carefully remove the pork to a large cutting board. Use two forks to shred the meat, removing any large pieces of fat. Transfer the shredded meat back into the slow cooker or a clean bowl and toss with 1.5 cups of BBQ sauce until every strand is glistening and coated.
- To assemble the board, toast your mini brioche buns in a pan with a little butter until golden brown. Place a large mound of the warm pulled pork in the center of a wooden board, surrounded by the toasted buns, a bowl of the remaining BBQ sauce, and a pile of crisp pickles. This allows guests to build their own sliders exactly how they like them.
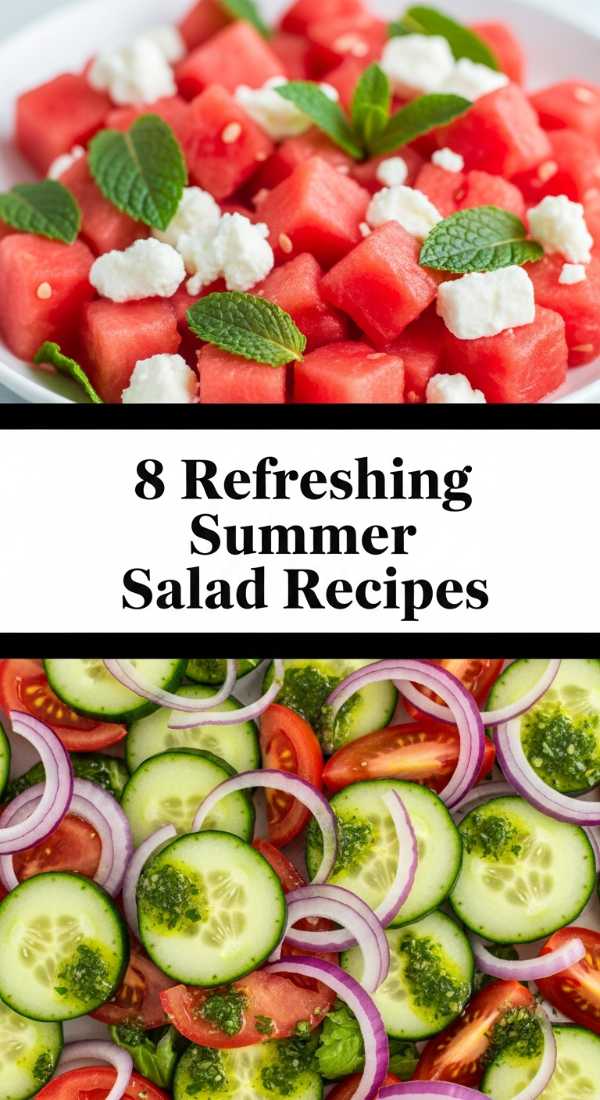
8 Refreshing Summer Salad Recipes To Try
Why we love this
Nothing says summer quite like a deconstructed Salad Board that highlights the vibrant colors and crisp textures of the season’s freshest produce. We love this because it transforms a standard side dish into a visual masterpiece where the snap of cold cucumbers meets the juicy sweetness of heirloom tomatoes and the creamy richness of fresh mozzarella. The aroma of torn basil leaves hitting the air as you set the board down is enough to make anyone’s mouth water. It’s light, hydrating, and provides that perfect refreshing bite on a sweltering July afternoon.
Ingredients
- 3 large heirloom tomatoes, sliced thick
- 2 English cucumbers, sliced into rounds
- 8 oz fresh mozzarella pearls or torn buffalo mozzarella
- 1/2 cup fresh basil leaves, hand-torn
- 1/4 cup extra virgin olive oil
- 2 tablespoons balsamic glaze
- Flaky sea salt and cracked black pepper
How to make it
- Select your largest wooden or ceramic platter. Start by laying down the sliced heirloom tomatoes in a slightly overlapping circular pattern around the outer edge. Use tomatoes of different colors—reds, yellows, and purples—to create a stunning visual gradient that looks professional.
- Layer the cucumber rounds inside the ring of tomatoes. For a more sophisticated look, you can use a mandoline to get paper-thin slices, or keep them thick for more of a crunch. Tuck the mozzarella pearls into the gaps between the vegetables, ensuring every guest will get a bit of cheese in every scoop.
- Tear the fresh basil leaves by hand just before serving; using a knife can cause the edges to bruise and turn black. Scatter the basil generously over the entire board. The scent will be immediately revitalizing.
- Drizzle the high-quality extra virgin olive oil over the vegetables, followed by a decorative zig-zag of thick balsamic glaze. Finish with a heavy pinch of flaky sea salt and fresh pepper. The salt is crucial here as it draws out the natural juices of the tomatoes, creating a delicious “dressing” right on the board.
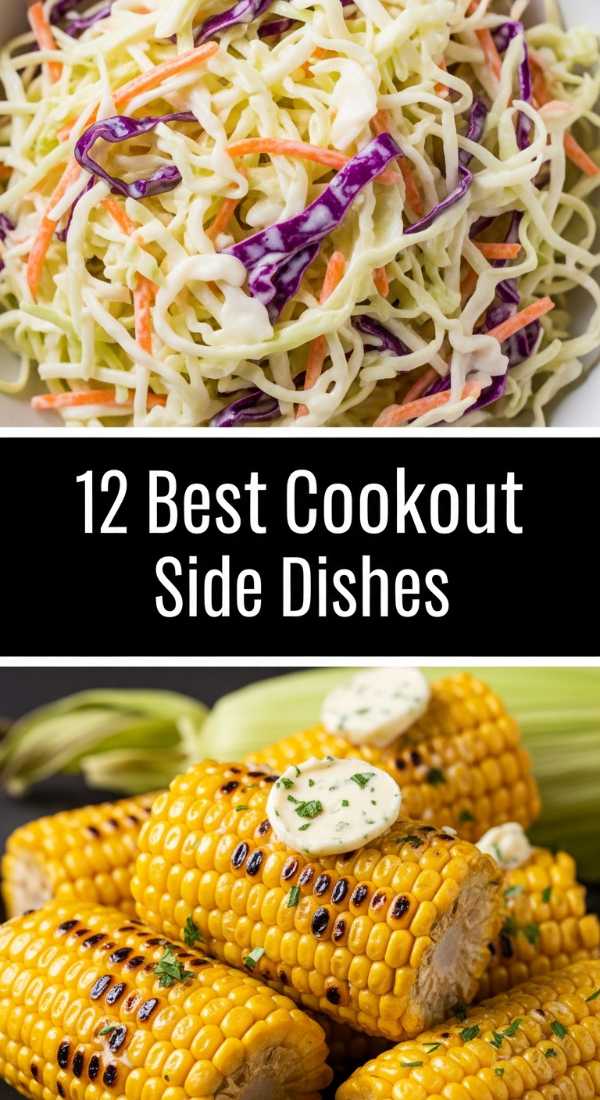
12 Best Cookout Side Dishes For BBQ
Why we love this
The star of any cookout is often the sides, and a Charred Corn Elote Board is the viral trend your BBQ needs. This board is a sensory explosion: the smoky, blackened kernels of the corn provide a deep char aroma that contrasts beautifully with the zesty lime and salty cotija cheese. It’s messy in the best way possible, encouraging guests to get their hands a little dirty as they slather their corn in creamy sauce and roll it in fresh cilantro. It brings a festive, street-food energy to any gathering that is simply infectious.
Ingredients
- 8 ears of fresh corn, husks removed
- 1/2 cup Mexican crema or sour cream
- 1/2 cup mayonnaise
- 1/2 cup crumbled cotija cheese
- 2 tablespoons chili powder
- 1 bunch fresh cilantro, chopped
- 3 limes, cut into wedges
How to make it
- Preheat your grill to medium-high heat (about 400°F). Place the husked corn directly onto the grates. Grill for 10-12 minutes, turning occasionally with tongs, until the kernels are bright yellow and have developed beautiful dark charred spots on all sides. This char is where the smoky flavor lives.
- While the corn grills, whisk together the crema, mayonnaise, and a squeeze of lime juice in a small bowl until smooth. This will be your “glue” for the toppings.
- Once the corn is done, remove it from the grill and immediately brush each ear generously with the cream mixture. Place the ears onto a large serving board.
- Sprinkle the crumbled cotija cheese and chili powder over the corn while it’s still hot so the cheese softens slightly. Top the entire board with a shower of fresh cilantro and nestle the lime wedges between the ears of corn. Serve immediately while the corn is steaming and the toppings are creamy.
7 Easy Healthy Summer Dinner Recipes

Why we love this
When the sun is out, we crave meals that leave us feeling energized rather than weighed down, and the Mediterranean Power Board is the perfect solution. We love the combination of warm, nutty quinoa paired with cold, crisp vegetables and zesty lemon-tahini dressing. The textures range from the soft pop of the grain to the crunch of radishes and the silkiness of homemade hummus. It feels like a spa day on a plate, offering a balanced, nutrient-dense dinner that is as beautiful to look at as it is delicious to eat.
Ingredients
- 2 cups cooked quinoa (chilled)
- 1 can chickpeas, drained and roasted with cumin
- 1 cup cherry tomatoes, halved
- 1 cup diced cucumber
- 1/2 cup kalamata olives
- 1/4 cup pickled red onions
- 1/2 cup hummus
- Lemon-tahini dressing
How to make it
- Prepare the quinoa ahead of time by boiling it in vegetable broth for extra flavor. Once the water is absorbed, fluff it with a fork and spread it on a baking sheet to cool completely in the fridge. This ensures the grains stay separate and don’t become mushy on the board.
- Toss the drained chickpeas with olive oil, cumin, and salt, then roast at 400°F for 20 minutes until they are crispy. This adds a much-needed crunch to the meal.
- On a large round board, place a bowl of hummus in the center. Surround the bowl with mounds of the chilled quinoa, the roasted chickpeas, halved tomatoes, cucumbers, and olives. Grouping the ingredients by color makes the board look more intentional and vibrant.
- Top the board with the pickled red onions for a pop of bright pink and acidity. Serve the lemon-tahini dressing in a small pitcher on the side so guests can drizzle to their heart’s content. This deconstructed style allows everyone to customize their bowl based on their dietary preferences.
9 Best Summer Pasta Salads Ever

Why we love this
Pasta salad is a classic, but serving it on a Mediterranean Orzo Board takes it to a whole new level of viral fame. The orzo acts like a canvas for the bright flavors of lemon zest, salty feta, and garden-fresh herbs. We love how the tiny pasta shapes soak up the vinaigrette, ensuring every bite is a burst of Mediterranean sunshine. It’s light enough for a hot day but satisfying enough to stand as a main course, and the aroma of fresh mint and dill is incredibly inviting as it wafts through the air.
Ingredients
- 1 lb orzo pasta
- 1/2 cup crumbled feta cheese
- 1/2 cup sun-dried tomatoes, chopped
- 1/4 cup toasted pine nuts
- Fresh mint, dill, and parsley, chopped
- Zest and juice of 2 lemons
- 1/3 cup extra virgin olive oil
- Salt and pepper to taste
How to make it
- Cook the orzo in a large pot of salted boiling water until it is just al dente—usually about 8-9 minutes. It’s vital not to overcook it, as it will continue to soften once the dressing is added. Drain and rinse under cold water to stop the cooking process and remove excess starch.
- In a large bowl, whisk together the lemon juice, lemon zest, and olive oil to create a bright, citrusy emulsion. Add the cooled orzo to the bowl and toss thoroughly until every grain is coated.
- Fold in the sun-dried tomatoes, crumbled feta, and the trio of fresh herbs. The mint adds a surprising coolness that is essential for a summer dish. Season generously with salt and pepper.
- To serve board-style, spread the orzo mixture in an even layer across a long rectangular platter. Sprinkle the toasted pine nuts over the top for a buttery crunch. Garnish with extra sprigs of fresh herbs and lemon slices to give it that “Pinterest-perfect” look.
5 Viral Summer Party Dips To Make

Why we love this
The Whipped Feta and Hot Honey Board is the definition of a viral sensation, and for good reason. It hits every single taste bud: the salty, tangy creaminess of the feta, the floral heat of the hot honey, and the crunch of pistachios. We love the interactive nature of this board—there’s something so satisfying about swirling a warm piece of pita through the light-as-air whipped cheese. The visual of the golden honey glistening against the stark white cheese is absolutely mouthwatering and makes for the perfect centerpiece for any cocktail hour.
Ingredients
- 8 oz feta cheese (block form in brine is best)
- 1/2 cup Greek yogurt
- 1 clove garlic, minced
- 2 tablespoons olive oil
- 3 tablespoons hot honey
- 1/4 cup crushed roasted pistachios
- Fresh thyme leaves
- Warm pita bread or crackers
How to make it
- Place the feta cheese, Greek yogurt, minced garlic, and olive oil into a food processor. Process on high for 2-3 minutes. Stop halfway through to scrape down the sides. You are looking for a completely smooth, airy, and mousse-like consistency. If it’s too thick, add a teaspoon of water or more yogurt.
- Transfer the whipped feta onto a wooden board or a flat plate. Use the back of a large spoon to create deep decorative swirls and “wells” in the cheese. These little pockets are perfect for catching the honey.
- Generously drizzle the hot honey over the cheese, letting it pool in the swirls you created. The contrast of the spicy honey with the cool cheese is the key to this dish’s success.
- Garnish with a sprinkle of crushed pistachios for texture and fresh thyme leaves for an earthy aroma. Surround the cheese with piles of warm, sliced pita bread or artisanal crackers. This is best served at room temperature so the cheese stays soft and dippable.
11 Delicious Summer Dessert Recipes Today

Why we love this
Forget the oven—the Summer Berry & S’mores Dessert Board is the ultimate way to end a summer night. We love how it combines the nostalgia of toasted marshmallows with the sophisticated freshness of seasonal berries. The scent of melting chocolate mixed with the sweet fragrance of strawberries is intoxicating. It’s a hands-on dessert that encourages guests to linger around the table, roasting their own treats and pairing them with dark chocolate and tart fruit. It’s pure, unadulterated summer joy on a board.
Ingredients
- 1 pack graham crackers
- 1 bag large marshmallows
- 4 dark chocolate bars, broken into squares
- 2 cups fresh strawberries and raspberries
- 1/2 cup Nutella or chocolate hazelnut spread
- Fresh mint for garnish
How to make it
- Start by placing a small bowl of Nutella in the center of your board—this acts as a delicious dip for those who want extra chocolate. Arrange the graham cracker rectangles in rows or fans around the edges of the board.
- Group your fresh berries in vibrant clusters. Wash them thoroughly and pat them dry so they don’t make the crackers soggy. The acidity of the berries is crucial for cutting through the sweetness of the marshmallows.
- Place the marshmallows in a large pile. If you aren’t near a campfire, you can use a kitchen torch to lightly toast the marshmallows right on the board for a dramatic flair, or pre-toast them under a broiler for 60 seconds (watch them closely!) before adding them to the display.
- Nestle the chocolate squares between the crackers and marshmallows. Encourage guests to make traditional s’mores or simply dip a strawberry into the Nutella and top it with a piece of chocolate. The variety ensures there’s something for everyone, from the fruit lover to the chocolate addict.
6 Easy Light Summer Lunch Ideas

Why we love this
Lunch should be light, elegant, and effortless, which is why the Tea Sandwich and Garden Board is a favorite. We love the delicate textures of soft, crustless bread paired with the cool, crisp snap of thinly sliced cucumbers and herbed cream cheese. It’s a refined way to eat that feels special without being heavy. The aroma of fresh dill and lemon zest in the spread is incredibly uplifting, making it the perfect choice for a bridge club gathering or a quiet afternoon on the porch with a book.
Ingredients
- 1 loaf high-quality white or whole wheat bread
- 8 oz cream cheese, softened
- 1 tablespoon fresh dill, chopped
- 1 English cucumber, sliced paper-thin
- 4 oz smoked salmon (optional)
- Radish sprouts or microgreens
How to make it
- In a small bowl, combine the softened cream cheese with the chopped dill and a pinch of salt. Mix until smooth and fragrant. This herb spread acts as the moisture barrier that keeps the sandwiches from getting soggy.
- Lay out your bread slices and spread a thin, even layer of the cream cheese mixture onto each one. On half the slices, layer the paper-thin cucumber rounds in an overlapping pattern. If using, add a small piece of smoked salmon on top of the cucumber.
- Close the sandwiches and use a very sharp serrated knife to remove the crusts. Cut each sandwich into three long fingers or four small triangles. Precision is key here for that viral, high-end aesthetic.
- Arrange the sandwiches on a board in a geometric pattern—alternating directions or stacking them in small towers. Garnish the board with extra cucumber ribbons and a handful of fresh radish sprouts for a peppery bite and a beautiful green finish.
10 Best Refreshing Summer Drink Ideas

Why we love this
The Summer Sangria Garnish Board is the host’s secret weapon for a stress-free party. Instead of mixing drinks individually, we love providing a base and letting guests customize their own glasses with a stunning array of frozen fruits and fresh herbs. The sight of frozen grapes, citrus wheels, and bright berries against a backdrop of chilled wine is gorgeous. As the frozen fruit melts, it slowly releases its juices into the drink, changing the flavor profile over time. It’s a sensory experience that looks like a work of art on your bar cart.
Ingredients
- 1 bottle of chilled White or Rosé wine
- 1 cup sparkling water or ginger ale
- 2 cups frozen fruit (grapes, peaches, berries)
- 1 orange and 1 lemon, thinly sliced
- Fresh mint sprigs and lavender
- 1/4 cup brandy (optional for a kick)
How to make it
- Prepare your fruit in advance. Freezing the grapes and peach slices is a pro tip—they act as ice cubes that won’t water down the drink. Place the frozen fruit in small, aesthetically pleasing bowls.
- Slice your citrus into perfect circles. On a small wooden board or marble slab, arrange the citrus wheels in a fan shape. Place the bowls of frozen fruit around the citrus, and tuck in plenty of fresh mint and lavender sprigs. The herbs provide an aromatic element every time someone leans in to garnish their glass.
- Set out a large pitcher filled with your chilled wine and a splash of brandy if you want a more traditional sangria flavor. Keep the sparkling water in a separate carafe so guests can control the level of carbonation and sweetness.
- Provide tall glasses and encourage guests to fill their glass with frozen fruit first, then pour the wine, and finally top with a sprig of slapped mint (slapping the mint between your hands releases the oils!) and a citrus slice. It’s a DIY station that doubles as decor.
8 Best Summer Grill Kabobs Ever

Why we love this
Kabobs are a grill-master’s dream, but serving them on a deconstructed Kabob Board is the real game-changer. We love the smoky, charred aroma of the grilled meats and vegetables combined with the bright, herbaceous punch of a chimichurri dipping sauce. The textures are fantastic—tender, juicy steak or chicken alongside peppers that still have a bit of a bite. It turns a standard grilled meal into a communal feast where everyone can pick their favorite charred bit right off the board. It feels rustic, hearty, and perfectly suited for an outdoor summer night.
Ingredients
- 2 lbs sirloin steak or chicken breast, cubed
- 2 bell peppers, cut into large chunks
- 1 red onion, cut into wedges
- 1 cup cherry tomatoes
- Wood or metal skewers
- 1/2 cup chimichurri sauce (parsley, garlic, oil, vinegar)
- Lemon wedges for serving
How to make it
- Marinate your meat cubes for at least 2 hours in a mixture of olive oil, garlic, and rosemary to ensure maximum tenderness and flavor. If using wooden skewers, soak them in water for 30 minutes to prevent them from burning on the grill.
- Thread the meat and vegetables onto the skewers, alternating colors for a beautiful look. Don’t crowd them too tightly; leaving a tiny bit of space between pieces ensures that the heat can circulate and cook everything evenly.
- Preheat the grill to high heat. Sear the skewers for 3-4 minutes per side until the meat reaches your desired doneness and the vegetables have those signature dark grill marks. The high heat is essential for a good sear without overcooking the center.
- To serve, slide the meat and vegetables off the skewers and onto a large, rustic wooden board. Pile them high in the center and place a bowl of bright green chimichurri sauce on the side. Squeeze fresh lemon juice over everything just before serving to brighten the flavors and cut through the richness of the grilled meat.
Conclusion: The Art of the Board
Hosting doesn’t have to be a source of stress. By embracing the viral food board trend, you’re not just serving a meal; you’re creating an environment where memories are made and conversations flow easily. Whether it’s a simple spread of seasonal fruit or a hearty display of grilled meats, the board concept celebrates the beauty of food and the joy of shared experiences. So, the next time you have friends over, skip the individual plates, grab your largest board, and let the food speak for itself. Happy hosting!