
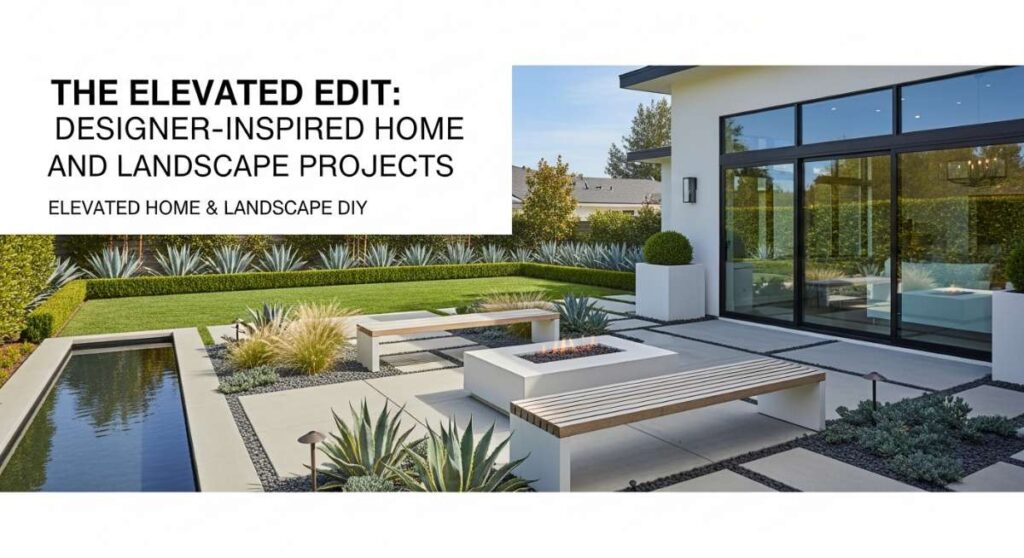
Have you ever scrolled through a high-end design magazine and felt that sudden spark of inspiration, only to be dampened by a massive price tag? I’ve been there more times than I can count. There is a specific kind of magic in realizing that the ‘designer look’ isn’t reserved for those with a limitless budget; it’s actually within reach for anyone with a little bit of vision and a weekend to spare. Today, we are diving into the art of the elevated edit, where we take those aspirational outdoor and indoor aesthetics and bring them home through thoughtful DIY projects.
Creating a sanctuary isn’t just about the finished product; it’s about the intentionality you pour into every stone laid and every seed planted. When we curate our spaces with our own hands, we develop a deeper connection to the environment we inhabit. From the way the morning light hits a freshly organized pantry to the soft rustle of wind through a new privacy screen, these projects are designed to engage your senses and elevate your everyday living. Let’s roll up our sleeves and transform the mundane into the extraordinary.
How to Design Front Yard Landscaping for Instant Curb Appeal

Why we love this
There is nothing quite like the feeling of pulling into your driveway and being greeted by a tapestry of textures and colors that whisper a warm welcome. We love the way structured, deep-green boxwoods provide a classic architectural anchor while soft, silver-blue lavender wafts its calming, herbal scent through the air with every passing breeze. It is a visual symphony where the crisp, clean lines of a stone border meet the wild, overflowing joy of blooming perennials, making your home feel like a curated retreat from the very first glance. The tactile contrast between rough mulch and velvet-soft petals creates a garden that feels as good as it looks.
Essential Elements:
- Structured evergreens (Boxwoods or Yews)
- Perennial flowers for color (Lavender, Coneflowers, or Salvia)
- Natural stone or metal landscape edging
- Dark hardwood mulch for contrast
- Solar-powered path lighting for evening ambiance
How to make it
- Begin by clearing the existing area of all weeds, debris, and tired plants. Use a garden hose or spray paint to mark out fluid, curved lines for your new beds; curves look more organic and expensive than rigid straight lines.
- Test your soil pH and amend it with organic compost. This phase is crucial for ensuring your plants have the nutrients they need to thrive. Dig holes that are twice as wide as the root balls of your primary anchor plants.
- Place your tallest evergreens toward the back or center, and layer smaller flowering plants in front. Ensure you leave enough space for each plant to reach its mature width without overcrowding.
- Install your chosen edging. If using stone, dig a shallow trench so the stones sit half-submerged for a permanent, professional look. This prevents grass from creeping into your beautiful new beds.
- Apply a 3-inch layer of dark mulch. Avoid ‘volcano mulching’ around tree trunks; instead, keep the mulch a few inches away from the stems to prevent rot while still locking in moisture and suppressing weeds.
How to Build Planter Privacy Walls for a Secluded Sanctuary
Why we love this
Imagine sitting on your patio, the air filled with the sweet, intoxicating perfume of climbing jasmine or honeysuckle, completely shielded from the prying eyes of the neighborhood. We love these privacy walls because they serve a dual purpose: they act as a living piece of art and a functional barrier that defines your outdoor ‘room.’ The warm, honey-toned cedar slats provide a modern, linear aesthetic that contrasts beautifully with the soft, cascading green vines. It creates a cocoon-like atmosphere where the world falls away, leaving you with a serene space that feels intimate, expensive, and deeply private.
Essential Elements:
- Pressure-treated lumber or Cedar for weather resistance
- Heavy-duty landscape fabric for lining the planters
- Galvanized screws and hardware
- Climbing plants (Star Jasmine, Clematis, or Climbing Roses)
- Exterior wood stain or sealant
How to make it
- Construct the base planter boxes first. Use 2x4s for the internal frame and wrap them in 1×6 cedar planks. Ensure the bottom has drainage holes spaced every six inches to prevent root rot in your climbing plants.
- Build the vertical trellis frame by attaching two tall 4×4 posts to the back of each planter box. Secure these with heavy-duty carriage bolts to ensure the wall doesn’t tip over in high winds.
- Attach horizontal slats to the vertical posts. Use a 1/2-inch spacer between each slat to create a modern ‘slatted’ look that allows some light and air to pass through while maintaining privacy.
- Sand all surfaces thoroughly to prevent splinters, then apply two coats of a high-quality exterior stain with UV protection. This preserves the wood’s color against the harsh sun.
- Line the boxes with landscape fabric, fill with high-quality potting mix, and plant your climbers at the base of the slats. Gently weave the young tendrils into the lower slats to guide their growth upward.
How to Master Concrete Slab Patio Makeovers for Chic Outdoor Living
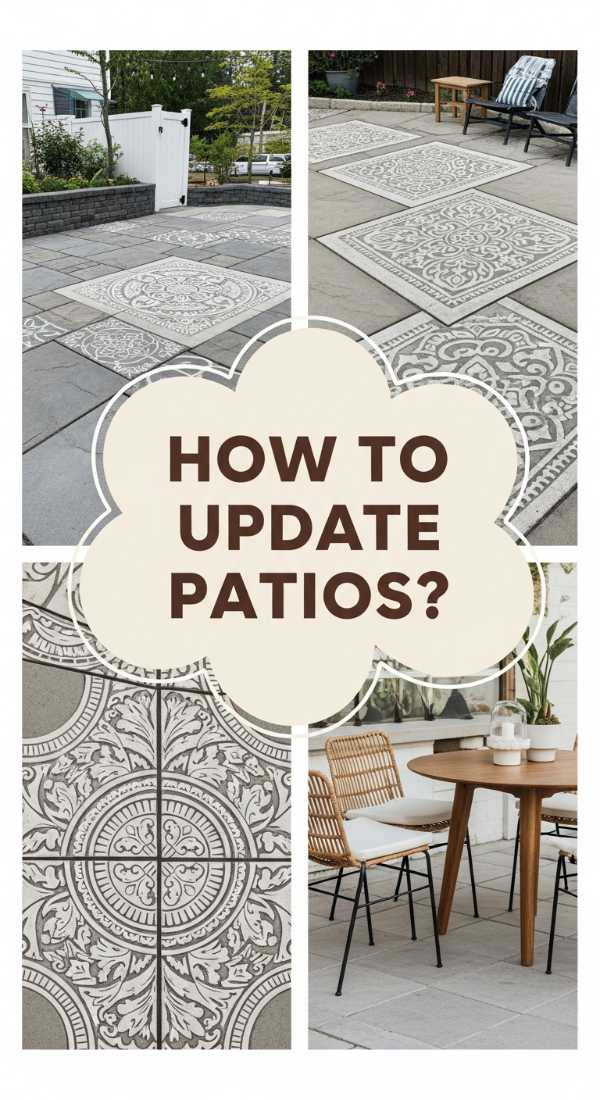
Why we love this
There is something incredibly satisfying about taking a cold, grey, and cracked concrete slab and turning it into a high-end designer floor that rivals a Mediterranean villa. We love the way a fresh, stenciled pattern or a chic epoxy finish can completely change the light reflectance of your patio, making the whole backyard feel brighter and more intentional. The smooth, cool finish underfoot is a dream for barefoot summer days, and the addition of a patterned rug or a border stain adds a layer of sophisticated ‘interior’ style to the great outdoors. It’s a total metamorphosis that feels like adding a whole new room to your home.
Essential Elements:
- High-pressure washer
- Concrete patch and repair compound
- Concrete primer and specialized porch/patio paint
- Large-scale geometric or Moroccan stencils
- Clear anti-slip masonry sealer
How to make it
- Begin by deep-cleaning the concrete with a pressure washer to remove all oils, dirt, and old paint. If the concrete is particularly smooth, use an etching solution to open the pores so the paint can bond properly.
- Fill any cracks or pits with a concrete patch compound. Use a putty knife to level the surface, and once dry, sand it smooth so the repairs are invisible under the final coat of paint.
- Apply a high-quality concrete primer using a long-handled roller. This is the ‘glue’ that ensures your design won’t peel after the first winter. Let it dry for at least 24 hours.
- Roll on your base color. Once dry, use a stencil and a dense foam roller to apply your pattern. The key is to use a ‘dry brush’ technique—using very little paint on the roller—to prevent the paint from bleeding under the stencil edges.
- Lock in your hard work with two coats of clear masonry sealer. For safety, mix in an anti-skid additive to the final coat to ensure the surface isn’t slippery when wet.
How to Layer Rock Landscaping Ideas for a Serene Garden Vibe
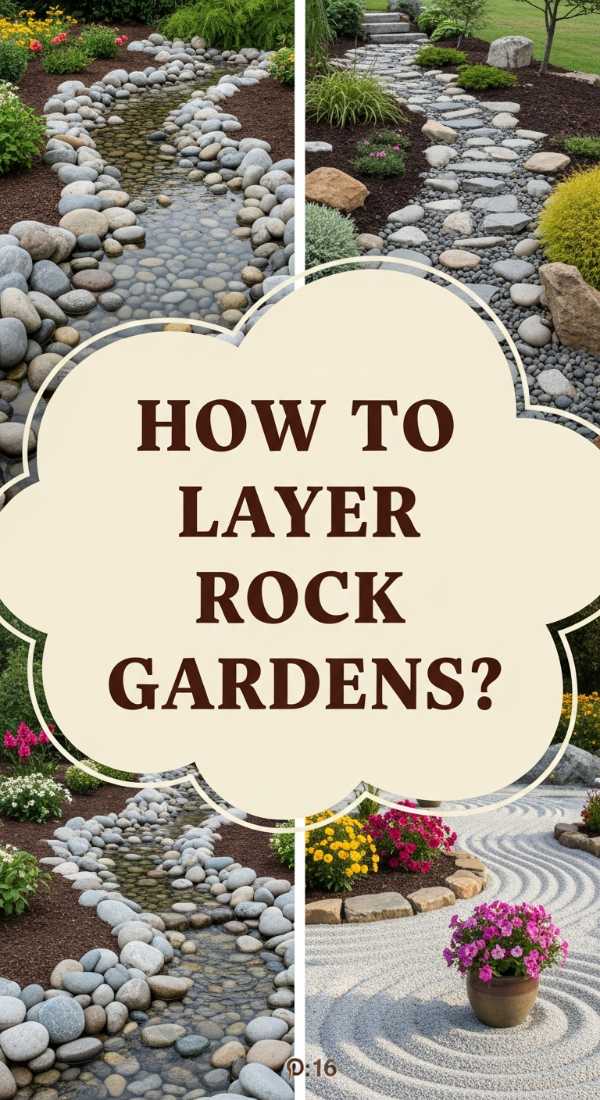
Why we love this
Rock landscaping brings a grounded, eternal feeling to a garden, reminiscent of a peaceful Zen retreat or a rugged coastal path. We love the interplay of textures—the smoothness of river rocks against the jagged edges of slate or lava rock—and the way the colors deepen and glow when they are caught in a summer rain. This layering technique adds a sense of permanence and ‘old-world’ charm that organic mulch simply can’t provide. It’s a tactile experience that invites you to slow down, listen to the crunch of stone underfoot, and appreciate the earthy, mineral scent of a well-designed rock garden.
Essential Elements:
- Large focal boulders for height and weight
- Medium river rocks or ‘egg stones’
- Fine pea gravel or decomposed granite
- Heavy-duty weed barrier fabric
- Low-profile landscape spikes
How to make it
- Excavate the area to a depth of about 3 to 4 inches. This allows your rock layers to sit flush with the surrounding ground rather than looking like a pile on top of the grass.
- Lay down a professional-grade weed barrier, securing it with landscape staples every 12 inches. This is the most important step to prevent maintenance headaches later on.
- Place your largest boulders first. ‘Plant’ them by digging a small hole so the bottom third of the rock is buried; this makes them look like they have been there for centuries rather than just dropped on the surface.
- Layer your medium stones around the boulders to create a natural transition. Finally, fill the remaining gaps with pea gravel or decomposed granite to create a smooth, walkable surface.
- Use a garden hose to wash the dust off the rocks once completed. This reveals their true colors and settles the finer gravel into the crevices for a locked-in, professional finish.
How to Style Front Porch Flower Pots for a Warm Welcome
Why we love this
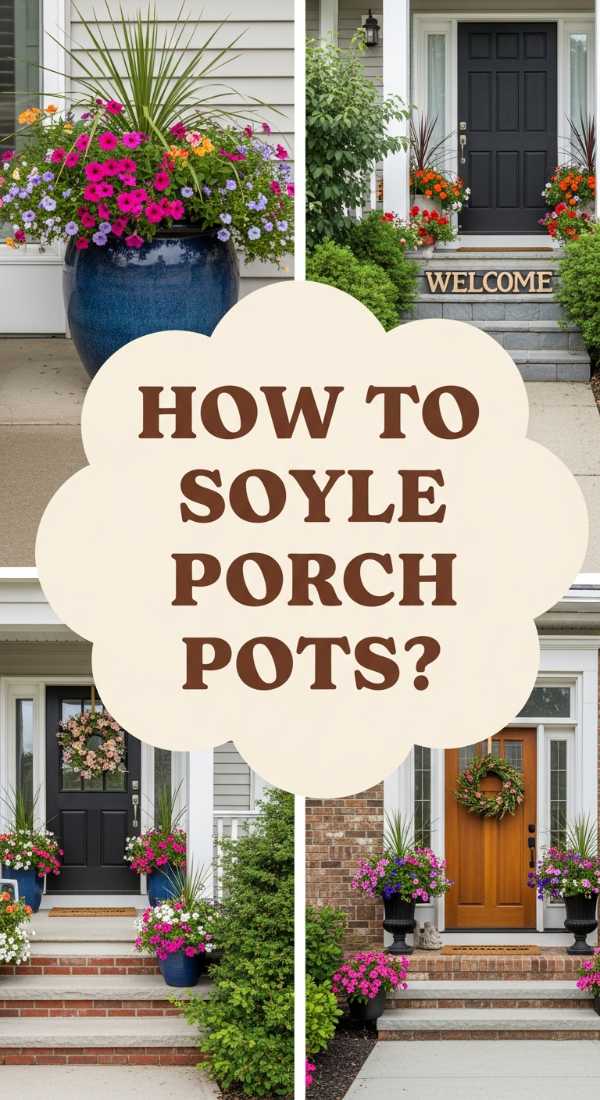
A well-styled porch pot is like a gorgeous piece of jewelry for your home’s exterior—it adds that final, sparkling touch of personality. We love the ‘thriller, filler, spiller’ method because it creates a lush, professional-grade arrangement that looks like it came straight from a boutique florist. The scent of fresh potting soil mixed with the sweet fragrance of petunias and the earthy aroma of ornamental grasses creates an immediate sensory shift the moment you step onto the porch. It’s a burst of life and vibrant color that makes coming home feel like a special occasion every single day.
Essential Elements:
- Large, high-quality planters (Ceramic, Concrete, or Resin)
- A ‘Thriller’ plant (Purple Fountain Grass or Dracaena)
- ‘Filler’ plants (Geraniums, Lantana, or Begonias)
- ‘Spiller’ plants (Sweet Potato Vine or Creeping Jenny)
- High-quality potting mix with slow-release fertilizer
How to make it
- Choose a pot with adequate drainage. If your pot is very large, you can fill the bottom third with empty plastic milk jugs to save on soil and keep the pot lightweight, then cover with landscape fabric.
- Fill the pot with premium potting mix up to about 2 inches below the rim. Mix in a handful of slow-release fertilizer granules to ensure your plants stay fed throughout the entire growing season.
- Plant your ‘thriller’ in the center (if the pot is viewed from all sides) or at the back (if it’s against a wall). This provides the height and drama that catches the eye from the street.
- Surround the thriller with your ‘fillers.’ These should be mounding plants that hide the soil and provide a dense punch of color. Space them closely for an instant ‘full’ look.
- Tuck your ‘spillers’ along the very edge of the pot. Angle them slightly outward so they are encouraged to drape over the sides, softening the hard edges of the container and adding elegant movement.
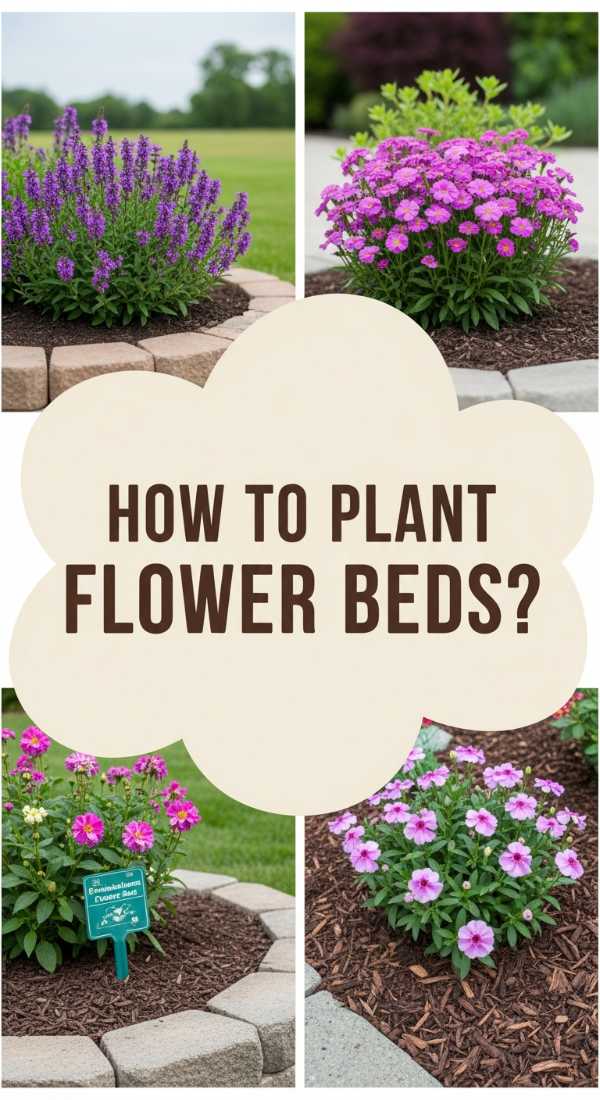
How to Arrange Low Maintenance Flower Beds for Effortless Beauty

Why we love this
The true luxury of a low-maintenance garden is the gift of time; it’s about having a breathtaking view without spending every Saturday morning pulling weeds. We love the quiet confidence of hardy perennials like Hosta and Sedum, which return year after year with more vigor and beauty. There is a deep, earthy satisfaction in seeing a well-mulched bed that stays tidy on its own, where the only thing you have to do is enjoy the way the sunlight filters through the leaves. It’s about creating a sustainable ecosystem that feels lush and abundant while requiring nothing more than an occasional pruning and a deep breath of fresh air.
Essential Elements:
- Native plants (check your local hardiness zone)
- Perennial groundcovers (Pachysandra or Vinca)
- Drip irrigation kit or soaker hoses
- Pre-emergent weed preventer
- Long-lasting cedar or cypress mulch
How to make it
- Select plants that are native to your region; they have adapted to your local climate and soil, meaning they need less water and are naturally resistant to local pests. This is the foundation of ‘low maintenance.’
- Group plants with similar water needs together (hydro-zoning). This ensures you aren’t overwatering your succulents or underwatering your ferns, leading to healthier plants and less manual intervention.
- Install a simple drip irrigation system or lay a soaker hose beneath the surface. Hook this up to a digital timer so your garden gets the perfect amount of hydration without you ever lifting a hose.
- Apply a pre-emergent weed preventer to the soil before mulching. This stops weed seeds from germinating in the first place, which is much easier than pulling them once they’ve grown.
- Layer a thick 4-inch coat of mulch. This provides superior moisture retention and eventually breaks down to feed the soil, creating a self-sustaining cycle of health for your plants.
How to Build Above Ground Pool Bars for the Ultimate Summer Hangout

Why we love this
The gentle splash of water against the pool edge paired with the rhythmic clinking of ice in a glass creates the ultimate summer soundtrack. We love how a pool bar transforms a simple backyard into a high-end resort, offering a sun-drenched spot to gather for frosty margaritas or cold lemonades. The scent of sun-warmed cedar and the smooth, cool touch of a polished bar top provide a tactile luxury that makes every Saturday afternoon feel like a permanent vacation. It bridges the gap between the water and the patio, creating a social hub where memories are made in the sun.
Essential Elements:
- Pressure-treated 4×4 posts for the structure
- Cedar or Acacia wood for the bar top
- Corrugated metal panels for a modern-industrial look
- Weatherproof bar stools
- Built-in bottle opener and towel hooks
How to make it
- Measure the height of your above-ground pool and build a frame that sits about 2 inches higher than the pool rail. Use 4×4 posts set in concrete or heavy-duty deck blocks for a stable, level base.
- Construct a rectangular frame using 2x4s, then attach corrugated metal panels to the front and sides using self-tapping screws with rubber washers to prevent rust. This gives it a chic, modern ‘stock tank’ vibe.
- Create the bar top using wide cedar planks. Sand the wood until it is buttery smooth, then apply multiple coats of a marine-grade spar urethane. This is vital to protect the wood from constant splashes and UV rays.
- Mount the bar top to the frame using L-brackets from underneath so no screws are visible on the beautiful wood surface. Ensure there is a slight overhang toward the pool for easy reach while swimming.
- Add the finishing touches: bolt a heavy-duty bottle opener to the side, install hooks for wet towels, and add a string of outdoor Edison bulbs overhead to keep the party going after sunset.
How to Complete a Realistic Pantry Organization for a Calm Kitchen

Why we love this
Opening a beautifully organized pantry feels like a deep, cleansing exhale for your brain. We love the visual rhythm of matching glass jars filled with the textures of grains, pastas, and spices, all perfectly labeled and ready for use. The ‘click’ of an airtight seal and the smooth glide of a wicker basket across a shelf are small but powerful sensory rewards for an organized life. It turns the chore of cooking into a curated experience, where every ingredient is easy to find and the aesthetic is as clean as a high-end gourmet shop. It’s not just about storage; it’s about creating a sense of peace in the heart of your home.
Essential Elements:
- Uniform glass or BPA-free plastic canisters
- Matching woven baskets for ‘loose’ items (chips, snacks)
- Tiered shelving for canned goods
- Custom labels (minimalist or handwritten style)
- Lazy Susans for oils and vinegars
How to make it
- Empty the entire pantry. Every. Single. Item. This is the ‘reset’ phase. Check expiration dates and toss anything that is no longer fresh. Group remaining items into categories like ‘baking,’ ‘snacks,’ ‘grains,’ and ‘dinner prep.’
- Decant dry goods like flour, sugar, pasta, and cereal into your uniform canisters. This not only looks better but also keeps food fresh for much longer by creating an airtight seal.
- Place your most-used items at eye level. Use tiered ‘stadium’ shelving for cans so you can see the labels at the back, preventing you from buying doubles of what you already have.
- Corral unsightly packaging into matching baskets. Use clip-on labels for these baskets so everyone in the family knows exactly where the granola bars or the potatoes belong.
- Utilize a Lazy Susan in the corners for taller bottles like olive oils and balsamic vinegars. This prevents the ‘forgotten bottle’ at the back of the shelf and keeps sticky drips contained to an easy-to-clean tray.
How to Renovate Seventies Ranch Exteriors for a Modern Aesthetic

Why we love this
There is a hidden beauty in the low-slung, horizontal lines of a seventies ranch that is just waiting to be modernised. We love the dramatic transformation that happens when you swap out dated beige brick for a crisp, creamy white or a bold, moody charcoal. The addition of vertical wood accents brings a warmth and ‘organic modern’ feel that perfectly balances the house’s original geometry. Walking up to a renovated ranch feels like discovering a hidden architectural gem—it’s the ultimate ‘glow up’ that honors the home’s history while feeling completely fresh, expensive, and relevant for today.
Essential Elements:
- High-quality masonry paint (like Romabio Lime Wash)
- Natural wood siding accents (Cedar or thermally modified ash)
- Modern, minimalist house numbers
- Black or bronze-finished exterior lighting fixtures
- Low-profile, architectural landscaping
How to make it
- Thoroughly clean the brick or siding using a solution of TSP and water to remove decades of oxidation and dirt. If painting brick, use a mineral-based paint that allows the brick to ‘breathe,’ preventing moisture from getting trapped inside.
- Select a high-contrast color palette. A warm white (like ‘Swiss Coffee’) for the body and a deep black (like ‘Iron Ore’) for the trim and window frames is a timeless, designer-approved combination for ranch homes.
- Add vertical interest. Install cedar ‘slat’ panels around the entryway or on a specific bump-out of the house. This breaks up the long horizontal lines of the ranch and adds a high-end, custom-built feel.
- Update the hardware. Swap out old, ornate ‘brass’ lights for sleek, oversized lanterns in a matte black finish. Replace dated house numbers with large, modern sans-serif digits installed with spacers for a floating effect.
- Refine the entryway. If the budget allows, replace the front door with a mid-century modern style door featuring glass lites. This invites natural light into the home and serves as the perfect focal point for the exterior.
How to Craft Rustic Birdhouses for a Charming Wildlife Haven
[IMAGE_10]
Why we love this
There is a whimsical, fairytale quality to a rustic birdhouse tucked away in a blooming garden. We love the way reclaimed wood and mossy details make these little structures look like they’ve always been a part of the landscape. The sound of chirping fledglings in the spring and the sight of colorful birds flitting to and fro adds a layer of ‘living art’ to your yard that no statue could ever provide. It’s a project that feels grounded and soulful, using tactile materials like cedar scraps and copper wire to create a cozy haven that invites nature right to your doorstep.
Essential Elements:
- Rough-sawn cedar or reclaimed fence pickets
- Corrugated tin or copper scrap for the roof
- Wood glue and galvanized finish nails
- Decorative ‘found’ items (twigs, moss, or old keys)
- Natural hemp twine for hanging
How to make it
- Cut your wood into six pieces: a base, two sides, a front, a back (peaked), and two roof panels. Use cedar because it is naturally rot-resistant and has a beautiful, earthy aroma that birds aren’t deterred by.
- Drill an entry hole in the front panel. The size of the hole is critical—1.5 inches is the ‘goldilocks’ size for bluebirds and tree swallows while keeping larger predators out. Do not add a perch; predators can use them to gain access to the nest.
- Assemble the walls and base using wood glue and finish nails. Ensure you leave a small 1/8-inch gap at the very top under the roof for ventilation and drill four small holes in the bottom corners for drainage.
- Attach the roof. For a designer look, cut a piece of corrugated tin or thin copper sheet and nail it over the wood roof. Over time, the copper will develop a stunning green patina that looks incredibly high-end and rustic.
- Finish with ‘organic’ decorations. Use hot glue to attach a small piece of preserved moss or a decorative twig under the entry hole. Hang the house 5-10 feet off the ground in a quiet spot facing an open area.
The Joy of an Elevated Home
Transforming your living space doesn’t require a professional crew or a mountain of cash; it simply requires the willingness to see the potential in the everyday. Whether it’s the quiet satisfaction of an organized pantry or the vibrant life of a new flower bed, these projects remind us that our homes are living, breathing extensions of ourselves. I hope these designer-inspired edits empower you to create a sanctuary that reflects your style and brings you peace every time you walk through the door. Happy DIYing!