
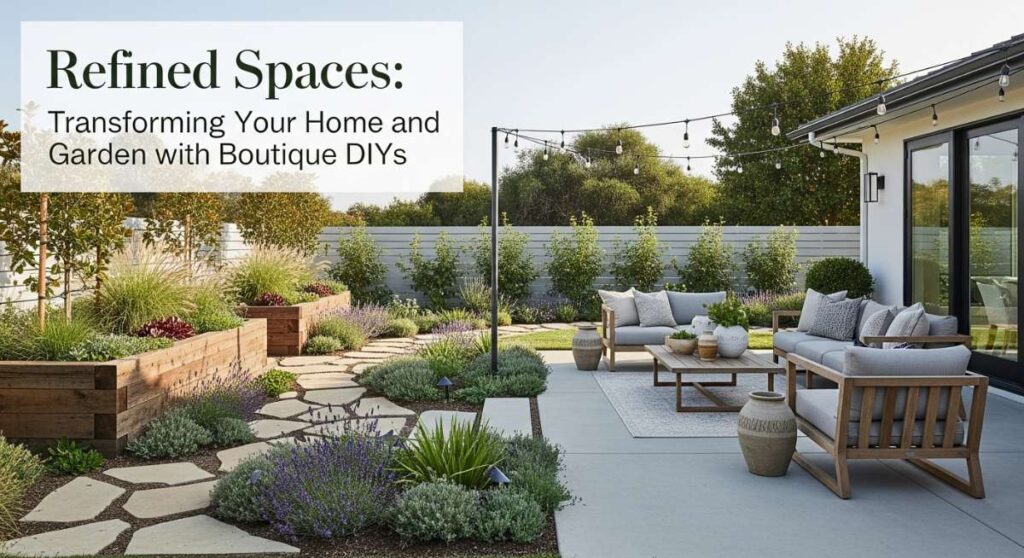
There is a profound, quiet magic in the act of turning a house into a home. It’s more than just choosing paint colors or rearranging furniture; it’s about the intentional creation of a sanctuary that mirrors your inner world. I remember the first time I really committed to a boutique DIY project—the sun was setting, my hands were dusted with garden soil, and for the first time, I felt a deep sense of belonging in the space I had built with my own two hands. We often wait for the ‘perfect time’ to renovate, but the truth is that beauty is something we can cultivate right now, one thoughtful project at a time.
In this guide, we are diving deep into the art of refined living. We aren’t just looking for quick fixes; we are focusing on elevated, boutique-inspired DIYs that bring a touch of luxury and soul to every corner of your property. From the textured crunch of a designer rock bed to the nostalgic neon glow of a Y2K-inspired retreat, these projects are designed to evoke emotion and provide a tactile sense of accomplishment. Let’s roll up our sleeves and transform the ordinary into the extraordinary.
How to Design Rock Flower Beds for Eternal Curb Appeal
Why we love this
There is something incredibly sophisticated about the juxtaposition of soft, emerald foliage against the rugged, cool-toned texture of river rocks or slate chips. These beds provide a permanent structure to your landscape that looks just as stunning in the frost of winter as it does under the golden summer sun. Every time you walk past, you’ll appreciate the clean lines and the way the stones catch the light after a fresh rain, releasing that earthy, petrichor scent that makes a garden feel like a living, breathing entity. It is a low-maintenance solution that exudes high-end, professional landscaping vibes without the recurring cost of mulch.
Essential Elements:
- Landscape fabric (heavy-duty)
- Galvanized steel or heavy plastic edging
- Assorted river rocks, lava rocks, or crushed slate
- Selection of drought-resistant perennials (like Lavender or Agave)
- Garden staples and a rubber mallet
How to make it
- Begin by marking the perimeter of your bed using a garden hose or spray paint to create fluid, organic curves that lead the eye toward your home’s entrance.
- Excavate the area to a depth of 3-4 inches, ensuring you remove all grass and weeds from the root level to prevent future growth.
- Install your edging along the perimeter; if using steel, ensure it is driven deep enough so only an inch is visible, providing a crisp, modern border.
- Lay down high-quality landscape fabric, overlapping the seams by at least 6 inches, and secure it firmly with garden staples every foot to prevent shifting.
- Cut ‘X’ shapes into the fabric where you wish to plant; dig your holes, enrich the soil with compost, and set your plants slightly higher than ground level to account for the rock depth.
- Pour your chosen stones over the fabric, starting from the center and working outward, maintaining a consistent depth of 2-3 inches for a lush, full appearance.
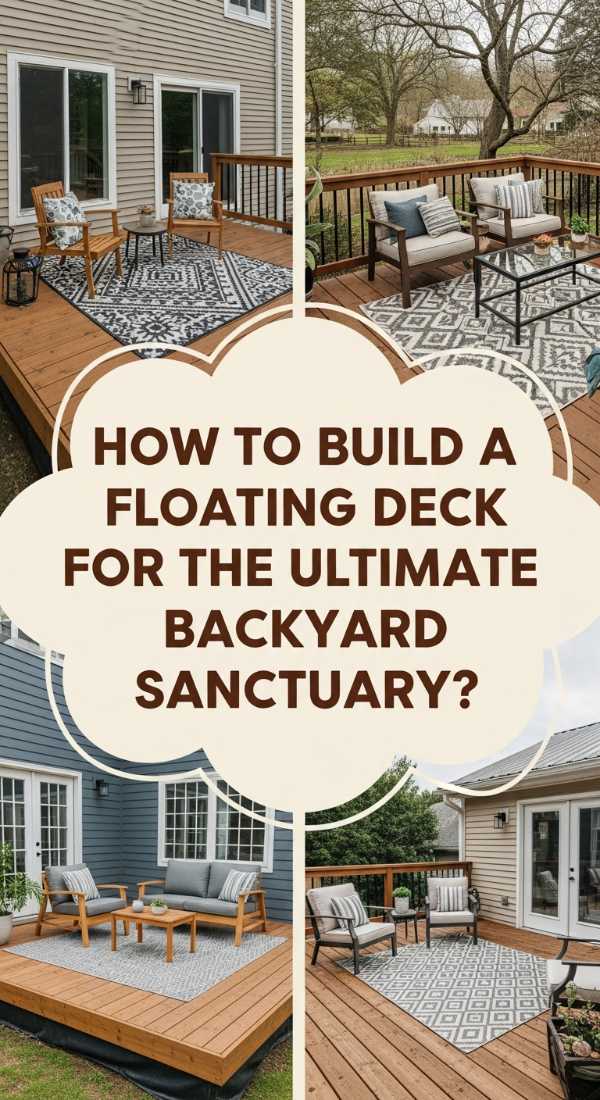
How to Build a Floating Deck for the Ultimate Backyard Sanctuary

Why we love this
A floating deck acts as a literal island of tranquility in your backyard, offering a dedicated space for morning coffee or sunset reflections. The scent of freshly cut cedar or pressure-treated pine fills the air, creating an immediate sensory connection to nature. As you step onto the boards, there is a satisfying, solid thud that speaks to the quality of your craftsmanship, and the low profile allows the deck to blend seamlessly into your garden rather than dominating it. It’s the perfect stage for plush outdoor rugs and flickering lanterns, turning a patch of grass into a high-end outdoor lounge.
Essential Elements:
- Pressure-treated 2×6 lumber for the frame
- Cedar or composite decking boards
- Pre-cast concrete deck blocks
- Level and chalk line
- Stainless steel deck screws
How to make it
- Level the ground where the deck will sit, removing sod and laying down a layer of gravel to ensure proper drainage and prevent wood rot over time.
- Position your concrete deck blocks in a grid pattern, usually spaced 4 feet apart, using a long straight-edge and a level to ensure every block is perfectly horizontal to the others.
- Construct the outer frame using 2×6 pressure-treated joists, squaring the corners with a framing square and securing them with heavy-duty lag screws.
- Install the interior joists every 16 inches on center; this spacing is critical to ensure the deck feels firm and ’boutique’ underfoot without any sagging.
- Lay your decking boards starting from the front edge, using spacers (or a carpenter’s pencil) to maintain a uniform 1/8-inch gap between boards for expansion and drainage.
- Fasten the boards with two screws at every joist intersection, ensuring the screw heads are slightly countersunk for a smooth, professional finish.
How to Create an Outdoor Play Area for Endless Childhood Magic

Why we love this
Designing a play space shouldn’t mean sacrificing the aesthetic of your garden; instead, it’s an opportunity to create a whimsical ‘secret garden’ for the little ones. Imagine the sound of wind chimes and giggles mingling as children explore a space filled with soft textures like cedar chips and smooth, sand-washed wood. This project is about creating a sensory-rich environment where the smell of pine and the feel of natural materials encourage open-ended, imaginative play. It becomes a beautiful focal point that looks like an intentional part of the landscape rather than an eyesore of bright plastic.
Essential Elements:
- Natural cedar playset or DIY timber frame
- Rubber mulch or engineered wood fiber (EWF)
- Timber border or landscape sleepers
- Sun sail or canvas canopy
- Chalkboard paint and weather-resistant plywood
How to make it
- Select a level area in partial shade and mark out a generous perimeter, leaving at least 6 feet of ‘fall zone’ space around any equipment.
- Install a border using 4×4 timber sleepers, securing them to the ground with rebar to create a deep ‘basin’ that will contain your safety surfacing.
- Lay a thick layer of professional-grade landscape fabric inside the border to prevent weeds from poking through the play media.
- Assemble your play structures—focusing on natural wood finishes—and ensure all bolts are recessed and sanded smooth to avoid any snags.
- Fill the basin with at least 9 inches of engineered wood fiber; this depth is the industry standard for impact absorption, providing a soft, springy landing for little feet.
- Add a custom element like a weather-proof chalkboard or a sensory herb garden at the perimeter to engage all the senses during playtime.
How to Style a Pool Bar for the Perfect Tropical Escape
Why we love this
There is an undeniable glamour in the poolside lifestyle, and a styled bar is the crown jewel of that experience. Imagine the clink of ice cubes against glass, the vibrant citrus aroma of freshly sliced limes, and the cool touch of a stone countertop against your skin on a humid afternoon. This space isn’t just about utility; it’s about evoking the feeling of a high-end Caribbean resort where time slows down. With the right styling, your pool bar becomes the social heartbeat of your home, draped in the atmosphere of eternal summer and effortless luxury.
Essential Elements:
- Pre-built bar structure or repurposed sideboard
- Outdoor-rated bar stools (wicker or teak)
- Stainless steel ice bucket and professional bar kit
- Overhead festoon lighting or solar tiki torches
- Weatherproof shelving for glassware
How to make it
- Position your bar in a shaded area near the pool, ensuring there is a stable, level surface such as a concrete pad or a well-placed stone patio.
- Apply a high-quality outdoor sealant or marine-grade varnish to all wood surfaces to protect against chlorine splashes and UV damage.
- Install a heavy-duty speed rail for frequently used spirits and juices, keeping the workspace organized and allowing for quick, professional-style service.
- Mount floating shelves behind the bar to display attractive, non-breakable melamine or acrylic glassware that mimics the look of real crystal.
- Incorporate greenery by placing potted palms or hibiscus around the base, creating a lush, tropical ‘walled-in’ feel that hides the bar’s structural legs.
- Set the mood with waterproof LED strip lighting under the bar lip, providing a soft, ambient glow that makes the space usable and inviting well into the night.
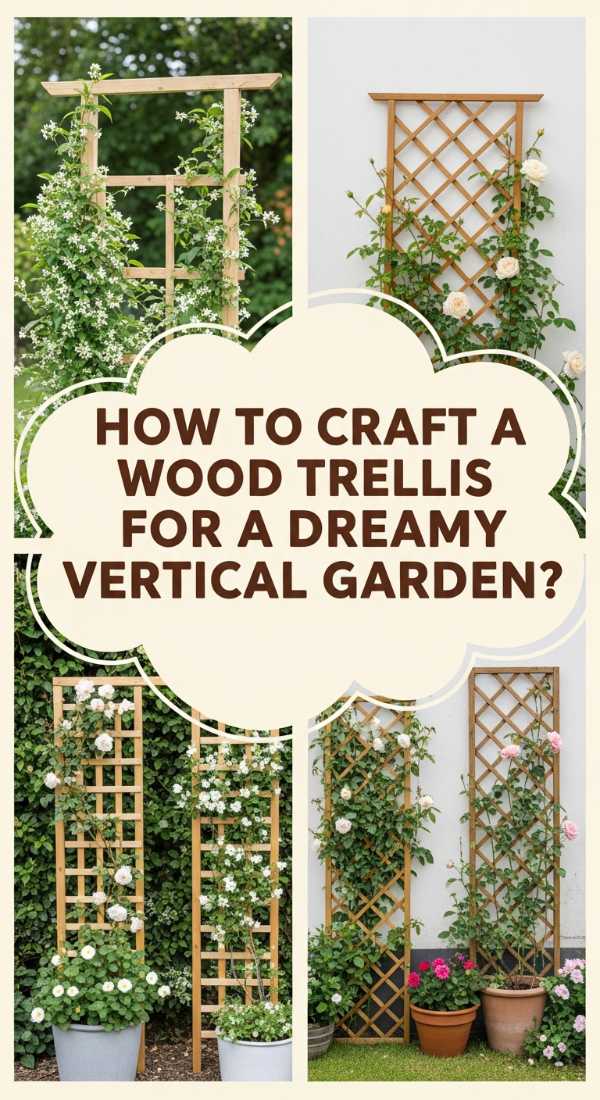
How to Craft a Wood Trellis for a Dreamy Vertical Garden

Why we love this
A trellis is more than a support structure; it is a living piece of art that brings height and architectural interest to a flat wall or fence. As climbing roses or jasmine begin to weave through the slats, the air becomes thick with perfume, and the visual weight of the wood adds a grounded, artisanal feel to the garden. There is something deeply romantic about watching a vine slowly claim the wood, creating a tapestry of green and floral hues that changes with the seasons. It transforms a blank exterior wall into a lush, vertical sanctuary that feels like an extension of the home’s interior design.
Essential Elements:
- 1×2 cedar or redwood lath strips
- Exterior wood glue and galvanized finish nails
- Wood stain or outdoor paint
- Wall spacers (to allow air circulation)
- Climbing plants (Clematis, Wisteria, or Star Jasmine)
How to make it
- Determine the desired height and width, then cut your vertical ‘support’ pieces from sturdier 2×2 lumber to act as the primary frame.
- Layout your horizontal lath strips on a flat surface, using a spacer block to ensure perfectly even gaps—usually 4 to 6 inches depending on the plant type.
- Apply a bead of exterior wood glue at every intersection before securing with a galvanized nail; this prevents the trellis from sagging under the weight of heavy vines.
- Stain the wood with a rich walnut or modern black finish, ensuring you coat all sides of the lath to protect against moisture trapped behind the foliage.
- Mount the trellis to your wall using 1-inch spacers; this gap is vital as it allows air to circulate, preventing mold on your siding and allowing the plant tendrils to wrap around the back.
- Plant your climbers at the base, gently weaving the initial shoots through the lower slats and securing them with soft garden twine to encourage upward growth.
How to Curate a Y2K Room for the Ultimate Nostalgic Vibe

Why we love this
Stepping into a Y2K-themed room is like a joyful time-travel experience, filled with the vibrant energy of the late 90s and early 2000s. It’s a sensory explosion of neon pinks, iridescent textures, and the smooth, futuristic feel of inflatable furniture and high-gloss plastics. The space feels playful and unpretentious, reminding us of a time when decor was about self-expression and ‘more is more.’ The glow of a lava lamp against a butterfly-decored wall creates a cozy, nostalgic hum that makes the room feel like a personalized sanctuary away from the stresses of the modern world.
Essential Elements:
- Beaded curtains and faux fur rugs
- Inflatable chairs or velvet bean bags
- Neon signs and multi-colored LED strips
- Inflatable or butterfly wall decals
- Discman or vintage-style translucent electronics
How to make it
- Choose a bold base color palette, such as baby blue and lavender, and apply a fresh coat of satin-finish paint to create a clean, bright canvas.
- Layer the floor with a high-pile faux fur rug in a contrasting color to provide that quintessential soft, ‘glam’ texture underfoot.
- Install perimeter LED lighting that can be switched to various neon hues, allowing you to change the ‘vibe’ of the room from electric blue to soft magenta.
- Curate a ‘media wall’ featuring vintage posters, CD jewel cases, and perhaps a small shelf for a translucent tech collection (like an old iMac or Gameboy).
- Incorporate holographic or iridescent accents through throw pillows and desk organizers to catch the light and add that ‘futuristic’ early-aughts shimmer.
- Hang a beaded curtain in the doorway to provide a tactile and auditory transition every time you enter your nostalgic retreat.
How to Remodel a Ranch Exterior for a Timeless Modern Look
Why we love this
Ranch-style homes have a classic, horizontal soul that is just waiting to be elevated with modern, high-contrast finishes. The transformation from a dated, faded exterior to a crisp, ‘Modern Ranch’ is visually stunning—think the smooth matte of black window frames against the creamy warmth of white siding. There is a satisfying weight to new, heavy-duty hardware and the clean, architectural scent of fresh paint and new wood accents. It’s a project that doesn’t just increase value; it completely changes the way you feel when you pull into your driveway at the end of the day.
Essential Elements:
- High-quality exterior paint (Matte or Eggshell)
- Natural wood corbels or shutters
- Modern black house numbers and lighting fixtures
- Power washer and high-grit sandpaper
- Caulk and premium painter’s tape
How to make it
- Thoroughly power wash the entire exterior to remove decades of dust and oxidation, allowing the surface to dry completely for at least 48 hours.
- Scrape away any peeling paint and sand rough spots on the trim to ensure the new coat adheres perfectly for a professional, streak-free finish.
- Apply a high-bond primer to any bare wood or masonry, followed by two coats of premium exterior paint using a sprayer for the body and a brush for the trim.
- Replace dated, ornate light fixtures with oversized, matte black lanterns or sleek ‘up-down’ sconces to emphasize the home’s height.
- Install horizontal wood slat shutters or a cedar-clad garage door to introduce organic warmth that breaks up the monochromatic paint scheme.
- Finish the look with large-scale, modern house numbers in a bold font, mounting them with spacers to create a subtle shadow effect against the siding.
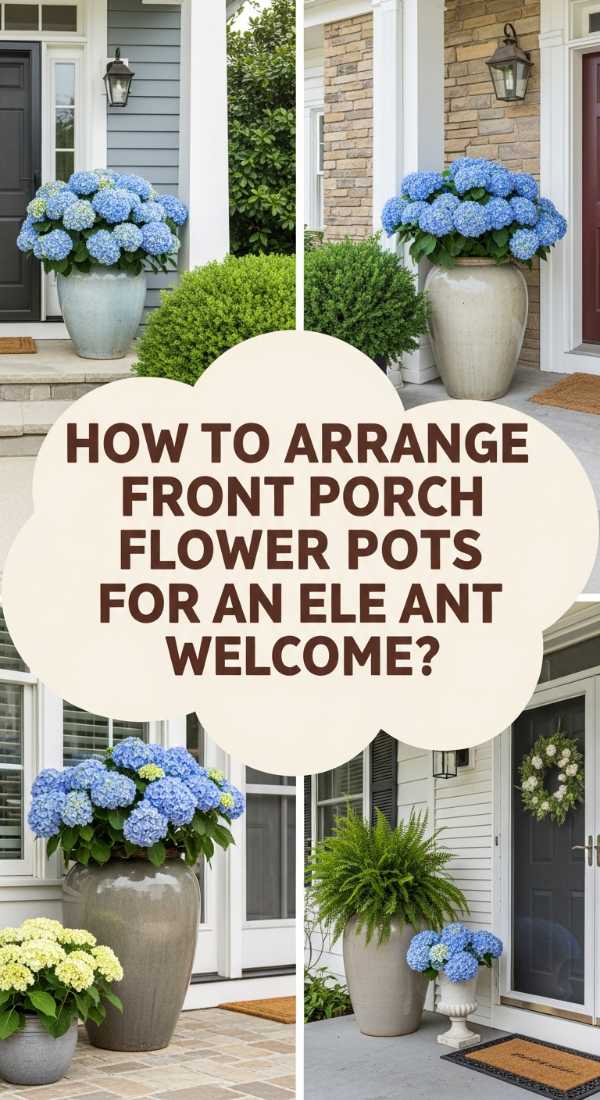
How to Arrange Front Porch Flower Pots for an Elegant Welcome
Why we love this
Your front porch is the ‘handshake’ of your home, and perfectly curated flower pots offer a greeting that is both lush and sophisticated. The scent of blooming geraniums mixed with the damp earth of a freshly watered pot creates an immediate sense of home. We love the rhythmic balance of the ‘Thriller, Filler, and Spiller’ technique, which provides a multi-dimensional explosion of color and texture. Touching the velvety leaves of a Dusty Miller or seeing the vibrant trailing vines of Sweet Potato Vine spill over the ceramic edge is a daily reminder of the beauty in the details.
Essential Elements:
- Large, high-quality ceramic or stone planters
- Potting mix with slow-release fertilizer
- ‘Thrillers’ (Dracaena, Canna Lily, or Grasses)
- ‘Fillers’ (Petunias, Begonias, or Lantana)
- ‘Spillers’ (English Ivy, Creeping Jenny, or Dichondra)
How to make it
- Select pots of varying heights but in a cohesive color family to create visual interest without looking cluttered.
- Ensure each pot has a large drainage hole; cover the hole with a coffee filter or a piece of screen to keep the soil in while letting water out.
- Fill the pots with a premium, lightweight potting mix, leaving about 2 inches of space at the top to prevent overflow when watering.
- Plant your ‘Thriller’—the tallest, most dramatic plant—right in the center (or toward the back if the pot will be against a wall).
- Surround the thriller with ‘Fillers’—mounding plants that provide bulk and color—ensuring you pack them tightly enough for an instant ‘full’ look.
- Finish by tucking ‘Spillers’ around the very edge of the pot, angling them slightly outward so they immediately begin their graceful cascade down the sides.
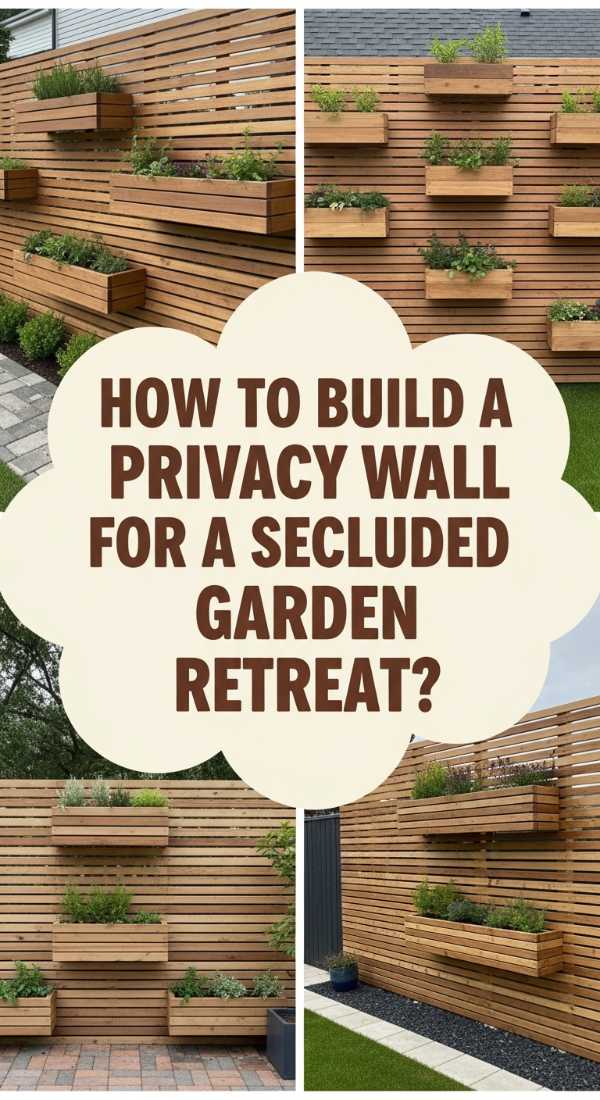
How to Build a Privacy Wall for a Secluded Garden Retreat

Why we love this
There is a unique sense of peace that comes from being ‘hidden’ in your own backyard, and a custom privacy wall provides that secluded, boutique-hotel vibe. The horizontal lines of the wood create a modern, rhythmic pattern that filters sunlight into beautiful, striped shadows across your patio. You can almost feel the air cool as the wall blocks the wind, creating a cozy microclimate for your favorite reading chair. It’s a structural element that defines the ‘outdoor room,’ making your garden feel like an intimate, private extension of your living room.
Essential Elements:
- 4×4 pressure-treated posts
- 1×4 or 1×6 cedar slats
- Post hole digger and Quikrete
- Stainless steel wood screws
- Level and 1/2-inch spacers
How to make it
- Dig post holes 24 inches deep and 6 feet apart; set the 4×4 posts in concrete, using a level to ensure they are perfectly vertical as the concrete cures.
- Once the posts are set, mark a level line across all posts to ensure your slats will be perfectly straight from top to bottom.
- Start at the top and screw your first cedar slat into place, ensuring it is perfectly level; this first board dictates the alignment of the entire wall.
- Use 1/2-inch wood spacers between each subsequent slat; this ‘gap’ is essential for wind resistance, allowing air to pass through so the wall doesn’t act like a sail.
- Work your way down to the desired height, checking for level every three boards to correct any minor shifts in the wood.
- Apply a high-quality UV-protectant stain to the cedar to maintain its warm, honey-toned color and prevent it from weathering to a dull grey.
How to Organize a Pantry for the Ultimate Functional Kitchen
[IMAGE_10]
Why we love this
A perfectly organized pantry is a balm for the soul in the midst of a busy week. Imagine opening the door to see a harmonious display of glass jars, the warm tones of wicker baskets, and the crisp clarity of custom labels. The smell of dried herbs and grains is contained in airtight seals, and the visual order makes meal prep feel like a curated experience rather than a chore. There is a tactile satisfaction in the weight of a glass canister and the smooth glide of a turntable, turning your kitchen into a space of high-functioning, boutique-level efficiency.
Essential Elements:
- Glass airtight canisters (various sizes)
- Uniform wicker or wire baskets
- Lazy Susans (turntables) for oils and sauces
- Custom labels or a label maker
- Tiered shelving for canned goods
How to make it
- Empty the entire pantry and wipe down the shelves; this is the ‘blank slate’ moment where you decide on the flow of your most-used items.
- Group like items together: baking supplies, snacks, grains, and canned goods. This ‘zoning’ is the secret to maintaining order long-term.
- Decant dry goods (flour, pasta, cereal) into glass canisters; this not only looks beautiful but also keeps food fresher and allows you to see exactly when you’re running low.
- Place oils, vinegars, and heavy jars on Lazy Susans in the corners or deep shelves to ensure nothing gets ‘lost’ in the back.
- Use uniform baskets for smaller, ‘messy’ items like chip bags or granola bars, keeping the visual noise to a minimum while remaining accessible.
- Apply clear, minimalist labels to every container at eye level; consistency in font and placement is what elevates the pantry from ‘neat’ to ’boutique.’
Conclusion
Elevating your home and garden is a journey of a thousand small, intentional steps. Whether you are building a sanctuary of privacy in your backyard or bringing a sense of nostalgic joy to an interior room, the key is to focus on quality materials and the sensory details that make a space feel truly lived-in. These boutique DIY projects are more than just home improvements—they are investments in your daily happiness and the soul of your home. Take your time, enjoy the process, and watch as your refined spaces transform your life.