

The Easiest Viral Food Board You’ll Ever Make (And Everyone Will Love)
There is something truly magical about a table filled with laughter, flickering candles, and a food board so stunning it stops the scroll. We’ve all seen those viral platters that look like works of art, but let’s be honest—sometimes they feel impossible to recreate. I wanted to create a guide that brings that Pinterest-perfect aesthetic into your kitchen without the stress, focusing on the comfort foods we actually crave. This isn’t just about food; it’s about the memories made when everyone reaches for their favorite bite at the same time.
The secret to a viral-worthy food board isn’t found in expensive gadgets, but in the textures, colors, and smells that invite people in. Imagine the crackle of golden potatoes, the rich aroma of seared steak, and the sweet promise of chocolate cake all nestled together. In this guide, I’m breaking down ten essential components that will turn your next gathering into a legendary event. Let’s dive into the art of the ultimate food board that is as delicious as it is beautiful.
How to sear juicy steak?

Why we love this
There is nothing quite like the primal, savory aroma of a steak hitting a ripping-hot cast iron skillet. The crust—that deep, mahogany Maillard reaction—provides a satisfying crunch that yields to a buttery, melt-in-your-mouth center. When sliced thin for a board, the juices pool slightly, mingling with sea salt and fresh herbs to create a sensory experience that feels incredibly luxurious yet comforting. It is the undisputed star of any savory platter, offering a rich, umami depth that keeps everyone coming back for just one more sliver.
Ingredients
- 1.5 lb Ribeye or New York Strip (1.5 inches thick)
- 2 tbsp high-smoke point oil (avocado or grapeseed)
- 3 tbsp unsalted butter
- 4 cloves garlic, smashed
- Fresh rosemary and thyme
- Coarse kosher salt and cracked black pepper
How to make it
- Remove the steak from the refrigerator at least 45 minutes before cooking to bring it to room temperature; this ensures even cooking throughout the meat.
- Pat the steak extremely dry with paper towels; moisture is the enemy of a good sear, so ensure every surface is bone-dry.
- Season aggressively with salt and pepper on all sides, including the edges, pressing the seasoning into the grain of the meat.
- Heat a heavy cast-iron skillet over high heat until it begins to smoke slightly, then add the oil, swirling to coat the bottom of the pan evenly.
- Carefully lay the steak away from you into the pan and sear for 3-4 minutes without moving it, allowing a thick, dark crust to form.
- Flip the steak and immediately add the butter, garlic, and herbs to the pan, tilting the skillet so the melting butter pools with the aromatics.
- Using a large spoon, continuously baste the steak with the foaming herb butter for another 3-4 minutes until the internal temperature reaches 130°F for medium-rare.
- Transfer the steak to a wooden cutting board and let it rest for a full 10 minutes to allow the juices to redistribute before slicing against the grain.
How to bake crunchy potatoes?

Why we love this
A potato that is truly crunchy on the outside and cloud-like on the inside is a culinary masterpiece that appeals to every palate. The golden, craggy edges provide a rhythmic snap with every bite, while the interior remains fluffy and infused with the essence of garlic and olive oil. As they roast, the kitchen fills with a warm, earthy scent that signals ultimate comfort, making these the perfect structural element for your board. They act as the ideal vessel for dipping or simply enjoying as the ultimate salty, crispy snack that disappears in minutes.
Ingredients
- 2 lbs Yukon Gold potatoes, peeled and cubed
- 1/4 cup extra virgin olive oil
- 1 tsp baking soda
- 1 tsp garlic powder
- 1 tsp dried oregano
- Flaky sea salt
How to make it
- Preheat your oven to 450°F (230°C) and place a large rimmed baking sheet inside to get it hot before the potatoes even touch it.
- Boil a large pot of water with a generous amount of salt and the baking soda; the soda breaks down the potato’s starch, creating more surface area for crunch.
- Add the potato cubes and simmer for about 10 minutes until the outsides are softened but the centers are still firm.
- Drain the potatoes and let them steam dry in the colander for 2 minutes, then shake them vigorously to roughen up the edges into a starchy mash.
- In a bowl, toss the roughened potatoes with olive oil, garlic powder, and oregano until every nook and cranny is coated.
- Carefully spread the potatoes onto the preheated baking sheet in a single layer, ensuring they aren’t crowded, and roast for 20 minutes.
- Flip the potatoes with a metal spatula and continue roasting for another 15-20 minutes until they are deep golden brown and audibly crunchy.
How to cook perfect chicken?

Why we love this
Perfectly cooked chicken is often overlooked, but when done right, it is a revelation of succulence and subtle herbal notes. The skin should be paper-thin and crisp, protecting the tender, steaming meat inside that releases a savory perfume of lemon and thyme. It provides a lighter protein option for your board that balances the heavier meats, offering a clean, satisfying flavor profile that pairs beautifully with fresh vegetables. When you pull a piece apart, the steam should rise, revealing meat that is glistening and remarkably juicy, never dry or stringy.
Ingredients
- 4 boneless, skin-on chicken breasts
- 2 tbsp olive oil
- 1 lemon, sliced
- 4 sprigs fresh thyme
- Salt and pepper to taste
How to make it
- Preheat your oven to 400°F and ensure the chicken breasts are even in thickness by lightly pounding the thicker ends if necessary.
- Season the chicken generously on both sides with salt and pepper, making sure the skin side is particularly well-seasoned.
- Heat olive oil in an oven-safe skillet over medium-high heat until shimmering, then place the chicken skin-side down.
- Press down on the chicken with a weight or another heavy pan for 5 minutes to ensure maximum skin contact and a glass-like crispiness.
- Flip the chicken over, tuck the lemon slices and thyme sprigs around the pieces, and immediately transfer the whole skillet to the oven.
- Roast for 10-12 minutes or until the internal temperature hits exactly 160°F (it will rise to 165°F while resting).
- Remove from the oven and let the chicken rest in the pan for 5 minutes, allowing the lemon-infused juices to soak back into the meat.
How to grill smoky burgers?

Why we love this
There is a specific nostalgia tied to the scent of charcoal and sizzling beef that instantly makes a gathering feel like a celebration. These smoky burgers boast a charred, slightly sweet exterior from the fire, containing a heart of rich, savory fat that drips with flavor. The texture is a contrast between the loose, tender grind of the meat and the crispness of the toasted bun, creating a handheld delight that is messy in the best way. Including mini versions or “sliders” on your board adds a fun, interactive element that appeals to the child in everyone.
Ingredients
- 1.5 lbs ground beef (80/20 fat ratio)
- 1 tbsp Worcestershire sauce
- Smoked paprika
- Brioche slider buns
- Sharp cheddar cheese slices
How to make it
- Prepare your grill for high-heat direct grilling, ensuring the grates are scrubbed clean and lightly oiled to prevent sticking.
- In a cold bowl, gently mix the ground beef with Worcestershire sauce and a pinch of smoked paprika, being careful not to overwork the meat.
- Form the beef into small, 3-ounce patties that are slightly wider than your buns, making a small indentation in the center with your thumb to prevent bulging.
- Season the outside of the patties liberally with salt and pepper just before they hit the grill to maintain the meat’s texture.
- Place the patties on the hottest part of the grill and sear for 3 minutes until a dark, smoky crust forms; do not press down on them with a spatula.
- Flip the burgers and immediately top with cheddar cheese, closing the grill lid for 1-2 minutes to allow the cheese to drape over the sides.
- Toast the brioche buns on the edge of the grill for 30 seconds until golden and fragrant before assembling.
How to make creamy pasta?

Why we love this
Creamy pasta is the ultimate comfort food, offering a silky, decadent texture that coats the palate in a warm embrace of cheese and garlic. The sight of long, glossy strands or perfectly coated shapes nestled in a bowl on your board provides a visual anchor that promises satiety and warmth. Its aroma is a heady mix of nutty parmesan and sweet cream, creating a sophisticated yet approachable dish that everyone finds irresistible. It serves as a fantastic base that complements the grilled meats and roasted vegetables on the platter, adding a soft, luxurious mouthfeel to the spread.
Ingredients
- 12 oz fettuccine or penne
- 1 cup heavy cream
- 1/2 cup freshly grated Parmesan cheese
- 2 cloves garlic, minced
- 2 tbsp butter
- Fresh parsley, chopped
How to make it
- Boil a large pot of water and add enough salt so that it tastes like the sea; this is your only chance to season the pasta itself.
- Cook the pasta until it is just under “al dente,” as it will finish cooking in the sauce and absorb those flavors.
- Before draining, reserve at least 1 cup of the starchy pasta water—this is the secret ingredient for a smooth, emulsified sauce.
- In a large skillet over medium heat, melt the butter and sauté the minced garlic for about 60 seconds until fragrant but not browned.
- Pour in the heavy cream and bring to a gentle simmer, letting it reduce slightly for about 3 minutes until it begins to thicken.
- Whisk in the Parmesan cheese slowly, followed by half a cup of the reserved pasta water, stirring until the sauce is glossy and cohesive.
- Toss the pasta directly into the sauce, stirring constantly over low heat until the sauce clings to every strand, adding more pasta water if it looks too thick.
How to roast midwest corn?

Why we love this
Roasting corn brings out a concentrated, candy-like sweetness that you simply cannot achieve through boiling. Each kernel becomes a tiny explosion of juice, with the occasional charred spot providing a smoky bitterness that balances the natural sugars perfectly. The bright yellow hue adds a vibrant pop of color to your food board, making the whole presentation look fresh and seasonal. Smothered in butter and salt, it is a rustic, finger-licking addition that feels like a summer afternoon in the Midwest, regardless of the time of year.
Ingredients
- 6 ears of fresh sweet corn, husks removed
- 4 tbsp melted butter
- 1 tsp chili powder
- Fresh lime wedges
- Coarse sea salt
How to make it
- Preheat your oven to 425°F or prepare a grill for medium-high heat if you prefer a more pronounced smoky flavor.
- Brush each ear of corn generously with melted butter, ensuring that the butter gets into the crevices between the kernels.
- Sprinkle the corn with salt and a light dusting of chili powder for a hint of warmth and color.
- Place the corn directly on the oven rack (with a tray below to catch drips) or on the grill grates.
- Roast for 20-25 minutes, turning every 5 minutes, until the kernels are tender and you see golden-brown toasted spots all over.
- Remove from heat and immediately squeeze fresh lime juice over the hot corn to brighten the flavors.
- Serve whole or cut into smaller “ribs” to make them easier for guests to grab and enjoy from the board.
How to bake chocolate cake?

Why we love this
Every great food board needs a sweet finale, and a rich chocolate cake is the ultimate crowd-pleaser. This isn’t just any cake; it’s a moist, dark, and deeply aromatic masterpiece with a crumb so tender it almost dissolves on the tongue. The scent of high-quality cocoa blooming in the oven creates an atmosphere of pure indulgence that draws guests in from across the room. When served in small, decadent squares, it provides the perfect chocolatey punch to end the savory feast, leaving everyone with a lingering sense of satisfaction.
Ingredients
- 1.5 cups all-purpose flour
- 1 cup unsweetened cocoa powder
- 1.5 tsp baking powder
- 2 cups sugar
- 2 large eggs
- 1 cup whole milk
- 1/2 cup vegetable oil
- 1 cup boiling water
How to make it
- Preheat your oven to 350°F (175°C) and grease a 9×13 inch baking pan thoroughly to ensure easy removal.
- In a large bowl, whisk together the flour, cocoa powder, baking powder, and sugar until there are no large lumps.
- Add the eggs, milk, and oil to the dry ingredients and beat on medium speed for about 2 minutes until the batter is smooth and thick.
- Stir in the boiling water by hand; the batter will be very thin, but this is the secret to a moist, fudgy texture.
- Pour the batter into the prepared pan and bake for 30-35 minutes, or until a toothpick inserted into the center comes out clean.
- Allow the cake to cool completely in the pan before slicing into small, bite-sized squares perfect for a finger-food board.
- Dust with powdered sugar or top with a dollop of ganache for an extra layer of visual and flavorful richness.
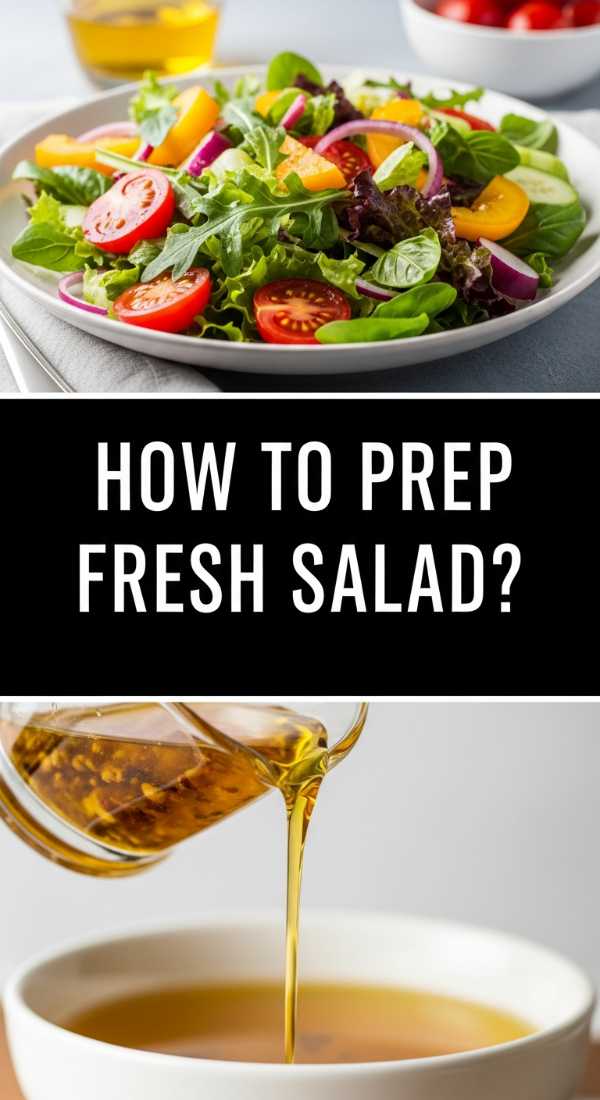
How to prep fresh salad?
Why we love this
A fresh salad is the essential “reset” button for your palate, providing a crisp, acidic crunch that cuts through the richness of the meats and pasta. The vibrant greens, jewel-toned radishes, and bright vinaigrette offer a visual freshness that makes the entire board feel balanced and healthy. There is a delightful coolness to the leaves that contrasts beautifully with the warm elements of the platter, creating a dynamic eating experience. It’s the breath of fresh air that keeps the meal from feeling too heavy, ensuring guests can keep grazing for hours.
Ingredients
- 5 oz mixed baby greens
- 1 cucumber, thinly sliced
- 1/2 red onion, shaved
- 1/4 cup toasted sunflower seeds
- Vinaigrette: 3 parts olive oil, 1 part apple cider vinegar, 1 tsp Dijon mustard
How to make it
- Wash your greens in ice-cold water and use a salad spinner to get them completely dry; wet leaves will make the dressing slide off.
- Place the dry greens in a large bowl and chill them in the refrigerator for 15 minutes to maximize their crispness.
- Prepare the vinaigrette by whisking the mustard and vinegar together, then slowly drizzling in the oil while whisking constantly to create a thick emulsion.
- Layer the cucumber and red onion on top of the greens, but do not toss them yet to prevent the vegetables from bruising.
- Just before serving, drizzle the dressing around the edges of the bowl and gently fold the salad together using clean hands or tongs.
- Top with the toasted sunflower seeds at the very last second to ensure they retain their crunch.
- Arrange the salad in small, individual cups or a low bowl nestled directly onto the board for easy access.
How to fry crispy tacos?

Why we love this
The sound of a fresh taco shell shattering into a million crispy shards is one of life’s simplest joys. These tacos bring a rustic, golden texture to the board, with shells that are flash-fried to perfection, carrying a light corn aroma and a satisfying saltiness. Inside, the fillings stay warm and protected, creating a hidden pocket of flavor that surprises the senses. They add a fun, casual energy to the spread, encouraging guests to pick them up and dive in, making the dining experience interactive and unpretentious.
Ingredients
- 12 small corn tortillas
- 1 lb seasoned ground beef or shredded chicken
- Vegetable oil for frying
- Shredded lettuce and Monterey Jack cheese
- Toothpicks
How to make it
- Warm the tortillas in the microwave for 20 seconds so they are pliable and don’t crack when folded.
- Fill each tortilla with a small amount of meat and cheese, then fold it in half and secure the top with a toothpick if necessary.
- Heat about 1/2 inch of oil in a heavy skillet over medium-high heat until it reaches 350°F (use a piece of tortilla to test; it should sizzle immediately).
- Carefully place 2-3 tacos in the oil at a time, being careful not to overcrowd the pan which would drop the temperature.
- Fry for 2 minutes on the first side until the shell is stiff and golden, then flip and fry for another 90 seconds.
- Drain the tacos upright on a wire rack or paper towels to ensure they stay crispy and don’t become soggy from trapped steam.
- Remove toothpicks and tuck in fresh lettuce before placing them in a row on your board for a stunning visual effect.
How to stew savory beef?

Why we love this
Savory stewed beef is the soul of a food board, offering deep, complex flavors that have been developed over hours of patient cooking. The meat becomes so tender that it falls apart at the mere suggestion of a fork, bathed in a thick, glossy gravy that tastes of red wine, thyme, and roasted vegetables. Its scent is heady and intoxicating, filling the room with a sense of home and hearth. Serving a small pot of this on your board provides a warm, dipping element that pairs perfectly with the crunchy potatoes or a slice of crusty bread.
Ingredients
- 2 lbs beef chuck roast, cut into 1-inch cubes
- 2 tbsp tomato paste
- 1 cup dry red wine
- 2 cups beef bone broth
- 3 carrots, sliced
- 2 stalks celery, chopped
How to make it
- Dry the beef cubes thoroughly and season with salt; sear them in batches in a heavy pot over high heat until they have a dark brown crust on all sides.
- Remove the beef and add the carrots and celery to the pot, scraping up the browned bits (the fond) from the bottom—this is where the flavor lives.
- Stir in the tomato paste and cook for 2 minutes until it turns a deep rust color, which removes the raw metallic taste.
- Deglaze the pan with the red wine, stirring constantly and letting it reduce by half to concentrate the acidity and sweetness.
- Return the beef to the pot and add the beef broth until the meat is just submerged.
- Cover with a tight-fitting lid and simmer on the lowest possible heat setting for 2.5 to 3 hours, or until the meat is fork-tender.
- If the sauce is too thin, simmer uncovered for the last 20 minutes to reduce it to a thick, coat-the-back-of-a-spoon consistency.
Bringing it All Together
Building this viral food board is more than just a recipe; it’s an invitation to slow down and enjoy the company of those you love. By combining these ten varied elements—from the crunch of the potatoes to the silkiness of the pasta and the decadence of the chocolate cake—you create a landscape of flavor that caters to every craving. Don’t worry about perfection; the beauty of a board like this lies in its abundance and the way it brings people together. So, grab your biggest platter, start cooking, and get ready to be the host everyone talks about for years to come!