

Elevate Your Hosting: 5 Simple Board Ideas That Went Viral
There is something truly magical about the way a shared meal can transform an ordinary evening into an unforgettable memory. When we gather around a table filled with vibrant colors and enticing aromas, the stress of the week seems to melt away, replaced by the warm hum of laughter and the gentle clinking of glasses. Hosting doesn’t have to be a high-pressure performance; instead, it should be an invitation into your world, a chance to nourish your favorite people with food that is as beautiful as it is delicious.
I remember the first time I set out a communal board rather than individual plates; the energy in the room shifted instantly. People leaned in, reached across one another, and engaged in that beautiful, tactile dance of sharing. It’s about creating a focal point that encourages connection and conversation. These viral board ideas are designed to do exactly that—using simple ingredients to create maximum impact, ensuring you spend less time in the kitchen and more time making memories with your guests.
How to make a refreshing summer salad

Why we love this
This salad is the ultimate celebration of the garden, offering a crunch that resonates with every bite and a freshness that feels like a cool breeze on a humid afternoon. The combination of crisp greens and zesty dressing creates a symphony of textures, from the snap of Persian cucumbers to the velvet smoothness of a perfectly ripe avocado. As you toss the leaves, the aroma of torn basil and lemon zest wafts up, instantly awakening the palate and promising a light yet deeply satisfying experience. It is the perfect palate cleanser or a vibrant centerpiece that brings a pop of emerald green to any wooden serving board.
Ingredients
- 2 heads of Little Gem lettuce
- 1 cup English cucumber, thinly sliced
- 1/2 cup radishes, mandoline-sliced
- 1/4 cup fresh basil leaves
- 1/2 cup crumbled feta cheese
- Dressing: 3 tbsp olive oil, 1 tbsp lemon juice, 1 tsp honey, salt, and cracked pepper
How to make it
- Begin by washing the Little Gem lettuce in ice-cold water to ensure maximum crispness; spin them completely dry using a salad spinner, as any residual moisture will prevent the dressing from adhering to the leaves.
- Prepare your dressing in a small glass jar by whisking together the extra virgin olive oil, fresh lemon juice, honey, and a generous pinch of sea salt until the mixture is fully emulsified and slightly thickened.
- Slice your cucumbers and radishes into paper-thin rounds using a mandoline or a very sharp chef’s knife; this creates a delicate mouthfeel that allows the vegetables to absorb the dressing more effectively.
- In a large chilled mixing bowl, tear the lettuce leaves by hand into bite-sized pieces and gently toss them with half of the dressing using clean hands to ensure every leaf is lightly coated but not weighed down.
- Layer the dressed greens onto a large platter, then artfully arrange the cucumber and radish slices on top, finishing with a sprinkle of feta and hand-torn basil for a rustic, elegant presentation.
How to grill perfect chicken skewers

Why we love this
There is nothing quite like the smoky, charred aroma of chicken skewers hitting a hot grill, signaling that the festivities have truly begun. Each bite offers a succulent, tender interior protected by a beautifully caramelized exterior that carries the essence of summer evenings spent outdoors. The contrast between the savory, herb-infused marinade and the slight bitterness of the grill marks creates a complex flavor profile that appeals to everyone at the table. These skewers aren’t just food; they are a tactile, fun way to eat that encourages guests to grab a stick and keep the conversation flowing.
Ingredients
- 1.5 lbs chicken thighs, cut into 1-inch cubes
- 3 tbsp olive oil
- 2 cloves garlic, minced
- 1 tbsp smoked paprika
- 1 tsp dried oregano
- Wooden or metal skewers
How to make it
- If using wooden skewers, submerge them in water for at least 30 minutes prior to grilling to prevent them from catching fire and splintering during the high-heat cooking process.
- In a large bowl, whisk together the olive oil, minced garlic, smoked paprika, oregano, salt, and pepper to create a thick, fragrant paste that will deeply season the meat.
- Pat the cubed chicken thighs dry with paper towels to remove excess moisture; this is a critical step to ensure you get a sear rather than steaming the meat.
- Thread the chicken onto the skewers, leaving about a quarter-inch of space between each piece to allow the hot air to circulate and cook the meat evenly on all sides.
- Preheat your grill to medium-high heat (about 400°F) and lightly oil the grates; place the skewers down and cook for 5-6 minutes per side, only turning once you see the meat easily release from the grates with a golden-brown crust.
How to cook fresh zucchini noodles
Why we love this
Zucchini noodles, or ‘zoodles’, bring a light and whimsical energy to the table, offering a vibrant alternative to traditional pasta that doesn’t leave you feeling heavy. When sautéed correctly, they retain a satisfying al dente snap, releasing a subtle, earthy sweetness that pairs beautifully with garlic and high-quality olive oil. The bright green ribbons look stunning when piled high on a platter, shimmering under the light and promising a meal that is as healthy as it is visually captivating. It’s a sensory delight to watch them soften just enough to twirl around a fork while remaining fresh and vibrant.
Ingredients
- 3 medium zucchinis
- 2 tbsp olive oil
- 3 cloves garlic, thinly sliced
- Red pepper flakes
- Freshly grated Parmesan cheese
- Lemon wedges
How to make it
- Use a spiralizer or a julienne peeler to create long, uniform ribbons of zucchini, being careful to stop once you reach the seedy core to avoid soggy noodles.
- Place the raw zucchini noodles in a colander and sprinkle lightly with salt; let them sit for 10 minutes to draw out excess moisture, then gently pat them dry with a clean kitchen towel.
- Heat a large skillet over medium heat and add the olive oil; once the oil is shimmering, add the sliced garlic and red pepper flakes, sautéing for only 30-60 seconds until the garlic is fragrant and pale gold.
- Increase the heat slightly and add the zucchini noodles to the pan, tossing them quickly with tongs for no more than 2 to 3 minutes; you want them heated through and coated in oil but still firm to the touch.
- Immediately remove from the heat to prevent overcooking and serve on a warmed platter with a heavy dusting of Parmesan and a bright squeeze of lemon to cut through the richness of the oil.
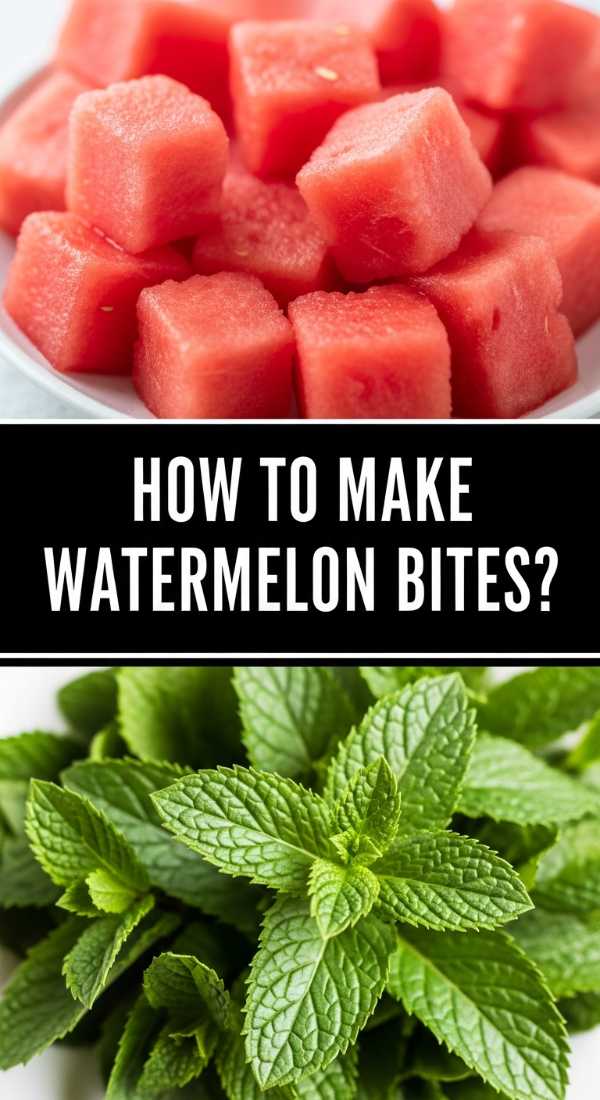
How to make juicy watermelon bites

Why we love this
Watermelon bites are the ultimate refreshment, offering an explosion of sweet juice that is instantly balanced by a touch of salt and the cooling sensation of fresh mint. The texture is a delightful journey—the grainy, icy crunch of the melon followed by the creamy, tangy crumble of feta cheese. These bites look like little jewels scattered across a board, their deep ruby red contrasting against the bright white of the cheese and the emerald of the mint. It is the kind of dish that makes guests pause and smile, a perfect bite-sized summary of everything we love about warm-weather hosting.
Ingredients
- 1 small seedless watermelon
- 4 oz block of feta cheese
- 1/2 cup fresh mint leaves
- Balsamic glaze for drizzling
- Flaky sea salt
How to make it
- Cut the watermelon into uniform 1-inch cubes by first removing the rind and then slicing the flesh into a grid; try to keep the cubes as square as possible for a professional, architectural look.
- Chill the watermelon cubes in the refrigerator for at least one hour before serving; the colder the fruit, the more refreshing the contrast will be against the room-temperature cheese.
- Slice the feta cheese into smaller squares that are roughly half the size of the watermelon cubes, or crumble it into large, rustic chunks if you prefer a more organic appearance.
- Place a small piece of feta and a single small mint leaf on top of each watermelon cube, securing the stack with a bamboo toothpick for easy grabbing by your guests.
- Arrange the bites on a marble or slate board, and just before serving, apply a very light drizzle of balsamic glaze and a pinch of flaky sea salt to enhance the natural sugars of the fruit.
How to make zesty shrimp tacos

Why we love this
Shrimp tacos bring a festive, coastal vibe to your board, featuring plump, pink shrimp that are bursting with citrus and a hint of spice. The aroma of lime juice hitting the hot pan as the shrimp sear is absolutely intoxicating, drawing everyone into the kitchen with anticipation. The contrast between the warm, charred tortillas and the cool, crunchy slaw creates a multi-textured experience that is deeply satisfying and fun to eat. Each taco is a small, hand-held explosion of flavor that feels like a mini-vacation, making them a perennial favorite for any casual gathering.
Ingredients
- 1 lb large shrimp, peeled and deveined
- 2 tsp chili powder
- 1 tsp cumin
- Corn tortillas
- Shredded cabbage slaw
- Lime wedges and cilantro for garnish
How to make it
- In a medium bowl, toss the raw shrimp with chili powder, cumin, salt, and a splash of oil until each shrimp is vibrantly orange and thoroughly coated in spices.
- Heat a heavy cast-iron skillet over high heat until it is nearly smoking; add the shrimp in a single layer, ensuring they don’t overlap so they can develop a deep, caramelized crust.
- Sear the shrimp for about 90 seconds per side; look for the flesh to turn opaque and the edges to slightly curl, which indicates they are perfectly cooked and still juicy inside.
- Briefly char your corn tortillas directly over a low gas flame or in a dry pan for 30 seconds per side until they are pliable and smell toasted and nutty.
- Assemble the tacos by placing 3-4 shrimp on each tortilla, topping with a mound of crunchy lime-dressed cabbage slaw, and finishing with a flurry of fresh cilantro and a final squeeze of lime.
How to sear fresh herb salmon
Why we love this
Searing salmon with fresh herbs elevates a simple fillet into a gourmet masterpiece, offering a skin that is as crisp as parchment and flesh that remains buttery and tender. As the salmon cooks, the herbs release their essential oils, creating an aromatic crust that smells of thyme, rosemary, and the sea. The visual appeal of the vibrant pink fish topped with charred green herbs is undeniable, making it a sophisticated addition to any dinner board. It is a dish that feels indulgent and healthy at the same time, providing a rich, savory depth that lingers pleasantly on the palate.
Ingredients
- 2 large salmon fillets (skin-on)
- 2 tbsp unsalted butter
- 3 sprigs of fresh thyme and rosemary
- 2 cloves garlic, smashed
- Lemon slices
How to make it
- Remove the salmon from the refrigerator 20 minutes before cooking to bring it to room temperature; this ensures the fish cooks evenly from the edges to the center.
- Pat the skin side of the salmon extremely dry with paper towels and season generously with sea salt; moisture is the enemy of a crispy skin, so this step is vital.
- Heat a stainless steel or cast-iron pan over medium-high heat with a tablespoon of high-smoke-point oil; once the oil shimmers, place the salmon skin-side down and press gently with a spatula for 30 seconds to prevent curling.
- Cook undisturbed for 5-6 minutes until the skin is golden and crispy, then flip the fillets and immediately add the butter, smashed garlic, and fresh herb sprigs to the pan.
- Tilt the pan so the melting butter pools with the herbs and garlic, then use a large spoon to continuously baste the salmon with the hot, fragrant butter for another 2 minutes until the fish is medium-rare.
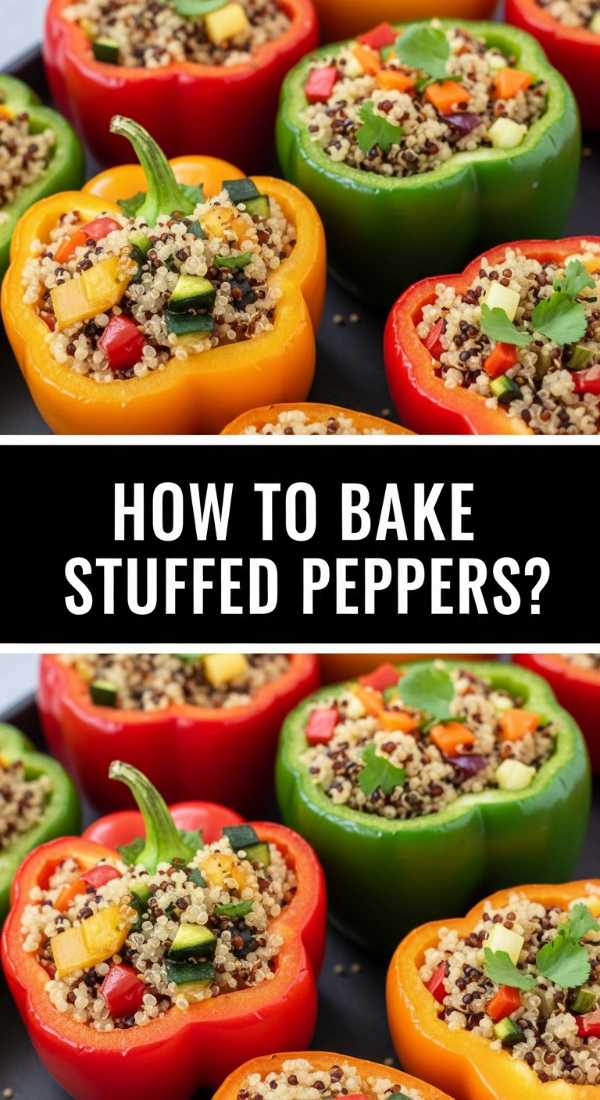
How to bake healthy stuffed peppers
Why we love this
Stuffed peppers are like little edible gift boxes, each one packed with savory fillings and topped with a layer of bubbly, melted cheese. The aroma of roasting bell peppers is sweet and comforting, filling the home with a sense of warmth and abundance. When you cut into them, the steam carries the scent of garlic, onions, and hearty grains, while the pepper itself becomes soft and silky under the heat of the oven. They are a colorful, crowd-pleasing option that looks stunning when served in a row, offering a balanced meal that is as pleasing to the eye as it is to the stomach.
Ingredients
- 4 large bell peppers (assorted colors)
- 2 cups cooked quinoa or brown rice
- 1 can black beans, rinsed
- 1 cup corn kernels
- 1 cup marinara sauce
- 1/2 cup shredded Monterey Jack cheese
How to make it
- Slice the tops off the bell peppers and carefully remove the seeds and white membranes, then place the peppers upright in a baking dish that fits them snugly to keep them from tipping over.
- In a large mixing bowl, combine the cooked grains, black beans, corn, and marinara sauce, stirring until the mixture is cohesive and well-seasoned with salt, pepper, and a dash of cumin.
- Spoon the filling into each pepper, packing it down firmly with the back of a spoon to ensure there are no air pockets and the pepper is filled to the very brim.
- Pour half a cup of water into the bottom of the baking dish and cover tightly with aluminum foil; bake at 375°F for 30 minutes to steam the peppers until they are tender.
- Remove the foil, top each pepper with a generous handful of cheese, and return to the oven for another 10-15 minutes until the cheese is melted, golden-brown, and bubbling.
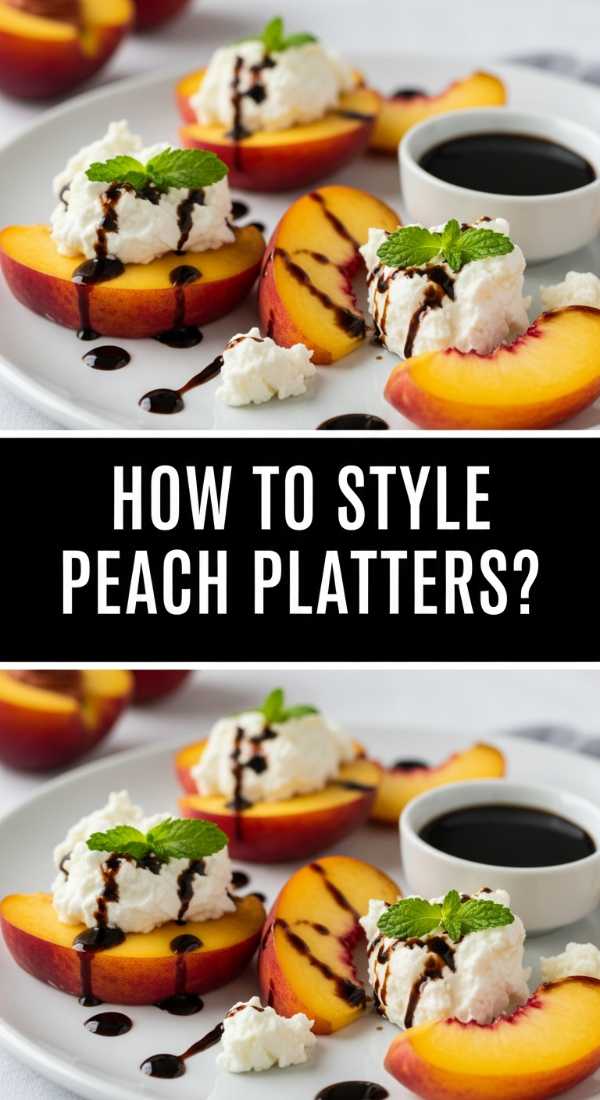
How to style a peach platter
Why we love this
A peach platter is the embodiment of late-summer decadence, featuring fruit so ripe that the juice practically glows under the kitchen lights. The fuzzy, velvet skin of the peaches provides a rustic texture that contrasts beautifully with the creamy, porcelain-white dollops of burrata cheese. As you drizzle golden honey over the top, the sweetness enhances the floral notes of the fruit, while a scattering of toasted nuts adds an earthy crunch. It is a dish that celebrates the peak of the season, turning simple ingredients into a sophisticated, painterly arrangement that guests will be hesitant to disturb because it looks like a work of art.
Ingredients
- 4 ripe peaches, sliced into wedges
- 2 balls of fresh burrata cheese
- 1/4 cup toasted pecans or walnuts
- 2 tbsp honey
- Fresh thyme leaves
How to make it
- Select peaches that are slightly soft to the touch and fragrant; slice them into thick, uniform wedges, keeping the skin on to provide structural integrity and a pop of color.
- Arrange the peach wedges in a circular or overlapping pattern on a large wooden or ceramic board, leaving a small space in the center for the cheese.
- Place the burrata balls in the center and use a sharp knife to gently break the outer shell, allowing the creamy stracciatella center to flow out slightly onto the peaches.
- Sprinkle the toasted nuts over the entire platter, ensuring even distribution so every guest gets a bit of crunch with their fruit and cheese.
- Finish the board by drizzling the honey in a thin, steady stream and scattering fresh thyme leaves over the top for a subtle, savory undertone that cuts through the sweetness.
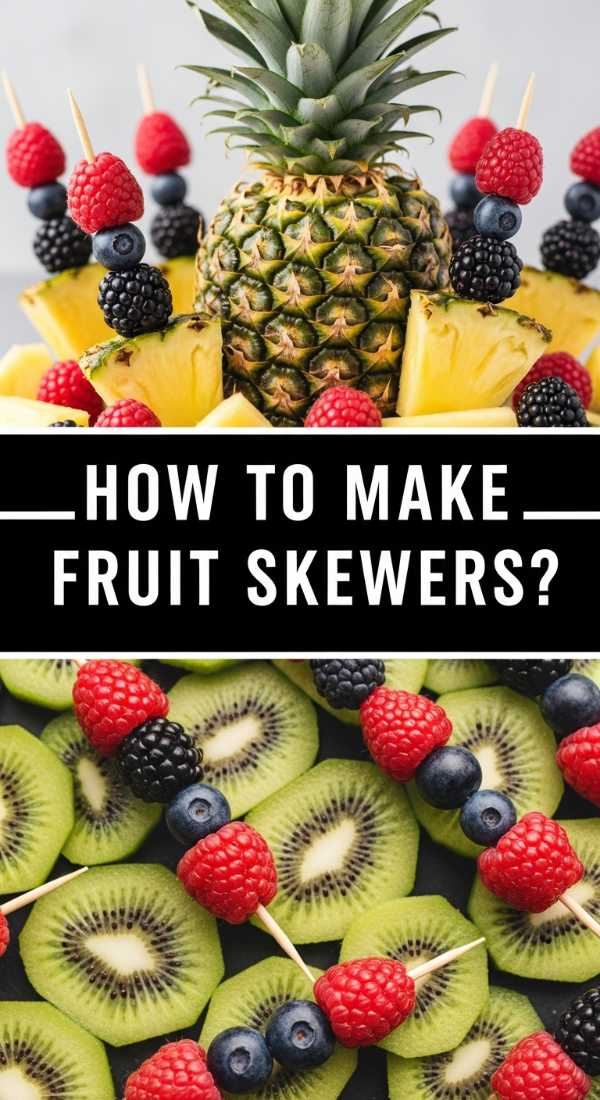
How to make chilled fruit skewers
Why we love this
Chilled fruit skewers are a vibrant rainbow on a plate, offering a playful and healthy way to satisfy a sweet tooth. The icy temperature makes the natural sugars in the berries and grapes pop, providing a refreshing burst of flavor that is perfect for a sunny afternoon. The tactile experience of sliding a piece of cold fruit off a wooden stick is nostalgic and fun, making it a hit with both children and adults. When served alongside a cloud-like yogurt dip, it becomes a light dessert or snack that feels special and thought-out, yet remains incredibly easy to assemble.
Ingredients
- 1 pint strawberries, hulled
- 1 cup pineapple chunks
- 1 cup green grapes
- 1 cup blueberries
- 1 cup Greek yogurt mixed with 1 tsp honey for dipping
How to make it
- Wash all the fruit thoroughly and pat dry; for the pineapple, ensure the chunks are cut into uniform sizes that match the diameter of the strawberries for a cohesive look.
- Thread the fruit onto wooden skewers in a consistent color pattern—red, orange, yellow, green, blue—to create a visually striking rainbow effect that draws the eye.
- Place the completed skewers on a tray and put them in the freezer for 15-20 minutes; you don’t want them frozen solid, just deeply chilled so they have a slight frost on the skin.
- While the fruit chills, whisk together the Greek yogurt and honey in a small serving bowl until smooth and glossy; you can add a drop of vanilla extract for extra depth.
- Serve the skewers immediately on a chilled platter with the yogurt dip in the center, encouraging guests to enjoy the contrast between the cold fruit and the creamy dip.
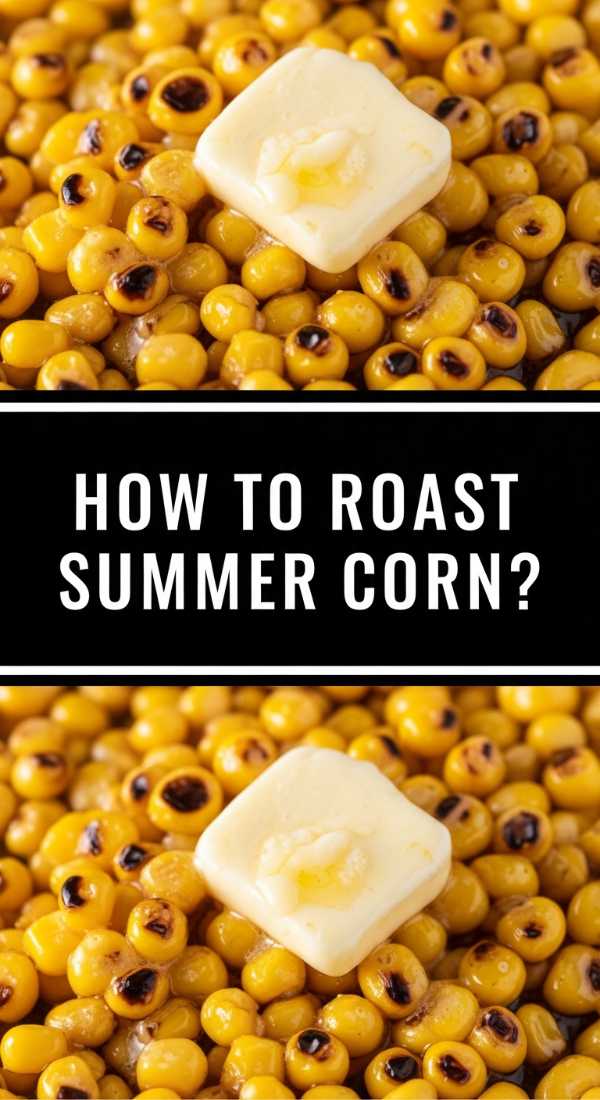
How to roast golden summer corn
[IMAGE_10]
Why we love this
Golden roasted corn is the quintessential taste of summer, offering a smoky sweetness that is amplified by the high heat of the oven or grill. The kernels become plump and juicy, while the tips develop a charred, caramelized crunch that provides a wonderful textural contrast. Smothered in melting herb butter, the corn becomes an indulgent treat that smells of toasted grain and fresh parsley. It is a humble ingredient transformed into a showstopper, its bright yellow hue acting as a beacon on any hosting board and inviting everyone to dig in and get a little messy for the sake of flavor.
Ingredients
- 4 ears of fresh corn, shucked
- 3 tbsp salted butter, softened
- 1 tbsp fresh parsley, chopped
- 1/2 tsp garlic powder
- Lime wedges for serving
How to make it
- Preheat your oven to 425°F or prepare your grill for medium-high direct heat; shuck the corn completely, removing all the silk threads which can burn and become bitter.
- In a small bowl, mash together the softened butter, chopped parsley, and garlic powder until you have a smooth, green-flecked herb butter that is easy to spread.
- Generously rub each ear of corn with the herb butter, ensuring every kernel is coated; this will help the corn brown and prevent it from drying out during the roasting process.
- Place the corn directly on the oven rack (with a tray underneath to catch drips) or on the grill grates; roast for 15-20 minutes, turning every 5 minutes to ensure even browning.
- The corn is done when the kernels are tender and you see golden-brown spots across the ears; remove from heat and serve immediately with an extra squeeze of lime for a zesty finish.
Creating Moments Around the Board
Hosting is less about the perfection of the plate and more about the warmth of the welcome. These boards are designed to be flexible, beautiful, and above all, easy to share. Whether you are serving a platter of seared salmon or a simple rainbow of fruit skewers, the goal is to create a space where your guests feel nourished and cared for. So, pour a drink, set the table, and let the food be the bridge to a wonderful evening of connection.
Frequently Asked Questions
How do I keep my boards looking fresh during a party?
To keep your boards looking their best, try to assemble temperature-sensitive items (like seafood or chilled fruit) just before guests arrive. You can also place small bowls of ice underneath platters of fruit or salad to maintain their crispness throughout the evening.
Can I prep these items in advance?
Absolutely! Most of the vegetables can be sliced and stored in airtight containers, and marinades for the chicken and shrimp can be made up to 24 hours in advance. However, wait to dress salads or slice peaches until the last minute to prevent wilting or browning.
What is the best board material for hosting?
Marble is excellent for keeping items like cheese and fruit cool, while wood provides a warm, rustic aesthetic that is perfect for grilled meats and roasted vegetables. Ensure any board you use is food-safe and easy to clean.