
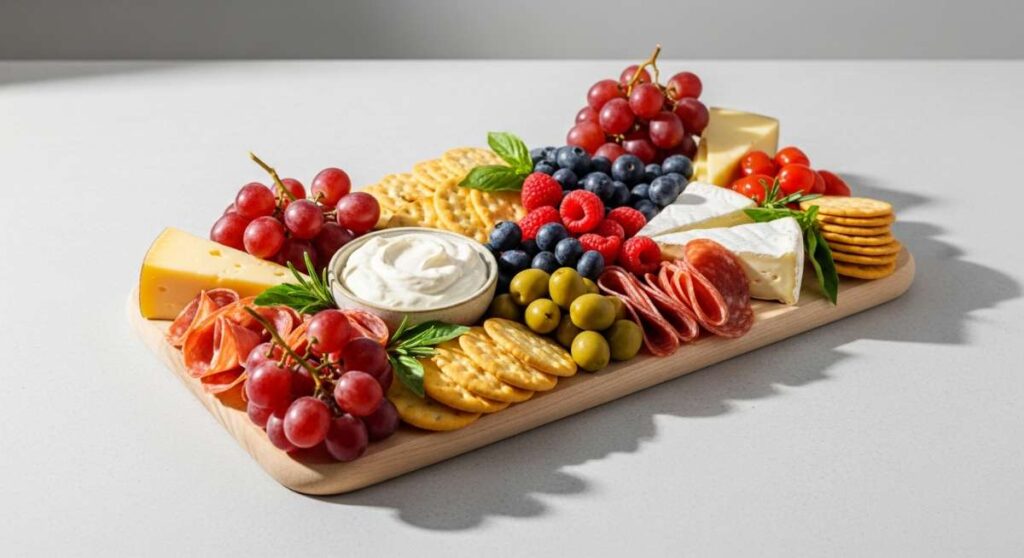
We have all been there—the frantic house-cleaning, the three-page grocery list, and the sudden realization that your guests are arriving in twenty minutes and you’re still in your bathrobe. Enter the ‘Viral Food Board,’ the ultimate secret weapon for the modern host who wants to serve a stunning, wholesome spread without the performative stress. There is something profoundly magical about a table overflowing with colors, textures, and aromas that invites people to lean in, linger, and graze at their own pace.
This isn’t just about throwing crackers on a tray; it’s about creating a curated experience that feels both indulgent and deeply nourishing. From the sizzle of a perfectly seared salmon to the comforting steam of a home-brewed tea, we are blending high-protein powerhouses with vibrant harvest greens. It’s a celebration of simple ingredients treated with respect, designed to spark conversation and satisfy every craving in the room. Let’s dive into the components that will make your next gathering legendary.
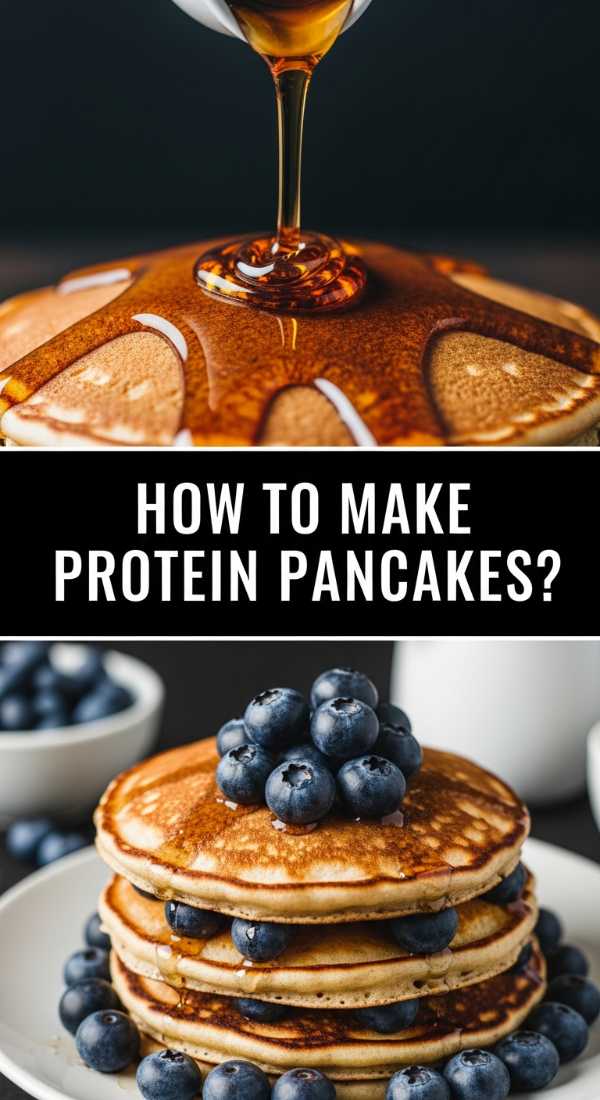
How to make protein pancakes?
Why we love this
There is nothing quite like the scent of warm vanilla and toasted oats wafting through the kitchen on a slow morning. These protein pancakes are the ultimate crowd-pleaser, offering a cloud-like texture that feels indulgent while providing the sustained energy needed for a busy day. Each bite is a delicate balance of sweetness and substance, especially when topped with a drizzle of amber maple syrup that pools in the golden-brown crevices of the stack. They bring a nostalgic comfort to the food board, reminding everyone of lazy weekend brunches while keeping the health-conscious guests smiling with every fluffy, protein-packed mouthful.
Ingredients
- 2 scoops vanilla protein powder
- 1 cup rolled oats (blended into flour)
- 1 ripe banana, mashed
- 2 large eggs
- 1/2 cup almond milk
- 1 tsp baking powder
- A pinch of cinnamon and sea salt
How to make it
- Start by blending your rolled oats in a high-speed blender until they reach a fine, flour-like consistency to ensure the fluffiest texture possible.
- In a large mixing bowl, whisk together the mashed banana, eggs, and almond milk until the mixture is smooth and pale yellow.
- Fold in the oat flour, protein powder, baking powder, cinnamon, and salt, stirring until just combined; do not overmix, as this can make the pancakes tough.
- Heat a non-stick griddle or large skillet over medium-low heat and lightly coat with coconut oil or grass-fed butter.
- Pour 1/4 cup of batter per pancake onto the hot surface, leaving space between each for easy flipping.
- Wait for bubbles to form on the surface and the edges to look set and matte (about 2-3 minutes).
- Flip carefully with a wide spatula and cook for another 60-90 seconds until the bottom is a beautiful golden brown and the center springs back when lightly pressed.
How to brew debloating tea?

Why we love this
After a night of indulgence, there is a distinct sense of relief that comes from wrapping your hands around a warm ceramic mug filled with this golden, aromatic elixir. The steam carries notes of spicy ginger and bright citrus, immediately signaling to your body that it is time to reset and soothe. The flavor is a sophisticated dance between the earthy warmth of turmeric and the refreshing zing of lemon, creating a sensory ritual that feels like a spa day in a cup. It’s the perfect digestive companion for a heavy food board, cutting through richness and leaving your palate—and your stomach—feeling light and refreshed.
Ingredients
- 2 cups filtered water
- 1 inch fresh ginger, sliced thin
- 1/2 inch fresh turmeric, sliced (or 1/2 tsp powder)
- 1/2 organic lemon, sliced
- 1 tsp raw honey or maple syrup
- A pinch of black pepper (to activate the turmeric)
How to make it
- Bring 2 cups of filtered water to a gentle boil in a small stainless steel saucepan over high heat.
- Once the water reaches a boil, reduce the heat to a low simmer to avoid scorching the delicate nutrients in the ginger and turmeric.
- Add the sliced ginger and turmeric directly to the water, allowing the roots to steep and release their natural oils for at least 5-7 minutes.
- Add the lemon slices during the last 2 minutes of simmering to extract the vitamin C without creating a bitter flavor from the rind.
- Turn off the heat and stir in a pinch of black pepper; this is a professional tip as piperine increases the absorption of curcumin significantly.
- Strain the tea into your favorite mug through a fine-mesh sieve to catch any fibrous bits.
- Stir in your sweetener of choice once the tea has cooled slightly to preserve the enzymes in the raw honey.
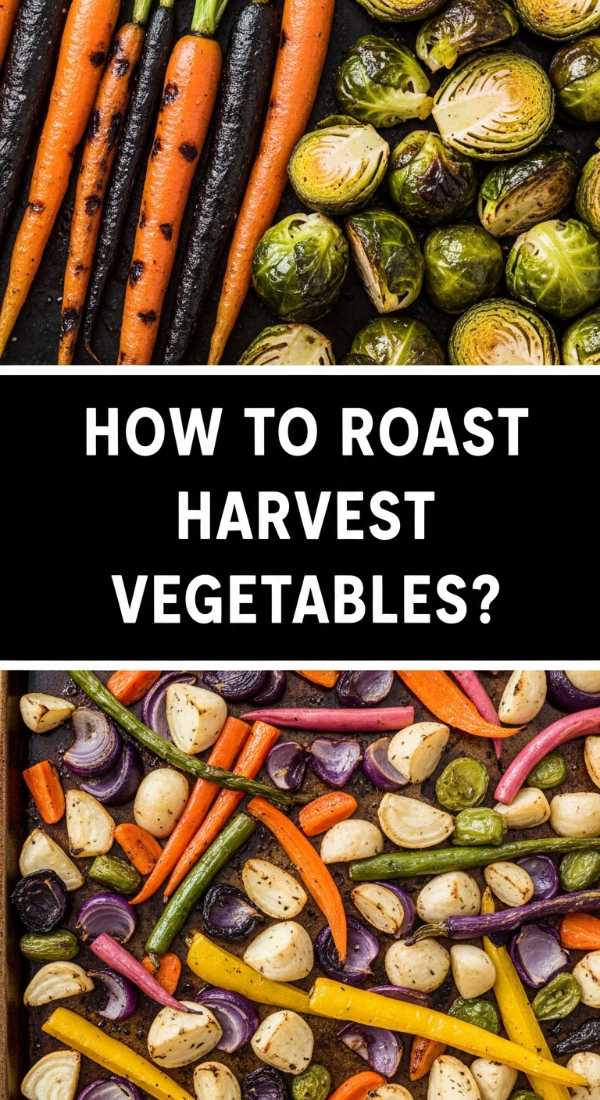
How to roast harvest vegetables?
Why we love this
Roasting vegetables transforms humble root crops into caramelized gems that anchor any food board with their deep, earthy sweetness. The visual appeal alone is stunning, with the deep purples of beets, the vibrant oranges of sweet potatoes, and the charred greens of Brussels sprouts creating a rustic masterpiece. As they cook, the natural sugars concentrate, resulting in a texture that is crisp on the exterior and buttery-soft on the inside. The aroma of roasted rosemary and garlic filling the house is enough to draw anyone to the table, making these vegetables the soulful, hearty heart of your entertaining spread.
Ingredients
- 2 cups butternut squash, cubed
- 1 lb Brussels sprouts, halved
- 3 large carrots, sliced into rounds
- 3 tbsp extra virgin olive oil
- 2 sprigs fresh rosemary
- 4 cloves garlic, smashed
- Sea salt and cracked black pepper to taste
How to make it
- Preheat your oven to 425°F (220°C); a high temperature is crucial for achieving that signature golden-brown caramelization without overcooking the interior.
- Ensure all your vegetables are chopped to a uniform size (about 1-inch cubes) so they cook at the same rate.
- Pat the vegetables completely dry with a clean kitchen towel; any moisture left on the surface will cause them to steam rather than roast.
- In a large bowl, toss the vegetables with olive oil, smashed garlic, rosemary leaves, salt, and pepper until every piece is glistening.
- Spread the vegetables onto a large, rimmed baking sheet in a single layer, ensuring they aren’t crowded; if they touch, they won’t get crispy edges.
- Roast for 25-30 minutes, using a metal spatula to toss them halfway through to ensure even browning on all sides.
- Look for dark charred edges and a fork-tender center as your visual cues for perfect doneness.
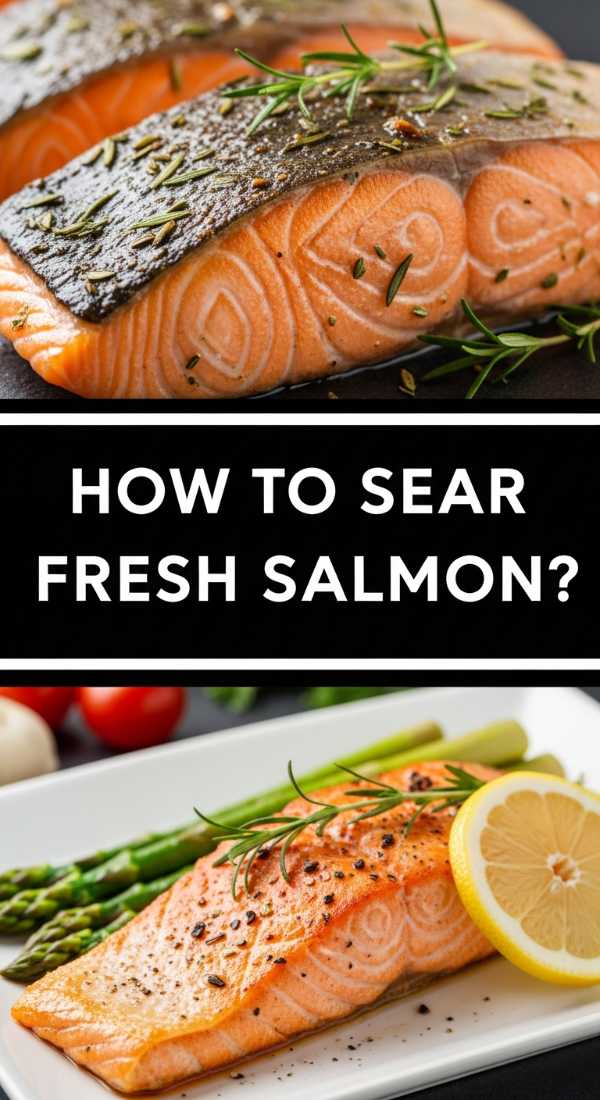
How to sear fresh salmon?
Why we love this
A perfectly seared piece of salmon is the height of culinary elegance, offering a sophisticated protein option that feels incredibly luxurious. The contrast between the crackling, salty skin and the succulent, pink flakes that melt in your mouth is a texture lover’s dream come true. It brings a vibrant pop of color to your board and a richness that pairs beautifully with lighter salads and zesty dips. When done right, the salmon retains its natural moisture and buttery flavor, elevated by a simple squeeze of lemon that cuts through the healthy fats and awakens the senses with every bite.
Ingredients
- 2 center-cut salmon fillets (6 oz each)
- 1 tbsp avocado oil (high smoke point)
- 2 tbsp unsalted butter
- 1 lemon, sliced
- Flaky sea salt and black pepper
- Fresh dill for garnish
How to make it
- Remove the salmon from the refrigerator 15 minutes before cooking to bring it to room temperature; this ensures the center cooks evenly.
- Pat the skin side of the salmon extremely dry with paper towels; this is the most important step for achieving a glass-like crunch.
- Season the flesh side generously with salt and pepper.
- Heat a cast-iron or heavy stainless steel skillet over medium-high heat until the avocado oil is shimmering and just beginning to smoke.
- Place the salmon fillets skin-side down into the pan and press firmly with a flexible spatula for 30 seconds to prevent the skin from curling.
- Lower the heat slightly to medium and cook undisturbed for 5-6 minutes until the skin is golden and crispy and the cook-line has moved halfway up the fillet.
- Flip carefully, add the butter and lemon slices to the pan, and spoon the foaming butter over the skin for 2 more minutes until the salmon is medium-rare (125°F internal temperature).
How to make avocado toast?
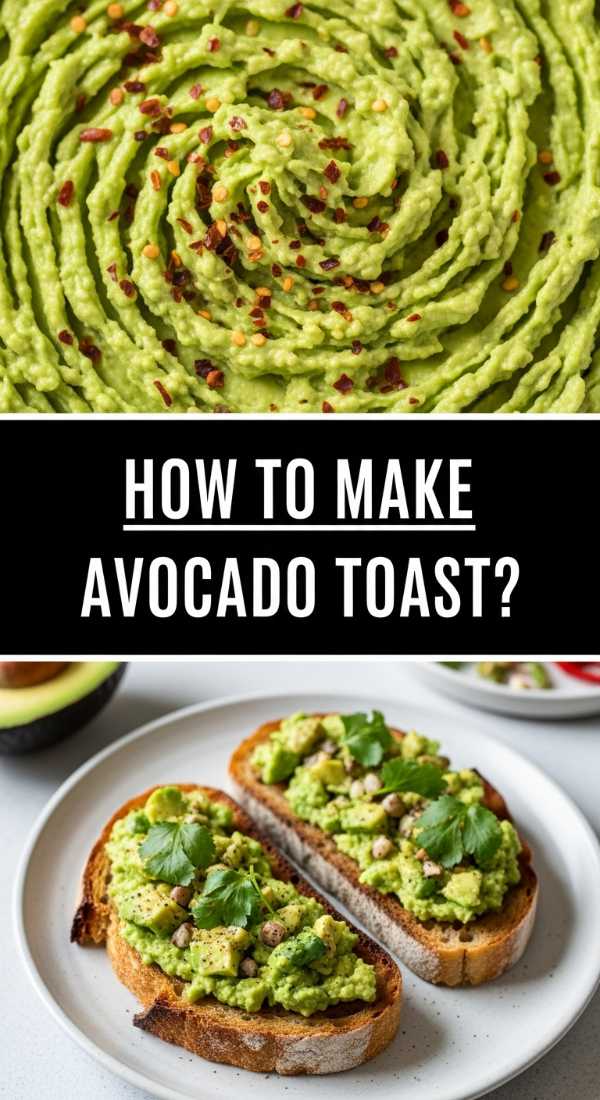
Why we love this
Avocado toast has become a viral sensation for a reason: it is the ultimate canvas for flavor and texture in a single, crunchy bite. The velvety, lime-infused avocado mash provides a cooling contrast to the warm, jagged edges of thick-cut sourdough bread. Every mouthful is a symphony of creamy healthy fats, spicy red pepper flakes, and the crunch of toasted seeds, making it feel both modern and timeless. It’s the kind of dish that guests can customize, adding a sense of playfulness to your food board while delivering a satisfying, fiber-rich base that keeps everyone feeling fueled and happy.
Ingredients
- 2 thick slices of sourdough bread
- 1 ripe Hass avocado
- 1/2 lime, juiced
- Red pepper flakes
- Everything Bagel seasoning
- Microgreens for garnish
- Drizzle of extra virgin olive oil
How to make it
- Toast your sourdough slices in a toaster or under a broiler until the edges are dark golden and the bread is sturdy enough to hold the weight of the toppings.
- While the bread toasts, slice the avocado in half, remove the pit, and scoop the flesh into a small bowl.
- Add the lime juice and a pinch of salt to the bowl and mash with a fork until you reach your desired consistency—some prefer a chunky rustic mash, while others love a silky puree.
- Rub a raw garlic clove over the warm surface of the toasted bread for a subtle, professional flavor boost.
- Spread the avocado mixture generously from edge to edge of the toast slices.
- Sprinkle with red pepper flakes and Everything Bagel seasoning for a savory, textured finish.
- Finish with a handful of fresh microgreens and a final drizzle of high-quality olive oil to add a peppery brightness.
How to prep protein bowls?
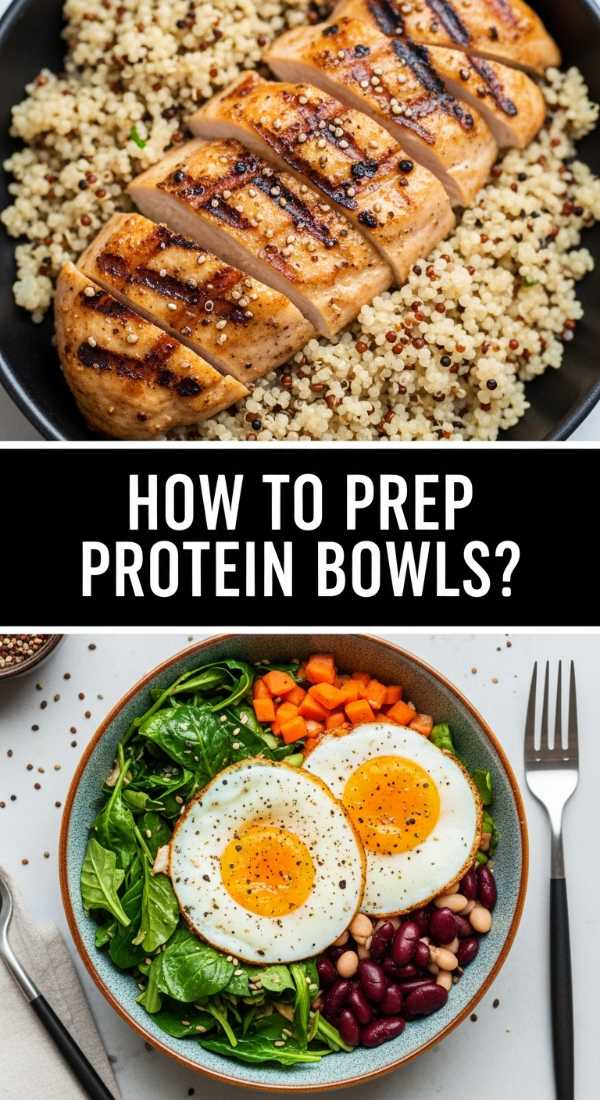
Why we love this
Protein bowls are the ultimate assembly-line hero of a food board, offering a customizable dining experience that caters to every dietary preference. The beauty lies in the layering—starting with a hearty base, adding colorful raw and roasted elements, and finishing with a decadent sauce that ties everything together. It feels like a vibrant mosaic of nutrition, where every forkful offers a different combination of textures, from the snap of fresh radishes to the creaminess of tahini. They are visually stunning and incredibly practical, allowing guests to build their own masterpiece while you sit back and enjoy the conversation.
Ingredients
- Base: 2 cups cooked quinoa or brown rice
- Protein: Grilled chicken, chickpeas, or tofu
- Veggies: Sliced cucumbers, shredded carrots, edamame
- Fats: Sliced avocado or hemp seeds
- Dressing: Tahini-lemon dressing or spicy mayo
How to make it
- Start by prepping your base grains; ensure they are fluffed with a fork and seasoned with a touch of salt and olive oil while still warm to absorb the flavor.
- Cook your chosen protein—if using chicken, sear it until the internal temperature reaches 165°F; if using tofu, press it for 20 minutes before pan-frying to ensure a crispy exterior.
- Organize your raw vegetables by slicing them into thin, uniform matchsticks (julienne style) for a professional look and easy eating.
- Create a ‘flavor station’ on your board by placing the grains, proteins, and veggies in separate clusters or bowls.
- Whisk your dressing in a small jar until completely emulsified; a good tahini dressing should be thick enough to coat a spoon but thin enough to drizzle.
- Allow guests to build their bowls by starting with grains, adding protein in the center, and surrounding it with a rainbow of vegetables.
- Encourage a ‘top-down’ seasoning approach where they finish with seeds and a generous pour of the signature dressing.
How to bake cheesy pasta?
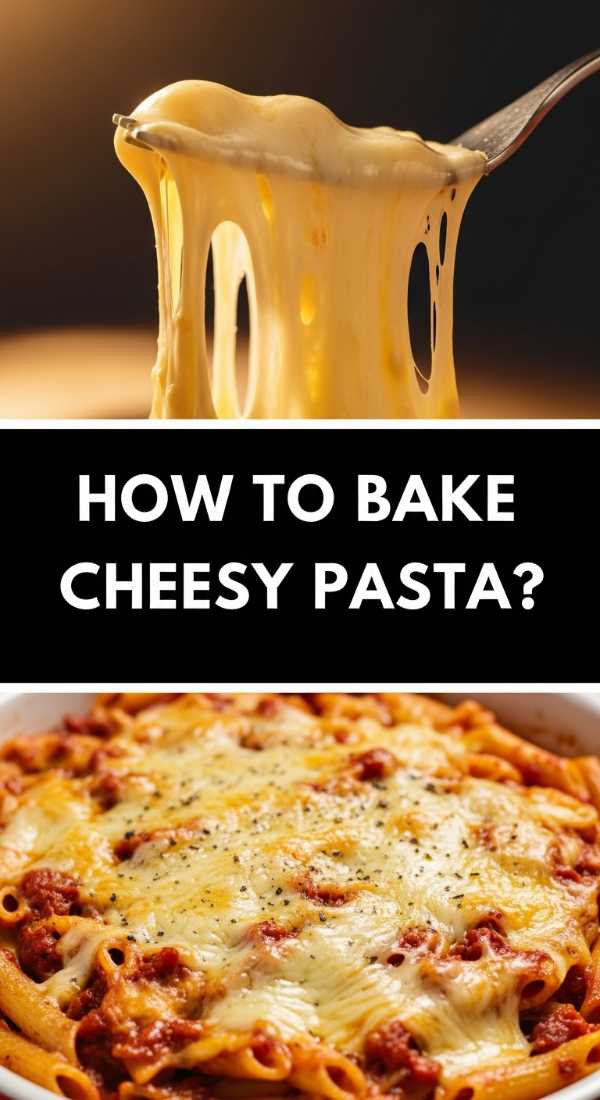
Why we love this
There is a primal joy in the sound of a fork breaking through a golden, bubbling crust of melted cheese to reveal tender pasta enveloped in a silky sauce. This cheesy pasta is the ultimate comfort food addition to your board, providing a warm, gooey anchor that appeals to the inner child in everyone. The aroma of toasted parmesan and bubbling cream creates an atmosphere of pure coziness and home-cooked love. It is the dish that people will keep coming back to, scraping the edges of the pan for those little bits of crispy cheese, making it the undeniable soul-soother of the entire spread.
Ingredients
- 1 lb rigatoni or macaroni
- 2 cups sharp cheddar, shredded
- 1 cup mozzarella, shredded
- 1/2 cup grated parmesan
- 3 tbsp butter and 3 tbsp flour (for the roux)
- 3 cups whole milk, warmed
- 1/2 tsp garlic powder and nutmeg
How to make it
- Boil your pasta in a large pot of salted water for 2 minutes less than the package directions; the pasta will finish cooking in the oven and you want it to remain ‘al dente’.
- In a separate heavy saucepan, melt the butter over medium heat and whisk in the flour for 1-2 minutes to create a blonde roux—this is the base of your silky sauce.
- Slowly pour in the warmed milk while whisking constantly to prevent lumps; simmer until the sauce thickens enough to coat the back of a wooden spoon.
- Remove from heat and stir in the cheddar and half of the mozzarella until completely melted and smooth.
- Season the sauce with garlic powder, salt, pepper, and a pinch of nutmeg to enhance the cheesiness.
- Toss the cooked pasta with the cheese sauce and transfer to a greased baking dish.
- Top with the remaining mozzarella and parmesan, then bake at 400°F (200°C) for 15-20 minutes until the top is bubbly and brown spots begin to form.
How to blend banana smoothies?
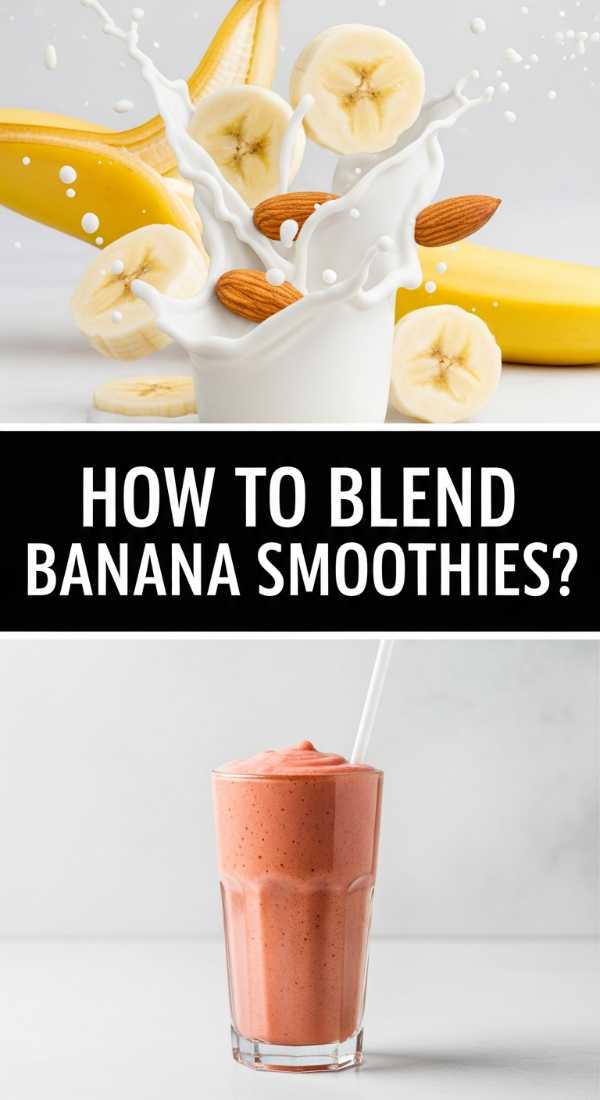
Why we love this
A perfectly blended banana smoothie is like a liquid silk treat that brings a refreshing, tropical vibe to your lifestyle board. The natural sweetness of ripe bananas provides a creamy, custard-like base that pairs effortlessly with nutty almond butter and earthy greens. It’s a vibrant, chilled component that cleanses the palate between savory bites, offering a burst of potassium and instant energy. Watching the swirl of colors merge into a soft, pastel hue is visually soothing, and the first sip is always a refreshing reminder that healthy eating can taste exactly like a decadent dessert.
Ingredients
- 2 frozen bananas (peeled before freezing)
- 1 cup almond milk or oat milk
- 1 tbsp almond butter
- 1 scoop vanilla collagen or protein powder
- A handful of baby spinach (optional for color)
- 1/4 cup Greek yogurt for extra creaminess
How to make it
- Ensure your bananas are ‘spotty’ and ripe before freezing them; the riper the banana, the sweeter and creamier your smoothie will be without added sugar.
- Place the liquid base (almond milk) into the blender first to allow the blades to move freely and prevent ‘air pockets’.
- Add the frozen banana chunks, Greek yogurt, and almond butter on top of the liquid.
- Add your dry ingredients like protein powder and cinnamon last so they don’t stick to the bottom of the blender jar.
- Start blending on the lowest speed to break up the frozen fruit, then gradually increase to the highest setting for 45-60 seconds.
- Professional tip: Listen for the sound change in the motor; when it becomes a smooth hum, the mixture is perfectly emulsified.
- Pour into chilled glasses immediately and serve with a straw to maintain that thick, frosty consistency.
How to cook juicy steak?
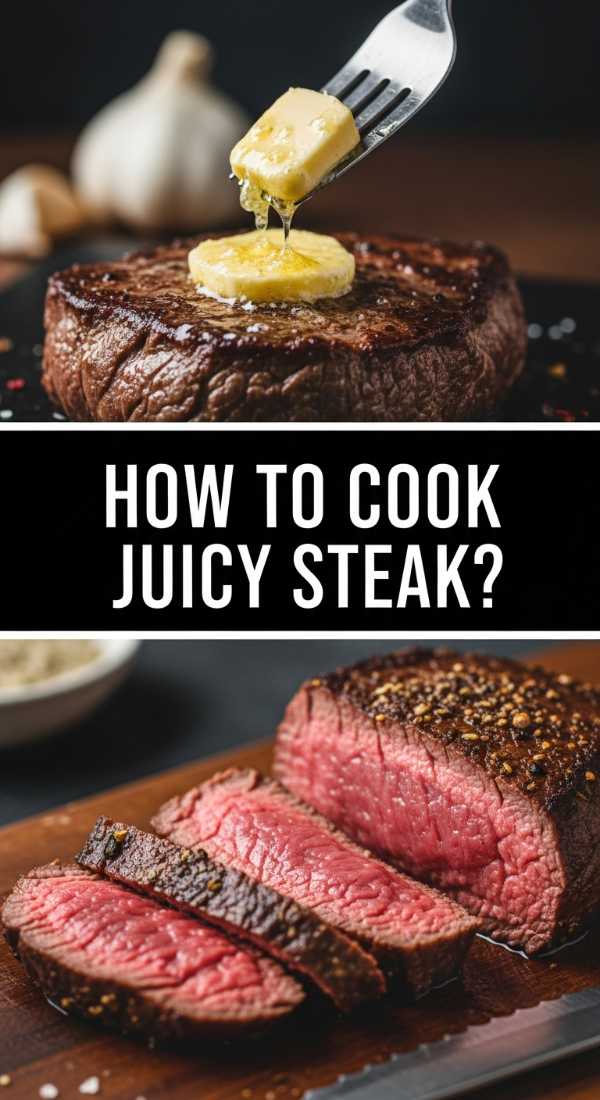
Why we love this
Steak is the undisputed king of the protein board, bringing a savory, umami-rich depth that commands attention. The deep mahogany crust achieved through a perfect sear gives way to a tender, rosy-pink center that drips with flavor and richness. It’s a dish that signifies celebration and hearty satisfaction, especially when basted in garlic-infused butter that adds a glossy, aromatic finish. Carving the steak into thin, elegant strips makes it perfectly shareable, allowing guests to grab a piece with tongs and enjoy a high-quality, melt-in-your-mouth experience that feels like a true restaurant-style treat at home.
Ingredients
- 1 lb Ribeye or New York Strip steak (at least 1.5 inches thick)
- 2 tbsp high-smoke point oil (grapeseed or avocado)
- 3 tbsp unsalted butter
- 3 cloves garlic, smashed
- 2 sprigs fresh thyme
- Coarse kosher salt and cracked black pepper
How to make it
- Take the steak out of the fridge at least 45 minutes before cooking; a cold steak will cook unevenly and become tough.
- Season very aggressively with salt and pepper on all sides, including the edges, to create a flavorful crust.
- Heat a cast-iron skillet over high heat until it is ripping hot; the oil should be shimmering and just starting to smoke.
- Lay the steak away from you into the pan to avoid oil splatters and sear for 3 minutes without moving it to develop a deep brown crust.
- Flip the steak and immediately add the butter, garlic, and thyme to the pan.
- Tilt the pan slightly and use a large spoon to continuously pour the hot, foaming butter over the steak for another 3-4 minutes (butter-basting).
- Remove the steak when the internal temperature hits 130°F (for medium-rare) and let it rest on a cutting board for at least 10 minutes to allow the juices to redistribute before slicing.
How to make quinoa salad?
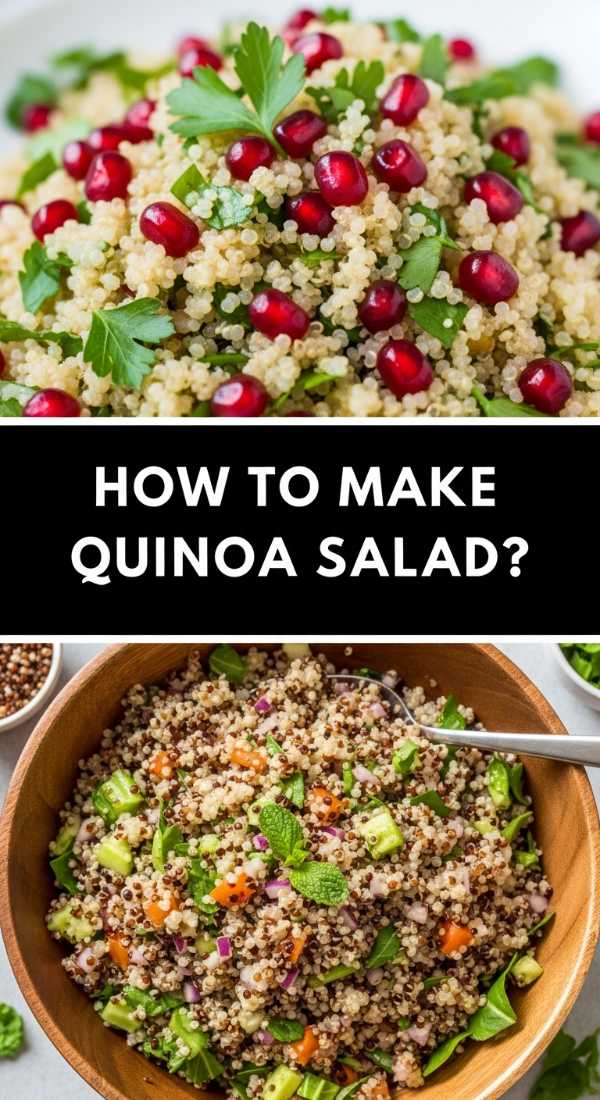
Why we love this
This quinoa salad is the bright, zesty firework of the food board, offering a crunch and freshness that balances out the richer meats and cheeses. The tiny, pearl-like grains of quinoa provide a wonderful nutty base that acts as a sponge for a tangy lemon-herb vinaigrette. Each bite is a discovery of textures—the snap of cucumber, the creaminess of feta, and the burst of sweet cherry tomatoes. It’s incredibly light yet satisfying, providing a plant-based protein punch that keeps the meal feeling balanced. Its vibrant colors make it a visual centerpiece, promising a clean and invigorating flavor profile that refreshes the palate.
Ingredients
- 1 cup dry quinoa (rinsed)
- 2 cups water or vegetable broth
- 1 cup cherry tomatoes, halved
- 1 English cucumber, diced
- 1/4 cup red onion, finely minced
- 1/2 cup crumbled feta cheese
- Dressing: 1/4 cup olive oil, 1 lemon (juiced), 1 tbsp fresh parsley
How to make it
- Rinse the quinoa under cold water in a fine-mesh strainer for 30 seconds to remove the bitter saponin coating.
- Combine quinoa and water/broth in a pot, bring to a boil, then cover and simmer on low for 15 minutes until the water is absorbed.
- Remove from heat and let it sit covered for 5 minutes; then fluff with a fork to separate the grains and let it cool to room temperature.
- In a large mixing bowl, combine the cooled quinoa with the tomatoes, cucumbers, red onion, and fresh herbs.
- In a small jar, shake the olive oil, lemon juice, salt, and pepper until the dressing is creamy and emulsified.
- Pour the dressing over the salad and toss gently to ensure every grain of quinoa is coated without mashing the vegetables.
- Top with crumbled feta just before serving to keep the cheese from absorbing too much liquid and losing its distinct texture.
The Art of the Effortless Spread
Creating a viral-worthy food board isn’t about perfection; it’s about the joy of variety and the ease of preparation. By combining these ten diverse elements—from the warmth of a juicy steak to the cooling crunch of a quinoa salad—you create a dining experience that is as beautiful to look at as it is to eat. Remember to lay everything out on a large wooden board or a clean marble countertop, using small bowls for the wetter items and letting the colors guide your arrangement. The best part? Once the board is set, your job is done, and you can finally join your guests for a stress-free, delicious evening.