

Have you ever walked into a room and felt an immediate sense of calm or a sudden surge of inspiration? More often than not, that feeling is anchored by a single, breathtaking focal point: the accent wall. In the world of high-end interior design, your walls are no longer just boundaries; they are the soul of your home, telling a story of your personality, your travels, and your eye for the extraordinary.
Creating a luxury interior isn’t about filling a space with expensive items; it’s about the deliberate interplay of texture, light, and dimension. Whether it’s the rugged charm of natural stone or the soft, oxygen-rich embrace of a living vertical garden, a well-executed feature wall transforms a house into a curated sanctuary. Today, we’re diving deep into the trends that are redefining modern living, moving beyond simple paint colors toward immersive, tactile experiences.
Grab a cup of coffee and join me as we explore how to elevate your space from ordinary to opulent. From the foyer to the backyard, we’ll look at the specific techniques and high-end materials that bring these visions to life. Let’s turn those blank canvases into masterpieces together.
How to Grow a Living Green Wall for Endless Freshness

Why we love this
There is something profoundly soul-soothing about bringing the outdoors in, and a living green wall is the ultimate expression of that connection. The air feels noticeably crisper as the plants work their oxygen-purifying magic, and the subtle, earthy aroma of damp soil and fresh foliage creates a spa-like atmosphere in any room. We love the tactile contrast between the waxy leaves and the soft mosses, providing a lush, vibrant tapestry that moves and grows with your home, offering a visual and sensory escape from the digital world.
Essential Elements:
- Automated hydroponic irrigation system
- Moisture-resistant backing board
- Selection of low-light plants (Pothos, Ferns, Philodendron)
- Full-spectrum LED grow lights
- Recycled felt pockets or plastic mounting trays
How to make it
- Begin by securing a heavy-duty moisture barrier, such as a PVC or polycarbonate sheet, to your wall to prevent any water damage to the structural drywall.
- Install a sturdy metal frame or a specialized vertical garden mounting system over the moisture barrier, ensuring it is anchored into the wall studs to support the weight of the water and plants.
- Attach your planting medium—typically a series of felt pockets or modular plastic trays—to the frame, ensuring there is a slight gap for airflow behind the system.
- Set up your irrigation line by running a thin microtubing system across the top of the wall, allowing water to gravity-feed through the pockets, and connect it to a discreet pump and reservoir at the base.
- Carefully transplant your chosen greenery into the pockets, arranging them by color and texture to create a flowing, organic pattern; start with larger ferns at the bottom and cascading vines at the top.
- Install your full-spectrum grow lights on a smart timer to ensure the plants receive at least 8-10 hours of light daily, especially in rooms with limited natural sunlight.
How to Personalize Your Living Room Wall for a Cozy Feel
Why we love this
A personalized wall is the heartbeat of a cozy living room, acting as a curated museum of your most cherished memories and refined tastes. We love how the mixture of antique brass frames, soft velvet accents, and textured linen-wrapped canvases creates a multi-layered visual warmth that invites guests to linger. It’s the feeling of a lived-in luxury—where the aroma of a cedarwood candle catches the light reflecting off a hand-painted portrait, making the room feel both sophisticated and deeply intimate.
Essential Elements:
- Custom-made picture-frame molding
- Dimmable brass art sconces
- High-quality linen or grasscloth wallpaper
- A mix of matte and gloss-finished frames
- Personal artifacts or curated photography
How to make it
- Apply a base layer of high-end grasscloth wallpaper to the wall to provide a tactile, organic background that adds immediate depth and sound-dampening qualities.
- Measure and install decorative picture-frame molding (boiserie) over the wallpaper, painting the trim in a contrasting satin finish to create a classic, structured look.
- Wire and mount dimmable LED sconces at shoulder height within the molding panels to provide a warm, adjustable glow that highlights specific pieces of art.
- Lay out your collection of frames on the floor first, experimenting with a balanced but asymmetrical gallery arrangement that mixes different heights and finishes.
- Use a laser level to mark your mounting points on the wall, ensuring every piece is perfectly aligned to maintain a professional, high-end aesthetic.
- Finalize the look by layering in small 3D elements, such as a wall-mounted ceramic vase or a brass clock, to break up the flat surfaces and add architectural interest.
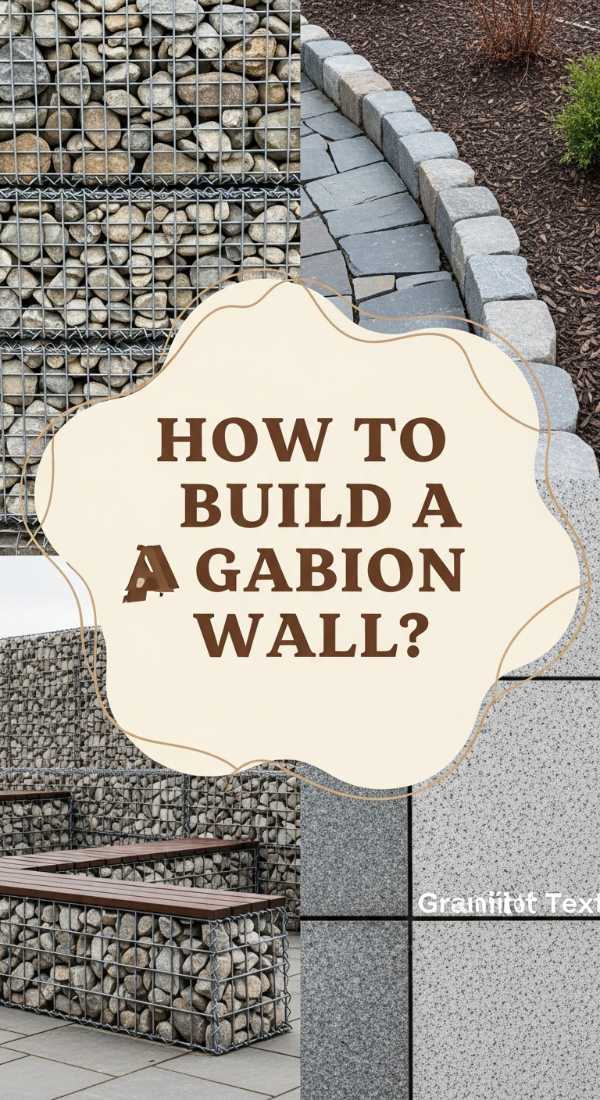
How to Construct a Modern Gabion Wall for an Industrial Vibe
Why we love this
The gabion wall is a masterclass in industrial elegance, combining the raw, cold strength of galvanized steel with the natural, rugged warmth of river stone. We love the rhythmic shadows created by the wire mesh and the way the stones feel cool and solid to the touch, grounding a modern space with an undeniable sense of permanence. It brings a sophisticated, architectural edge to the interior that smells faintly of clean minerals and crisp stone, perfect for those who appreciate the beauty of raw materials.
Essential Elements:
- Galvanized steel wire cages (gabion baskets)
- Uniform river rocks or crushed basalt
- Internal structural support posts
- Recessed floor up-lighting
- Steel top-capping or a live-edge wood mantle
How to make it
- Assess the floor’s load-bearing capacity, as stone is incredibly heavy; if necessary, install a reinforced steel plate or footing to distribute the weight evenly.
- Assemble the galvanized wire cages according to the manufacturer’s instructions, using high-tensile wire spirals or C-rings to secure the corners tightly.
- Anchor internal support posts through the center of the cages and into the floor/wall to ensure the structure doesn’t bow or lean once filled.
- Begin filling the cages by hand, carefully placing the most attractive stones against the outer mesh to ensure a clean, uniform look with minimal gaps.
- As you reach every 12 inches of height, install internal stiffeners (connecting wires) across the center of the cage to prevent the mesh from bulging under the pressure of the rocks.
- Once filled to the top, secure the lid and finish with a sleek steel cap or a warm timber mantle to provide a polished, functional surface.
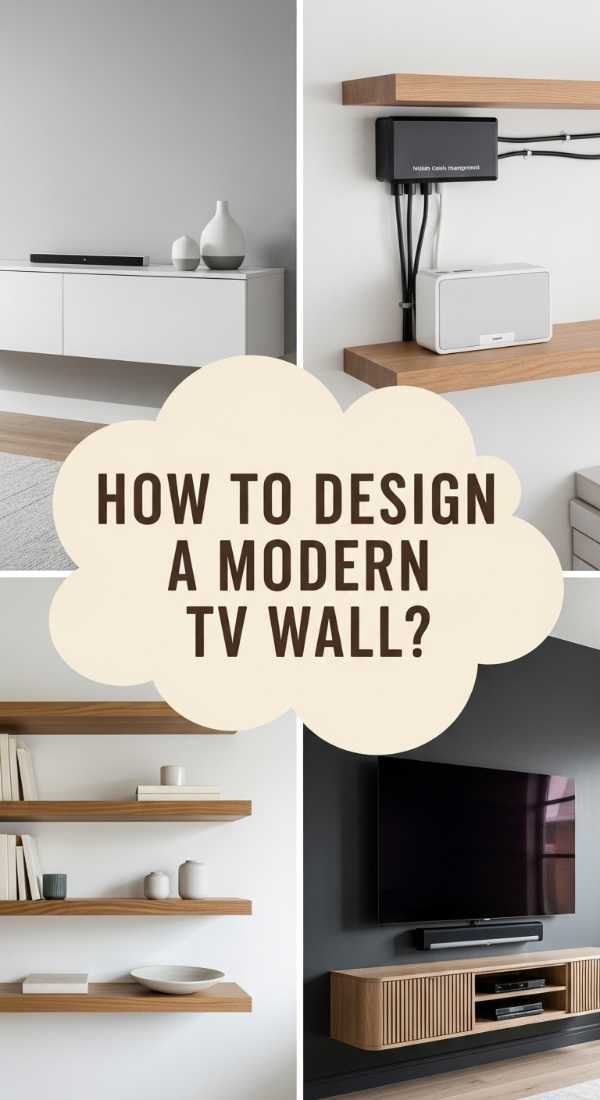
How to Integrate a Smart TV Wall for a Seamless Tech Experience

Why we love this
There is nothing more satisfying than a high-tech wall that looks completely effortless, where wires vanish and screens blend into the architecture like digital art. We love the futuristic, sleek feel of a hidden integration—it removes the visual clutter of black cords and bulky boxes, leaving only clean lines and the soft, ambient glow of backlighting. It creates a space that feels both highly functional and incredibly serene, allowing you to transition from a minimalist gallery to a cinematic experience with the touch of a button.
Essential Elements:
- Recessed in-wall TV mount
- In-wall cable management conduits
- Flush-mounted smart speakers
- RGBIC ambient backlighting strips
- Infrared-friendly cabinetry or hidden media closet
How to make it
- Construct a shallow “bump-out” wall or frame a dedicated niche in the existing wall that is exactly 2 inches larger than your TV’s dimensions for a true flush-mount look.
- Install a specialized recessed outlet box and data ports behind where the TV will sit, ensuring all cables are routed through internal conduits to a hidden AV rack or cabinet.
- Apply a matte, dark-toned paint or a non-reflective textured paneling inside the niche to minimize glare and make the screen appear as though it’s floating in a void.
- Mount the TV using a thin-profile articulated bracket that allows you to pull the screen forward for maintenance while keeping it tight to the wall during daily use.
- Adhere smart LED strips to the back of the TV, syncing them with your smart home hub so the lighting changes color based on the on-screen content.
- Conceal any remaining equipment in a vented cabinet with IR-repeating glass, allowing your remotes to work while the tech stays out of sight.
How to Achieve a Luxury TV Wall for an Opulent Family Room
Why we love this
A luxury TV wall transforms the standard entertainment unit into a high-end art installation through the use of rare materials like book-matched marble and warm metallic accents. We love how the cool, smooth touch of the stone contrasts with the warmth of integrated wood slats, creating a rich sensory experience that feels both grand and inviting. The faint scent of polished stone and the way the gold trim catches the evening sun makes the family room feel like a five-star hotel lounge, elevating every movie night into a special occasion.
Essential Elements:
- Large-format porcelain or marble slabs
- Brushed brass or gold T-bars for joint accents
- Vertical walnut or oak fluted panels
- Integrated LED channel lighting
- Floating minimalist hearth or media console
How to make it
- Build a secondary framing structure using metal studs to support the weight of heavy stone slabs and to create depth for recessed lighting channels.
- Install fluted wood panels on the outer sections of the wall, using a high-strength adhesive and finish nails to ensure a seamless, vertical rhythm.
- In the center section, apply large-format porcelain slabs using a thin-set mortar designed for vertical applications; ensure the patterns are “book-matched” so the veins flow continuously.
- Insert brushed brass T-bars between the stone and the wood panels to hide the transition seams and add a touch of reflective luxury.
- Install LED channels along the top and bottom of the feature wall, using a warm 2700K temperature to highlight the texture of the wood and the grain of the stone.
- Mount a floating console in a matching wood finish underneath the screen to provide storage for media devices without breaking the visual flow of the floor.
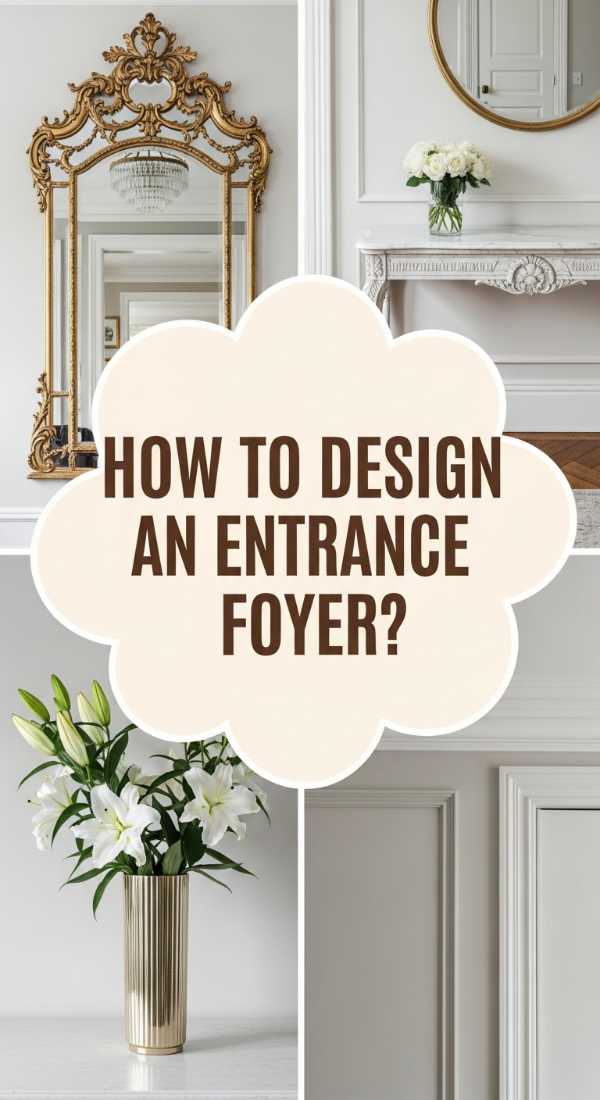
How to Decorate a Foyer Wall for an Elegant Entrance

Why we love this
The foyer wall is your home’s first handshake, and an elegant design here sets a tone of grace and curated beauty for the rest of the house. We love the dramatic impact of an oversized, antiqued mirror paired with a sleek marble console table, which creates a sense of light and infinite space. There’s a certain crispness in the air of a well-designed foyer—the scent of fresh flowers and the cool, hard surfaces of stone and glass that tell guests they’ve arrived somewhere truly special.
Essential Elements:
- Oversized floor-to-ceiling mirror or art piece
- Slim-profile marble or metal console table
- Statement wall sconces (asymmetrical or paired)
- Designer wallpaper with metallic leafing
- Decorative tray for keys and small artifacts
How to make it
- Start by applying a subtle, shimmering metallic wallpaper to the foyer wall to catch the light and provide a high-end, reflective backdrop.
- Center an oversized mirror on the wall, ensuring it is anchored safely into the studs; a tall mirror will bounce light from the doorway and make the entrance feel twice as large.
- Position a slim console table directly in front of the mirror, choosing a height that allows the table’s surface to be reflected clearly.
- Install two statement sconces on either side of the mirror at roughly 65 inches from the floor, creating a balanced frame of soft light.
- Style the console with three varying heights of objects: a tall vase of fresh lilies, a medium-sized stack of art books, and a low decorative bowl.
- Ensure the color palette of the foyer wall complements the adjacent rooms to create a cohesive, professional flow throughout the home.
How to Texture an Interior Wall for a Tactile Visual Delight
Why we love this
Texture is the secret language of high-end design, adding a layer of sophisticated depth that flat paint simply cannot match. We love the hand-crafted feel of Venetian plaster or lime wash, which creates a mottled, stone-like finish that is incredibly soft to the touch yet visually complex. It brings a quiet, old-world elegance to a modern room, where the interplay of light and shadow on the uneven surface creates a dynamic wall that seems to change its personality from dawn until dusk.
Essential Elements:
- Authentic Venetian plaster or Lime wash paint
- Stainless steel trowels and spatulas
- Protective wax or sealer
- Natural mineral pigments
- Sandpaper (various grits for burnishing)
How to make it
- Prepare the wall surface by sanding it perfectly smooth and applying a high-grip primer specifically designed for mineral-based plasters.
- Using a flexible stainless steel trowel, apply the first “base coat” of plaster in thin, random strokes, covering the entire wall while leaving some slight texture.
- Allow the first coat to dry for at least 4 hours, then apply a second coat using shorter, overlapping strokes to build up the iconic mottled appearance and depth.
- While the second coat is still slightly damp, “burnish” the surface by running a clean trowel over it at a low angle with firm pressure, which brings out the natural shine.
- For extra depth, apply a third, very thin layer of a slightly different shade, then sand lightly with 1000-grit sandpaper to reveal the layers beneath.
- Finish the wall by buffing in a natural beeswax sealer, which protects the plaster and gives it a luxurious, touchable satin sheen.
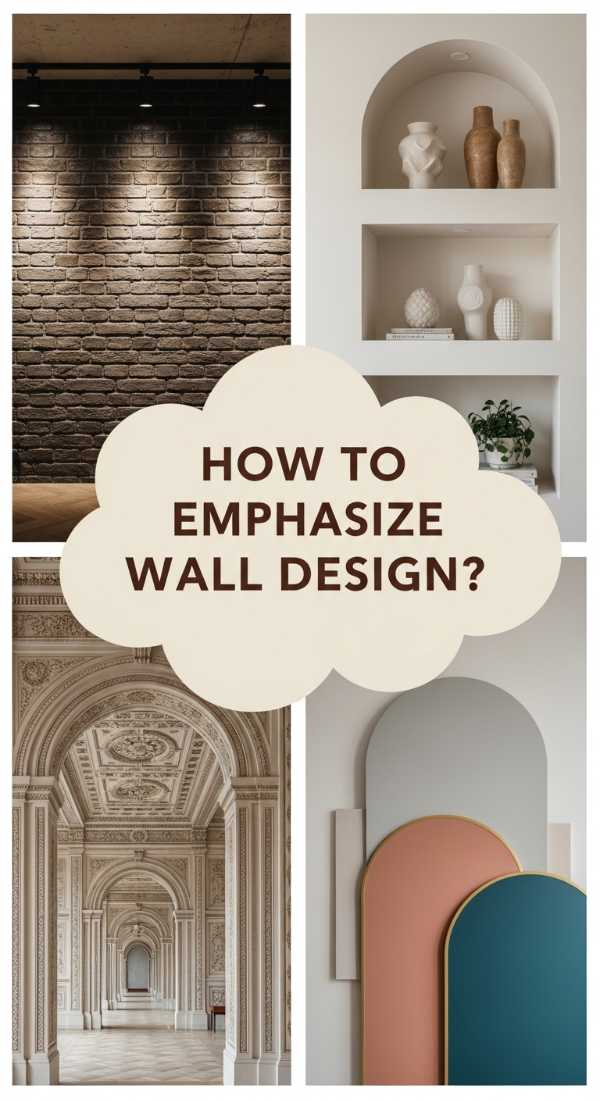
How to Highlight Architectural Features for a Bold Statement

Why we love this
Highlighting architectural features is about celebrating the “bones” of your home, turning structural elements like beams, columns, or niches into intentional design statements. We love the bold, confident feeling of a room where a high-contrast color palette meets dramatic up-lighting, drawing the eye upward to appreciate the craftsmanship of the build. It creates a sense of grand scale and historic weight, making even a new construction feel as though it has a storied, majestic past.
Essential Elements:
- High-contrast accent paint (Charcoal, Navy, or Black)
- Recessed floor up-lights (puck lights)
- Custom wood or plaster molding
- Directional spotlighting
- Matte-finish stains for wooden beams
How to make it
- Identify the unique architectural elements of the room, such as a vaulted ceiling, a structural pillar, or an arched doorway, that deserve to be the focus.
- Paint these specific features in a deep, matte accent color that contrasts sharply with the surrounding walls to immediately draw the eye.
- Install low-voltage recessed LED puck lights at the base of columns or beams, angling the beam upward to cast long, dramatic shadows that emphasize height.
- If your feature is a ceiling beam, sand it down and apply a dark walnut stain, then finish with a matte wax to highlight the natural wood grain without adding a cheap-looking gloss.
- Use trim molding to “frame” architectural niches, then place a single, high-end piece of sculpture inside the niche with a dedicated overhead spotlight.
- Balance the boldness by keeping the rest of the room’s decor minimal, allowing the highlighted architecture to be the undisputed star of the space.
How to Curate a Botanical Feature Wall for a Natural Escape
Why we love this
A botanical feature wall is like having a permanent spring morning captured within your home, offering a delicate balance of wild nature and refined luxury. We love the intricate details of high-end floral wallpapers or hand-painted murals, where the sight of soft petals and winding vines evokes a sense of peace and romance. It’s a sensory delight that makes a room feel garden-fresh, providing a lush, organic backdrop that pairs beautifully with natural rattan, linen, and light-toned woods.
Essential Elements:
- Designer botanical wallpaper or custom mural artist
- Woven cane or rattan wall accents
- Real or high-quality silk trailing plants
- Antique brass hanging hardware
- Neutral-toned trim paint
How to make it
- Choose a high-impact botanical wallpaper with a large-scale print; large patterns feel more modern and luxurious, while small patterns can often look dated.
- Ensure the wall is perfectly prepped with a smoothing primer, then apply the wallpaper using the “paste-the-wall” technique to avoid messy bubbles and misalignment.
- Carefully match the pattern seams at eye level first, working outward toward the ceiling and floor to ensure the visual flow is uninterrupted.
- Install a pair of simple, thin wood shelves at staggered heights across the wallpapered wall to hold real trailing plants like String of Pearls or Ivy.
- The real greenery will blend with the printed greenery, creating a 3D effect that makes the entire wall feel like a living, breathing escape.
- Finish the look by framing the botanical wall with a soft, warm-white trim paint that doesn’t compete with the vibrant colors of the mural.
How to Balance Stone and Light for a Stunning Exterior
[IMAGE_10]
Why we love this
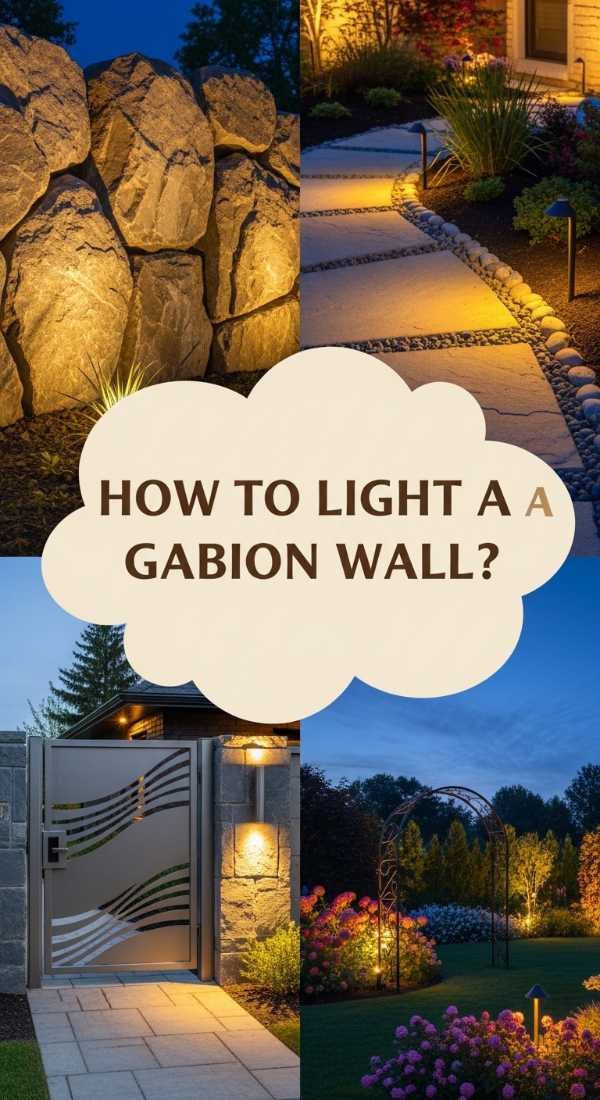
The juxtaposition of heavy, rugged stone and the ethereal glow of strategically placed lighting is the pinnacle of exterior luxury. We love how the rough texture of the stone comes alive at night, with every crack and crevice highlighted by warm light to create a dramatic, 3D landscape. It gives your home an imposing yet welcoming presence that feels secure and timeless, smelling of cool night air and rain-washed rock—a perfect setting for outdoor entertaining or a quiet evening by the fire.
Essential Elements:
- Natural stone veneer or dry-stack ledger stone
- Weatherproof LED “grazing” lights
- Smart exterior lighting transformer
- Stone sealant with a natural finish
- Professional-grade exterior mortar
How to make it
- Install a moisture-proof house wrap and metal lath over your exterior wall to provide a secure, weather-resistant base for the stone application.
- Apply a “scratch coat” of mortar over the lath, then let it dry until it is firm but still slightly rough to the touch to ensure a strong bond.
- Starting from the bottom corner, apply a thick layer of mortar to the back of each stone piece (buttering) and press it firmly against the wall, working in small horizontal sections.
- Use a dry-stack technique where the stones are placed tightly together without visible grout lines for a modern, high-end look.
- Mount waterproof LED grazing lights at the base of the wall, positioned just 2-3 inches away from the stone and angled upward to highlight the deep textures.
- Apply a breathable, non-yellowing stone sealer to protect the wall from the elements while maintaining the natural, matte color of the rock.
The Final Touch to Your Home Sanctuary
Creating a high-end accent wall is about more than just aesthetics; it’s about intentionality. Whether you choose the living energy of a green wall or the industrial strength of stone, these features serve as the foundation for a home that feels curated, professional, and uniquely yours. Remember that the best designs are those that speak to your senses—texture, light, and even the scent of natural materials play a role in how you experience your space. Take these steps, use these tips, and transform your home into the masterpiece it deserves to be.